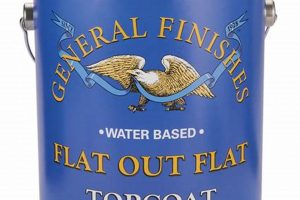
The process of correctly applying a durable, water-based polyurethane finish from General Finishes is crucial for protecting and enhancing wood surfaces. This clear coat provides a robust layer of defense against scratches, stains, and UV damage, suitable for both interior and exterior applications. The application technique significantly impacts the final appearance and longevity of the protective barrier.
A properly applied finish enhances the inherent beauty of the wood, providing a professional-grade appearance. The resistance offered by the coating extends the lifespan of the underlying material, reducing the need for frequent refinishing or replacement. The product’s water-based formulation offers advantages such as low odor and easy cleanup, contributing to a user-friendly experience. Early adoption of water-based finishes presented challenges related to durability; however, modern formulations like this one have overcome many of these limitations, offering performance comparable to solvent-based alternatives.
Achieving optimal results requires careful attention to surface preparation, appropriate application techniques, and environmental conditions. The following sections will outline the essential steps for successfully using this top coat to achieve a durable and aesthetically pleasing finish.
Application Refinement
The following advice enhances the likelihood of achieving a professional-quality finish using the specified top coat.
Tip 1: Surface Preparation is Paramount: Ensure the substrate is meticulously clean, dry, and free of any contaminants such as dust, grease, or wax. Sanding to the appropriate grit level (typically 220-320 grit) creates a smooth, receptive surface for optimal adhesion.
Tip 2: Controlled Application Environment: Maintain a consistent temperature and humidity level in the workspace. Avoid applying the finish in direct sunlight or excessively humid conditions, as these factors can negatively impact drying time and clarity.
Tip 3: Thin, Even Coats: Apply multiple thin coats rather than a single thick coat. This technique minimizes the risk of runs, drips, and uneven drying. Allow each coat to dry completely before applying the subsequent layer, following the manufacturer’s recommended drying times.
Tip 4: Appropriate Application Tools: Utilize high-quality brushes, foam applicators, or spray equipment designed for water-based finishes. Clean the chosen applicator thoroughly before each use to prevent contamination and ensure a smooth application.
Tip 5: Sanding Between Coats (Optional): Lightly sanding between coats with fine-grit sandpaper (320-400 grit) can further enhance the smoothness of the final finish. Ensure all sanding dust is removed before applying the next coat.
Tip 6: Proper Stirring, Not Shaking: Stir the finish thoroughly before each use to ensure even distribution of the solids. Avoid shaking, as this can introduce air bubbles that may compromise the final appearance.
Tip 7: Adhesion Testing: On less visible areas, perform an adhesion test after the initial coat has dried. This can be done by applying masking tape to the finish and then quickly removing it. If the finish lifts off with the tape, the surface preparation may need improvement.
Adherence to these recommendations increases the potential for a durable, aesthetically pleasing, and long-lasting protective coating. These steps contribute significantly to the quality and longevity of the finished project.
The subsequent section will address troubleshooting common issues encountered during application.
1. Surface Preparation
Surface preparation is a non-negotiable precursor to a successful application of General Finishes High Performance Top Coat. The quality of the substrate directly dictates the adhesion, uniformity, and overall longevity of the finish. Inadequate preparation introduces defects that the top coat cannot rectify, ultimately diminishing its protective and aesthetic properties. Contaminants such as dust, grease, wax, or existing coatings act as barriers, preventing the top coat from properly bonding to the wood. An improperly prepared surface may cause the top coat to peel, chip, or exhibit inconsistent sheen levels. For instance, applying the finish over a surface containing residual wax from a previous polish will inevitably lead to poor adhesion and a compromised final appearance.
The sanding process, an integral part of surface preparation, serves to create a profile conducive to mechanical adhesion. The microscopic scratches left by sandpaper increase the surface area and provide “tooth” for the finish to grip. The specific grit sequence, typically progressing from coarser to finer abrasives (e.g., 120 grit to 220 grit), is crucial for achieving a smooth, uniform surface devoid of deep scratches. Skipping grit levels or using excessively coarse sandpaper can leave imperfections that become amplified by the top coat, resulting in a textured, uneven finish. An example of proper execution would involve sanding a raw wood surface, starting with 120 grit to level imperfections, followed by 180 grit to remove the 120-grit scratches, and culminating with 220 grit for a smooth, paintable surface.
Therefore, meticulous attention to surface preparation is paramount to unlocking the full potential of General Finishes High Performance Top Coat. It is an investment in the long-term durability and visual appeal of the finished piece. Disregarding this critical step invariably leads to compromised results, necessitating corrective measures that are often more time-consuming and costly than proper preparation. The key takeaway is that the success of the top coat is inextricably linked to the quality of the prepared substrate.
2. Application Method
The application method employed directly determines the uniformity, thickness, and overall quality of the General Finishes High Performance Top Coat. The chosen method influences the appearance of the finish, its ability to protect the substrate, and its longevity. Selecting an inappropriate application technique invariably results in imperfections, ranging from uneven sheen to compromised durability. Therefore, the application method is not merely a procedural step but a critical component of achieving a successful and lasting finish. The impact of the application method is especially pronounced with a product like High Performance Top Coat, which is formulated to provide a durable, clear barrier while maintaining the aesthetic integrity of the underlying surface.
Several application methods are available, including brushing, spraying (both airless and HVLP), and wiping. Each technique offers distinct advantages and disadvantages based on the projects scale, complexity, and the desired finish characteristics. Brushing, for example, is suitable for smaller projects and allows for precise control over the application; however, it can also introduce brush marks that detract from the final appearance. Spraying, conversely, provides a smooth, even coat on larger surfaces but requires specialized equipment and meticulous control over spray pressure and technique to avoid runs or orange peel texture. Wiping, commonly used for applying stain or sealers, can also be used for very thin coats of topcoat, but requires experience to avoid lap marks. The correct selection depends on the project’s specific requirements and the operator’s skill level. Failure to adapt the application method to the specific characteristics of the product and the project invariably leads to substandard results.
In summary, the application method is a decisive factor in determining the success of a General Finishes High Performance Top Coat project. Selecting the appropriate technique, mastering its execution, and understanding its impact on the finish are crucial for achieving a durable, aesthetically pleasing, and long-lasting protective layer. Ignoring the intricacies of the application method often results in compromised results, necessitating corrective measures or complete reapplication, highlighting the practical significance of this understanding.
3. Environmental Conditions
Environmental conditions exert a significant influence on the application and subsequent performance of General Finishes High Performance Top Coat. Temperature, humidity, and air circulation directly affect the drying time, adhesion, and final appearance of the finish. Unfavorable environmental factors can compromise the integrity and longevity of the coating, necessitating careful consideration and control during the application process.
- Temperature Influence
Temperature directly affects the viscosity and drying rate of the top coat. Elevated temperatures accelerate drying, potentially leading to premature skinning and trapping solvents within the film. Conversely, low temperatures retard drying, increasing the risk of dust contamination and prolonged tackiness. The manufacturer typically specifies an optimal temperature range for application; deviation from this range can result in an inconsistent finish, reduced adhesion, and an increased likelihood of surface defects. For example, applying the top coat in a non-climate controlled environment on a hot summer day might cause the finish to dry too quickly, resulting in brush marks or an uneven surface. Maintaining the recommended temperature range is crucial for achieving the desired flow and leveling properties.
- Humidity Impact
Humidity affects the evaporation rate of water-based finishes such as High Performance Top Coat. High humidity levels slow the evaporation process, prolonging drying times and increasing the susceptibility to runs, sags, and blushing (a cloudy appearance caused by trapped moisture). Low humidity can lead to rapid drying and potential cracking or checking of the finish. Proper ventilation can mitigate the effects of high humidity by promoting air circulation and facilitating evaporation. Failing to control humidity levels might cause water to condense on the surface during the drying process, leading to a hazy or milky appearance in the final finish.
- Air Circulation Considerations
Adequate air circulation is essential for removing evaporated solvents and moisture during the drying process. Insufficient air movement can lead to prolonged drying times, increased tackiness, and a higher risk of dust contamination. Conversely, excessive air circulation can accelerate drying too rapidly, potentially causing surface defects. A controlled level of airflow is therefore desirable. However, air circulation that is excessive could introduce airborne contaminants, like dust or pollen, which would then embed themselves in the drying finish. It’s therefore important to balance adequate circulation with proper filtration.
- Dust and Contamination Control
Environmental cleanliness is paramount to prevent dust particles and other contaminants from settling onto the wet finish. Airborne particles can become embedded in the drying film, creating a textured, uneven surface and detracting from the aesthetic appeal. Minimizing dust by thoroughly cleaning the workspace, using tack cloths, and employing appropriate filtration systems is critical for achieving a smooth, flawless finish. If the application area is not appropriately free of particulate, the resulting finish might require extensive sanding and reapplication to correct the imperfections.
The impact of environmental conditions cannot be overstated when applying General Finishes High Performance Top Coat. By meticulously controlling temperature, humidity, air circulation, and dust levels, the applicator can significantly enhance the probability of achieving a durable, aesthetically pleasing, and long-lasting protective finish. A failure to consider these factors frequently results in suboptimal outcomes that demand corrective actions. These corrective actions can potentially be more resource-intensive and challenging than the original application.
4. Coat Thickness
Coat thickness represents a critical factor in determining the overall performance and appearance of General Finishes High Performance Top Coat. The applied thickness dictates the film’s protective properties, clarity, and resistance to wear. Applying too little material compromises the coating’s ability to provide adequate protection, while applying too much risks runs, sags, and an extended drying time. The relationship between coat thickness and proper application is therefore inextricably linked to the long-term success of the finishing project. For instance, a thin coat may not adequately seal the wood, leaving it vulnerable to moisture damage, whereas a thick coat may obscure the grain and result in an unprofessional appearance. Achieving the recommended film thickness, as specified by the manufacturer, is essential for maximizing the product’s benefits.
The optimal coat thickness balances protection with aesthetic considerations. Multiple thin coats, rather than a single thick coat, generally yield superior results. This technique allows for better leveling, reduces the likelihood of imperfections, and facilitates proper curing. The application method significantly influences the achievable coat thickness. Spraying, for example, enables the application of thin, even coats over large surfaces, while brushing may require greater attention to detail to avoid excessive build-up in certain areas. Regardless of the application method, accurate measurement and consistent application are crucial for maintaining the desired film thickness. Industrial applications, where coatings provide resistance to abrasion, depend on exact measurement of thickness. This is to ensure consistent durability of the coating in the final product.
In summary, coat thickness is a key determinant of the performance and appearance of the General Finishes High Performance Top Coat. Accurate measurement and skillful application are essential for realizing the product’s full potential. Deviations from the recommended thickness can compromise the finish, leading to reduced protection or aesthetic flaws. The challenge lies in achieving a balance between adequate protection and visual appeal through precise application techniques.
5. Drying Time
Drying time is a critical parameter directly influencing the success of the application and performance of General Finishes High Performance Top Coat. The period required for the coating to fully cure affects its resistance to damage, adhesion to the substrate, and overall aesthetic appearance. Inadequate attention to drying time can lead to a compromised finish with reduced durability and increased susceptibility to imperfections.
- Temperature and Humidity Effects
Environmental conditions, specifically temperature and humidity, exert a substantial impact on the drying time of the top coat. Higher temperatures generally accelerate drying, while increased humidity slows the process. These variables must be considered to determine appropriate recoat times and handling procedures. Deviations from the manufacturer’s recommended drying times, based on these environmental factors, can result in a soft, tacky finish or premature adhesion failure. For instance, attempting to sand or recoat the finish before it has fully cured, particularly in humid conditions, can damage the surface and compromise the integrity of subsequent coats.
- Coat Thickness and Drying
The thickness of each applied coat is directly proportional to the required drying time. Thicker coats necessitate longer drying periods to allow for complete solvent evaporation and film crosslinking. Applying subsequent coats before the previous layer has fully dried can trap solvents, leading to a soft, easily damaged finish. Conversely, excessively thin coats may dry too rapidly, preventing proper leveling and potentially resulting in a rough or uneven surface. Careful control over coat thickness, in conjunction with appropriate drying times, is essential for achieving a uniform, durable finish.
- Ventilation’s Role
Proper ventilation plays a crucial role in facilitating the evaporation of solvents during the drying process. Adequate air circulation removes moisture and volatile organic compounds (VOCs), accelerating drying and preventing the buildup of harmful fumes. Insufficient ventilation can prolong drying times, increase the risk of dust contamination, and create an unhealthy work environment. Ensuring adequate airflow during the drying period is particularly important in enclosed spaces to promote efficient solvent evaporation and reduce the potential for adverse health effects.
- Recoating Windows
The recoating window, defined as the permissible time interval for applying subsequent coats of the finish, is a critical factor in achieving optimal intercoat adhesion. Applying the next coat too soon can prevent proper drying and solvent release, while waiting too long may result in a less than ideal chemical bond between coats. Adhering to the manufacturer’s recommended recoating window, based on environmental conditions and coat thickness, is essential for ensuring a durable, cohesive finish. Sanding lightly between coats, after the previous coat has fully dried, can further enhance intercoat adhesion by providing a mechanical key for the subsequent layer.
These factors underscore the importance of meticulous attention to drying time when applying General Finishes High Performance Top Coat. Proper management of temperature, humidity, coat thickness, ventilation, and the recoating window significantly impacts the durability, appearance, and longevity of the finished product. Disregarding these considerations invariably leads to compromised results and the potential for costly rework. The key takeaway is that adequate drying time is not merely a waiting period, but an active step essential for achieving a high-quality, professional finish.
6. Sanding (Optional)
The inclusion of sanding as an optional step in the application of General Finishes High Performance Top Coat warrants careful consideration. While not always necessary, light sanding between coats can significantly enhance the final finish quality, depending on the specific project and desired outcome. Its optional nature stems from the balance between achieving a smooth surface and the potential risks associated with improper sanding techniques.
- Enhancing Intercoat Adhesion
Light sanding between coats of High Performance Top Coat creates microscopic scratches on the surface of the dried film. These scratches, invisible to the naked eye, provide a mechanical key for subsequent coats to adhere to. This enhanced intercoat adhesion results in a more durable and cohesive finish, reducing the risk of delamination or chipping over time. An example of this benefit is particularly evident on surfaces subjected to heavy use, such as table tops or cabinet doors, where increased adhesion translates to improved resistance to wear and tear.
- Removing Imperfections
Sanding between coats effectively removes minor imperfections that may accumulate during the drying process. Dust particles, air bubbles, or slight brush marks can mar the surface of the finish, detracting from its aesthetic appeal. Light sanding with fine-grit sandpaper (e.g., 320-400 grit) levels these imperfections, creating a smoother, more uniform surface for the next coat. For instance, if a small insect lands on the wet finish and leaves an indentation, gentle sanding can eliminate the blemish before the next coat is applied, resulting in a flawless final product.
- Leveling Uneven Sheen
Variations in sheen can sometimes occur between coats of High Performance Top Coat, particularly when using different application methods or environmental conditions. Light sanding helps to blend these inconsistencies, creating a more uniform and consistent sheen across the entire surface. This is especially important on large, flat surfaces where variations in sheen are more noticeable. An example of this is on the flat door of a kitchen cabinet. The goal here is to create as close to a perfect final product.
- Mitigating Risks of Sanding Through
The “optional” nature of sanding between coats arises from the risk of inadvertently sanding through the finish, particularly on edges or corners. Aggressive sanding or the use of excessively coarse sandpaper can remove too much of the top coat, exposing the underlying substrate and requiring corrective measures. Therefore, careful technique and the use of appropriate sandpaper are essential for maximizing the benefits of sanding while minimizing the risk of damage. On detailed trim, it is vital to sand carefully. Doing otherwise can damage the underlying substrate.
In conclusion, while not always a mandatory step, sanding between coats of General Finishes High Performance Top Coat offers significant advantages in terms of intercoat adhesion, imperfection removal, and sheen uniformity. The decision to sand, and the manner in which it is executed, should be based on a careful assessment of the project’s specific requirements and the operator’s skill level. Proper technique and material selection are crucial for maximizing the benefits of this optional step while minimizing the potential risks.
7. Product Consistency
Product consistency is a fundamental prerequisite for achieving predictable and reliable results when applying General Finishes High Performance Top Coat. Variance in the product’s composition, viscosity, or color can directly impact the application process, drying time, and final appearance of the finished surface. Maintaining consistency from batch to batch and within the same container is essential for ensuring a uniform and aesthetically pleasing outcome. Variations can manifest in the form of uneven sheen, inconsistent durability, or adhesion issues, ultimately compromising the protective qualities of the coating. The effectiveness of the application technique hinges on the assumption that the product behaves predictably based on its established characteristics. The failure of a product to match expected parameters renders even the most skilled application methods ineffective.
One critical aspect of product consistency involves thorough mixing prior to and during application. The settling of solids or separation of components can lead to uneven distribution of the protective agents and pigments within the finish. Inadequate mixing results in inconsistent sheen levels or inadequate protection against UV damage and abrasion. For example, if the matting agents in a satin finish settle at the bottom of the can and are not properly re-dispersed, the initial coats may appear glossier than subsequent coats, resulting in an uneven sheen across the finished surface. Similarly, improper mixing can lead to variations in viscosity, making the product difficult to apply evenly and increasing the risk of runs or brush marks. Regular stirring, rather than shaking which can introduce air bubbles, helps to maintain a homogenous mixture throughout the application process.
In conclusion, product consistency is not merely a desirable attribute but a necessary condition for successfully applying General Finishes High Performance Top Coat. The inherent characteristics of the product significantly influence the application process, drying time, and final aesthetic. Failure to ensure product consistency, through proper mixing and storage, undermines the effectiveness of even the most meticulous application techniques, resulting in a compromised finish. Maintaining a consistent product ensures that the application process yields a durable, aesthetically pleasing, and uniform coating as intended.
Frequently Asked Questions
The following section addresses commonly encountered questions regarding the application of General Finishes High Performance Top Coat. The responses are intended to provide clarification and guidance based on established best practices and manufacturer recommendations.
Question 1: Is sanding between coats always necessary?
Sanding between coats is not strictly required for every application, but it is frequently recommended to enhance intercoat adhesion and remove minor imperfections, leading to a smoother final finish. The necessity depends on the specific project requirements and desired aesthetic. Light sanding with fine-grit sandpaper (320-400 grit) can significantly improve the overall quality of the finished surface.
Question 2: What is the ideal temperature and humidity range for application?
The optimal temperature range for application is typically between 70F and 80F (21C and 27C), with relative humidity below 70%. Elevated humidity can significantly extend drying times and increase the risk of surface imperfections. Consult the product’s technical data sheet for specific recommendations regarding environmental conditions.
Question 3: How many coats of High Performance Top Coat should be applied?
A minimum of three coats is generally recommended for adequate protection and durability. Additional coats may be applied to achieve the desired level of sheen or to provide enhanced resistance to wear and tear. Each coat should be applied thinly and evenly, allowing sufficient drying time between applications.
Question 4: What is the best method for cleaning brushes and application equipment?
Brushes and application equipment should be cleaned immediately after use with warm water and mild soap. Thorough rinsing is essential to remove all traces of the finish. Proper cleaning prolongs the life of the equipment and prevents contamination of future applications.
Question 5: How long should the finish cure before heavy use?
The finish should be allowed to cure for a minimum of 7-10 days before being subjected to heavy use. Full cure allows the finish to achieve its maximum hardness and resistance to damage. Avoid placing heavy objects on the surface or exposing it to harsh chemicals during the curing period.
Question 6: What can be done to address runs or sags in the finish?
Runs or sags can be addressed by lightly sanding the affected area with fine-grit sandpaper once the finish is fully dry. Subsequent coats can then be applied to blend the repaired area with the surrounding surface. Preventing runs and sags is best achieved by applying thin, even coats and avoiding excessive application.
The answers provided here represent a general guideline and should be supplemented with a thorough review of the manufacturer’s instructions and safety data sheet. Consult a professional finisher for complex projects or when encountering unfamiliar situations.
The subsequent section will provide resources for further learning.
Conclusion
This exploration of how to apply General Finishes High Performance Top Coat has underscored the importance of meticulous preparation, careful application, and environmental awareness. Achieving a durable and aesthetically pleasing finish requires a thorough understanding of the product’s properties and the factors that influence its performance. Proper surface preparation, controlled application techniques, and adherence to recommended drying times are critical for maximizing the protective and aesthetic benefits of this coating.
Mastering the application of General Finishes High Performance Top Coat empowers individuals and professionals to enhance the beauty and longevity of wood surfaces. Continued learning and adherence to best practices will ensure consistently high-quality results, safeguarding valuable materials and elevating the standard of craftsmanship. Investing in knowledge and diligent execution provides enduring value.


![Buy General Finishes Walnut Stain Online - [Year] Guide Best Final Touch: Elevate Your Projects with Professional Finishing Buy General Finishes Walnut Stain Online - [Year] Guide | Best Final Touch: Elevate Your Projects with Professional Finishing](https://bestfinaltouch.com/wp-content/uploads/2025/10/th-824-300x200.jpg)
