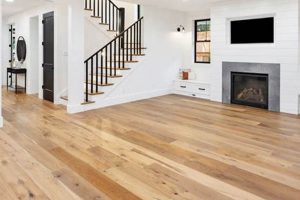
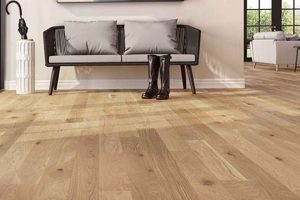
The process of applying a protective and aesthetic coating to timber flooring is vital for its longevity and visual appeal. This procedure typically involves sanding the wood surface, applying stain if desired, and then sealing it with several coats of a finish, such as polyurethane or varnish. The objective is to create a durable layer that protects the wood from scratches, moisture, and daily wear and tear, enhancing its natural beauty.
A professionally executed coating application significantly extends the lifespan of wooden floors and greatly improves its appearance. Historically, oils and waxes were used, however, modern coatings offer greater durability, resistance to spills, and ease of maintenance. A well-protected surface prevents costly repairs and maintains a refined look, contributing to the overall value of the property.
The subsequent sections will provide a detailed overview of the necessary tools, materials, and techniques required. This includes surface preparation, application methods, drying times, and considerations for different types of wood and desired finishes. Furthermore, it will cover essential safety precautions and troubleshooting common problems that can arise during the process.
Essential Guidance for Hardwood Floor Completion
The following are vital suggestions to consider during the process. Adhering to these guidelines helps ensure a professional-grade outcome and maximizes the durability of the surface.
Tip 1: Prior to the application of any coating, ensure the floor is meticulously sanded to a uniform smoothness. Uneven sanding will result in inconsistent finish absorption and an aesthetically unappealing final result. Employ progressively finer grits of sandpaper for optimal smoothness.
Tip 2: Thoroughly remove all sanding dust before applying the finish. Vacuuming and tack-clothing the surface are crucial steps. Remaining dust particles will become trapped in the finish, creating a textured and imperfect surface.
Tip 3: Maintain a consistent room temperature and humidity level during application and drying. Fluctuations in these conditions can affect the drying time and the adhesion of the finish. Optimal conditions typically range between 65-75F and 40-60% humidity.
Tip 4: Apply thin, even coats of finish. Thick coats are prone to runs, drips, and prolonged drying times. Multiple thin coats offer superior durability and a more refined appearance.
Tip 5: Allow sufficient drying time between coats, as recommended by the product manufacturer. Premature application of subsequent coats can lead to cloudiness, bubbling, and compromised adhesion.
Tip 6: Screen or lightly sand between coats to remove any imperfections or raised grain. This step ensures a smooth, even surface for the final coat.
Tip 7: Select the appropriate finish for the intended use and traffic level of the floor. High-traffic areas require more durable finishes, such as polyurethane, while lower-traffic areas may benefit from the aesthetic qualities of oil-based finishes.
Adherence to these recommendations allows for a professional and durable coating, safeguarding and enhancing the floor’s appearance for years. Precise preparation, controlled application, and diligent adherence to drying times are crucial for a high-quality outcome.
The following sections will discuss common challenges and how to address them, ensuring the completion of the project is effective and satisfying.
1. Preparation
The initial phase, prior to any surface coating application, directly influences the overall outcome. Neglecting or inadequately executing preparation tasks creates a cascade of potential problems that can compromise the appearance and longevity of the surface. For example, failure to thoroughly clean the floor prior to sanding results in contaminants being ground into the wood, potentially affecting finish adhesion and color consistency. Similarly, an uneven subfloor necessitates proper leveling to avoid structural issues after the coating.
Effective preparation encompasses a range of activities, including the removal of existing floor coverings, addressing subfloor imperfections, and meticulously cleaning the wood surface. The assessment of moisture content within the wood is also crucial. Excessive moisture prevents proper finish adhesion, potentially leading to peeling or bubbling. Addressing these preparation steps methodically is not merely procedural; it’s an investment in the floor’s durability and aesthetic quality.
Ultimately, comprehensive initial work provides a stable, clean, and receptive surface. This groundwork minimizes the risk of subsequent complications and sets the stage for a superior coating. Inadequate attention at this stage represents a false economy, potentially leading to costly rework and diminished satisfaction with the final product. Proper preparatory measures are, therefore, paramount.
2. Sanding
Sanding constitutes a critical process in the application of a protective coating to timber flooring. The procedure involves abrading the wood surface to create a smooth, uniform substrate receptive to finishes. Insufficient or improperly executed sanding can compromise the adhesion, appearance, and durability of the final result.
- Leveling Imperfections
Sanding eliminates existing irregularities, such as scratches, dents, and previous finish layers. This process ensures a consistent surface profile. For instance, neglecting to adequately sand out deep scratches results in visible imperfections beneath the new coating, detracting from the final aesthetic.
- Opening Wood Pores
The abrasion action creates microscopic openings in the wood, facilitating better penetration and adhesion. When the wood is too smooth, the finish may not properly bond. This is particularly critical for oil-based finishes that rely on absorption for adherence to the surface.
- Creating Uniformity
Different sections of a timber floor may exhibit varying degrees of wear or staining. Sanding blends these discrepancies, creating a consistent color and texture across the entire surface. Failure to achieve this uniformity results in a patchy, unprofessional appearance.
- Dust Removal
The sanding process generates fine particulate matter that must be thoroughly removed prior to application. Residual dust compromises finish adhesion and results in a gritty texture. Vacuuming and tack cloth usage are essential for achieving a clean surface.
The facets of leveling imperfections, opening wood pores, creating uniformity, and dust removal demonstrate the significance of surface preparation. Proper execution guarantees optimal appearance, and prolonged lifespan after coating.
3. Application
Application constitutes a fundamental stage in the process, directly determining the final aesthetics, protective properties, and longevity of the flooring. The meticulous execution of this phase, encompassing material selection, technique, and environmental control, is paramount to achieving a durable and visually appealing outcome. The success of application hinges on understanding the interplay of various factors that impact the adhesion, leveling, and curing of the surface.
- Selection of Coating
Choosing the appropriate finish is crucial. Polyurethane offers high durability for high-traffic areas, while oil-based finishes enhance the natural grain. An inappropriate choice, such as using a water-based finish in a moisture-prone environment, leads to premature failure and costly repairs. The decision must consider factors such as foot traffic, potential for spills, and desired sheen level.
- Application Techniques
Techniques such as brushing, rolling, or using a floor applicator influence finish uniformity and the formation of bubbles. Inconsistent application methods cause uneven coating thickness, resulting in variations in color and durability. The chosen technique must align with the finish type and the applicator’s skill level to ensure a smooth, consistent layer.
- Environmental Control
Maintaining stable temperature and humidity levels during the application process is essential for proper curing and adhesion. Extreme temperature fluctuations cause the finish to dry too quickly or too slowly, leading to imperfections like clouding or cracking. Monitoring and controlling the environment is, therefore, necessary for optimal results.
- Layering and Coverage
Achieving the appropriate number of coats, with adequate drying time between each, is vital for achieving the desired level of protection and sheen. Insufficient layering exposes the wood to damage and wear, while excessive layering causes a build-up of finish that affects its clarity and appearance. Each layer must be applied evenly and allowed to cure properly before the next.
These considerationsselection of coating, application techniques, environmental control, and layering and coveragecollectively shape the quality of the final result. Effective application guarantees adherence to surface preparation, and drying time which enhances the flooring’s longevity.
4. Drying
The curing phase is an integral component of the timber floor coating process. It is the period during which the applied coating undergoes chemical changes, solidifying and adhering to the wood surface. Precise execution of drying protocols is essential for achieving optimal finish performance and aesthetic qualities.
- Solvent Evaporation
The majority of coatings contain solvents that must evaporate for the film to harden. Incomplete solvent release compromises film integrity. For instance, inadequate ventilation prolongs drying times, trapping solvents and leading to a soft, easily damaged finish. This can result in a sticky or tacky surface that attracts dirt and debris.
- Chemical Crosslinking
Many modern coatings rely on chemical reactions, known as crosslinking, to achieve their hardness and durability. Insufficient drying time hinders crosslinking, preventing the formation of a strong, protective film. For example, polyurethane finishes require specific temperature ranges to facilitate proper crosslinking. Deviations from these conditions result in a weaker, less resilient coating that is more susceptible to scratches and wear.
- Adhesion Enhancement
The drying phase promotes adhesion between the coating and the wood substrate. Improper drying negatively influences the bond. For example, applying subsequent coats of finish before the previous coat has fully dried prevents the layers from fusing together properly. This can result in delamination or peeling, requiring costly repairs.
- Environmental Factors
The drying process is significantly influenced by environmental conditions, including temperature, humidity, and airflow. Uncontrolled environmental factors compromise the coating’s integrity. For instance, high humidity slows the evaporation of solvents and disrupts the crosslinking process. Maintaining appropriate environmental controls during drying is, therefore, essential for optimal coating performance.
These facets solvent evaporation, chemical crosslinking, adhesion enhancement, and environmental factors underscore the vital role of drying in the timber flooring coating process. By carefully monitoring and controlling these aspects, a durable, aesthetically pleasing, and long-lasting result can be achieved. These guarantee long lasting protection and better looking surface after application.
5. Protection
Protection represents the ultimate goal in the process; the application of a coating aims to preserve the underlying wood from a range of damaging elements. The effectiveness of any coating application is judged by its ability to shield the timber from abrasion, moisture, UV radiation, and chemical spills. Therefore, a comprehensive understanding of protection strategies is integral to the process.
Consider, for instance, a floor subjected to heavy foot traffic. Without a durable, abrasion-resistant coating, the wood surface will quickly exhibit scratches and wear patterns. A polyurethane finish, known for its hardness, offers significant protection in such environments. Conversely, in a bathroom setting, moisture resistance is paramount. An oil-based finish or a specifically formulated water-based polyurethane will better protect the wood from water damage and warping. UV radiation, prevalent near windows, can cause fading and discoloration; a finish with UV inhibitors mitigates this effect. Similarly, in kitchens or dining areas, resistance to common household chemicals is crucial. The choice of coating must align with the specific environmental challenges the floor faces.
The selection and application of a suitable finish, therefore, are not merely aesthetic considerations but fundamental protective measures. A well-executed finishing project prolongs the life of the timber flooring and maintains its visual appeal. Understanding the interplay between environmental stressors, coating properties, and application techniques is essential for ensuring lasting protection and the long-term value of the investment.
Frequently Asked Questions
The following are common inquiries regarding the procedures for applying a protective coating to hardwood floors. These responses aim to provide clarity and guidance for achieving a professional-quality result.
Question 1: How does surface preparation influence the longevity of a coating?
Thorough surface preparation is fundamental to ensure proper adhesion and prevent premature failure. Inadequate removal of old finishes, contaminants, or imperfections reduces the bond between the coating and the wood, leading to peeling, cracking, or bubbling.
Question 2: What factors determine the appropriate drying time between coats?
Drying time varies based on the type of finish, ambient temperature, humidity levels, and ventilation. Adherence to the manufacturer’s recommended drying times is crucial to prevent solvent entrapment, clouding, and compromised adhesion between layers. Shortening drying times risks weakening the final finish.
Question 3: Is sanding between coats always necessary?
Light sanding, or screening, between coats is generally recommended to remove imperfections such as dust particles or raised grain. This process creates a smoother surface for subsequent coats, enhancing the final appearance and improving adhesion.
Question 4: What are the key differences between oil-based and water-based finishes?
Oil-based finishes typically offer greater durability, a warmer tone, and enhanced penetration. However, they exhibit longer drying times, higher VOC emissions, and a stronger odor. Water-based finishes dry faster, have lower VOCs, and produce less odor, but may not offer the same level of durability as oil-based options.
Question 5: How does humidity affect the application process?
High humidity slows the evaporation of solvents in coatings, potentially prolonging drying times and increasing the risk of imperfections such as clouding or blistering. Maintaining optimal humidity levels, as specified by the manufacturer, is essential for achieving a smooth, durable finish.
Question 6: What safety precautions are necessary when working with coatings?
Appropriate safety measures include adequate ventilation, the use of respirators to prevent inhalation of harmful vapors, and the wearing of gloves to protect the skin from chemical exposure. It is also crucial to avoid open flames or sources of ignition, as many coatings are flammable.
These FAQs provide a foundation for understanding key facets. Thorough preparation, controlled application, and careful adherence to drying times remain paramount for successful timber flooring projects.
The subsequent article will offer guidance on troubleshooting challenges encountered.
Concluding Remarks
The preceding sections have detailed the multifaceted process. From meticulous preparation and precise sanding to controlled application and careful drying, each step is instrumental in achieving a durable, aesthetically pleasing, and long-lasting surface. The selection of appropriate materials and techniques, tailored to the specific environment and usage of the flooring, is also critical. Understanding the interplay of these factors is essential for successful project outcomes.
Properly executed, the effort to finish a hardwood floor represents a substantial investment in property value and interior aesthetics. Continued adherence to best practices and diligent maintenance will ensure that the finished surface continues to provide lasting beauty and protection for years to come. Further consultation with experienced professionals and adherence to manufacturer guidelines are always recommended for optimal results.


![Protect & Shine: Loba Wood Floor Finish - [Floor Type] Best Final Touch: Elevate Your Projects with Professional Finishing Protect & Shine: Loba Wood Floor Finish - [Floor Type] | Best Final Touch: Elevate Your Projects with Professional Finishing](https://bestfinaltouch.com/wp-content/uploads/2026/01/th-359-300x200.jpg)
