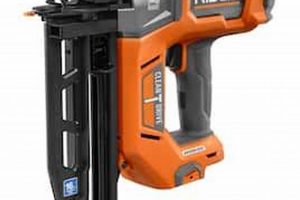
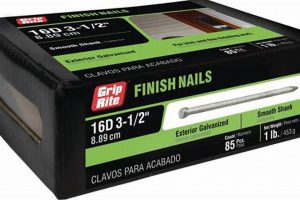
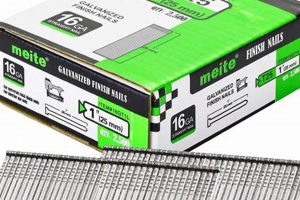
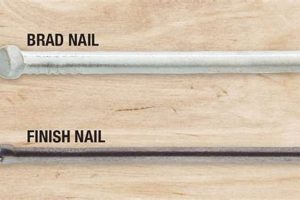
These slender fasteners, commonly utilized in woodworking and trim carpentry, feature a small head designed to be easily concealed. Their length, expressed in inches, is a critical factor in determining their suitability for a given application. For instance, attaching delicate molding often necessitates a shorter variety to prevent splitting the wood, while securing thicker trim pieces requires a longer shank for adequate holding power.
The value of selecting the correct size lies in the creation of aesthetically pleasing and structurally sound finished products. Employing appropriately sized fasteners minimizes surface imperfections and ensures a secure and lasting bond between materials. Historically, these types of fasteners have been essential in interior and exterior finishing work, contributing to the overall quality and durability of constructed environments.
The subsequent sections will delve deeper into the specific applications, selection criteria, and best practices associated with these vital components of carpentry and construction. Focus will be given to material types, proper installation techniques, and considerations for various wood species.
Essential Usage Guidelines
Effective use requires attention to detail and adherence to established best practices. The following guidelines ensure optimal results and minimize potential complications.
Tip 1: Material Compatibility: Select fasteners composed of materials compatible with the wood being used. Dissimilar metals can lead to galvanic corrosion, weakening the joint over time. Stainless steel or coated options are advisable for exterior or moisture-prone environments.
Tip 2: Correct Gauge Selection: Employ the appropriate gauge for the task. Overly thin fasteners may lack sufficient holding power, while excessively thick ones can cause splitting, particularly in hardwoods. Pilot holes are crucial when utilizing thicker gauges in sensitive materials.
Tip 3: Proper Setting Depth: The head should be set slightly below the surface of the wood. Achieve this with a nail set to avoid marring the surrounding area. Avoid over-driving, as it can damage the wood fibers and diminish the holding strength.
Tip 4: Spacing and Pattern Considerations: Maintain consistent spacing to distribute the load evenly and prevent stress concentrations. Stagger patterns strategically to maximize structural integrity, especially when attaching larger trim pieces.
Tip 5: Pilot Hole Pre-Drilling: Pre-drilling pilot holes is particularly crucial for hardwoods or when fastening near the edge of a board. This prevents splitting and allows for more precise placement, ultimately resulting in a stronger and cleaner finish.
Tip 6: Avoid Excessive Force: Employ controlled, deliberate hammer strikes. Excessive force can bend the fastener or damage the surrounding wood. Consider using a nail gun with adjustable depth settings for consistent and efficient application.
Tip 7: Consider Adhesive Assistance: In applications requiring enhanced structural integrity, consider supplementing mechanical fastening with a suitable adhesive. This combination provides both immediate holding power and long-term durability.
Adherence to these guidelines ensures secure, aesthetically pleasing, and long-lasting results in various woodworking and carpentry projects. Careful selection and proper application are paramount to achieving optimal performance.
The subsequent section will address common issues encountered during usage and provide troubleshooting solutions. Understanding potential problems and their remedies is essential for efficient project completion.
1. Gauge
Gauge, in the context of these fasteners, refers to the diameter of the shank. This dimension directly impacts the fastener’s holding power and its potential to split the wood into which it is driven. Selecting an appropriate gauge is paramount for achieving both a secure and aesthetically pleasing finish.
- Holding Power
A larger gauge typically equates to increased holding power. This is due to the greater surface area in contact with the wood fibers. Applications requiring robust connections, such as securing heavier trim pieces, often benefit from a slightly larger gauge. However, this must be balanced against the risk of splitting the wood.
- Splitting Risk
Conversely, a smaller gauge reduces the likelihood of splitting, particularly in hardwoods or when nailing near the edge of a board. Delicate moldings and intricate trim work frequently necessitate a finer gauge to preserve the integrity of the wood. Pilot holes can further mitigate the risk of splitting, regardless of gauge.
- Aesthetic Considerations
The gauge also influences the visual impact of the finished product. A smaller gauge leaves a less noticeable hole, facilitating easier concealment with wood filler. This is particularly important in applications where a seamless finish is desired. A larger gauge, while providing greater holding power, may require more extensive filling and sanding to achieve a similar aesthetic.
- Nail Gun Compatibility
The gauge must be compatible with the nail gun being used. Most nail guns are designed to accommodate a specific range of gauges. Using an incompatible gauge can result in misfires, damage to the tool, and improper fastener placement.
Therefore, careful consideration of gauge is crucial when working with these fasteners. Balancing holding power with splitting risk and aesthetic concerns will ultimately determine the success and longevity of the finished project. Selecting the correct gauge ensures that the fastener performs its intended function effectively without compromising the structural integrity or visual appeal of the workpiece.
2. Head Design
Head design is a defining characteristic that contributes significantly to the utility and application of these fasteners. The specific configuration of the head directly influences its ability to be concealed, its holding power, and its overall suitability for various woodworking and finishing tasks. Its design minimizes visibility while maximizing functional efficacy.
- Conical Shape
The conical shape is a common design element, facilitating easy countersinking. This allows the head to be set flush with or slightly below the surface of the wood. The resulting indentation can then be filled with wood filler or putty to achieve a smooth, seamless finish. The degree of the cone influences the ease and effectiveness of countersinking.
- Small Diameter
Compared to other types of nails, these possess a noticeably smaller head diameter. This reduction in size minimizes the visible footprint of the fastener, making it less conspicuous on the finished surface. The small diameter is a key factor in achieving a clean and professional appearance, especially in applications where aesthetics are paramount.
- Cupped Head (Rare)
While less common, some variations feature a slightly cupped head. This design is intended to provide a more secure grip on the wood surface, preventing the fastener from pulling through under stress. However, the cupped shape can also make concealment more challenging, requiring careful filling and sanding.
- Material Composition
Although not strictly a design element of the shape of the head, the material of the head interacts with the wood. Softer metals, for example, countersink more easily but also deform more readily, while harder metals resist deformation but may be more difficult to countersink properly. The chosen material for the head must therefore be considered in conjunction with the wood being fastened.
These design attributes contribute directly to the intended purpose: to provide a secure fastening solution while minimizing visual disruption. The careful balance between functionality and aesthetics inherent in head design underscores the importance of selecting the appropriate fastener for each specific application. Ignoring the nuances of head design can compromise both the structural integrity and visual appeal of the finished project.
3. Wood Type
The selection of wood directly impacts the performance and suitability. Wood density, grain pattern, and inherent hardness influence fastener choice, installation technique, and the long-term integrity of the connection. Failure to consider wood type can lead to compromised structural stability and aesthetic defects.
- Hardwood vs. Softwood Density
Hardwoods, such as oak or maple, possess a higher density than softwoods like pine or fir. This increased density requires greater force for nail penetration and increases the risk of bending or splitting the wood. Pilot holes are frequently necessary in hardwoods to prevent these issues. Softwoods, on the other hand, are more easily penetrated, but may offer less holding power. The wood’s density dictates the appropriate gauge and length necessary for a secure and durable connection.
- Grain Direction and Splitting
The direction of the wood grain significantly affects the potential for splitting during nail insertion. Nailing parallel to the grain increases the risk of splitting, especially near the edge of the board. Angling the nail slightly across the grain can mitigate this risk. Furthermore, pre-drilling pilot holes is highly recommended when working with woods prone to splitting, irrespective of grain direction.
- Wood Acidity and Corrosion
Certain wood species possess higher acidity levels than others. Acidic woods can accelerate the corrosion of metal fasteners, weakening the joint over time. This is particularly relevant in outdoor applications or environments with high humidity. Stainless steel or coated fasteners are advisable when working with acidic wood species to prevent premature failure due to corrosion.
- Wood Stability and Movement
Wood is a hygroscopic material, meaning it expands and contracts with changes in moisture content. This movement can stress the fastener and the surrounding wood fibers. Employing longer can help to distribute the stress over a greater area. Allowing wood to acclimate to the environment before installation can also minimize subsequent movement and prevent potential problems.
Therefore, a comprehensive understanding of wood characteristics is crucial for selecting the appropriate size, material, and installation technique. Neglecting these considerations can lead to structural weaknesses, aesthetic imperfections, and premature failure of the finished product. Careful assessment of wood type ensures a robust and visually appealing result.
4. Corrosion Resistance
Corrosion resistance is a critical performance attribute, directly influencing the longevity and structural integrity of connections, particularly in exterior or moisture-prone environments. Selecting fasteners with adequate corrosion resistance is essential for preventing premature degradation and ensuring long-term performance.
- Material Composition and Protective Coatings
The base material, along with any applied coatings, dictates the level of protection against corrosion. Stainless steel offers inherent resistance due to its chromium content, forming a passive layer that inhibits oxidation. Coated options, such as galvanized or zinc-plated steel, provide a sacrificial barrier, corroding preferentially to protect the underlying steel. The choice of material and coating depends on the severity of the environmental conditions and the required lifespan of the connection. For example, coastal environments necessitate stainless steel, while indoor applications may suffice with galvanized coatings.
- Environmental Factors and Galvanic Corrosion
Exposure to moisture, salts, pollutants, and dissimilar metals accelerates the corrosion process. Moisture acts as an electrolyte, facilitating the electrochemical reactions that drive corrosion. Salts, particularly chlorides, enhance conductivity and increase corrosion rates. Galvanic corrosion occurs when dissimilar metals are in contact in the presence of an electrolyte, with the more active metal corroding preferentially. Selecting compatible materials and avoiding contact between dissimilar metals is crucial for minimizing galvanic corrosion. Insulation or coatings can be used to prevent direct contact between dissimilar metals.
- Long-Term Performance and Structural Integrity
Corrosion weakens the fastener, reducing its holding power and potentially leading to structural failure. Corrosion products, such as rust, expand and exert pressure on the surrounding wood fibers, further compromising the integrity of the connection. Regular inspection and maintenance are essential for identifying and addressing corrosion issues before they escalate. Replacing corroded fasteners is necessary to maintain the structural integrity of the assembly. The cost of using corrosion-resistant options is often offset by the reduced maintenance and replacement costs over the lifespan of the structure.
- Aesthetic Considerations and Staining
Corrosion not only compromises structural integrity but also detracts from the aesthetic appearance. Rust stains can discolor the surrounding wood, creating unsightly blemishes. Selecting corrosion-resistant fasteners prevents staining and maintains the visual appeal of the finished product. The cost of repair and refinishing due to corrosion-related staining can be significant, making the use of corrosion-resistant options a cost-effective choice in the long run.
The appropriate level of corrosion resistance guarantees lasting performance and preserves the structural and aesthetic integrity of finished carpentry work. Neglecting corrosion resistance can result in costly repairs, premature failure, and compromised safety, underlining its paramount importance in the selection process.
5. Application Technique
Effective application directly determines the success and longevity of fastening with these slender fasteners. Incorrect technique compromises holding power, causes cosmetic damage, and potentially splits the wood. Each strike of the hammer, the angle of entry, and the depth of set are critical variables impacting the final result. Skillful execution maximizes the benefits of this type of fastener while mitigating its inherent limitations.
Consider a scenario where trim is being applied to a delicate furniture piece. Applying excessive force with a hammer bends the fastener’s shank, rendering it useless and marring the surrounding wood. Conversely, insufficient force leaves the head protruding, preventing proper concealment and creating a potential snag point. A controlled strike, utilizing a nail set for the final depth, ensures a flush finish and secure hold. Furthermore, pre-drilling pilot holes in dense hardwoods minimizes splitting, enabling a stronger, cleaner connection. The proper use of a nail gun, with adjustable depth settings, can also provide consistent and efficient application, preventing over-driving or under-driving the fastener. These practical examples emphasize that technique is not merely a procedural step but an integral component of achieving the desired outcome.
In summary, successful fastening relies on deliberate and precise application. Mastering the nuances of technique is as important as selecting the correct type and size. Challenges arise when working with unfamiliar materials or in confined spaces, requiring adaptive strategies and careful execution. Ultimately, proficiency in application technique translates to enhanced structural integrity, improved aesthetics, and reduced waste, underscoring its vital role in woodworking and carpentry.
Frequently Asked Questions about 1 2 Finishing Nails
This section addresses common inquiries regarding these fasteners, offering concise and authoritative answers to clarify their appropriate usage and limitations.
Question 1: What is the primary application of 1 2 finishing nails?
Their main utility lies in attaching trim and molding, where a minimal visual impact is desired. The small head design facilitates easy concealment, making them suitable for fine woodworking projects.
Question 2: In what wood types should 1 2 finishing nails be used?
They are effective in both softwoods and hardwoods. However, in denser hardwoods, pre-drilling pilot holes is crucial to prevent bending or splitting.
Question 3: Are 1 2 finishing nails suitable for structural applications?
Due to their slender profile, they are not intended for load-bearing applications. They are best suited for non-structural elements where aesthetics are a primary concern.
Question 4: What type of hammer is best for driving 1 2 finishing nails?
A lightweight hammer, typically 8-12 ounces, provides adequate control and minimizes the risk of bending the fastener. A nail set should be used to set the head below the surface without marring the wood.
Question 5: How should one address bending during installation?
Bending often indicates excessive force or insufficient pilot hole preparation. Reduce hammer force, ensure a straight driving angle, and pre-drill a pilot hole when working with hardwoods or near the edge of the wood.
Question 6: Can 1 2 finishing nails be used outdoors?
Standard steel varieties are prone to corrosion. Stainless steel or galvanized options are necessary for outdoor applications or environments with high humidity to ensure long-term durability.
Selecting the appropriate fastener and employing correct installation techniques are essential for achieving optimal results. Careful attention to these details ensures a secure, aesthetically pleasing, and long-lasting finish.
The following section will provide a summary and concluding remarks regarding the proper usage and considerations.
Conclusion
The preceding discussion has elucidated the multifaceted nature of 1 2 finishing nails, extending beyond their simple definition as fasteners. Key considerations include the appropriate selection based on wood type, environmental factors, and the specific requirements of the application. Proper installation techniques, encompassing pilot hole preparation and controlled driving force, are paramount for achieving optimal results and preventing common pitfalls such as bending or splitting. The importance of corrosion resistance, particularly in exterior or moisture-prone environments, cannot be overstated, as it directly impacts the longevity and structural integrity of the finished product.
Therefore, a comprehensive understanding of these factors is essential for anyone involved in woodworking, carpentry, or any application where a discreet and reliable fastening solution is required. Mastery of the selection criteria and implementation techniques associated with 1 2 finishing nails translates to enhanced project quality, reduced material waste, and increased structural durability. Continued adherence to these principles will ensure consistent and successful outcomes in future endeavors.


