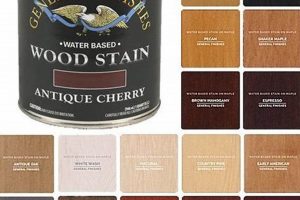
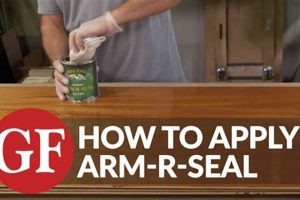
A widely utilized oil-based polyurethane topcoat provides durable protection and enhances the aesthetic appeal of wood surfaces. This product is favored for its ease of application, self-leveling properties, and ability to impart a rich, amber hue to wood, highlighting the natural grain. For instance, it can be applied to furniture, cabinetry, and millwork to create a resilient and attractive finish.
The significance of this type of finish stems from its protective qualities against scratches, moisture, and household chemicals, extending the lifespan of treated items. Its oil-based formulation offers exceptional penetration, bonding deeply with the wood for long-lasting results. Historically, such coatings have been preferred for their ability to impart a hand-rubbed look without the extensive labor typically associated with traditional finishing methods, making it a practical solution for both professionals and DIY enthusiasts.
The following sections will delve into application techniques, drying times, suitable wood types, and best practices for achieving optimal results with this popular wood finishing solution.
Application and Usage Considerations
The following guidelines are intended to optimize the performance and longevity of surfaces treated with this oil-based polyurethane finish.
Tip 1: Surface Preparation: Ensure the wood surface is clean, dry, and free of any existing finishes, wax, or contaminants. Proper preparation is critical for adhesion and a uniform appearance. Sanding to an appropriate grit level (typically 180-220) is essential to create a smooth and receptive substrate.
Tip 2: Thinning: While typically applied directly from the can, thinning with mineral spirits or a compatible thinner can improve flow and leveling, particularly in colder temperatures or when spraying. Adhere to the manufacturer’s recommendations for thinning ratios to avoid compromising the finish’s integrity.
Tip 3: Application Method: Achieve optimal results by applying thin, even coats using a high-quality brush, foam applicator, or spray equipment. Avoid applying excessively thick coats, which can lead to runs, drips, and prolonged drying times.
Tip 4: Sanding Between Coats: Lightly sand between coats with fine-grit sandpaper (320-400 grit) to remove any imperfections or dust nibs. This step enhances adhesion and contributes to a smoother, more refined final finish. Remove sanding dust thoroughly before applying the subsequent coat.
Tip 5: Adequate Drying Time: Allow sufficient drying time between coats, as specified by the manufacturer’s instructions. Drying times can vary depending on environmental factors such as temperature and humidity. Insufficient drying can lead to a soft or tacky finish.
Tip 6: Environmental Control: Maintain a dust-free environment during application and drying. Airborne particles can settle on the wet finish, creating imperfections. Proper ventilation is also crucial to facilitate the evaporation of solvents.
Tip 7: Avoid Direct Sunlight: Prevent direct sunlight exposure during the drying process. Rapid temperature fluctuations can negatively impact the curing process, potentially leading to cracking or clouding of the finish.
Adhering to these guidelines will promote a durable, aesthetically pleasing, and long-lasting protective coating on wood surfaces.
The subsequent sections will address troubleshooting common issues and maintenance recommendations.
1. Durability
Durability, concerning this specific oil-based polyurethane finish, represents its capacity to withstand wear, abrasion, and chemical exposure, factors directly impacting the longevity and protective capabilities of the coating. This resistance is paramount in maintaining the aesthetic and structural integrity of treated wood surfaces.
- Abrasion Resistance
Abrasion resistance signifies the finish’s ability to resist surface wear from friction, such as scuffing or rubbing. Higher abrasion resistance translates to fewer visible scratches and marks over time, preserving the finish’s appearance, especially on high-use surfaces like tabletops and floors. For example, items finished with a durable coating would resist marring from everyday use, whereas a less durable finish might show scratches more readily.
- Chemical Resistance
Chemical resistance pertains to the coating’s ability to withstand exposure to common household chemicals, solvents, and cleaning agents without degradation or discoloration. This characteristic is essential for surfaces that may come into contact with spills or frequent cleaning. A chemically resistant finish will protect the wood from staining or damage caused by spills, maintaining its aesthetic appeal and preventing underlying wood damage.
- Moisture Resistance
Moisture resistance defines the finish’s ability to repel water and prevent it from penetrating the wood. Effective moisture resistance is crucial to prevent warping, swelling, or fungal growth, particularly in humid environments or on surfaces exposed to water. Wood surfaces coated with a highly moisture-resistant finish will withstand spills and humidity changes without undergoing structural damage.
- UV Resistance
UV resistance involves the finish’s ability to resist degradation from ultraviolet (UV) light exposure. Prolonged exposure to sunlight can cause discoloration, cracking, or weakening of the finish. Enhanced UV resistance helps to maintain the finish’s color and structural integrity over time, especially for items placed near windows or outdoors. A UV-resistant coating prevents yellowing and fading, preserving the original color and preventing premature deterioration.
These aspects collectively contribute to the overall durability of items finished with this product. By providing resistance to abrasion, chemicals, moisture, and UV light, the coating ensures a long-lasting and protective barrier for wood surfaces, minimizing the need for frequent refinishing and maintaining the aesthetic quality of the treated items.
2. Application Methods
The successful utilization of this oil-based polyurethane topcoat is intrinsically linked to the chosen application method. These methods influence the final appearance, durability, and overall effectiveness of the protective layer. Factors such as the viscosity of the finish, the complexity of the substrate, and the desired aesthetic outcome dictate the most suitable approach. Incorrect application can lead to defects like runs, orange peel texture, or inadequate film build, ultimately compromising the protective qualities and visual appeal. For instance, spraying the finish allows for a uniform, thin coat ideal for intricate details, whereas brushing is often preferred for larger, flat surfaces where meticulous control is desired.
Specific techniques, such as padding or wiping, are also employed to achieve a hand-rubbed appearance, offering enhanced control over the build and resulting in a thin, even film. Each method presents its own set of challenges and requires specific tools and techniques. Spraying, for example, demands proper ventilation and safety precautions due to atomized particles, while brushing necessitates careful brush selection and technique to minimize brush strokes. The choice directly impacts the time required for application, the quantity of material used, and the level of skill necessary to achieve a satisfactory result. A properly applied finish will protect the wood from moisture and scratches, while a poorly applied one could lead to premature failure and require reapplication.
Ultimately, understanding the nuances of different application methods is crucial for maximizing the benefits of the protective coating. Considerations must extend beyond mere application and include proper preparation, environmental control, and post-application inspection. By carefully selecting and executing the appropriate application technique, it is possible to achieve a durable, aesthetically pleasing, and long-lasting protective finish on wood surfaces. This understanding addresses challenges associated with achieving optimal results and contributes to the broader objective of effectively protecting and enhancing wood surfaces.
3. Drying Time
Drying time is a critical parameter that directly influences the quality and efficiency of projects utilizing this oil-based polyurethane finish. Proper management of drying time ensures optimal film formation, adhesion, and overall durability. Insufficient or extended drying periods can lead to various finish defects, negatively impacting the final result.
- Environmental Factors
Temperature and humidity levels exert a significant influence on drying time. Higher temperatures typically accelerate drying, while high humidity retards it. The manufacturer’s specified drying times are usually based on ideal environmental conditions, and deviations from these conditions may necessitate adjustments to the recommended waiting periods. For instance, projects undertaken in humid environments may require substantially longer drying times than those completed in dry conditions to achieve full cure.
- Film Thickness
The thickness of the applied film directly impacts the required drying time. Thicker coats necessitate longer drying periods as the solvents within the finish need more time to evaporate completely. Applying multiple thin coats is preferable to a single thick coat to promote faster and more uniform drying. Overly thick coats can trap solvents, leading to a soft or tacky finish that is prone to damage. Properly applied thin coats dry faster, allowing for quicker re-coating and a more durable final product.
- Ventilation
Adequate ventilation is crucial for promoting solvent evaporation and facilitating the drying process. Proper air circulation helps remove solvent vapors, creating a more conducive environment for the finish to cure. Inadequate ventilation can trap solvent vapors, extending drying times and potentially leading to a lingering odor. Projects undertaken in confined spaces require particular attention to ventilation to ensure complete and timely drying.
- Recoating Interval
Adhering to the manufacturer’s recommended recoating intervals is essential for achieving optimal inter-coat adhesion. Applying subsequent coats before the previous coat has fully dried can lead to issues such as solvent entrapment and a weakened finish. Conversely, waiting too long between coats can result in poor adhesion, requiring additional surface preparation before applying the next layer. Following the specified recoating window ensures a strong, cohesive finish with maximum durability.
Understanding and carefully managing drying time, in conjunction with factors such as environmental conditions, film thickness, ventilation, and recoating intervals, is crucial for achieving a high-quality and durable finish. Deviations from recommended drying times can compromise the protective and aesthetic qualities of surfaces treated with this oil-based polyurethane.
4. Surface Preparation
Effective surface preparation is a fundamental prerequisite for the successful application and performance of the oil-based polyurethane finish. Proper preparation ensures optimal adhesion, a uniform appearance, and the long-term durability of the protective coating. Failure to adequately prepare the substrate can lead to a range of issues, undermining the finish’s ability to protect and enhance the underlying material.
- Cleaning and Degreasing
The removal of surface contaminants such as dirt, grease, wax, and previous finishes is critical. These substances can impede adhesion and result in an uneven finish. For instance, residual wax from prior furniture polishes must be completely removed to prevent the finish from beading up or failing to adhere properly. The use of appropriate solvents and cleaning agents is essential to ensure a clean, receptive surface.
- Sanding and Smoothing
Sanding creates a smooth, uniform surface and provides mechanical keying for the finish to grip. The appropriate grit sequence depends on the initial condition of the substrate. Starting with coarser grits to remove imperfections and progressing to finer grits for smoothing is a common practice. Uneven surfaces or mill marks can telegraph through the finish, impacting the final appearance. Proper sanding ensures a level, visually appealing surface.
- Repairing Imperfections
Addressing any existing damage, such as dents, scratches, or cracks, is vital before applying the finish. These imperfections can detract from the overall appearance and compromise the integrity of the coating. Filling voids with appropriate wood fillers and sanding them flush creates a smooth, seamless surface that is ready to receive the finish. Ignoring these defects can lead to an uneven finish and potential structural weakness.
- Dust Removal
Thorough dust removal after sanding is crucial to prevent contamination of the finish. Dust particles can become trapped in the finish, creating a rough or uneven texture. Methods such as vacuuming, tack cloths, and compressed air are employed to ensure a dust-free surface. Even minute particles can negatively affect the final appearance, emphasizing the need for meticulous dust removal.
These preparation steps, implemented correctly, establish an ideal foundation for the oil-based polyurethane to bond effectively, resulting in a durable, aesthetically pleasing, and long-lasting protective coating. The investment in thorough surface preparation translates directly into the quality and longevity of the finished product.
5. Wood Compatibility
The interaction between wood species and an oil-based polyurethane finish significantly impacts the final outcome of a finishing project. Different wood types possess varying densities, grain patterns, and resin contents, all of which influence the absorption rate and drying characteristics of the finish. This inherent variability necessitates careful consideration of wood compatibility to prevent issues such as uneven sheen, prolonged drying times, or compromised adhesion. For example, resinous woods, like pine, may hinder proper curing due to their natural oils interfering with the finish’s cross-linking process. Conversely, hardwoods with tight grain patterns, such as maple, may require more coats to achieve the desired level of protection and aesthetic appeal. Understanding these nuances is crucial to optimizing the application process and ensuring the longevity of the finished product.
The practical significance of wood compatibility extends to the selection of appropriate surface preparation techniques. Open-grained woods, such as oak, often benefit from the use of a grain filler to create a smooth, uniform surface prior to the application of the finish. This step prevents the finish from sinking into the pores, resulting in a more even sheen and enhanced durability. Conversely, closed-grain woods may not require grain filling, but they may still benefit from meticulous sanding to ensure proper adhesion. Ignoring these considerations can lead to an inconsistent finish and a reduced lifespan for the protective coating. A careful evaluation of the wood’s properties, combined with tailored preparation techniques, is essential for achieving the desired aesthetic and functional results.
In summary, the successful application hinges on a comprehensive understanding of wood compatibility. The inherent characteristics of different wood species directly influence the finish’s performance, necessitating careful consideration of surface preparation and application techniques. Addressing these factors proactively mitigates potential issues, optimizes the final result, and ensures the long-term protection and enhancement of the wood surface.
6. Finish Appearance
The final visual characteristics imparted by an oil-based polyurethane topcoat are crucial in determining the overall aesthetic value of finished wood surfaces. These attributes, ranging from sheen level to clarity, directly contribute to the perceived quality and appeal of the treated object. The selection and proper application techniques significantly influence these characteristics, requiring careful attention to detail.
- Sheen Level
Sheen level refers to the degree of light reflection from the finished surface, ranging from matte (minimal reflection) to gloss (high reflection). The choice of sheen level is often a matter of personal preference and intended use. Higher gloss levels may highlight imperfections in the substrate, while matte finishes tend to conceal them. Application of this oil-based finish allows for various sheen levels, from matte to semi-gloss, affecting the perceived depth and richness of the wood grain. For instance, a semi-gloss finish on a dining table enhances the wood’s natural beauty while providing adequate protection against spills.
- Clarity and Color
Clarity denotes the transparency of the finish, influencing the visibility of the underlying wood grain. The inherent color of the finish can also affect the overall appearance, with some formulations imparting a slight amber hue. High clarity ensures that the natural beauty of the wood is not obscured, while ambering can enrich the color and add warmth. Application typically enhances wood grain clarity, providing a subtle amber tone that enriches the natural color of the wood, making it a preferred choice for hardwoods like cherry or walnut.
- Smoothness and Texture
The smoothness of the finish contributes to the tactile and visual appeal of the surface. A smooth, even finish is generally preferred, but textured finishes may be desired for specific applications. Proper application techniques, including sanding between coats, are essential for achieving a smooth, defect-free surface. Multiple thin coats of this oil-based product, properly sanded between applications, result in a smooth, furniture-grade finish, ideal for surfaces that are frequently touched.
- Uniformity
Uniformity refers to the consistency of the finish across the entire surface. Variations in sheen, color, or texture can detract from the overall appearance. Proper application techniques, including consistent film thickness and overlap, are crucial for achieving a uniform finish. Ensuring consistent application yields a uniform sheen and color across large surfaces, vital for achieving a professional-looking finish on cabinets or bookshelves.
These facets collectively determine the final visual characteristics imparted. The careful selection of sheen level, consideration of clarity and color, attention to smoothness and texture, and emphasis on uniformity, contribute to a visually appealing and high-quality finish. These elements are directly influenced by the choice of topcoat and the skill with which it is applied.
7. Maintenance
Maintaining surfaces finished with an oil-based polyurethane topcoat is essential to preserve their aesthetic qualities and extend their lifespan. The protective barrier provided by the finish is susceptible to wear, scratches, and chemical exposure over time. Proper maintenance practices, therefore, are crucial in mitigating these effects and ensuring long-term performance. Failure to maintain surfaces adequately results in premature degradation of the finish, necessitating costly repairs or refinishing. For example, a tabletop subjected to daily use without proper cleaning and protection will exhibit scratches and dullness much sooner than one that is carefully maintained.
Regular cleaning using mild, non-abrasive detergents is a cornerstone of effective maintenance. Harsh chemicals or abrasive cleaners can damage the finish, leading to discoloration or loss of sheen. Periodic waxing with a high-quality furniture wax can provide an additional layer of protection against scratches and moisture. Furthermore, the use of coasters and placemats under beverages and hot dishes minimizes the risk of staining or heat damage. Scratches and minor imperfections can often be addressed with specialized touch-up products designed for oil-based finishes, restoring the appearance and preventing further deterioration. The type of wear will determine the type of solution, from simple wax touch ups to specialized kits.
In summary, implementing a consistent maintenance routine is indispensable for safeguarding surfaces finished with this popular topcoat. By employing gentle cleaning methods, protective measures, and timely repairs, the finish’s integrity can be preserved, ensuring its continued aesthetic appeal and protective function. Neglecting maintenance leads to premature degradation and necessitates more extensive and costly interventions. Prioritizing proactive care is essential for maximizing the value and longevity of finished wood surfaces.
Frequently Asked Questions
The following questions address common inquiries and concerns regarding the application and performance of this oil-based polyurethane finish.
Question 1: What is the appropriate method for cleaning a surface finished with this product?
Surfaces should be cleaned using a soft cloth dampened with a mild detergent solution. Abrasive cleaners or harsh chemicals are to be avoided, as they can damage the finish. Excess water should be wiped away immediately.
Question 2: How many coats are recommended for optimal protection?
A minimum of three coats is generally recommended for adequate protection and durability. Additional coats may be applied to high-use surfaces or to achieve a desired aesthetic effect.
Question 3: What is the ideal drying time between coats?
The manufacturer’s instructions should be consulted for specific drying time recommendations. Generally, a minimum of 24 hours between coats is advised, but this may vary depending on environmental conditions.
Question 4: Can this finish be applied over existing finishes?
The existing finish must be thoroughly cleaned and sanded to promote adhesion. Compatibility with the existing finish should be tested in an inconspicuous area before proceeding with full application. Incompatible finishes may result in adhesion failures or an undesirable appearance.
Question 5: What is the best method for addressing minor scratches or imperfections?
Minor scratches can often be minimized with specialized scratch repair products designed for oil-based finishes. Deeper scratches may require spot sanding and reapplication of the finish.
Question 6: Is this finish suitable for outdoor use?
While it offers some degree of moisture resistance, this finish is primarily intended for interior applications. Prolonged exposure to sunlight and the elements can lead to premature degradation and is not recommended. Exterior applications require finishes specifically formulated for outdoor use.
These answers provide essential guidance for maximizing the effectiveness and longevity of this coating. Adherence to these recommendations promotes a durable and aesthetically pleasing result.
The subsequent section will address troubleshooting common issues encountered during application.
Conclusion
This exploration of “general finishes arm r seal” has underscored the critical factors influencing its effective application and long-term performance. Surface preparation, application methods, drying times, wood compatibility, finish appearance, and maintenance have all been identified as essential elements in achieving a durable and aesthetically pleasing result. Mastery of these aspects is paramount for both professional and amateur woodworkers seeking to leverage the protective and enhancing qualities of this popular oil-based polyurethane finish.
Continued adherence to best practices and a thorough understanding of these principles will ensure the longevity and beauty of treated wood surfaces. The information presented provides a foundation for informed decision-making and successful project execution, maximizing the investment in materials and labor. Further research and experimentation are encouraged to refine techniques and optimize results, ensuring the continued success of future finishing endeavors.


