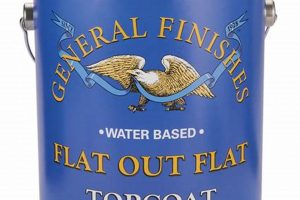
This specialized coating is a thick, oil-based polyurethane designed to provide a durable and aesthetically pleasing finish to wood and other surfaces. Its formulation allows it to level well, minimizing brush strokes and providing a smooth, even sheen. For example, it is frequently used to protect and enhance the appearance of furniture, cabinets, and interior doors.
The value of this product lies in its superior protection against scratches, moisture, and UV damage compared to other types of finishes. Historically, traditional varnishes required multiple coats and often resulted in uneven surfaces. This coating offers a simpler application process, enhanced durability, and often a richer, more lustrous appearance. Its self-leveling properties and resistance to drips also contribute to a more professional-looking outcome.
Understanding the characteristics, application techniques, and appropriate uses of this coating are essential for achieving optimal results. The following sections will detail surface preparation, application methods, drying times, and troubleshooting tips, ensuring a successful and long-lasting finish.
Application Techniques for Optimal Results
Achieving a professional-grade finish requires careful attention to application details. The following tips outline essential techniques for maximizing the effectiveness and appearance of the coating.
Tip 1: Surface Preparation is Paramount: Ensure the surface is clean, dry, and free from dust, grease, or previous finishes. Sanding is crucial for adhesion and even application. Failure to properly prepare the surface will compromise the integrity and appearance of the final finish.
Tip 2: Stir, Do Not Shake: Vigorously shaking the can introduces air bubbles that can become trapped in the finish, resulting in an uneven surface. Stir gently and thoroughly to ensure uniform consistency before application.
Tip 3: Apply Thin, Even Coats: Multiple thin coats are preferable to a single thick coat, which is prone to drips, runs, and prolonged drying times. Thin coats allow for proper leveling and reduce the risk of imperfections.
Tip 4: Use Quality Application Tools: A natural-bristle brush designed for oil-based finishes, or a lint-free cloth, will yield the best results. Avoid foam brushes, which can leave bubbles and an uneven texture.
Tip 5: Maintain Consistent Temperature and Humidity: Apply in a well-ventilated area with a temperature between 65F and 75F and humidity levels below 60%. Extreme temperatures or high humidity can affect drying times and finish quality.
Tip 6: Allow Adequate Drying Time Between Coats: Consult the manufacturer’s instructions for recommended drying times. Insufficient drying time can lead to adhesion problems and a soft, easily damaged finish. Lightly sand with fine-grit sandpaper between coats to ensure optimal adhesion.
Tip 7: Consider using a foam pad: Foam pads can provide a very thin, smooth, and even application to your coats.
Following these techniques will significantly improve the durability and aesthetic appeal of the final product. Proper application ensures long-lasting protection and enhances the beauty of the underlying material.
These practices represent fundamental principles for a successful outcome. The subsequent sections will delve into specific applications and troubleshooting scenarios.
1. Durability
Durability, in the context of specialized coatings, refers to the resistance of the applied finish to wear, abrasion, impact, and environmental factors over an extended period. It is a critical attribute determining the longevity and protective capabilities of the material.
- Abrasion Resistance
Abrasion resistance is the ability of the cured coating to withstand scratching, scuffing, and rubbing without significant damage. It is particularly important in high-traffic areas, such as furniture tops and cabinet doors. A durable coating should maintain its integrity and appearance despite repeated contact with abrasive materials. For example, a kitchen table finished with a durable product will better resist scratches from everyday use compared to one with a less resistant finish.
- Impact Resistance
Impact resistance relates to the coating’s ability to withstand sudden forces without cracking, chipping, or delaminating from the substrate. This is critical for surfaces prone to accidental impacts, such as table edges or chair legs. High impact resistance ensures that the finish remains intact and continues to protect the underlying material even after experiencing a significant force.
- Chemical Resistance
Chemical resistance is the capacity of the finish to resist degradation or staining upon exposure to household chemicals, solvents, and liquids. Surfaces in kitchens and bathrooms are frequently exposed to cleaning agents and spills. A durable coating should prevent these substances from penetrating and damaging the underlying material, ensuring a long-lasting and aesthetically pleasing finish.
- Moisture Resistance
Moisture resistance refers to the coating’s ability to prevent water or humidity from penetrating and causing damage to the substrate. This is particularly important for wood surfaces, which can warp, rot, or develop mold when exposed to moisture. A durable finish should provide a barrier against moisture intrusion, protecting the underlying wood and preventing structural damage.
The interplay of abrasion, impact, chemical, and moisture resistance defines the overall durability of the coating. Selecting a formulation with superior performance in these areas ensures a prolonged lifespan and consistent protection of the finished surface, thereby minimizing the need for frequent repairs or refinishing.
2. Application
The application process is a critical determinant of the ultimate performance and aesthetic quality of specialized coatings. Precise techniques are paramount in achieving the desired results. Improper application can negate the inherent qualities of even the highest-quality materials.
- Surface Preparation Influence
The condition of the substrate significantly impacts adhesion and finish uniformity. Contaminants, existing coatings, or inadequate sanding create barriers preventing proper bonding and leveling. For instance, applying without thoroughly degreasing a surface can lead to fisheyes and poor adhesion, resulting in premature failure of the coating.
- Environmental Factors Effects
Ambient temperature, humidity, and ventilation exert considerable influence on drying times and cure rates. Deviations from optimal conditions may lead to prolonged drying, trapping solvents and producing a soft, easily damaged finish. High humidity, in particular, can introduce cloudiness or blushing into the cured film.
- Tool Selection Ramifications
The choice of application toolbrush, roller, or spray equipmentaffects the coating’s thickness, texture, and overall appearance. Incorrect tool selection can result in uneven application, excessive brush strokes, or orange peel effects. For example, using a low-quality brush can introduce loose bristles into the finish, compromising its smoothness.
- Layering Strategy Significance
The number of coats, thickness of each layer, and intercoat sanding influence the finish’s durability, clarity, and leveling properties. Applying excessively thick coats can lead to runs, sags, and extended drying times. Insufficient intercoat sanding diminishes adhesion between layers, weakening the overall finish structure.
These facets highlight the intrinsic connection between the application process and the success of specialized coatings. Mastery of these techniques optimizes the inherent properties of the material, resulting in a durable, aesthetically pleasing, and long-lasting finish. Neglecting any one of these facets compromises the entire endeavor.
3. Clarity
In specialized coatings, clarity denotes the degree to which the finish allows light to pass through without distortion, discoloration, or cloudiness. For this specific oil-based polyurethane, clarity directly impacts the visual appeal of the coated surface, influencing how underlying colors and grain patterns are perceived. A high level of clarity ensures that the natural beauty of the wood or other material is enhanced, not obscured. For example, on a dark-stained wood, insufficient clarity could result in a muddy or dull appearance, diminishing the richness of the stain. Conversely, excellent clarity allows the full depth and nuance of the stain to be appreciated.
The formulation of this coating is crucial in achieving optimal clarity. Factors such as the quality of the resins used, the presence of additives, and the manufacturing process all contribute. Impurities or poorly refined resins can introduce haze or yellowing, reducing clarity. Additionally, improper mixing or application techniques can trap air bubbles within the finish, creating a cloudy appearance. Consider the application to a highly figured piece of wood; a coating with exceptional clarity is essential to showcase the unique grain patterns and chatoyancy without any visual obstruction. The practical significance lies in the ability of the finish to act as a transparent protective layer, preserving the aesthetic integrity of the underlying material.
Ultimately, the clarity of this type of coating is a vital attribute directly linked to the final appearance and perceived value of the finished product. While durability and protection are essential functions, clarity ensures that the underlying beauty is preserved and enhanced. Challenges can arise from environmental factors during application or long-term exposure to UV light, which can degrade clarity over time. Understanding the factors that influence this quality is key to selecting and applying the coating appropriately, achieving a lasting and visually appealing result.
4. Leveling
Leveling, concerning this specific oil-based polyurethane, refers to the ability of the liquid coating to flow and spread evenly across a surface after application, minimizing brush strokes, roller marks, or other surface imperfections. This characteristic is vital for achieving a smooth, professional-looking finish without requiring extensive sanding or other corrective measures.
- Viscosity Influence
The viscosity of the coating plays a central role in its leveling properties. A lower viscosity allows the liquid to flow more easily and self-correct surface irregularities. However, excessively low viscosity can lead to runs and sags, counteracting the benefits of good leveling. The formulation is carefully balanced to provide optimal flow without sacrificing film thickness or protection. For example, if the coating were too thick, brush strokes would remain visible, and if too thin, it might not adequately cover the surface. Appropriate viscosity ensures a uniform film.
- Surface Tension Effects
Surface tension influences how the coating interacts with the substrate. A lower surface tension promotes wetting and spreading, allowing the coating to flow into small crevices and irregularities, resulting in a smoother surface. Additives in the formulation are often used to reduce surface tension, enhancing leveling. For instance, a coating with high surface tension might bead up on certain surfaces, creating an uneven finish. Lowering surface tension allows the coating to spread evenly, minimizing imperfections.
- Drying Time Implications
The drying time of the coating directly impacts its leveling capability. If the coating dries too quickly, it may not have sufficient time to level properly before the film sets, resulting in visible imperfections. Conversely, excessively slow drying can increase the risk of dust contamination and sagging. The formulation of this oil-based polyurethane is designed to provide a balance between leveling time and drying time. A coating that dries too fast might trap brush marks, while one that dries too slowly could collect dust particles from the air. The correct drying time allows the coating to settle and level effectively.
- Application Technique Interaction
The method of application significantly influences leveling. Techniques such as proper brush loading, even pressure, and overlapping strokes can enhance the coating’s ability to self-level. Incorrect application, such as applying too much or too little material, can negate the leveling properties. For instance, applying with a dry brush can create streaks and unevenness, whereas using the correct amount and applying it uniformly will allow the coating to level effectively, hiding imperfections.
These interrelated factors highlight the complexities of achieving optimal leveling. The specific formulation of this coating is engineered to provide a balance of viscosity, surface tension, and drying time, allowing the applied finish to flow and self-correct, minimizing surface imperfections. Understanding these aspects is crucial for achieving a smooth, professional-looking finish. This characteristic differentiates it from other coatings and makes it highly desirable for a flawless result.
5. Protection
The primary function of any topcoat is to provide a protective barrier against external elements. In the context of this specific oil-based polyurethane, this protection manifests in several key areas: resistance to abrasion, blocking moisture intrusion, guarding against chemical damage, and mitigating the effects of ultraviolet (UV) radiation. Without such protection, the underlying surface would be vulnerable to degradation, staining, and physical damage, substantially reducing its lifespan. For example, a wooden tabletop without adequate protection would quickly show scratches, water rings, and discoloration from spills. The protective capabilities of this coating are not merely superficial; they extend the functional and aesthetic life of the treated object.
The level of protection afforded is directly influenced by the formulation of the coating and the application technique. The dense molecular structure of the cured polyurethane film creates a durable shield that resists physical wear and chemical attack. Furthermore, additives within the formulation enhance UV resistance, preventing yellowing and fading over time. Correct application, involving proper surface preparation and multiple thin coats, ensures uniform coverage and maximizes the protective properties. Consider the case of kitchen cabinets: properly coated, they can withstand frequent cleaning, resist grease and food stains, and maintain their appearance for years, whereas inadequately protected cabinets would quickly show signs of wear and damage.
The protective characteristics of this coating are fundamentally linked to its long-term performance and value. By safeguarding the underlying surface from damage, it reduces the need for frequent repairs or refinishing, saving both time and resources. While factors such as clarity and leveling contribute to the aesthetic appeal, it is the protective function that ensures the longevity and durability of the finish. Challenges can arise from improper application or use in extreme environments, requiring careful attention to technique and appropriate product selection. Ultimately, understanding and leveraging the protective capabilities of this specialized coating is essential for achieving a durable and long-lasting finish.
6. Cure time
Cure time, in the context of specialized coatings, refers to the period required for the applied film to fully harden and achieve its optimal performance characteristics. For this specific oil-based polyurethane, cure time is a critical factor influencing the coating’s durability, chemical resistance, and overall longevity. Insufficient cure time can compromise the integrity of the finish, rendering it susceptible to damage from abrasion, solvents, or moisture. For example, placing objects on a surface before it has fully cured can leave permanent indentations or mar the finish. The specific formulation dictates the recommended cure time, which is often longer than the “dry to the touch” time.
The chemical processes occurring during the cure time involve cross-linking of the polyurethane molecules, creating a robust, three-dimensional network. Environmental conditions, such as temperature and humidity, significantly affect the rate of this process. Lower temperatures and higher humidity levels can extend the cure time considerably, whereas warmer, drier conditions accelerate it. Failing to account for these environmental factors can lead to a finish that remains soft or tacky for an extended period, making it vulnerable to dust contamination and physical damage. Using a woodworking project as an example, if a freshly coated item is moved into a colder environment, the full cure time would be much longer. An understanding of these variables is crucial for achieving optimal results and avoiding costly rework.
In summary, proper cure time is an indispensable element in the successful application of this product. It directly impacts the coating’s ability to provide long-lasting protection and enhance the aesthetic appeal of the underlying surface. While the temptation to expedite the process may exist, adhering to the manufacturer’s recommendations and considering environmental conditions ensures a durable and professional finish. Ignoring the importance of cure time can lead to premature failure of the coating, negating the benefits of its other desirable qualities.
Frequently Asked Questions
The following addresses common inquiries concerning the use, application, and performance of this coating. The information provided aims to clarify best practices and address potential challenges.
Question 1: What is the recommended surface preparation procedure prior to application?
Adequate surface preparation is paramount. Surfaces must be clean, dry, and free of any contaminants, such as grease, wax, or dust. Sanding is typically required to create a profile for proper adhesion. Previous finishes should be removed entirely before applying.
Question 2: How many coats are necessary to achieve optimal protection and appearance?
Multiple thin coats are preferable to a single thick coat. Typically, two to three coats are sufficient for most applications. Each coat should be allowed to dry thoroughly before applying the subsequent layer. Light sanding between coats can improve adhesion and smoothness.
Question 3: What is the recommended drying time between coats and before subjecting the finished surface to use?
Refer to the manufacturer’s specifications for recommended drying times. Generally, allow a minimum of 24 hours between coats and a full cure time of 72 hours before placing the finished surface into service. Environmental conditions, such as temperature and humidity, can affect drying times.
Question 4: What are the potential causes of a cloudy or uneven finish?
Cloudiness can result from high humidity during application, inadequate surface preparation, or improper mixing of the product. Unevenness may be caused by applying excessively thick coats, using incorrect application tools, or failing to sand between coats.
Question 5: Can this coating be applied over existing finishes?
Application over existing finishes is not generally recommended unless the existing finish is in good condition and compatible. In such cases, thorough sanding and testing in an inconspicuous area are advisable. Complete removal of the existing finish is the preferred method for optimal results.
Question 6: What is the best method for cleaning brushes and application tools after use?
Brushes and tools should be cleaned immediately after use with mineral spirits or a suitable solvent recommended by the manufacturer. Proper cleaning and maintenance of tools will extend their lifespan and ensure consistent application quality.
Understanding these factors will contribute to a successful application. Careful attention to detail and adherence to best practices are essential for achieving a durable and aesthetically pleasing result.
The following sections will elaborate on troubleshooting common application issues and providing expert tips for advanced finishing techniques.
Conclusion
This discussion has explored several facets of its utilization, encompassing application techniques, key attributes, and troubleshooting strategies. The material’s capacity to deliver a durable, aesthetically pleasing, and protective finish hinges on proper preparation, skillful application, and a thorough understanding of its properties. Successfully employing the coating requires attention to detail and adherence to recommended practices, maximizing its potential benefits.
Continued adherence to established procedures and ongoing evaluation of its performance in diverse applications remain crucial. As material science advances, further refinements may emerge, optimizing its capabilities and expanding its utility. Diligent observation and responsible use will ensure the continued effectiveness of this coating in protecting and enhancing surfaces for years to come.


![Buy General Finishes Walnut Stain Online - [Year] Guide Best Final Touch: Elevate Your Projects with Professional Finishing Buy General Finishes Walnut Stain Online - [Year] Guide | Best Final Touch: Elevate Your Projects with Professional Finishing](https://bestfinaltouch.com/wp-content/uploads/2025/10/th-824-300x200.jpg)
