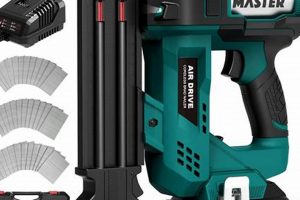
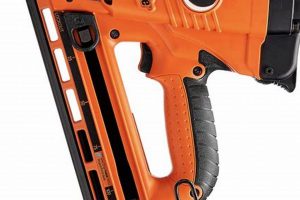
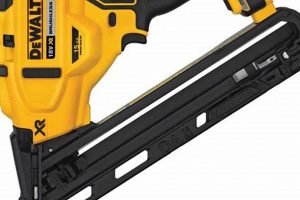
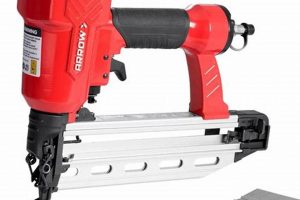
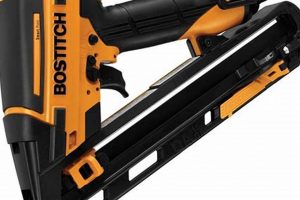
A pneumatic or cordless electric tool designed for driving fasteners into wood trim and molding, this device provides a means of attaching delicate materials without splitting or marring the surface. It typically utilizes smaller-gauge nails, often referred to as brads or finish nails, to minimize visibility and maintain the aesthetic integrity of the work. For example, it is commonly employed in securing baseboards, crown molding, door casings, and window trim in residential and commercial construction.
The significance of this type of nailer lies in its ability to deliver precise and consistent results, enhancing the overall quality and appearance of interior finishing projects. Its use reduces the need for manual hammering, increasing efficiency and minimizing the risk of damage to the surrounding materials. Historically, skilled carpenters relied on hand-driven nails, requiring considerable time and expertise. The introduction of this specialized tool marked a significant advancement, enabling faster and more accurate installations.
The following sections will delve deeper into the specific features, applications, safety considerations, and maintenance procedures associated with this valuable tool in the woodworking and construction trades. These discussions will provide a thorough understanding of its operational characteristics and best practices for its utilization.
Usage Guidance
This section presents critical advice for the effective and safe operation of these specialized tools. Adherence to these guidelines will ensure optimal performance and minimize the risk of injury or damage.
Tip 1: Select Appropriate Fasteners: Always utilize the correct gauge and length of nail recommended by the tool manufacturer for the specific application. Using incorrect fasteners can lead to jamming, misfires, or damage to the work piece.
Tip 2: Adjust Depth Settings Precisely: The depth setting should be adjusted to ensure the fastener is driven flush with the surface without damaging the surrounding material. Test the setting on a scrap piece before working on the final project.
Tip 3: Maintain Proper Air Pressure: For pneumatic models, ensure the air compressor is set to the recommended pressure range. Insufficient pressure can result in incomplete nail driving, while excessive pressure may cause damage to the tool or work piece.
Tip 4: Ensure Proper Tool Placement: Position the tool firmly and squarely against the work piece before firing. A loose or angled placement can lead to misfires and inaccurate fastening.
Tip 5: Regularly Inspect the Tool: Before each use, inspect the tool for any signs of damage or wear, including the nosepiece, safety mechanism, and air hose (if applicable). Replace any damaged components immediately.
Tip 6: Utilize Safety Glasses and Hearing Protection: Protect yourself from flying debris and loud noises by wearing appropriate safety glasses and hearing protection whenever the tool is in operation.
Tip 7: Disconnect Air Supply or Battery When Not in Use: Prevent accidental firing by disconnecting the air supply or removing the battery when the tool is not actively being used or during maintenance.
By following these essential guidelines, users can maximize the efficiency, accuracy, and safety associated with this type of fastening equipment, thereby enhancing the quality and longevity of their projects.
The concluding section will provide a summary of key features, maintenance procedures, and best practices, reinforcing the principles outlined in this article.
1. Precision
In the realm of finish carpentry, precision represents a paramount attribute, particularly when employing a specialized nailer. The accuracy with which the tool drives fasteners directly influences the quality and aesthetic appeal of the finished project, underscoring the critical relationship between the two.
- Consistent Nail Placement
Precise placement ensures nails are uniformly spaced and aligned, contributing to a professional and visually appealing finish. Inconsistent placement detracts from the overall quality, requiring additional corrective measures.
- Controlled Nail Depth
Depth control is essential to driving fasteners flush with the surface without damaging the surrounding material or leaving unsightly protrusions. Over-driving or under-driving nails compromises the aesthetic integrity of the trim work.
- Minimized Material Splitting
Precise driving force and nail angle reduce the likelihood of splitting delicate trim pieces, particularly when working with hardwoods or intricate molding profiles. Splitting necessitates replacement or repair, adding time and cost to the project.
- Reduced Surface Marring
A precision tool minimizes surface marring or indentation around the nail entry point. This is achieved through controlled impact and a well-designed nosepiece, preserving the surface quality of the finished material.
The collective impact of these precision-related facets ensures that finish carpentry projects achieve a high level of visual appeal and structural integrity. When deployed effectively, this type of nailer significantly contributes to a seamless and professional final product, enhancing the value and longevity of the installation.
2. Air Pressure
Air pressure constitutes a critical operating parameter for pneumatic types of this tool. Consistent and appropriate air pressure directly influences the driving force delivered to the fastener. Insufficient pressure results in incomplete nail insertion, leaving nail heads protruding from the surface. Conversely, excessive pressure can drive nails too deep, marring the surrounding material or even causing structural damage to delicate trim. Proper regulation of air pressure is, therefore, paramount for achieving the desired finish quality and preventing material waste. Consider, for instance, the installation of delicate crown molding: too little pressure leaves visible nail heads, requiring manual setting and potentially damaging the molding; too much pressure creates unsightly depressions in the finished surface, necessitating replacement of the affected section.
The optimal air pressure setting is typically specified by the tool manufacturer and often varies depending on the density of the wood being fastened and the length of the nails being used. Many models feature adjustable pressure regulators, allowing users to fine-tune the driving force to match the specific application. Furthermore, the consistent supply of air pressure is essential. Fluctuations in air pressure from the compressor, due to an undersized compressor or leaks in the air lines, can lead to inconsistent fastener placement and diminished performance. Therefore, ensuring a stable and properly sized air supply is integral to the effective operation of a pneumatic nailer.
In summary, air pressure serves as a fundamental control mechanism for pneumatic versions of this tool. Its proper adjustment and maintenance are crucial for achieving consistent, high-quality results and preventing damage to both the tool and the workpiece. Understanding the relationship between air pressure, material density, and nail length is essential for any user seeking to maximize the performance and longevity of their pneumatic nailer and produce professional-grade finish carpentry.
3. Nail Gauge
The selection of an appropriate nail gauge is intrinsically linked to the functionality and effectiveness of a finished nail gun. Nail gauge, a numerical designation indicating the diameter of the nail shaft, dictates the holding power and the visibility of the fastener within the finished workpiece. A higher gauge number denotes a thinner nail, suitable for delicate trim work where minimizing visual impact is paramount. Conversely, a lower gauge number signifies a thicker nail, offering increased holding strength in applications where structural integrity outweighs aesthetic considerations. The finished nail gun is specifically designed to accommodate a range of nail gauges, each optimized for particular finishing tasks. Using the incorrect gauge can lead to splitting of the workpiece, inadequate fastening, or damage to the tool itself. For example, employing a heavy-gauge framing nail in a tool designed for finish nails would likely cause irreparable damage to the nailer and ruin the trim material.
The compatibility between nail gauge and the specific tool is engineered into the magazine and firing mechanism of the finished nail gun. These tools are typically designed to accept collated strips or coils of nails within a defined gauge range. Attempting to load nails outside of this specified range will result in jamming, misfires, or a complete inability to operate the tool. Furthermore, the nailer’s driving force is calibrated to effectively set nails of the intended gauge without causing excessive surface damage. This balance between driving force and nail diameter is essential for achieving a clean, professional finish. A thinner nail, appropriate for delicate molding, requires less driving force to set flush, while a slightly thicker nail for heavier trim demands correspondingly more power. The selection of the correct gauge, therefore, necessitates careful consideration of the material properties of the workpiece and the structural requirements of the application.
In summary, the nail gauge is a crucial parameter to consider when using a finished nail gun. Its selection directly impacts the quality of the finished product, the efficiency of the fastening process, and the longevity of the tool. Understanding the relationship between nail gauge, material properties, and tool specifications is essential for achieving optimal results in finish carpentry and ensuring the reliable operation of the finished nail gun. Improper nail gauge can lead to structural problems, wasted materials and safety risk.
4. Depth Control
Depth control is an indispensable feature of any finished nail gun. It dictates the precise penetration depth of the fastener, directly influencing the quality and appearance of the finished product. Insufficient depth results in nail heads protruding from the surface, creating a visually unappealing and potentially hazardous condition. Conversely, excessive depth leads to unsightly depressions, surface marring, and weakening of the material. The effectiveness of a finished nail gun hinges on its ability to consistently drive fasteners to the desired depth, ensuring a seamless and professional finish. Without accurate depth control, even the most skilled carpenter would struggle to achieve consistent, high-quality results.
The mechanism for adjusting depth control varies among models. Some utilize a simple dial or knob near the nose of the tool, allowing for incremental adjustments to the driving force. Others employ a more sophisticated system with pre-set depth settings tailored to specific materials or nail lengths. Regardless of the specific mechanism, the underlying principle remains the same: to provide the user with precise control over the fastener’s final position. In practical applications, depth control allows for subtle adjustments to compensate for variations in material density. For instance, when fastening trim to hardwood, a slightly higher depth setting might be necessary compared to fastening to softwood. Similarly, when using longer nails, a reduced depth setting may be required to prevent over-penetration.
Accurate depth control represents a key factor in the overall performance and versatility of a finished nail gun. It empowers the user to achieve consistent and professional results across a range of finishing applications. The absence of this feature severely limits the tool’s utility and compromises the quality of the finished product. Therefore, depth control is not merely an ancillary function but an integral component of the finished nail gun, essential for achieving optimal results and ensuring the long-term integrity of the finished carpentry.
5. Safety Mechanisms
Safety mechanisms constitute an indispensable component of every finished nail gun. Their presence mitigates the risk of unintended nail discharge, thereby preventing potential injuries to the user and bystanders. These mechanisms are engineered to require deliberate activation, preventing accidental firing from occurring due to bumps, drops, or unintended trigger pulls. The absence or malfunction of these mechanisms elevates the risk of serious injury significantly, transforming the tool from a valuable asset into a potential hazard. Consider, for instance, the common sequential trip mechanism. This design necessitates that the nosepiece be fully depressed against the work surface before the trigger can be activated, preventing nail discharge if the tool is inadvertently pointed towards a person or object. A malfunctioning or bypassed safety mechanism negates this protection, potentially leading to severe injury from a projectile nail.
The design and implementation of safety mechanisms within a finished nail gun are guided by industry standards and regulatory requirements. Manufacturers are obligated to incorporate features that minimize the risk of accidental firing and ensure the tool’s safe operation. These features may include trigger locks, which prevent the trigger from being pulled when the tool is not in use, and contact-trip mechanisms, which require the nosepiece to be fully engaged before the tool can fire. Regular inspection and maintenance of these mechanisms are crucial for ensuring their continued effectiveness. Damaged, worn, or improperly adjusted safety features should be addressed immediately to prevent potential accidents. For example, a bent or damaged contact trip mechanism may fail to fully engage, allowing the tool to fire even when not properly pressed against the work surface.
In summary, safety mechanisms are not optional add-ons but rather integral components of a finished nail gun, crucial for mitigating the inherent risks associated with its operation. Their presence and proper functioning are paramount for preventing accidental injuries and ensuring a safe working environment. Reliance on these mechanisms, coupled with adherence to safe operating procedures, is essential for responsible and effective use of the tool. Users must prioritize safety by understanding the function of these mechanisms and ensuring their proper operation before each use. Failure to do so can result in serious and preventable injuries.
6. Maintenance
Regular maintenance is essential for ensuring the continued performance, longevity, and safe operation of any finished nail gun. Consistent upkeep prevents malfunctions, reduces downtime, and prolongs the tool’s lifespan, maximizing the return on investment. Neglecting maintenance can lead to diminished performance, increased repair costs, and potential safety hazards.
- Cleaning and Lubrication
Accumulated dust, debris, and dried lubricants can impede the internal mechanisms of a nail gun, causing jamming, misfires, and reduced power. Regular cleaning with compressed air and application of appropriate lubricants ensures smooth operation and prevents premature wear. For instance, the build-up of sawdust within the firing chamber can obstruct the piston’s movement, leading to inconsistent nail depth and eventual tool failure.
- Air Filter Maintenance (Pneumatic Models)
Pneumatic nail guns rely on clean, dry compressed air for optimal performance. The air filter removes moisture and contaminants from the air supply, preventing corrosion and damage to internal components. Neglecting filter maintenance allows moisture and debris to enter the tool, leading to rust, reduced power, and eventual failure. Replacing or cleaning the air filter according to the manufacturer’s recommendations is crucial for maintaining consistent performance and extending the tool’s lifespan.
- Inspection of Fasteners and Feed System
The nail feed system, responsible for delivering fasteners to the firing chamber, is susceptible to wear and damage. Regularly inspecting the magazine, pusher mechanism, and feed pawls for signs of wear or damage prevents jamming and misfeeds. Using damaged or incompatible fasteners can also lead to malfunctions. Replacing worn parts and ensuring proper fastener compatibility are essential for reliable operation.
- Hose and Fitting Inspection (Pneumatic Models)
For pneumatic nail guns, the air hose and fittings are crucial for delivering compressed air to the tool. Inspecting the hose for leaks, kinks, and damage, and ensuring secure connections at all fittings prevents pressure loss and performance degradation. Leaks reduce power and efficiency, while damaged hoses pose a safety hazard. Replacing damaged hoses and fittings promptly is essential for maintaining safe and reliable operation.
These four facets of maintenance are critical for preserving the functionality and safety of a finished nail gun. Consistent adherence to a regular maintenance schedule ensures optimal performance, extends the tool’s lifespan, and minimizes the risk of malfunctions and injuries. A well-maintained nail gun delivers consistent results, enhances productivity, and contributes to the overall quality of finish carpentry projects.
Frequently Asked Questions
This section addresses common inquiries and clarifies essential aspects related to the operation and maintenance of this specialized tool.
Question 1: What is the appropriate air pressure setting for a pneumatic finished nail gun?
The optimal air pressure setting varies depending on the specific model, nail length, and material density. Consult the manufacturer’s recommendations for the specific tool in use. Generally, a pressure range of 70-100 PSI is suitable for most finishing applications. It is always advisable to test the setting on a scrap piece of the target material before beginning the project.
Question 2: What gauge of nail is best suited for a finished nail gun?
Finished nail guns typically utilize 15- to 18-gauge nails. The appropriate gauge depends on the thickness and density of the trim or molding being attached. Thinner materials require higher gauge numbers to prevent splitting. A 16-gauge nail offers a balance of holding power and minimal visibility for many applications.
Question 3: How frequently should a finished nail gun be cleaned and lubricated?
The frequency of cleaning and lubrication depends on the intensity of use and the operating environment. For regular use, cleaning and lubrication should be performed at least once a week. In dusty or humid environments, more frequent maintenance may be necessary. Consult the manufacturer’s instructions for specific recommendations.
Question 4: What are the key safety precautions to observe when operating a finished nail gun?
Essential safety precautions include wearing safety glasses and hearing protection, ensuring the work area is clear of bystanders, maintaining a firm grip on the tool, and disconnecting the air supply or battery when not in use. Never disable or bypass any safety mechanisms.
Question 5: What causes a finished nail gun to jam, and how can it be prevented?
Jams are often caused by using incorrect nail sizes, damaged or bent nails, or a buildup of debris within the tool. Preventative measures include using only recommended fasteners, cleaning the tool regularly, and inspecting the nail feed system for damage.
Question 6: Can a finished nail gun be used for framing applications?
A finished nail gun is not designed for framing applications. The smaller gauge nails used in finished nailers lack the necessary holding power for structural framing. Use a dedicated framing nailer for such tasks.
Understanding these aspects contributes to efficient, accurate, and safe operation of this tool.
The subsequent section will provide a summary of crucial points.
Finished Nail Gun
This exploration has detailed critical aspects of the finished nail gun, encompassing its function, usage, maintenance, and safety. The tool’s proficiency in driving fasteners into trim and molding depends on precision, controlled air pressure (for pneumatic models), and appropriate nail gauge selection. Accurate depth control is crucial for achieving a flush finish without damaging the material. Functioning safety mechanisms are paramount for preventing accidental injuries, and consistent maintenance ensures reliable operation and extends the tool’s lifespan. Understanding and adhering to these principles optimizes performance.
The finished nail gun, when operated responsibly and maintained diligently, remains a valuable asset in finish carpentry and woodworking. Its correct application significantly enhances project quality, efficiency, and safety. Continued adherence to established guidelines and a commitment to ongoing education regarding best practices are essential for maximizing the tool’s potential and minimizing risks in the field. The finished nail gun, while a powerful tool, demands respect and careful handling to deliver consistently superior results.


