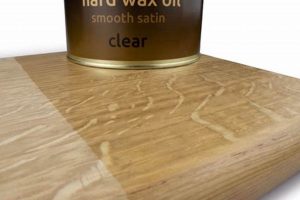
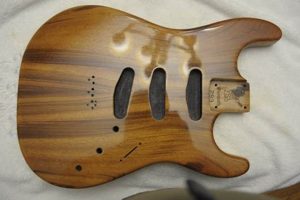
This surface treatment, commonly applied to wood, particularly walnut, enhances the natural grain and color of the material. The process involves the application of an oil-based product, which penetrates the wood fibers, providing protection and a subtle sheen. For example, this type of treatment might be used on furniture, cabinetry, or gun stocks to both preserve and beautify the wood.
The advantages of this wood finishing technique are multifaceted. It offers a relatively simple application process, often requiring only basic tools and materials. This finish highlights the wood’s inherent characteristics, offering a warm and inviting aesthetic. Historically, oiled finishes were favored for their ability to be easily repaired and maintained, allowing for the preservation of valuable wooden items over extended periods.
Understanding this finishing process is fundamental to appreciating the longevity and beauty it imparts to wooden objects. Further discussions will delve into specific application techniques, maintenance practices, and comparative analyses with alternative wood finishing methods.
Tips for Optimal Results
Achieving a desirable outcome with this type of wood finish requires careful attention to preparation and application. The following tips offer guidance for ensuring a durable and aesthetically pleasing result.
Tip 1: Surface Preparation is Paramount: Thoroughly sand the wood surface to achieve a uniform texture. Begin with coarser grit sandpaper and gradually progress to finer grits (e.g., 120 to 220 grit) for a smooth foundation.
Tip 2: Oil Application Technique: Apply thin, even coats of oil using a clean cloth or brush. Avoid excessive application, as it can lead to a sticky or uneven finish.
Tip 3: Allow Adequate Drying Time: Permit sufficient drying time between coats, typically 24-48 hours, depending on the oil type and ambient humidity. Proper drying is crucial for preventing tackiness and ensuring durability.
Tip 4: Buffing for Enhanced Sheen: After the final coat has dried completely, buff the surface with a clean, soft cloth to enhance the sheen and remove any residual oiliness.
Tip 5: Temperature and Humidity Considerations: Apply the finish in a well-ventilated area with moderate temperature and humidity. Extreme conditions can affect the drying time and overall quality of the finish.
Tip 6: Oil Type Selection: Choose a high-quality oil specifically formulated for wood finishing. Consider factors such as drying time, sheen level, and UV resistance when selecting an appropriate product.
Tip 7: Disposal of Oily Rags: Properly dispose of oil-soaked rags to prevent spontaneous combustion. Lay the rags flat to dry completely before discarding them or store them in a tightly sealed metal container filled with water.
These guidelines, when diligently followed, will contribute significantly to achieving a professional and lasting result. They ensure the wood’s natural beauty is accentuated while providing lasting protection.
With these tips in mind, the subsequent sections will address common issues and troubleshooting techniques associated with this finishing process.
1. Protection
The protective qualities imparted by an oil finish are a key determinant in its suitability for application on walnut and other wood surfaces. The ability of the finish to shield the underlying material from environmental factors and physical wear directly impacts the longevity and aesthetic appeal of the treated wood.
- Moisture Resistance
A primary function of the finish is to inhibit the absorption of moisture. By penetrating the wood pores, the oil creates a barrier that slows the ingress of water and humidity. This is particularly important in preventing warping, swelling, and the development of mold or mildew. For example, an oiled walnut dining table, if properly treated, will resist damage from spills and humid conditions better than an unfinished surface.
- Scratch and Abrasion Resistance
While not as robust as some film-forming finishes, an oil treatment provides a degree of protection against minor scratches and abrasions. The oil cushions the surface, minimizing the impact of light contact and preventing the immediate exposure of bare wood. This is beneficial for high-traffic areas or surfaces subject to regular handling, such as furniture or handrails.
- UV Protection
Some oil formulations include UV inhibitors that shield the wood from the damaging effects of ultraviolet radiation. Exposure to sunlight can cause fading, discoloration, and degradation of the wood fibers. The incorporation of UV absorbers in the oil helps to mitigate these effects, preserving the natural color and integrity of the walnut. Antique oiled walnut furniture, for instance, may benefit from a finish with UV protection to minimize fading over time.
- Resistance to Chemical Damage
The oil finish offers a moderate level of resistance to certain household chemicals and solvents. While it is not impervious to harsh substances, it can provide a degree of protection against minor spills and splashes. Immediate cleaning of any spills is recommended to prevent staining or damage to the finish. An oiled walnut countertop in a kitchen, while aesthetically pleasing, requires diligence in cleaning to maintain its protective layer against everyday liquids.
These protective facets, when combined, contribute to the overall durability and longevity of oiled walnut surfaces. The effectiveness of this protection is reliant on proper application, regular maintenance, and the selection of an appropriate oil formulation for the intended application and environmental conditions.
2. Aesthetics
The inherent aesthetic qualities of walnut wood are significantly enhanced through an oil finish. This particular finishing technique does not merely coat the surface; it penetrates the wood fibers, accentuating the natural grain patterns and deepening the color tones. The result is a richer, more visually appealing surface than could be achieved with film-forming finishes that tend to obscure the underlying wood characteristics. The choice of an oil finish is often a deliberate decision to showcase the natural beauty of the walnut.
Consider, for example, a meticulously crafted walnut table. An oil finish highlights the complex variations in the wood grain, creating a visual depth that invites tactile engagement. The warmth of the walnut color is intensified, lending an air of sophistication and natural elegance to the piece. In contrast, a polyurethane finish might create a hard, glossy surface that, while durable, detracts from the wood’s inherent charm. The application of the finish is therefore a process of artistic interpretation, balancing protection with the desire to reveal the wood’s unique personality. Modern furniture designs often incorporate oil-finished walnut to appeal to consumers seeking a connection with natural materials.
In summary, the aesthetic impact of an oil finish on walnut extends beyond mere surface appearance. It is a symbiotic relationship where the finish serves as a vehicle to reveal and amplify the wood’s inherent beauty. This approach presents challenges, such as maintaining the finish and protecting the wood from significant wear, but the resulting aesthetic is a testament to the enduring appeal of natural materials and thoughtful design.
3. Application
The application process is integral to the success of an oiled walnut finish. The technique employed directly influences the appearance, durability, and protective qualities of the final product. Correct application ensures that the oil penetrates the wood properly, enhancing its natural grain and providing adequate protection. Conversely, improper application can lead to a finish that is uneven, sticky, or prone to damage.
- Surface Preparation
Prior to applying any oil, the walnut surface must be properly prepared. This typically involves sanding to create a smooth, uniform surface free of imperfections. The grade of sandpaper used progresses from coarser to finer grits, ensuring that the wood is refined without being overly polished. Effective surface preparation is critical because it allows the oil to penetrate evenly and adhere properly. An inadequately prepared surface may result in blotchy or uneven absorption, compromising the aesthetic outcome.
- Oil Application Method
The method of oil application can significantly affect the final result. Common techniques include using a brush, cloth, or spray applicator. Regardless of the method, the oil should be applied in thin, even coats, working with the grain of the wood. Excess oil should be wiped away to prevent a sticky or gummy finish. The consistency of the application is crucial for achieving a uniform sheen and ensuring consistent protection across the entire surface. Variations in application can lead to noticeable differences in color and texture, detracting from the overall quality of the finish.
- Number of Coats
The number of coats applied influences the depth of color and the level of protection provided. Typically, multiple thin coats are preferred over a single thick coat. Each coat should be allowed to dry completely before the next is applied. The drying time varies depending on the type of oil used and the ambient conditions. Insufficient drying time between coats can lead to a soft, easily damaged finish. The cumulative effect of multiple coats is a richer, more durable finish that better resists moisture and wear.
- Curing and Buffing
After the final coat has dried, a curing period is necessary to allow the oil to fully harden. Once cured, the surface can be buffed to achieve the desired sheen. Buffing removes any residual oiliness and enhances the smoothness of the finish. The intensity of the buffing affects the final gloss level, ranging from a matte sheen to a subtle gloss. Proper curing and buffing are essential for optimizing the aesthetic appeal and protective qualities of the finish.
In summary, the application process is a critical determinant of the success of an oiled walnut finish. Meticulous surface preparation, careful application techniques, appropriate coat layering, and diligent curing and buffing are all necessary to achieve a durable, aesthetically pleasing result. The quality of the application directly reflects the skill of the craftsman and influences the long-term performance of the finish.
4. Durability
The durability of an oiled walnut finish represents a critical consideration in assessing its suitability for various applications. It refers to the finish’s capacity to withstand wear, resist damage, and maintain its aesthetic qualities over an extended period. This characteristic is influenced by several factors related to the oil itself, the application method, and the environmental conditions to which the finished surface is exposed.
- Resistance to Moisture Ingress
The ability of the finish to impede moisture penetration is a primary component of its overall durability. Moisture can lead to swelling, warping, and eventual decay of the wood substrate. An effectively applied oil finish creates a barrier that slows the absorption of water, thereby mitigating these risks. For instance, an oiled walnut countertop in a kitchen requires regular maintenance to ensure the continuity of this protective barrier against spills.
- Protection Against Scratches and Abrasions
While not as robust as film-forming finishes like polyurethane, an oil treatment provides a degree of protection against minor surface damage. The oil penetrates the wood, creating a resilient layer that can absorb light impacts and reduce the visibility of scratches. An oiled walnut table, for example, may exhibit fewer noticeable blemishes from everyday use compared to an unfinished surface, contributing to its long-term aesthetic appeal.
- Impact of UV Exposure
Exposure to ultraviolet (UV) radiation can cause fading and degradation of both the wood and the finish. Some oil formulations include UV inhibitors to mitigate these effects, thereby enhancing the durability of the finish in sunlit environments. Oiled walnut furniture placed near windows, for example, benefits from UV protection to maintain its original color and prevent premature aging of the finish.
- Maintenance and Reapplication
The durability of an oiled finish is intrinsically linked to regular maintenance. Periodic cleaning and reapplication of oil are necessary to replenish the protective layer and address any wear or damage. This ongoing care ensures that the finish continues to perform its intended function of protecting the wood and enhancing its aesthetic appeal. Oiled walnut gun stocks, for example, require periodic re-oiling to maintain their protective and aesthetic qualities, especially in demanding outdoor conditions.
In conclusion, the durability of an oiled walnut finish is not a static attribute but rather a dynamic characteristic influenced by various factors and requiring ongoing maintenance. While it may not offer the same level of protection as some synthetic finishes, its ability to enhance the natural beauty of the wood, combined with appropriate care, contributes to its enduring appeal and longevity.
5. Maintenance
The longevity and aesthetic appeal of an oiled walnut finish are inextricably linked to consistent maintenance practices. This finish, unlike some more durable synthetic coatings, requires regular attention to preserve its protective and visual qualities. The absence of adequate maintenance precipitates a decline in the finish’s ability to repel moisture, resist scratches, and maintain its characteristic luster. Neglect can result in the wood becoming susceptible to environmental damage, such as warping, staining, and the development of surface imperfections. An oiled walnut dining table, for example, will exhibit water rings and dullness if spills are not promptly addressed and the finish is not periodically replenished. Proper maintenance, therefore, is not merely an optional step but an essential component of the oiled walnut finish system.
Maintenance primarily involves regular cleaning to remove dust and debris, followed by periodic re-oiling to replenish the protective layer. Cleaning should be performed with a soft cloth and a mild, pH-neutral cleaner to avoid damaging the finish. Re-oiling frequency depends on the usage and environmental conditions but generally ranges from every few months to once per year. The re-oiling process entails applying a thin, even coat of oil, allowing it to penetrate the wood, and then wiping away any excess. This procedure restores the finish’s protective barrier and enhances its aesthetic depth. Consider, for instance, the maintenance of an oiled walnut gun stock. Regular cleaning and re-oiling are crucial to protect the wood from the elements and maintain its structural integrity, ensuring the firearm’s longevity and performance.
In summary, the long-term success of an oiled walnut finish is contingent upon diligent maintenance. The required effort, while perhaps greater than that for some alternative finishes, is offset by the inherent beauty and warmth that this finish imparts to the wood. Addressing spills promptly, cleaning regularly, and re-oiling periodically are essential to preserve the finish’s protective qualities and aesthetic appeal, ensuring the enduring beauty of the oiled walnut surface. The challenge lies in consistently adhering to these practices, thereby maximizing the investment in both the finish and the underlying wood.
6. Restoration
The restoration of items featuring this type of finish is a specialized process distinct from the initial application and ongoing maintenance. Restoration becomes necessary when the finish has deteriorated significantly due to age, wear, or damage, and regular maintenance is no longer sufficient to revive its original appearance and protective qualities.
- Surface Cleaning and Preparation
The initial step in restoring a piece with this finish involves thorough cleaning to remove accumulated dirt, wax buildup, and any existing damaged finish layers. Gentle solvents and specialized cleaning agents are often employed to avoid further harm to the underlying wood. Careful preparation ensures that the new finish adheres properly and the wood’s natural grain is not obscured. An antique desk, for example, may require meticulous cleaning to remove years of accumulated grime before any restoration work can commence.
- Damage Repair and Wood Stabilization
Before applying a new finish, any structural damage to the wood itself must be addressed. This may involve repairing cracks, filling gouges, or reinforcing weakened joints. Wood fillers and adhesives compatible with walnut are used to restore the integrity of the piece. Stabilization is critical to ensure that the restored finish adheres to a sound substrate and the piece can withstand further use. A vintage chair with this finish may require joint reinforcement and wood filling to restore its structural stability prior to refinishing.
- Re-Oiling and Finishing
Once the surface is prepared and any structural repairs are completed, the restoration process proceeds with the re-application of the finish. Multiple thin coats of oil are typically applied, allowing each coat to fully penetrate and dry before applying the next. The specific oil formulation may be chosen to match the original finish or to provide enhanced protection and aesthetic qualities. Proper application ensures an even, durable finish that enhances the natural beauty of the walnut wood. Restoring the finish on a antique gun stock would follow this multi-coat oiling process.
- Buffing and Polishing
The final stage of restoration involves buffing and polishing the newly oiled surface. This process refines the finish, removing any excess oil and enhancing the sheen. A soft cloth or specialized buffing tools are used to achieve a smooth, even surface. The level of sheen can be adjusted to match the original finish or to meet the restorer’s aesthetic preferences. The final buffing and polishing steps can bring out depth and luster on a refinished, oiled walnut table.
These restoration techniques, when skillfully applied, can revive antique and well-worn items featuring this finish, preserving their historical and aesthetic value. The careful attention to detail and the use of appropriate materials and methods are crucial to achieving a successful and long-lasting restoration.
Frequently Asked Questions
This section addresses common inquiries and clarifies misconceptions regarding this specific wood finishing technique.
Question 1: What is the expected lifespan of a properly applied and maintained finish of this type?
The lifespan varies significantly based on usage and environmental conditions. With regular maintenance, including periodic cleaning and re-oiling, such a finish can protect and enhance walnut for many years. However, surfaces subject to heavy wear or frequent exposure to moisture may require more frequent attention and eventual restoration.
Question 2: Does an application of this type of finish provide adequate protection against water damage?
While this finish offers a degree of water resistance, it is not waterproof. Prolonged exposure to standing water or high humidity can penetrate the finish and damage the underlying wood. Promptly wiping up spills and maintaining a well-sealed finish are crucial for mitigating water damage.
Question 3: Can this finish be applied over existing finishes, such as varnish or lacquer?
Generally, this finish is not compatible with existing film-forming finishes. The existing finish must be completely removed to allow the oil to penetrate the wood properly. Attempting to apply it over an incompatible finish can result in poor adhesion and an uneven appearance.
Question 4: What are the recommended cleaning agents for surfaces treated with this finish?
Mild, pH-neutral cleaners are generally recommended for cleaning this type of finish. Harsh chemicals or abrasive cleaners can damage the oil and dull the surface. A soft cloth dampened with a mild soap solution is typically sufficient for routine cleaning.
Question 5: How does this finish compare to polyurethane in terms of durability and protection?
Polyurethane finishes generally offer greater durability and resistance to scratches, chemicals, and water than this oil treatment. However, they also tend to create a harder, more plastic-like appearance that some find less desirable than the natural look and feel provided by oil. The choice between the two depends on the desired aesthetic and the level of protection required.
Question 6: Is the reapplication process complex or time-consuming?
The reapplication process is generally straightforward and can be completed with basic tools and materials. However, it does require careful preparation and attention to detail to ensure a consistent and even finish. The time required depends on the size and complexity of the surface being treated.
In conclusion, this finishing method presents a balance between aesthetic appeal and protective qualities, demanding informed application and consistent maintenance for optimal performance.
The subsequent section will detail potential issues encountered with this finish, along with corresponding troubleshooting strategies.
Conclusion
This article has comprehensively explored “oiled walnut finish,” detailing its application, benefits, limitations, maintenance, and restoration. From surface preparation to regular upkeep, the process requires informed decisions and diligent execution to achieve optimal results. Understanding its inherent properties is crucial for preserving and enhancing wooden objects.
The enduring appeal of this wood finishing approach lies in its ability to accentuate the natural beauty of the material while providing a measure of protection. Proper application and maintenance not only safeguard the wood but also ensure the lasting aesthetic value of the finished piece, making it a worthwhile endeavor for those who value craftsmanship and the inherent qualities of natural materials.


