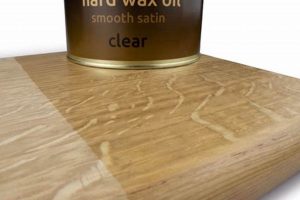
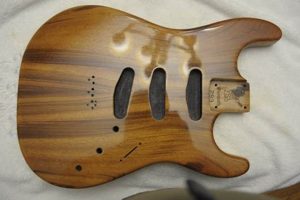
A durable and aesthetically pleasing treatment for wood, particularly walnut, involves the application of penetrating oils. This process enhances the natural grain and color of the wood while providing a protective layer against environmental factors. This type of treatment is frequently employed on furniture, cabinetry, and gun stocks to accentuate the wood’s inherent beauty.
This method offers several advantages, including ease of application and repair. It creates a warm, matte sheen that highlights the figure of the wood. Historically, this technique has been favored for its ability to create a tactile and visually appealing surface, offering a balance of protection and aesthetic enhancement. The finish penetrates the wood fibers, offering protection from within, unlike surface coatings that may chip or peel.
The following sections will delve into the specific types of oils used, the application techniques involved, the maintenance procedures required, and the comparative analysis of this finishing method against alternative wood treatments. This will provide a comprehensive understanding of the process and its implications.
Tips for Optimal Results
Achieving a superior outcome with this wood finishing technique requires careful preparation, application, and maintenance. The following tips offer guidance for maximizing the aesthetic and protective qualities of the finished product.
Tip 1: Wood Preparation is Paramount: Prior to application, the walnut surface must be properly sanded to a fine grit. This ensures even oil penetration and eliminates imperfections that could detract from the final appearance.
Tip 2: Select a High-Quality Oil: The type of oil used significantly impacts the final result. Tung oil and linseed oil are common choices, each offering distinct characteristics regarding drying time, sheen, and durability. Research the properties of each oil type to determine the best fit for the intended application.
Tip 3: Apply Thin, Even Coats: Multiple thin coats are preferable to a single thick coat. This allows for better oil penetration and reduces the risk of a sticky or uneven finish. Allow each coat to dry completely before applying the next.
Tip 4: Wipe Away Excess Oil: After allowing the oil to penetrate, wipe away any excess from the surface. This prevents the formation of a gummy or tacky residue and ensures a smooth, even sheen.
Tip 5: Allow Adequate Drying Time: Proper curing is essential for achieving a durable and long-lasting finish. Follow the manufacturer’s recommendations for drying times between coats and for the final cure.
Tip 6: Consider Environmental Factors: Temperature and humidity can affect the drying process. Ideal conditions are typically a moderate temperature and low humidity. Avoid applying oil in extremely cold or humid environments.
Tip 7: Periodic Maintenance is Key: To maintain the finish, regularly clean the surface with a soft cloth and a mild wood cleaner. Reapplication of a thin coat of oil may be necessary periodically to replenish the protective layer.
By adhering to these recommendations, the natural beauty of walnut can be enhanced and protected, resulting in a durable and aesthetically pleasing finish.
The subsequent sections will explore the advantages and disadvantages of this finishing method in comparison to alternative options and address common issues that may arise during the application process.
1. Penetration Depth
The effectiveness of an oil finish on walnut hinges significantly on the depth to which the oil permeates the wood’s cellular structure. Penetration depth dictates the degree of protection afforded against moisture ingress, dimensional changes resulting from humidity fluctuations, and susceptibility to surface abrasions. A shallow penetration offers minimal protection, leaving the wood vulnerable to environmental stressors. Conversely, deep penetration fortifies the wood from within, enhancing its resilience and longevity. For example, an oil finish applied to a walnut dining table, if inadequately penetrated, is prone to water rings and surface scratches from daily use.
Several factors influence penetration depth. The type of oil utilized plays a crucial role; oils with smaller molecular structures, such as certain modified linseed oils, tend to penetrate more deeply than those with larger molecules. Proper wood preparation, including thorough sanding to open the wood’s pores, is essential for facilitating oil absorption. Moreover, the application technique, involving multiple thin coats rather than a single heavy coat, promotes deeper and more uniform penetration. Furthermore, environmental factors, such as temperature, can impact the oil’s viscosity and, consequently, its ability to penetrate the wood.
In summary, penetration depth constitutes a critical determinant of the performance and durability of an oil finish on walnut. Achieving optimal penetration necessitates careful consideration of oil selection, meticulous wood preparation, appropriate application techniques, and awareness of environmental conditions. Neglecting penetration depth compromises the wood’s protection and undermines the finish’s intended purpose, potentially leading to premature deterioration and diminished aesthetic appeal.
2. Color Enhancement
Color enhancement, in the context of oil finish on walnut, refers to the process of accentuating the wood’s natural tones and grain patterns. The application of oil alters the refractive index of the wood surface, deepening the existing color and revealing details that might otherwise remain muted.
- Highlighting Natural Grain Patterns
Walnut wood possesses distinctive grain patterns that vary from straight to highly figured. Oil finishes penetrate the wood fibers, saturating them and creating a greater contrast between the lighter and darker areas of the grain. This increased contrast enhances the visual depth and three-dimensionality of the wood surface. Consider a walnut gunstock; an oil finish brings out the swirling patterns and intricate details, transforming a utilitarian object into a work of art.
- Deepening Existing Color Tones
Walnut wood exhibits a range of natural colors from light brown to dark chocolate. An oil finish intensifies these existing tones, resulting in a richer, warmer appearance. The oil acts as a transparent layer, allowing the underlying color to become more pronounced. This is particularly evident in older walnut pieces, where the oil finish can rejuvenate faded colors and restore the wood’s original vibrancy. For example, an antique walnut desk might appear dull and lifeless until an oil finish is applied, at which point the deep, rich browns are brought back to life.
- Creating a Sheen and Luster
Oil finishes impart a subtle sheen to the walnut surface, enhancing its visual appeal. The level of sheen can be controlled by the type of oil used and the application technique. A hand-rubbed oil finish creates a soft, matte sheen that highlights the natural beauty of the wood without appearing artificial. This understated luster adds a touch of elegance to walnut furniture and other wood products. Compare this to a polyurethane finish, which creates a hard, glossy surface that can sometimes mask the wood’s natural character.
- Minimizing Color Distortion
Unlike some surface coatings, oil finishes generally do not alter the wood’s natural color significantly. They enhance what is already there, rather than adding a new color layer on top. This is important for preserving the authenticity and inherent beauty of walnut wood. While tinted oils are available, a clear oil finish allows the wood’s natural color to shine through. This is a key advantage when aiming for a traditional or natural look, as it allows the walnut to retain its unique identity.
In summary, color enhancement via oil finishes on walnut wood is a method of amplifying the wood’s inherent characteristics. By deepening tones, highlighting grain, creating a subtle sheen, and minimizing distortion, the oil finish allows the beauty of the walnut to take center stage. This makes it a favored choice for applications where showcasing the natural elegance of the wood is paramount.
3. Surface Protection
Surface protection represents a critical function of any finish applied to wood, particularly walnut, a material valued for both its aesthetic qualities and inherent durability. An oil finish, while accentuating the wood’s natural beauty, also provides a degree of protection against environmental factors and everyday wear. The efficacy of this protection depends on several interconnected facets.
- Resistance to Moisture Ingress
An oil finish, when properly applied and maintained, imparts a level of water resistance to walnut surfaces. The oil penetrates the wood’s pores, creating a barrier that slows the absorption of liquids. This is crucial in environments where spills or humidity fluctuations are common. For instance, a walnut countertop treated with an oil finish will resist water damage better than an unfinished surface, though it is not entirely waterproof. The degree of resistance depends on the type of oil used and the frequency of reapplication.
- Protection Against Abrasions and Scratches
While an oil finish does not create a hard, impenetrable layer like some synthetic coatings, it provides a degree of protection against minor abrasions and scratches. The oil-saturated wood is less likely to splinter or chip upon impact. However, it is important to note that oil finishes are more susceptible to scratching than harder finishes like lacquer. A walnut table with an oil finish will show wear and tear over time, but the scratches tend to blend in with the natural grain, often adding to the character of the piece rather than detracting from it.
- Mitigation of UV Damage
Exposure to ultraviolet (UV) radiation can cause wood to fade and discolor over time. An oil finish can help to mitigate this damage by absorbing some of the UV rays. Certain oils, particularly those with added UV inhibitors, offer greater protection than others. However, prolonged exposure to direct sunlight will eventually affect even the best oil finish. Regular maintenance and reapplication of the oil are essential for maintaining the wood’s original color and preventing UV-induced degradation. Consider a walnut panel exposed to sunlight; an oil finish with UV inhibitors will slow down the fading process compared to an unprotected panel.
- Enhancement of Wood’s Natural Resilience
An oil finish enhances the natural resilience of walnut by penetrating the wood fibers and providing a degree of internal support. This helps to prevent the wood from becoming brittle or cracking over time. The oil also allows the wood to expand and contract with changes in humidity, reducing the likelihood of warping or splitting. A walnut chair with an oil finish will be more resistant to structural damage than an unfinished chair subjected to similar environmental conditions.
In conclusion, surface protection afforded by an oil finish on walnut represents a balance between aesthetic enhancement and functional defense. While it does not provide the same level of protection as harder, synthetic coatings, an oil finish offers a natural and renewable barrier against moisture, abrasions, UV radiation, and environmental stress. Regular maintenance and reapplication are key to maximizing its protective capabilities and preserving the beauty and longevity of walnut wood.
4. Application Technique
The application technique employed when applying an oil finish to walnut wood is a critical determinant of the final outcome, influencing both the aesthetic appeal and the protective qualities of the finish. Improper application can negate the benefits of even the highest-quality oil, resulting in an uneven, poorly protected, or visually unappealing surface. Conversely, meticulous application can enhance the natural beauty of the walnut, providing a durable and attractive finish.
The process typically involves several key steps, each requiring careful attention. Initially, thorough sanding of the walnut surface is essential to create a smooth, uniform base for the oil. The grade of sandpaper used progresses from coarser to finer grits, removing imperfections and opening the wood pores to facilitate oil penetration. After sanding, the surface must be meticulously cleaned to remove any dust or debris, as contaminants can interfere with the oil’s adherence and create an uneven finish. The oil is then applied in thin, even coats, using a brush, cloth, or spray applicator. The method selected depends on the desired finish and the complexity of the piece. Excess oil is wiped away after each coat to prevent the formation of a sticky or gummy residue. Multiple coats are typically required, with appropriate drying time allowed between each application to ensure proper penetration and curing of the oil. Finally, the surface may be buffed to achieve the desired sheen, ranging from matte to a subtle gloss. For example, applying too much oil in a single coat on a walnut dining table can lead to a slow-drying, tacky surface that attracts dust and detracts from the wood’s natural beauty. Conversely, careful, thin applications result in a smooth, durable finish that enhances the grain and protects the wood.
Effective application technique directly impacts the penetration depth, color enhancement, and surface protection provided by the oil finish. Insufficient penetration leaves the wood vulnerable to moisture and scratches, while uneven application can result in blotchy color and inconsistent sheen. The practical significance of mastering the application technique lies in the ability to consistently achieve a professional-quality finish that maximizes the beauty and longevity of walnut wood products. The challenges inherent in achieving this include selecting the appropriate oil for the specific application, understanding the wood’s grain and porosity, and maintaining consistent application across the entire surface. Overcoming these challenges requires practice, patience, and a thorough understanding of the materials and methods involved. By understanding and applying appropriate techniques, the full potential of oil-finished walnut can be realized.
5. Maintenance Requirements
The longevity and aesthetic appeal of walnut wood treated with oil finish hinges significantly on adherence to a consistent maintenance regimen. These requirements, if neglected, can lead to premature degradation of the finish and compromise the wood’s structural integrity and visual characteristics.
- Regular Cleaning Protocols
Dust and particulate matter accumulate on oiled surfaces, potentially dulling the finish and creating minor abrasions over time. Regular cleaning with a soft, lint-free cloth is essential. The use of harsh chemical cleaners should be avoided, as they can strip the oil from the wood and damage the underlying surface. A mild soap solution diluted in water is generally sufficient for removing surface grime without compromising the integrity of the finish. For example, a walnut desk subjected to daily use should be dusted weekly and cleaned monthly to prevent the buildup of contaminants.
- Periodic Oil Reapplication
Oil finishes, unlike some synthetic coatings, require periodic reapplication to maintain their protective and aesthetic qualities. The frequency of reapplication depends on factors such as the type of oil used, the level of use the surface receives, and environmental conditions. Signs that reapplication is necessary include a dull or faded appearance, increased susceptibility to water stains, or a dry, rough texture. The process typically involves lightly cleaning the surface, applying a thin coat of oil, allowing it to penetrate, and then wiping away any excess. For example, a walnut dining table might require re-oiling every six to twelve months, depending on the frequency of use.
- Protection from Environmental Extremes
Extreme temperature fluctuations and humidity levels can negatively impact oil-finished walnut. Excessive dryness can cause the wood to shrink and crack, while excessive humidity can promote swelling and warping. Maintaining a stable environment is crucial for preserving the finish and the wood’s structural integrity. This might involve using humidifiers or dehumidifiers to regulate moisture levels and avoiding placing walnut furniture in direct sunlight or near sources of heat. A walnut cabinet placed near a radiator, for instance, is at increased risk of damage due to the localized heat exposure.
- Prompt Attention to Spills and Stains
Oil finishes provide a degree of protection against spills, but prompt action is necessary to prevent staining and water damage. Liquids should be wiped up immediately with a clean, absorbent cloth. Stubborn stains may require gentle cleaning with a specialized wood cleaner or a mild abrasive. Harsh scrubbing should be avoided, as it can damage the finish and the underlying wood. For example, if wine is spilled on an oil-finished walnut floor, immediate cleanup is essential to prevent permanent staining.
These maintenance facets, when consistently observed, contribute directly to the extended lifespan and sustained visual appeal of oil-finished walnut. Neglecting these aspects not only diminishes the wood’s aesthetic value but also increases the risk of irreversible damage, ultimately requiring costly repairs or replacement. The commitment to proper maintenance reflects a long-term investment in the inherent quality and beauty of this wood treatment.
6. Curing Time
Curing time is a crucial consideration in the application of an oil finish to walnut wood. This period, often underestimated, directly influences the finish’s durability, appearance, and long-term performance. Inadequate curing compromises the protective qualities and aesthetic benefits of the oil finish.
- Oxidation and Polymerization
The curing process involves oxidation and polymerization of the oil. During oxidation, the oil reacts with oxygen in the air, initiating the hardening process. Polymerization then forms a network of interconnected molecules, creating a solid film. Insufficient curing time prevents the full development of this network, resulting in a soft, easily damaged finish. For example, applying furniture wax to an oil finish before it is fully cured can trap solvents and impede the polymerization process, leading to a perpetually tacky surface.
- Solvent Evaporation
Many oil finishes contain solvents that aid in application and penetration. Curing time allows these solvents to evaporate completely. If the solvents are not fully released, the finish may remain soft, attract dirt, and emit odors. Moreover, trapped solvents can interfere with the proper cross-linking of the oil molecules, weakening the overall structure of the finish. Consider a walnut gunstock; trapped solvents can cause dimensional instability and negatively affect accuracy.
- Environmental Factors
Environmental conditions significantly impact curing time. Temperature, humidity, and air circulation all play a role. High humidity slows the evaporation of solvents and retards the oxidation process. Low temperatures also impede curing, while adequate air circulation promotes solvent evaporation and accelerates oxidation. For instance, an oil finish applied to walnut in a humid basement will take significantly longer to cure than the same finish applied in a dry, well-ventilated workshop.
- Impact on Durability and Resistance
The degree to which an oil finish is cured directly affects its resistance to scratches, moisture, and chemicals. A fully cured finish provides a harder, more durable surface that is less susceptible to damage from everyday use. In contrast, an incompletely cured finish remains vulnerable to marring, staining, and solvent damage. As an example, an oil-finished walnut tabletop that has not fully cured is more likely to develop water rings and scratches from dishes and utensils.
Therefore, adequate curing time is not merely a waiting period but an integral part of the oil finishing process for walnut wood. Proper attention to curing ensures the development of a durable, protective, and aesthetically pleasing finish, maximizing the inherent qualities of the wood and enhancing its longevity.
7. Oil Type
The selection of oil type is paramount in determining the characteristics of an oil finish on walnut wood. The oil’s composition directly influences the finish’s appearance, durability, and protective qualities. Different oils offer varying levels of penetration, sheen, and resistance to environmental factors. Understanding these distinctions is critical for achieving the desired outcome.
- Drying Characteristics and Curing Time
Different oils exhibit varying drying times, impacting the overall project timeline. Drying oils, such as linseed and tung oil, polymerize upon exposure to air, forming a solid film. Linseed oil typically dries slower than tung oil, but offers excellent penetration. Non-drying oils, like mineral oil, do not polymerize and remain perpetually wet, offering minimal surface protection. The slower drying time of linseed requires longer intervals between coats and a more extended curing period before the finished piece can be put into service. This is evident in the restoration of antique walnut furniture where linseed oil is preferred for its traditional properties, despite the extended process.
- Sheen and Appearance
The chosen oil significantly affects the final sheen and visual characteristics of the walnut surface. Tung oil imparts a matte or satin sheen that enhances the wood’s natural grain patterns. Boiled linseed oil can create a slightly glossier finish than raw linseed oil. Mineral oil, due to its non-drying nature, produces a wet look that can be appealing but lacks the protective qualities of drying oils. The selection depends on the desired aesthetic; a modern walnut table may benefit from the subtle sheen of tung oil, while a rustic piece might be enhanced by the deeper tone and slightly glossier finish of boiled linseed oil.
- Durability and Protective Qualities
The inherent protective qualities of an oil finish on walnut depend heavily on the oil type. Tung oil creates a harder, more water-resistant finish compared to linseed oil. Mineral oil offers negligible protection against moisture and scratches. The application of multiple coats and proper curing further enhances the durability. For example, a walnut cutting board treated with mineral oil requires frequent reapplication and offers minimal protection against bacterial growth, whereas a chopping block treated with multiple coats of properly cured tung oil provides superior protection and longevity.
- Color Enhancement and Grain Definition
Different oils interact with walnut’s natural color in distinct ways. Linseed oil tends to amber over time, adding a warm, golden tone to the wood. Tung oil typically maintains a more neutral color, allowing the walnut’s natural hues to shine through. Mineral oil primarily enhances the existing color tones without adding its own tint. This nuance is important; for instance, when preserving the original color of a vintage walnut cabinet, tung oil would be a better choice than linseed oil.
In summary, oil type represents a crucial decision in the application of oil finish on walnut. The choice impacts drying time, sheen, durability, color enhancement, and ultimately, the long-term performance and aesthetic appeal of the finished piece. Selecting the appropriate oil requires careful consideration of the desired outcome and the specific characteristics of the walnut being treated.
Frequently Asked Questions
The following section addresses common inquiries regarding the application, maintenance, and properties of oil finishes on walnut wood. These questions aim to provide clarity and informed guidance for achieving optimal results.
Question 1: What distinguishes an oil finish from other wood finishes like varnish or lacquer?
Oil finishes penetrate the wood’s surface, enhancing the natural grain and providing protection from within. Varnish and lacquer, conversely, form a surface coating that sits atop the wood. This distinction affects the appearance, feel, and repairability of the finish.
Question 2: How often should an oil finish be reapplied to walnut furniture?
The frequency of reapplication depends on usage and environmental factors. Generally, reapplication is recommended every six to twelve months for surfaces subjected to regular use. Signs of needing reapplication include a dull appearance, increased water absorption, or a dry texture.
Question 3: Can an oil finish be applied over existing finishes on walnut?
The compatibility of an oil finish with existing finishes is variable. Oil finishes typically do not adhere well to surfaces already coated with varnish, lacquer, or polyurethane. Removal of the existing finish is generally recommended to ensure proper oil penetration and adhesion.
Question 4: What type of oil is most suitable for finishing walnut intended for food contact?
For surfaces that come into contact with food, such as cutting boards or salad bowls, mineral oil or certain food-grade drying oils are recommended. These oils are non-toxic and do not impart any unwanted flavors or odors to food.
Question 5: How can water stains be removed from an oil-finished walnut surface?
Minor water stains can often be removed by gently rubbing the affected area with a soft cloth and a small amount of oil. More stubborn stains may require the use of specialized wood cleaning products. In some cases, light sanding and reapplication of the oil finish may be necessary.
Question 6: Does an oil finish offer adequate protection against scratches and abrasions on walnut furniture?
Oil finishes provide some protection against minor scratches and abrasions, but they are generally less resistant than harder finishes like lacquer or polyurethane. Regular maintenance and care are necessary to minimize the risk of damage. Deeper scratches may require repair by sanding and re-oiling the affected area.
In conclusion, oil finishes on walnut offer a balance of aesthetic enhancement and surface protection. Understanding the nuances of application, maintenance, and oil selection is crucial for achieving optimal results and preserving the natural beauty of the wood.
The following section will provide a comparative analysis of this finishing method against alternative wood treatments.
Conclusion
The preceding exploration has illuminated the multifaceted characteristics of oil finish walnut. This method represents a deliberate choice, balancing aesthetic enhancement with functional preservation of the wood. The process, involving careful oil selection, precise application, and diligent maintenance, underscores the commitment required to maximize the benefits. From deepening color and highlighting grain to providing a degree of surface protection, the proper execution of this finishing technique directly impacts the longevity and visual appeal of walnut products.
The decision to utilize oil finish walnut necessitates a thorough understanding of its inherent properties and limitations. While offering a tactile and visually appealing surface, its long-term performance is intrinsically linked to responsible application and regular care. As consumer and industrial preferences evolve, continuous investigation and refinement of oil finishing techniques remain crucial to ensure its continued relevance and effectiveness in the realm of wood preservation and aesthetic design.


