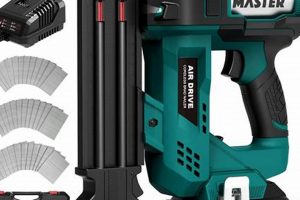
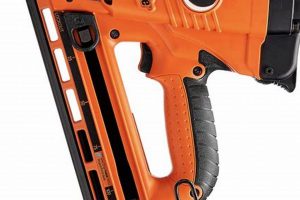
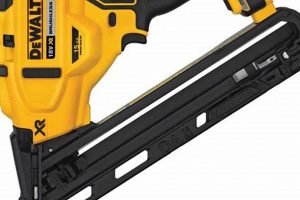
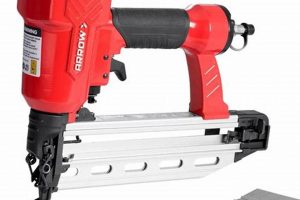
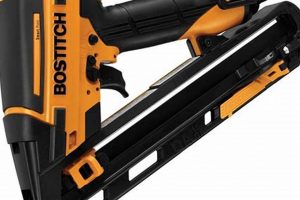
These fasteners are designed for use in pneumatic or electric tools that drive them into wood or other materials. They are characterized by their small head size, which allows them to be easily concealed by filling the resulting hole with putty or wood filler. This makes them ideal for applications where a clean, aesthetically pleasing finish is desired, such as installing trim, molding, or cabinetry. For example, using these fasteners to attach a delicate piece of crown molding ensures minimal visibility of the fastener itself, resulting in a more polished and professional appearance.
Their significance lies in their ability to provide a strong, reliable hold while minimizing visual impact. This is particularly valuable in applications where aesthetics are paramount. Historically, achieving such results required hand-nailing and meticulous setting of each nail. The advent of powered tools and specifically designed fasteners significantly increased efficiency and consistency in these types of projects. The benefits extend beyond mere time savings, including reduced risk of surface damage from hammer blows and a more uniform depth of fastener penetration.
The following sections will delve into specific aspects of selecting the appropriate gauge and length, common applications across various woodworking projects, and best practices for ensuring optimal performance and safety when utilizing these tools and associated fasteners.
Essential Usage Guidelines
The following guidelines offer insight into maximizing the performance and longevity when using appropriate fasteners in conjunction with pneumatic or electric tools.
Tip 1: Select the Correct Gauge and Length: Choose the appropriate gauge and length of fastener based on the thickness and density of the materials being joined. Using an insufficient length will result in a weak hold, while excessive length can lead to the fastener protruding through the back of the workpiece.
Tip 2: Adjust Air Pressure Appropriately: Ensure that the air compressor is set to the appropriate pressure for the tool being used and the hardness of the wood. Too much pressure can cause the fastener to be driven too deep, damaging the surrounding material, while insufficient pressure may result in the fastener not being fully set.
Tip 3: Maintain Proper Tool Angle: Hold the nail gun perpendicular to the work surface to ensure the fastener is driven straight and provides maximum holding power. Angled fasteners may bend or break, compromising the integrity of the joint.
Tip 4: Use a Consistent Firing Sequence: Establish a consistent firing sequence to prevent overdriving or underdriving fasteners. Overlapping fasteners can weaken the wood, while insufficient penetration reduces holding strength.
Tip 5: Check for Wood Splitting: Be mindful of the wood’s grain and avoid driving fasteners too close to the edge, which can cause splitting. Pre-drilling pilot holes in particularly brittle or dense woods can mitigate this risk.
Tip 6: Regularly Clean and Lubricate the Tool: Follow the manufacturer’s recommendations for cleaning and lubricating the nail gun to ensure optimal performance and prevent premature wear. A clean and well-lubricated tool will operate more reliably and deliver consistent results.
Tip 7: Store Fasteners Properly: Keep fasteners stored in a dry environment to prevent rust and corrosion. Corroded fasteners are more likely to break or bend, compromising the strength of the joint.
Adherence to these guidelines fosters more reliable results, ultimately leading to enhanced project quality.
The concluding section will summarize the key points covered in this discussion.
1. Gauge Selection
Gauge selection, when employing these fasteners with a nail gun, directly influences both the holding power and the aesthetic result of the finished project. The gauge, a numerical designation indicating the diameter of the fastener, dictates the size of the hole left upon insertion. A higher gauge number corresponds to a smaller diameter. Consequently, selecting an appropriate gauge is critical for minimizing visibility in applications such as installing delicate trim or molding. Conversely, choosing a gauge that is too small may compromise the structural integrity of the connection, particularly when working with heavier materials or high-stress joints. For example, using a 23-gauge pin nailer might be suitable for attaching lightweight decorative elements, but would be inadequate for securing a substantial piece of baseboard.
The selection process necessitates a careful evaluation of the material’s density and the intended application. Softer woods, such as pine, may accommodate a larger gauge without significant risk of splitting, while harder woods, like oak or maple, often require a smaller gauge or pre-drilling to prevent damage. Moreover, the type of nail gun being used plays a role. Some nail guns are designed to accept a specific range of gauges, limiting the available options. Understanding the tool’s capabilities and limitations is therefore paramount. As an illustration, consider the installation of door casings. An 18-gauge brad nailer would likely provide sufficient holding power while leaving a small, easily concealed hole, striking a balance between strength and aesthetics.
In summary, gauge selection for these fasteners is not a trivial decision but rather a critical element in achieving both structural soundness and visual appeal. The appropriate choice depends on a complex interplay of factors, including material properties, application requirements, and tool specifications. Neglecting this consideration can lead to compromised aesthetics, weakened joints, or even damage to the workpiece. A thorough understanding of these factors is essential for any woodworking or finishing professional.
2. Length Appropriateness
Length appropriateness, in the context of these fasteners used with powered tools, is a critical parameter determining the structural integrity of the joint and the finished appearance of the project. Selecting the correct length ensures adequate penetration for secure holding power while preventing undesirable protrusion through the workpiece. Deviation from the appropriate length can lead to weakened joints, visible defects, and potential safety hazards.
- Material Thickness and Density
The thickness and density of the materials being joined directly dictate the minimum acceptable length. A fastener must penetrate deep enough into the receiving material to provide sufficient purchase. Harder, denser materials require longer fasteners to achieve the same level of holding power as softer materials with shorter fasteners. As an example, securing a piece of hardwood trim to a softwood frame necessitates a length that accounts for both the trim’s thickness and the frame’s lower density.
- Penetration Depth
Optimal penetration depth is generally considered to be approximately two-thirds of the total material thickness. This provides a secure hold without risking the fastener’s tip emerging on the opposite side. Exceeding this depth increases the likelihood of protrusion, necessitating additional finishing work and potentially compromising the aesthetics. Insufficient penetration, conversely, results in a weak joint prone to failure. For instance, when installing a thin veneer, a shorter fastener is essential to prevent penetration, even if the combined thickness would suggest a longer one for greater strength in other applications.
- Fastener Protrusion and Clinching
Protrusion of the fastener beyond the back surface is undesirable for both aesthetic and safety reasons. Exposed fastener points can present a hazard, and the visible heads detract from the finished appearance. In certain applications, clinching, or bending the protruding fastener tip, may be employed. However, this is generally avoided with powered tools and smaller fasteners due to the risk of damage to the surrounding material. Preemptive selection of the correct length eliminates the need for such corrective measures. As a case, consider attaching a drawer bottom; protruding points would damage contents and be unsightly.
- Tool Settings and Adjustments
Even with correctly sized fasteners, proper tool settings are necessary to achieve the desired depth. Most nail guns offer depth adjustment features to compensate for variations in material hardness and density. Incorrect settings can lead to overdriving, resulting in sunken fastener heads and potential damage to the surface. Conversely, underdriving results in protruding heads and inadequate holding power. Calibration of the tool is crucial for ensuring consistent and accurate fastener placement. Using an air compressor with too much pressure can drive fasteners too deeply, while settings that are too low lead to protruding heads.
The interplay between material properties, penetration depth, potential protrusion, and tool settings underscores the importance of careful consideration of length. Accurate selection minimizes rework, ensures structural integrity, and contributes significantly to the overall quality and appearance of the finished product. Therefore, understanding these factors is essential for effective and efficient use of these fasteners in conjunction with powered tools.
3. Head Concealment
Head concealment is a primary consideration in applications utilizing these fasteners with powered tools. The small head size, relative to the fastener’s shaft diameter, is specifically designed to facilitate minimal visibility upon installation. This feature is crucial in achieving a clean, professional finish, particularly in woodworking and trim applications where aesthetic appearance is paramount.
- Countersinking and Setting
The design of these fasteners permits countersinking, allowing the head to be driven slightly below the surface of the material. This creates a recess that can be filled with wood filler or putty, effectively concealing the fastener. Proper setting involves adjusting the nail gun’s depth control to consistently achieve the desired level of countersinking without damaging the surrounding wood fibers. For example, when installing baseboards, consistent countersinking allows for seamless filling and painting, rendering the fasteners virtually invisible.
- Head Shape and Size
The head’s shape and size are deliberately minimized to reduce its visual impact. Common head types include brad heads and pin heads, each offering varying degrees of concealability. Brad heads provide a balance between holding power and minimal visibility, while pin heads are almost entirely concealed due to their extremely small size. The selection of head type depends on the application’s requirements for both structural integrity and aesthetic finish. Securing delicate molding often benefits from using pin-headed fasteners.
- Filling and Finishing Techniques
Even with countersinking and minimal head size, complete concealment often requires the application of wood filler or putty. These materials are used to fill the resulting hole, creating a smooth, even surface that can be sanded and finished to match the surrounding wood. Proper filling techniques involve overfilling the hole slightly to compensate for shrinkage during drying and careful sanding to avoid damaging the surrounding finish. An example is filling the small holes left by brad nails on a finished cabinet, then sanding and applying touch-up paint.
- Color Matching and Stainability
The choice of wood filler or putty is crucial for achieving a seamless finish. These materials should be carefully matched to the color of the wood and be stainable or paintable to blend seamlessly with the surrounding surface. Improper color matching can result in visible patches or discoloration, detracting from the overall aesthetic. Testing the filler or putty on a scrap piece of wood is recommended to ensure a perfect match before applying it to the finished project. On stained trim, for example, it is necessary to use a stainable filler and match the stain to the wood.
These facets of head concealment are intrinsically linked to the performance and aesthetic outcome when employing these fasteners with a nail gun. By carefully considering the degree of countersinking, the type of head shape, the selection of appropriate filling materials, and the method of color matching, a professional finish can be achieved where the fasteners are virtually undetectable, enhancing the overall quality and visual appeal of the project.
4. Wood Compatibility
Wood compatibility is a critical factor when selecting and utilizing these fasteners in conjunction with a powered nail gun. The hardness, density, grain structure, and moisture content of the wood directly influence the fastener’s performance and the resulting quality of the finished product. Incompatible combinations can lead to splitting, bending, inadequate holding power, or aesthetic imperfections. For instance, driving a fastener designed for softwood into dense hardwood may result in bending or buckling, rendering the joint ineffective. Conversely, using a large-gauge fastener in a delicate softwood can cause the wood to split along the grain, compromising its structural integrity. The selection process, therefore, necessitates a clear understanding of the wood’s properties and the fastener’s characteristics.
Practical application highlights the importance of wood compatibility. Consider the task of installing hardwood trim around a window frame made of softwood. Selecting a fastener gauge and length appropriate for the hardwood is essential to avoid splitting. However, the nail gun’s pressure must be adjusted to prevent the fastener from being driven too deeply into the softer frame material, which could damage the surrounding surface. Similarly, when working with woods that are prone to splitting, such as cedar, pre-drilling pilot holes may be necessary to mitigate this risk. The use of specific types of fasteners, such as those with a blunt tip, can also reduce the likelihood of splitting by displacing rather than cutting the wood fibers. Furthermore, the moisture content of the wood at the time of fastening should be considered. Wood that is excessively wet or dry can expand or contract after installation, potentially loosening the fasteners over time.
In summary, wood compatibility is an integral element of successful applications. Ignoring the specific properties of the wood can lead to structural weaknesses, aesthetic flaws, and premature failure of the joint. Proper selection of fastener type, gauge, and length, coupled with appropriate tool settings and techniques, ensures a secure and aesthetically pleasing result. Recognizing and addressing the challenges posed by varying wood characteristics is crucial for achieving professional-quality woodworking outcomes.
5. Tool Calibration
Tool calibration, in the context of utilizing pneumatic or electric tools with associated fasteners, directly impacts the consistency and quality of the finished result. Precise calibration ensures that the tool consistently drives the fasteners to the correct depth without either overdriving or underdriving them. This is particularly crucial when using these fasteners, where the goal is to achieve a flush or slightly countersunk head for seamless concealment. Incorrect calibration can lead to inconsistent results, requiring additional finishing work or, in severe cases, compromising the structural integrity of the joint. The cause-and-effect relationship is straightforward: inaccurate calibration leads to inconsistent fastener placement, which negatively affects both aesthetics and structural reliability.
The importance of tool calibration as a component of proper fastener application is underscored by real-world examples. In cabinetmaking, for instance, precise fastener depth is critical to avoid damaging the delicate surface of the cabinet doors or sides. Overdriving the fasteners can create unsightly dents and require extensive repairs. Conversely, underdriving them results in protruding heads that interfere with the proper closing of doors and drawers. Similar considerations apply in trim carpentry, where consistent fastener depth is essential for achieving a smooth, paintable surface. Neglecting tool calibration, therefore, introduces a significant element of variability into the process, increasing the risk of errors and reducing the overall efficiency of the work. Properly calibrated equipment facilitates consistency.
In summary, tool calibration is not merely a procedural step but an essential element in achieving reliable and professional results when using these specialized fasteners. The challenges of achieving consistent fastener placement without proper calibration are significant, and the consequences can range from minor aesthetic flaws to serious structural defects. Therefore, understanding the practical significance of tool calibration and implementing regular maintenance and adjustments are vital for maximizing the performance and effectiveness of these tools and related fasteners.
6. Consistent Depth
Achieving consistent depth when utilizing these fasteners with a pneumatic or electric tool is paramount for both the structural integrity and aesthetic outcome of the finished project. Consistent depth refers to the uniform penetration of the fastener into the substrate, ensuring that the head is set either flush with the surface or slightly countersunk, as dictated by the specific application. Inconsistent depth, conversely, can lead to a range of problems, including weakened joints, unsightly protrusions, and the need for extensive rework. The fasteners’ design, with their small head size intended for near-invisibility, makes consistent depth particularly crucial, as even minor variations in penetration become readily noticeable.
The link between consistent depth and successful fastener application is evident in numerous practical scenarios. Consider, for instance, the installation of crown molding. If some fasteners are driven too deeply, the surrounding wood may be damaged, creating depressions that require filling and sanding. If others are not driven deeply enough, the protruding heads will be visible and interfere with painting or staining. Similarly, in cabinet making, inconsistent fastener depth can affect the alignment of doors and drawers, impacting both functionality and aesthetics. These examples illustrate that consistent depth is not merely a cosmetic concern but a fundamental aspect of proper fastener usage, directly affecting the quality and longevity of the finished product. Achieving this consistency relies on factors such as proper tool calibration, appropriate air pressure settings, and the operator’s skill in maintaining a consistent angle and pressure on the tool.
In summary, consistent depth is integral to achieving optimal results with these specialized fasteners. Recognizing its importance, understanding the factors that influence it, and employing appropriate techniques to ensure its attainment are essential for professionals and hobbyists alike. Addressing the challenges associated with achieving consistent depth ultimately leads to enhanced project quality, reduced rework, and improved overall efficiency. The reliable nature of the fastener is, in many respects, predicated on the consistent setting.
7. Secure Fastening
Secure fastening is a fundamental objective when utilizing these fasteners driven by pneumatic or electric tools. It signifies the ability of the fastener to resist withdrawal or loosening under applied stress, ensuring the reliable and lasting connection of the materials being joined. The design and application of the fastener directly influence the security of the fastening, impacting both the structural integrity and the longevity of the finished assembly. Failure to achieve secure fastening can result in joint failure, compromising the functionality and safety of the constructed item. Secure fastening, therefore, is not merely a desirable attribute but an essential requirement for the successful application of these fasteners.
The relationship between proper application and secure fastening is evident in various real-world scenarios. In the construction of furniture, for example, the fasteners secure the joints between the frame components. Insufficient penetration depth, or the use of an inappropriate gauge, may result in a weak connection that fails under normal use. Similarly, when installing trim or molding, secure fastening is essential to prevent the trim from detaching over time due to temperature changes or humidity fluctuations. The proper selection of fastener length, gauge, and tool settings, coupled with adherence to best practices for fastener placement, is critical for achieving a secure and durable connection. As examples, consider how insufficiently fastened baseboards pull away from walls, creating gaps, or how drawers assembled with weak fastener joints might collapse over time, rendering the furniture unusable.
In summary, secure fastening is a critical consideration when utilizing these fasteners. Understanding the interplay between fastener characteristics, application techniques, and the properties of the materials being joined is essential for achieving reliable and long-lasting results. Properly addressing the challenges associated with secure fastening ensures that the finished product meets the required performance standards and provides years of dependable service. Ignoring the tenets of secure fastening risks creating a weak or failing product.
Frequently Asked Questions
This section addresses common inquiries regarding the selection, application, and performance characteristics of these fasteners when used in conjunction with pneumatic or electric tools. The information presented is intended to provide clear and concise answers to frequently encountered questions.
Question 1: What distinguishes finishing nails from other types of nails suitable for nail guns?
These nails are characterized by their small head size, designed for minimal visibility after installation. This contrasts with framing nails, which feature larger heads for increased holding power but are less aesthetically pleasing. The reduced head size permits easy concealment with wood filler or putty, making them ideal for trim work and fine woodworking where appearance is paramount.
Question 2: Is there a specific nail gun type required for using these fasteners?
Yes, these nails necessitate a nail gun specifically designed to accommodate their gauge and length. These tools, often referred to as “finish nailers,” feature magazines and driving mechanisms calibrated for the precise dimensions of these fasteners. Attempting to use them in incompatible nail guns can result in tool damage and improper fastener deployment.
Question 3: What factors determine the appropriate length for these nails in a given application?
The primary factors influencing length selection include the combined thickness of the materials being joined and the desired depth of penetration into the receiving material. A general guideline is to select a length that allows for approximately two-thirds penetration into the substrate, ensuring a secure hold without risking protrusion through the back surface.
Question 4: Can these nails be used in hardwoods without pre-drilling?
While possible, using these fasteners in hardwoods without pre-drilling can increase the risk of wood splitting, particularly near edges or in brittle wood species. Pre-drilling pilot holes is recommended to mitigate this risk and ensure clean, accurate fastener placement. The diameter of the pilot hole should be slightly smaller than the fastener’s shank diameter.
Question 5: What is the optimal air pressure setting for a pneumatic nail gun when using these fasteners?
The optimal air pressure setting depends on several factors, including the hardness of the wood and the specific tool being used. As a starting point, consult the nail gun manufacturer’s recommendations. Fine-tune the pressure setting to achieve consistent fastener depth without overdriving or underdriving. A test piece is often the best way to dial in the pressure.
Question 6: How can one prevent these nails from bending or buckling during installation?
Bending or buckling can occur due to excessive force, improper tool angle, or encountering an obstruction within the wood. Ensure that the nail gun is held perpendicular to the work surface and that the air pressure is appropriately adjusted. If encountering resistance, inspect the wood for knots or other irregularities that may be deflecting the fastener.
These FAQs provide a foundational understanding of the intricacies associated with these specialized fasteners. Adherence to these guidelines will contribute to enhanced project outcomes.
The subsequent section will present a comparative analysis of different types of these nails and their respective applications.
Conclusion
The preceding analysis has explored critical facets of “finishing nails for nail gun” systems, encompassing selection criteria, application techniques, and performance considerations. Key points include gauge and length selection, proper tool calibration, wood compatibility, and the importance of consistent depth and secure fastening for aesthetic and structural integrity. A thorough understanding of these factors is indispensable for achieving optimal results.
Mastery of “finishing nails for nail gun” applications demands diligent attention to detail. Further research and practical experience will refine technique and optimize outcomes. This understanding is crucial for professionals seeking efficiency and precision in their woodworking endeavors. Pursue expertise with these tools to elevate the quality and durability of finished products.


