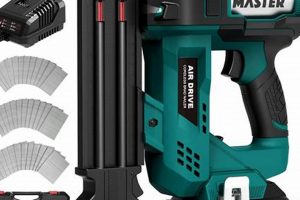
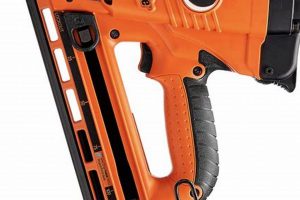
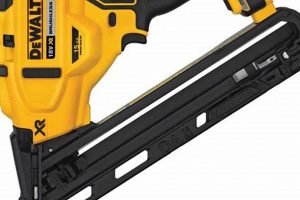
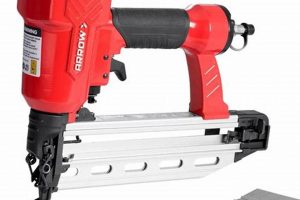
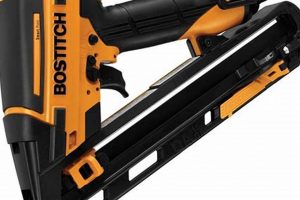
This specialized tool drives thin, headless fasteners into wood trim and molding. These tools provide a near-invisible hold, ideal for securing delicate pieces without marring the surface. Cabinet makers, finish carpenters, and serious DIYers frequently rely on this particular type of fastening equipment.
The primary benefit lies in the ability to attach materials while minimizing visible evidence of the fastener. This results in a cleaner, more professional appearance for finished projects. The evolution of pneumatic and cordless models has also greatly increased efficiency and maneuverability on job sites, replacing older, less precise methods.
The following sections will explore different models, the range of appropriate applications, and the necessary safety precautions for operating this tool effectively. Further discussion will address maintenance procedures and troubleshooting common operational issues.
Operating and Maintaining a Finish Staple Gun
Effective use and proper maintenance are crucial for maximizing the performance and lifespan of this tool. The following tips provide guidance on achieving optimal results and ensuring safe operation.
Tip 1: Select the Appropriate Fastener Length: Choosing the correct staple length is critical. Staples that are too long can protrude from the material, while staples that are too short will not provide sufficient holding power. Always test on scrap material before commencing work on the final piece.
Tip 2: Adjust the Depth Setting: Most models allow adjustment of the staple driving depth. This setting determines how deeply the staple is embedded into the material. Adjust this setting to ensure the staple is flush with the surface without damaging the surrounding wood fibers.
Tip 3: Maintain Consistent Air Pressure (Pneumatic Models): For pneumatic models, consistent air pressure is essential for reliable performance. Fluctuations in air pressure can lead to inconsistent staple driving. Regularly check and adjust the air compressor to the manufacturer’s recommended pressure.
Tip 4: Apply Even Pressure: When firing, apply consistent and even pressure to the tool against the workpiece. This ensures the staple is driven straight and true, preventing jams and misfires. Avoid angling the tool during operation.
Tip 5: Use Safety Glasses: Eye protection is paramount. This tool can eject debris during operation. Safety glasses will protect against potential eye injuries from flying particles.
Tip 6: Regularly Lubricate the Tool (Pneumatic Models): Pneumatic tools require regular lubrication to maintain smooth operation and prevent wear. Use pneumatic tool oil according to the manufacturer’s instructions. A few drops of oil into the air inlet before each use is generally sufficient.
Tip 7: Clean the Tool After Each Use: After each use, disconnect the tool from the air supply (pneumatic) or remove the battery (cordless). Wipe down the tool with a clean cloth to remove dust and debris. This prevents buildup that can affect performance.
These guidelines, if diligently followed, will enhance the efficiency and safety of using this tool, extending its service life and improving the quality of finished projects.
The next section will discuss troubleshooting common problems encountered while operating these tools.
1. Gauge
Gauge, when referring to a fastening tool, indicates the thickness or diameter of the fastener it utilizes. In the context of a finish staple gun, gauge is a particularly significant factor. A higher gauge number signifies a thinner staple. This is directly related to the tool’s application, which centers on securing delicate trim and molding without leaving prominent marks. Using a lower gauge (thicker) staple would defeat the purpose, leaving a visible and undesirable hole.
The selection of an appropriate gauge is often dictated by the type of wood being used. Softer woods may accommodate a slightly thicker staple (lower gauge) without splitting. However, harder woods typically require a higher gauge (thinner) staple to minimize the risk of damage. Consider the example of attaching a thin, ornate molding to a solid oak cabinet face frame. Employing a staple gauge too thick would likely result in the oak splitting around the fastener. Conversely, a smaller gauge staple would minimize this risk, providing sufficient holding power without compromising the material’s integrity.
Therefore, understanding the gauge of the staples used in these specialized tools is crucial for achieving a professional finish. The chosen gauge directly impacts the aesthetic outcome and the structural integrity of the fastened materials. Careful consideration of material type and the desired level of visibility is essential for selecting the proper staple gauge for a given task, minimizing damage and ensuring a clean, professional result.
2. Air Pressure
Air pressure is a critical parameter for pneumatic versions of these specialized fastening tools. Insufficient air pressure results in incomplete staple insertion, leaving the fastener protruding from the material. Conversely, excessive air pressure can drive the staple too deeply, potentially damaging delicate trim or causing the fastener to pass entirely through the workpiece. Precise control of air pressure is, therefore, paramount for achieving consistent and professional results.
The recommended air pressure for a specific model is typically detailed in the manufacturer’s specifications. Adherence to these guidelines is crucial for optimal tool performance and longevity. For instance, a tool rated for 70-100 PSI operating pressure will likely malfunction if consistently operated outside of this range. Operating above the specified maximum can damage internal components, while insufficient pressure will lead to staple misfires and inconsistent fastening. Furthermore, variations in air pressure during operation can lead to uneven staple depth, compromising the aesthetic quality of the finished product. Consider the case of attaching a delicate crown molding: inconsistent air pressure could lead to some staples being flush while others protrude, requiring manual adjustment and potentially damaging the molding.
Understanding the interplay between tool specifications and air pressure is essential for effective and safe operation. Maintaining the correct air pressure not only ensures proper staple insertion but also prolongs the tool’s lifespan and minimizes the risk of damage to the materials being fastened. Regular monitoring and adjustment of air pressure, in conjunction with adherence to manufacturer guidelines, are integral components of responsible tool operation.
3. Staple Length
Staple length is a critical variable in the application of a finish staple gun. The proper selection of staple length directly impacts the holding power, aesthetic result, and structural integrity of the finished product. Deviation from appropriate staple lengths can lead to compromised workmanship and potential material damage.
- Material Thickness Compatibility
Staple length must correspond to the thickness of the materials being joined. If the staple is too short, it will not penetrate sufficiently into the substrate, resulting in a weak or failed connection. Conversely, an excessively long staple will protrude through the back of the material, creating an unsightly appearance and posing a potential safety hazard. For example, when attaching thin veneer to a solid wood core, a short staple is required. Attaching thick baseboard to a stud requires a longer staple.
- Wood Density Considerations
The density of the wood influences staple penetration depth. Softer woods allow for deeper penetration than harder woods, requiring adjustments to staple length. Using a staple length suitable for softwood in hardwood can result in insufficient holding power. Conversely, a staple that is too long for hardwood can cause splitting or cracking. As an example, when applying a molding to pine, a longer staple can be used; to oak, a shorter length would be advisable.
- Aesthetic Requirements
In finish carpentry, the aesthetic outcome is paramount. Staples should be fully embedded but not so deeply that they create visible depressions or damage the surrounding wood fibers. The correct staple length minimizes the visibility of the fastener. If the staple leg is flush with the surface, a clean, professional look is achieved. Overdriving staples can cause unsightly marks, while underdriving them leaves exposed metal.
- Holding Power and Joint Integrity
Staple length directly affects the strength and durability of the joint. A staple that penetrates sufficiently provides a secure mechanical bond between the materials. Too short of a staple cannot provide adequate hold, leading to joint failure over time. The selected length must provide a robust connection to prevent separation or loosening of the attached materials.
Proper staple length selection for these tools is not arbitrary. It requires careful consideration of material thickness, wood density, aesthetic requirements, and the desired level of joint integrity. The combination of these factors ensures professional and durable results in finish carpentry applications.
4. Depth Adjustment
Depth adjustment is a critical feature found on most finish staple guns. This function allows the user to control the degree to which the staple is driven into the workpiece. Proper adjustment is essential for achieving a flush, professional finish and preventing damage to the material being fastened.
- Preventing Surface Damage
The primary function of depth adjustment is to prevent surface damage. Overdriving staples can create unsightly depressions around the staple insertion point, while underdriving leaves the staple protruding, both compromising the aesthetic quality of the finished piece. The adjustment mechanism allows for fine-tuning the staple’s final position to be flush with the surface without marring the wood.
- Accommodating Material Density
Different wood species possess varying densities, requiring corresponding adjustments to the driving depth. Softer woods require less force, and thus a shallower setting, while hardwoods necessitate a deeper setting for proper staple embedding. The adjustment feature enables users to adapt to different material characteristics without switching tools or relying on inconsistent manual force.
- Ensuring Consistent Results
The depth adjustment mechanism promotes consistent results across a project. By setting the appropriate depth, each staple is driven with uniform force, creating a visually appealing and structurally sound fastening. This consistency is particularly important for larger projects where variations in staple depth would be readily noticeable and detract from the overall quality.
- Tool Longevity and Safety
Correct depth setting also contributes to the longevity of the tool itself. Forcing a tool to overdrive staples can strain the internal mechanisms, leading to premature wear and potential malfunctions. Similarly, underdriving staples can cause jams and misfires, also impacting tool lifespan. Utilizing the depth adjustment feature promotes safer and more efficient operation.
In summary, the depth adjustment feature of these tools is not merely a convenience; it is an essential element for achieving professional-quality results. By accommodating material variations, preventing surface damage, ensuring consistent performance, and contributing to tool longevity, this function plays a vital role in finish carpentry and woodworking applications.
5. Wood Density
Wood density exerts a significant influence on the performance and application of a finish staple gun. It dictates the resistance encountered by the staple as it penetrates the material, affecting the required driving force and influencing the selection of appropriate staple length and depth settings. High-density woods, such as oak or maple, necessitate greater force for staple penetration compared to lower-density woods like pine or cedar. Failure to account for wood density can result in improperly set fasteners, either protruding from the surface or being driven too deeply, potentially damaging the surrounding material.
The effect of wood density is exemplified in practical scenarios. When attaching a delicate molding to a dense hardwood cabinet frame, a higher air pressure setting (for pneumatic models) and a precise depth adjustment are essential to ensure the staple is flush without causing splitting or cracking. Conversely, when securing the same molding to a softer pine surface, a lower air pressure and shallower depth setting are required to prevent over-penetration and unsightly depressions. Furthermore, the choice of staple length is directly linked to wood density; longer staples are generally required for softer woods to achieve adequate holding power, while shorter staples are suitable for denser materials to prevent protrusion. Ignoring these relationships between wood density and tool settings compromises the quality and aesthetic appeal of the finished product.
In conclusion, understanding wood density is paramount for effective operation of a finish staple gun. Proper assessment of wood density, coupled with appropriate adjustments to tool settings and staple selection, ensures consistent and professional results. Neglecting this critical factor can lead to compromised fastener performance, material damage, and an overall reduction in the quality of the finished product. Awareness of wood density is thus a fundamental aspect of skilled finish carpentry.
6. Safety Mechanisms
Safety mechanisms are integral components of a finish staple gun, designed to mitigate the risk of accidental firing and potential injuries associated with tool operation. These features are not mere afterthoughts but critical design elements intended to protect the user and bystanders during the tool’s use.
- Contact Trip Mechanism
The contact trip mechanism, also known as a sequential trip, requires the tool’s nose to be fully depressed against the work surface before the trigger can be activated. This prevents accidental firing if the trigger is inadvertently pulled while the tool is not properly positioned. An example of its efficacy would be a dropped staple gun: If the nose isn’t depressed the unit will not activate and discharge the staple preventing injury.
- Trigger Lock/Safety Switch
Many models incorporate a trigger lock or safety switch that disables the firing mechanism when the tool is not in use. This feature prevents unintentional discharge during storage or transport. The operator engages the lock to prevent accidental firing of the finish staple gun.
- Directional Exhaust Port
The directional exhaust port deflects the exhaust air (and potentially small debris) away from the user’s face and body. This minimizes the risk of eye irritation or other injuries caused by displaced particles. This port diverts high-pressure air away from the operator providing a clear line of sight during use.
- Overload Protection
Some models, particularly cordless electric versions, feature overload protection systems. These systems automatically shut down the tool if it encounters excessive resistance or overheating, preventing damage to the tool and reducing the risk of electrical hazards. By shutting down the motor, potential damage to internal components is reduced during prolonged use.
The presence and proper functioning of these safety mechanisms are crucial for the safe operation of a finish staple gun. Regular inspection and maintenance of these features are essential to ensure their continued effectiveness and minimize the risk of accidents. Disabling or bypassing these mechanisms significantly increases the potential for injury and is strongly discouraged.
7. Maintenance
Regular maintenance is paramount to ensure the consistent performance and extended lifespan of a finish staple gun. Neglecting maintenance can lead to a variety of operational problems, ranging from decreased power and inconsistent staple driving to complete tool failure. The pneumatic versions, in particular, rely on clean and properly lubricated internal components to function effectively. For instance, the accumulation of moisture or debris within the air chamber can cause corrosion, restricting airflow and reducing the tool’s power. This, in turn, leads to staples being incompletely driven or frequent jamming.
Specific maintenance procedures vary slightly depending on the model (pneumatic, electric, or manual), but certain principles remain universal. For pneumatic models, daily draining of the air compressor tank is crucial to remove accumulated moisture. Regular lubrication of the tool’s internal components with pneumatic tool oil is also essential. Electric models, while not requiring lubrication, benefit from regular cleaning to remove dust and debris. Regardless of the type, inspection of the staple magazine and firing mechanism for any obstructions or damage is necessary. Consider a situation where a carpenter continuously uses a pneumatic finish staple gun without regularly oiling it. Over time, the internal parts may seize, resulting in costly repairs or complete replacement of the tool. Proper maintenance schedules are an investment that can pay dividends in the form of reduced downtime and prolonged tool service.
In conclusion, a proactive maintenance approach is indispensable for the effective use of these tools. Ignoring maintenance requirements results in decreased performance, potential safety hazards, and ultimately, reduced tool lifespan. By adhering to recommended maintenance schedules and implementing basic cleaning and lubrication practices, operators can ensure their tools remain reliable and efficient, leading to improved productivity and cost savings. Furthermore, proper maintenance ensures consistent, high-quality results in finish carpentry applications, minimizing rework and enhancing the overall quality of craftsmanship.
Frequently Asked Questions
This section addresses common inquiries regarding the usage, maintenance, and selection of this specialized fastening equipment. The aim is to provide concise and informative answers to enhance understanding and optimize tool performance.
Question 1: What staple gauge is appropriate for attaching delicate trim to hardwood?
A higher gauge staple (thinner) is generally recommended for delicate trim on hardwood to minimize the risk of splitting. The exact gauge depends on the specific wood species and trim thickness; testing on scrap material is advised.
Question 2: How frequently should a pneumatic version of this tool be oiled?
Pneumatic models should ideally be oiled before each use. A few drops of pneumatic tool oil in the air inlet is typically sufficient to maintain smooth operation.
Question 3: What constitutes a proper depth setting?
A proper depth setting results in the staple being flush with the surface of the material without creating an indentation or protruding from the surface. This requires careful adjustment based on material density.
Question 4: Is it safe to operate this tool without safety glasses?
Operating without safety glasses is strongly discouraged. These tools can eject small debris during operation, posing a risk of eye injury. Eye protection is always recommended.
Question 5: What happens if the air compressor delivers inconsistent air pressure to a pneumatic model?
Inconsistent air pressure leads to inconsistent staple driving. Some staples may be overdriven, while others may be underdriven, compromising the finished appearance and structural integrity.
Question 6: Can any type of staple be used in this tool?
No. Only staples specifically designed for use with this type of equipment should be utilized. Using incorrect staples can cause jams, damage the tool, and compromise fastening performance.
In summary, selecting the appropriate staple gauge and length, maintaining proper air pressure (for pneumatic models), adjusting the depth setting correctly, prioritizing safety, and using the recommended staples are essential for achieving optimal results and ensuring the longevity of this valuable woodworking tool.
The next section will delve into troubleshooting common operational problems.
Conclusion
This exploration has outlined the multifaceted aspects of the finish staple gun, emphasizing its role in precision fastening. From understanding staple gauge and length to the importance of proper maintenance and safety protocols, each element contributes to achieving professional-grade results. The tool’s effectiveness is directly proportional to the operator’s knowledge and adherence to best practices.
Mastery of this tool necessitates a commitment to continuous learning and refinement of technique. As advancements in fastening technology emerge, a thorough understanding of core principles remains indispensable. The finish staple gun, when employed with skill and diligence, represents a valuable asset in achieving superior craftsmanship and lasting structural integrity. Therefore, the information contained herein is essential to operate this equipment effectively.


