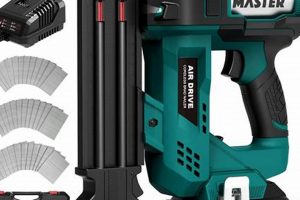
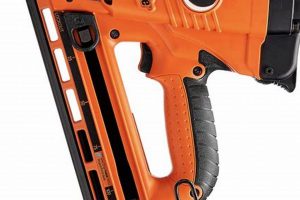
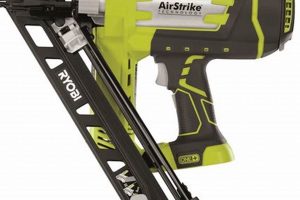
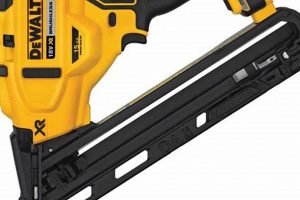
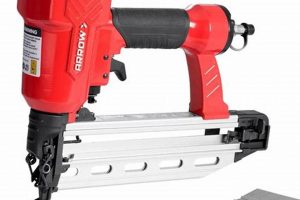
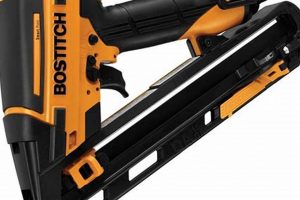
A compressed air-powered tool designed for driving finish nails into wood surfaces. It excels at applications requiring a refined, near-invisible fastening method, such as installing trim, molding, and cabinetry. These tools utilize pressurized air to rapidly and consistently insert nails, resulting in a professional and clean appearance, minimizing surface damage.
The value of this type of fastening device lies in its efficiency, precision, and the reduced physical strain it offers compared to manual hammering. Historically, craftsmen relied on hand tools for such tasks. The introduction of pneumatic nailers significantly improved productivity and consistency. The ability to achieve seamless finishes and stronger, more reliable joints has cemented its importance in various construction and woodworking applications.
The following sections will delve into the key features to consider when selecting a suitable device, examining factors such as power, nail capacity, angle, and ergonomics. The article will also present a curated list of models, highlighting their strengths and weaknesses, allowing for informed decision-making for both professionals and hobbyists.
Tips for Optimizing Performance and Longevity
Maximizing the effectiveness and lifespan of pneumatic finish nailers requires adhering to best practices in usage, maintenance, and storage. The following tips provide essential guidance for ensuring consistent performance and preventing premature wear or damage.
Tip 1: Select the Correct Nail Size and Type: Using the appropriate nail length and gauge for the material being fastened is crucial. Incorrect nail selection can lead to blow-through, splitting, or inadequate holding power. Consult manufacturer guidelines and conduct test drives to determine the optimal nail specifications for each application.
Tip 2: Maintain Consistent Air Pressure: Operating the tool within the recommended air pressure range is essential for consistent nail driving depth and preventing damage to internal components. Regularly check and adjust the air compressor regulator to maintain the correct pressure as specified by the manufacturer.
Tip 3: Apply Lubrication Regularly: Most pneumatic nailers require daily lubrication with a specialized pneumatic tool oil. Apply a few drops of oil into the air inlet fitting before each use to ensure smooth operation and prevent corrosion of internal parts. Refer to the manufacturer’s instructions for specific lubrication guidelines.
Tip 4: Clean and Inspect the Tool Frequently: Regularly clean the nailer to remove accumulated dust, debris, and nail fragments. Inspect the nosepiece, driver blade, and other critical components for wear or damage. Address any issues promptly to prevent further deterioration and maintain optimal performance.
Tip 5: Utilize Proper Safety Equipment: Always wear appropriate personal protective equipment, including safety glasses or goggles, when operating the nailer. Hearing protection is also recommended, especially during prolonged use. Ensure the work area is clear of obstructions and bystanders.
Tip 6: Store the Tool Properly: When not in use, store the nailer in a clean, dry environment, away from moisture and extreme temperatures. Disconnect the air hose and relieve any residual pressure. Consider storing the tool in its original case or a suitable container to protect it from damage.
Tip 7: Follow Manufacturer’s Instructions: Always refer to the manufacturer’s operating manual for specific instructions regarding usage, maintenance, and troubleshooting. Adhering to these guidelines will ensure safe and efficient operation and prolong the lifespan of the tool.
By implementing these tips, users can extend the service life of their pneumatic finish nailer, improve the quality of their work, and minimize the risk of accidents or injuries. Consistent adherence to these guidelines is essential for both professional craftsmen and DIY enthusiasts.
The following sections will address common troubleshooting scenarios and provide guidance on selecting the appropriate accessories to further enhance the capabilities of the pneumatic finish nailer.
1. Power
Within the context of pneumatic finish nail guns, power directly dictates the tool’s capability to consistently and effectively drive nails into various materials. Insufficient power results in protruding nail heads or incomplete drives, compromising the quality and integrity of the finished product. An understanding of power requirements is therefore essential for selecting a suitable device.
- Driving Force and Material Density
The density of the material being fastened directly impacts the power required. Softwoods require less force than hardwoods or composite materials. A nail gun with inadequate power may struggle to consistently sink nails flush into oak, maple, or engineered wood products, leading to rework and compromised aesthetics.
- Air Pressure Requirements
Power is directly correlated to the operating air pressure. Pneumatic nail guns have a specified air pressure range (PSI) within which they function optimally. Operating the tool below this range reduces driving force, while exceeding it can damage internal components or lead to inconsistent results. Selecting a model compatible with readily available air compressors is crucial.
- Stroke Length and Cylinder Size
The stroke length and cylinder size of the pneumatic mechanism influence the force delivered to the nail. A longer stroke and larger cylinder generally translate to greater driving power. However, this can also increase air consumption, requiring a larger air compressor capacity. A balance between power and efficiency is often desirable.
- Nail Size and Gauge Compatibility
The power output must be sufficient to drive the intended nail size and gauge. Larger nails require more force to penetrate the material. Using nails that exceed the tool’s capacity can result in jams, misfires, and damage to the driving mechanism. Therefore, confirming nail size compatibility is paramount during the selection process.
Therefore, assessing power requirements based on the intended application and materials is paramount when selecting a pneumatic finish nail gun. Consideration of material density, air pressure requirements, internal mechanisms, and nail size compatibility all contribute to ensuring the chosen tool delivers the necessary power for consistent, high-quality results. Selecting a nail gun with adequate power minimizes rework, improves efficiency, and contributes to a professional finish.
2. Nail Capacity
Nail capacity, in the context of pneumatic finish nail guns, refers to the number of nails the tool’s magazine can hold at a given time. This parameter significantly influences efficiency and workflow, impacting the overall suitability of a nail gun for specific applications.
- Reduced Reloading Frequency
A higher nail capacity minimizes the need to frequently reload the magazine. This is particularly beneficial in large-scale projects, such as installing baseboards or crown molding throughout an entire house, where frequent interruptions for reloading can substantially reduce productivity. A larger capacity magazine allows for extended periods of uninterrupted work.
- Impact on Project Timeline
The time saved by reducing reloading frequency can directly impact project timelines. For professionals working under tight deadlines, the cumulative effect of fewer reloads can translate to significant time savings. In contrast, a nail gun with a limited capacity may introduce delays and inefficiencies, especially in projects requiring a high volume of nail applications.
- Magazine Design and Nail Compatibility
Nail capacity is often linked to magazine design and nail compatibility. Some nail guns are designed to accommodate specific nail lengths or types within a given capacity. Users must ensure that the selected nail gun is compatible with the required nail specifications and that the magazine design facilitates easy and reliable nail feeding to maximize efficiency.
- Weight and Ergonomics Considerations
While a larger nail capacity offers advantages in terms of reduced reloading, it can also increase the overall weight and bulk of the nail gun. This may impact ergonomics and user comfort, particularly during prolonged use. Therefore, a balance must be struck between nail capacity and the tool’s handling characteristics to ensure optimal performance and minimize user fatigue.
In conclusion, nail capacity is a critical factor in determining the suitability of a pneumatic finish nail gun for specific tasks. While a larger capacity generally improves efficiency by reducing reloading frequency, it is essential to consider its impact on magazine design, nail compatibility, and overall ergonomics to ensure the tool meets the demands of the application without compromising user comfort or performance.
3. Angle
The angle of a pneumatic finish nail gun, specifically referring to the collation angle of the nail magazine, directly influences its maneuverability and accessibility in various woodworking and construction applications. The collation angle determines the orientation of the nails within the magazine and, consequently, the gun’s profile. A straight, or zero-degree, collation often results in a bulkier tool, while angled collation allows for a slimmer nose, improving access to tight corners and intricate spaces. The impact of angle selection extends beyond mere convenience; it affects the efficiency and precision of finish work. For example, installing crown molding often necessitates working at acute angles where a straight nail gun would be unwieldy. The choice of angle must align with the typical tasks undertaken.
Different collation angles, such as 15-degree, 21-degree, or 34-degree, cater to distinct needs. Higher angles generally permit greater maneuverability in confined areas. However, variations in angle also correspond to differing nail strip configurations and potentially proprietary nail systems. This means selecting a specific angle may restrict the user to a particular brand or type of nail. Professional trim carpenters, for instance, might prioritize a 15-degree angled nailer for its superior access in detailed work, accepting the potential limitation in nail selection. Conversely, a contractor performing more general finish carpentry might favor a 34-degree nailer for its balance of maneuverability and broader nail availability.
In summary, the angle of a pneumatic finish nail gun significantly impacts its suitability for various applications. The trade-off between maneuverability, nail system compatibility, and potential cost must be carefully weighed against the specific demands of the work being performed. An informed decision regarding angle is essential for maximizing the efficiency and precision of finish carpentry projects. Failure to consider angle can lead to compromised results and increased labor time, underscoring the practical significance of this often-overlooked factor.
4. Ergonomics
The ergonomic design of a pneumatic finish nail gun significantly influences user comfort, reduces fatigue, and ultimately enhances productivity. The concept of ergonomics focuses on designing tools to fit the human body, minimizing strain and maximizing efficiency. In the context of finish nail guns, this translates to features such as balanced weight distribution, comfortable grip designs, and strategically placed controls. A nail gun lacking ergonomic considerations can lead to muscle strain, repetitive motion injuries, and diminished work quality due to user fatigue. The long-term effects of using a poorly designed tool can be detrimental to a professional’s health and career longevity.
Examples of ergonomic features in finish nail guns include rubberized grips that absorb vibration and provide a secure hold, adjustable exhaust ports that direct air away from the user’s face, and lightweight materials that reduce overall tool weight. The placement of the trigger and safety mechanisms also plays a crucial role. A trigger that requires excessive force or an awkwardly positioned safety can contribute to hand fatigue and reduced precision. Furthermore, some models incorporate adjustable belt hooks, allowing users to conveniently carry the nail gun when not in use, minimizing strain on the arms and shoulders. Consider a trim carpenter installing crown molding for eight hours a day; a well-designed, ergonomically sound nail gun would significantly reduce the physical toll compared to a heavier, less comfortable model, leading to increased accuracy and a higher quality finish.
Ultimately, the integration of ergonomic principles in pneumatic finish nail gun design is not merely a matter of comfort; it is a fundamental aspect of optimizing performance, preventing injuries, and extending the working life of professionals. While features like power and nail capacity are critical considerations, neglecting ergonomics can negate these advantages if the tool is uncomfortable or difficult to handle for extended periods. Manufacturers are increasingly recognizing the importance of ergonomics, leading to continuous improvements in design and materials. The selection of a pneumatic finish nail gun, therefore, should include a thorough assessment of its ergonomic features to ensure a tool that is both powerful and user-friendly.
5. Durability
Durability, in the context of selecting a pneumatic finish nail gun, represents a critical factor impacting long-term value and operational efficiency. It signifies the tool’s capacity to withstand sustained use, resist damage from typical jobsite conditions, and maintain consistent performance over an extended lifespan. The selection of a durable model minimizes downtime, reduces repair costs, and ensures reliable operation, contributing directly to project profitability and user satisfaction.
- Material Composition and Construction
The materials used in the nail gun’s construction directly influence its resistance to wear and tear. High-grade metals, such as hardened steel and aircraft-grade aluminum, are commonly employed in critical components like the driver blade, cylinder, and housing. Reinforcement with composite materials can further enhance impact resistance. A robust construction minimizes the risk of damage from accidental drops or exposure to abrasive materials, extending the tool’s operational life. For example, a nail gun with a die-cast magnesium housing exhibits superior durability compared to a model with a plastic casing.
- Internal Component Quality
The quality of internal components, such as O-rings, seals, and the piston assembly, significantly impacts the nail gun’s ability to maintain consistent performance over time. High-quality seals prevent air leaks, ensuring efficient operation and preventing premature wear on the compressor. A durable piston assembly withstands repetitive impact forces, reducing the likelihood of failure and maintaining consistent nail driving power. Models with reinforced internal components often command a higher initial price but offer substantial long-term cost savings due to reduced maintenance and repair requirements.
- Resistance to Environmental Factors
Jobsite conditions often expose nail guns to dust, moisture, and temperature extremes. A durable model incorporates features designed to mitigate the impact of these environmental factors. Sealed air intakes prevent dust and debris from entering the tool’s internal mechanisms, reducing wear and preventing malfunctions. Corrosion-resistant coatings protect metal components from rust and degradation in humid environments. A nail gun designed to withstand a wide range of operating temperatures ensures reliable performance in diverse climates.
- Maintenance Requirements and Repairability
Even the most durable nail guns require periodic maintenance to ensure optimal performance. A well-designed model facilitates easy access to internal components for cleaning and lubrication. The availability of replacement parts and qualified repair services is also a critical consideration. A nail gun with readily available parts and a simple design is easier to repair, minimizing downtime and extending its operational life. Choosing a model from a reputable manufacturer with a strong service network ensures access to technical support and replacement parts when needed.
These facets highlight the significance of durability in the overall assessment of a pneumatic finish nail gun. A tool characterized by robust materials, high-quality internal components, resistance to environmental factors, and ease of maintenance represents a sound investment that delivers consistent performance, reduces operating costs, and enhances long-term value. The selection process should prioritize durability as a key attribute, ensuring the chosen nail gun meets the demands of the intended applications and provides reliable service for years to come.
6. Air Consumption
Air consumption, a crucial specification for pneumatic finish nail guns, directly impacts operational efficiency and the selection of appropriate support equipment. It quantifies the volume of compressed air, typically measured in standard cubic feet per minute (SCFM), required for the tool to perform its function. Lower air consumption translates to reduced demands on the air compressor, enabling the use of smaller, more portable units, or the capacity to operate multiple tools simultaneously from a single compressor. Conversely, high air consumption necessitates a larger, more powerful compressor, increasing initial investment and ongoing energy costs. A ‘best pneumatic finish nail gun’ effectively balances performance with minimized air usage, optimizing overall system efficiency.
The relationship between air consumption and a nail gun’s performance is multifaceted. Models designed for high-volume applications or capable of driving nails into dense materials may exhibit higher air consumption due to the increased force required. However, advancements in pneumatic technology have led to the development of tools that achieve comparable power with significantly lower air requirements. For instance, a contractor utilizing a framing nailer alongside a finish nail gun would benefit from selecting models with low and similar air consumption rates to prevent compressor overloading and maintain consistent pressure across both tools. Failure to consider air consumption can result in pressure drops, inconsistent nail driving, and potential damage to the compressor itself.
Therefore, understanding and prioritizing air consumption is integral to selecting an appropriate pneumatic finish nail gun. This parameter influences compressor size, operational costs, and overall system efficiency. Balancing performance with minimized air usage is a hallmark of ‘best pneumatic finish nail gun’, enabling users to optimize their workflow, reduce energy consumption, and ensure reliable operation. Ignoring this aspect can lead to significant inefficiencies and increased expenses, underscoring the practical importance of air consumption in pneumatic tool selection.
7. Adjustability
Adjustability, within the context of pneumatic finish nail guns, constitutes a critical factor distinguishing high-performance models from less sophisticated alternatives. It encompasses the range of customizable settings available to the user, enabling precise control over nail depth, firing mode, and other operational parameters. The availability of such adjustments directly impacts the quality of the finished product, the efficiency of the workflow, and the versatility of the tool across diverse applications. A ‘best pneumatic finish nail gun’ invariably features a comprehensive suite of adjustable settings, allowing users to tailor the tool’s performance to the specific requirements of each task.
The most prevalent adjustability feature is depth control, which allows users to regulate the depth to which the nail is driven into the material. This is crucial for preventing overdriving, which can damage the surface of delicate trim, or underdriving, which can compromise the structural integrity of the joint. For example, when installing thin paneling, precise depth adjustment is essential to avoid nail heads protruding from the surface. Similarly, the option to switch between sequential and contact firing modes enhances both safety and speed. Sequential firing requires the trigger to be pulled each time a nail is driven, reducing the risk of accidental firing, while contact firing allows for rapid nail placement by holding the trigger and bumping the nose against the work surface. Professional carpenters often utilize contact firing for high-volume applications such as installing subflooring, but switch to sequential firing when working in tight or hazardous environments. Some advanced models also incorporate adjustable air deflectors, which redirect exhaust air away from the user’s face, and adjustable belt hooks, which improve comfort and convenience.
In summary, adjustability is a key attribute differentiating superior pneumatic finish nail guns from their less capable counterparts. The ability to fine-tune nail depth, firing mode, and other operational parameters provides users with greater control, enhancing precision, safety, and efficiency. This flexibility enables the tool to adapt to a wider range of applications and materials, maximizing its value and utility. Therefore, prospective buyers should carefully evaluate the adjustability features of a pneumatic finish nail gun to ensure it meets the demands of their specific woodworking or construction projects.
Frequently Asked Questions
The following section addresses common inquiries regarding the selection, operation, and maintenance of a tool optimized for precision woodworking and finishing tasks.
Question 1: What distinguishes a ‘best pneumatic finish nail gun’ from other nailers?
A device optimized for finishing applications excels in precision, control, and minimizing surface damage. Key distinctions include adjustable depth control, a narrow nose for accessing tight spaces, and a lightweight design for reduced user fatigue. It also utilizes smaller gauge nails that leave less visible holes.
Question 2: What nail size should be used in a ‘best pneumatic finish nail gun’?
Finish nailers typically accommodate 15- or 16-gauge nails, ranging in length from 1 inch to 2.5 inches. The appropriate nail size depends on the thickness and density of the materials being joined. Always consult the manufacturer’s specifications for compatible nail sizes.
Question 3: How often should a ‘best pneumatic finish nail gun’ be oiled?
Daily lubrication is recommended for most pneumatic finish nailers. Applying a few drops of pneumatic tool oil into the air inlet fitting before each use ensures smooth operation and prevents internal corrosion. Refer to the manufacturer’s manual for specific lubrication guidelines.
Question 4: What air pressure is required to operate a ‘best pneumatic finish nail gun’ effectively?
The optimal air pressure typically falls between 70 and 100 PSI. Consult the manufacturer’s specifications for the recommended pressure range for the specific model. Maintaining consistent air pressure is crucial for consistent nail driving depth and preventing damage to the tool.
Question 5: What safety precautions should be taken when operating a ‘best pneumatic finish nail gun’?
Always wear safety glasses or goggles to protect against flying debris. Hearing protection is recommended, especially during prolonged use. Ensure the work area is clear of obstructions and bystanders. Never point the tool at oneself or others, and disconnect the air hose before performing maintenance or adjustments.
Question 6: How can nail jams be prevented in a ‘best pneumatic finish nail gun’?
Using the correct nail size and type, maintaining consistent air pressure, and regularly cleaning the nailer can minimize the risk of jams. Ensure the nail magazine is properly loaded and that the nails are free from debris. If a jam occurs, disconnect the air hose before attempting to clear the obstruction.
Proper selection, operation, and maintenance are paramount for maximizing the performance and lifespan of a pneumatic finish nailer. Adhering to these guidelines ensures safe and efficient completion of woodworking and finishing projects.
The following section will provide a comparative analysis of top-rated models, evaluating their features, performance, and overall value.
Conclusion
The preceding analysis has examined the salient characteristics defining the qualities of a best pneumatic finish nail gun. Attributes such as power, nail capacity, angle, ergonomics, durability, air consumption, and adjustability significantly influence the tool’s performance and suitability for various finishing applications. Careful consideration of these factors enables informed decision-making, aligning the selection process with specific project demands.
The pursuit of a best pneumatic finish nail gun necessitates a balanced assessment of functional capabilities and long-term value. Investing in a tool that prioritizes both performance and durability ensures consistent, reliable operation and minimizes the potential for costly repairs or replacements. Continued advancements in pneumatic technology promise further refinements in efficiency and user experience, solidifying the importance of informed selection for professionals and hobbyists alike.


