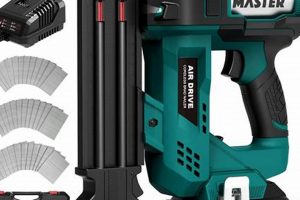
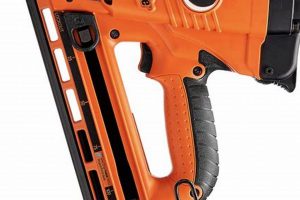
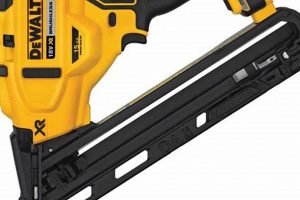
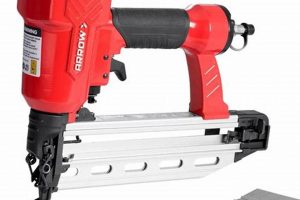
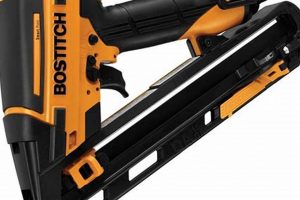
This pneumatic tool, often found in workshops and construction sites, is designed for driving small-gauge nails into wood surfaces. It is a specialized type of nail gun intended for detailed work where aesthetics are crucial, such as installing trim, molding, or cabinetry. The resulting nail holes are significantly smaller compared to those created by framing nailers, allowing for easier concealment with wood filler or putty.
Its value lies in its ability to produce clean, nearly invisible nail holes, essential for a professional-looking finish. The tool’s development reflects a need for precision and efficiency in woodworking, streamlining the process of applying finishing touches to projects. It significantly reduces the time and effort required to achieve high-quality results compared to hand-nailing, while minimizing the risk of splitting delicate wood pieces.
The following sections will delve into the specific features, maintenance practices, safety considerations, and selection criteria associated with this essential woodworking implement, providing a thorough understanding for both novice and experienced users.
Operating and Maintaining the Pneumatic Tool
The following guidelines ensure optimal performance and longevity of the described pneumatic tool.
Tip 1: Regulate Air Pressure: Maintain consistent air pressure within the manufacturer’s specified range. Excessive pressure can damage the tool and lead to nail over-penetration, while insufficient pressure may result in incomplete nail driving.
Tip 2: Use Correct Nail Size: Employ the appropriate gauge and length of finishing nails recommended for the tool. Mismatched nails can cause jamming or damage to the internal mechanism.
Tip 3: Lubricate Regularly: Apply a few drops of pneumatic tool oil into the air inlet before each use. Proper lubrication reduces friction and prevents premature wear of internal components.
Tip 4: Clear Jams Immediately: If a nail becomes jammed, disconnect the air supply and carefully remove the obstruction. Forcing the tool to operate with a jam can lead to more significant damage.
Tip 5: Inspect the Driver Blade: Regularly examine the driver blade for signs of wear or damage. A worn or damaged blade can cause inconsistent nail depth and increase the risk of misfires. Replace the blade if necessary.
Tip 6: Store Properly: When not in use, disconnect the air supply, drain any remaining air from the tool, and store it in a clean, dry environment to prevent corrosion and damage.
Tip 7: Maintain Cleanliness: Periodically clean the tool’s magazine and nosepiece to remove dust, debris, and nail fragments that can interfere with its operation.
Adhering to these tips will contribute to safe, efficient, and reliable operation of the pneumatic finishing nailer, maximizing its lifespan and minimizing the risk of costly repairs.
The following sections will discuss safety precautions.
1. Pneumatic Operation
Pneumatic operation forms the core functionality of this power tool. It provides the necessary force to drive finishing nails into wood surfaces. Compressed air, supplied by an external air compressor, enters the tool and powers an internal piston mechanism. This piston, in turn, propels the driver blade that strikes and sets the nail. The effectiveness of this tool is directly linked to the reliability and consistency of its pneumatic system; any fluctuations in air pressure or leaks within the system can compromise its ability to drive nails accurately and consistently. For example, inadequate air pressure can result in nails not being fully driven, while excessive pressure could cause damage to the workpiece or the tool itself.
The practical significance of understanding the pneumatic operation lies in troubleshooting common issues and maintaining the tool effectively. Recognizing symptoms of pneumatic malfunctions, such as slow nail driving or air leaks, enables prompt corrective action. Regular maintenance, including lubrication and inspection of air hoses and fittings, is crucial for preserving the tool’s performance. In a professional setting, a properly maintained pneumatic finishing nailer contributes to increased productivity and reduces downtime caused by equipment failure. Furthermore, familiarity with the pneumatic system allows for adjusting air pressure to suit the type of wood being worked on, preventing damage to delicate materials while ensuring sufficient driving force for harder woods.
In summary, the pneumatic system represents an integral component, dictating its power and precision. Effective operation depends on a consistent air supply and regular maintenance. Comprehending this connection is essential for maximizing the tool’s performance, minimizing downtime, and ensuring its longevity within a woodworking or construction environment.
2. Nail Gauge Range
The nail gauge range is a critical specification that defines the types of fasteners a finishing nailer can accommodate. It directly influences the tool’s versatility and suitability for various woodworking tasks. Understanding the gauge range is essential for selecting the appropriate nailer for a specific application.
- Gauge and Nail Size Compatibility
The gauge refers to the thickness of the nail shank, with higher gauge numbers indicating thinner nails. A finishing nailer’s specifications dictate the range of gauges it can accept, for example, 15-gauge to 18-gauge. Using nails outside of this specified range can lead to tool malfunction or damage. 16-gauge nails offer a good balance of holding power and minimal visibility, while 18-gauge nails are nearly headless and ideal for delicate trim work where aesthetics are paramount.
- Impact on Wood Splitting
The nail gauge significantly affects the risk of splitting the wood, particularly in delicate or brittle materials. Thinner, higher-gauge nails minimize the likelihood of splitting, making them suitable for applications like attaching fine moldings or intricate trim. Conversely, attempting to use a thick, low-gauge nail in such scenarios can result in unsightly splits and necessitate rework or material replacement. This consideration is crucial when working with expensive or irreplaceable wood stock.
- Holding Power Considerations
While thinner nails reduce the risk of splitting, they also provide less holding power compared to thicker nails. Therefore, selecting the appropriate gauge involves balancing the need for minimal visibility with the required holding strength. For applications where structural integrity is paramount, such as attaching door casings or baseboards, a slightly thicker gauge might be preferred, even if it means slightly more visible nail holes that require filling. This trade-off is a common consideration in woodworking.
- Magazine Capacity and Reload Frequency
The nail gauge can indirectly influence the magazine capacity of the nailer. Because thinner nails require less space, nailers designed for higher-gauge fasteners may have larger magazine capacities compared to those designed for thicker nails. This translates to fewer reloads during extensive projects, increasing efficiency and reducing downtime. The trade-off is, of course, the limitations on the holding power provided by the nails.
In summary, the nail gauge range represents a key characteristic influencing functionality and its effectiveness. Understanding this range, and the trade-offs associated with different nail thicknesses, is vital for selecting the appropriate tool and fasteners for achieving optimal results in various woodworking and finishing tasks.
3. Depth adjustment
Depth adjustment is an essential feature directly influencing the functionality of a finishing nail gun. This mechanism allows the user to control the extent to which the nail is driven into the workpiece. The cause-and-effect relationship is clear: adjusting the depth setting alters the force applied to the nail and, consequently, the final position of the nail head relative to the wood surface. Its importance stems from the need for consistent and flush nail placement in finish work, where aesthetics are paramount. An improperly adjusted depth setting can result in either protruding nail heads, which require manual setting and mar the finish, or nails driven too deeply, creating unsightly craters in the wood that necessitate filling and sanding. For example, installing delicate trim around a window requires a precise setting to avoid damage and maintain a seamless appearance, while attaching thicker baseboards demands a deeper setting to ensure secure fastening.
Practical applications further illustrate this point. When working with softwoods, a reduced depth setting is necessary to prevent nails from sinking too deeply. Conversely, hardwoods require a greater depth setting to achieve proper penetration. Failure to adjust the depth accordingly can compromise the quality of the finish and the structural integrity of the assembly. Additionally, different nail lengths necessitate adjustments to ensure the nail is fully embedded without passing completely through the material. Imagine affixing thin plywood to a frame; excessive depth would cause the nail to protrude on the opposite side, whereas insufficient depth would leave the nail head exposed.
In summary, depth adjustment is an indispensable component of a finishing nail gun, providing the user with the control needed to achieve professional-quality results. Mastering the use of this feature requires understanding the relationship between material density, nail length, and desired finish. Although seemingly straightforward, its proper utilization is fundamental to avoiding common pitfalls and maximizing the tool’s effectiveness, leading to superior woodworking outcomes.
4. Safety Mechanisms
The incorporation of safety mechanisms into any nail gun, including finishing models, is paramount to minimize the risk of accidental discharge and subsequent injury. These features are integral components designed to prevent unintended nail firing, ensuring the tool operates only under controlled conditions.
- Contact (Nose) Safety
The contact safety, typically located on the nose of the tool, requires the tool to be pressed firmly against the workpiece before the firing mechanism can be engaged. This design prevents the nailer from discharging if the trigger is accidentally pulled while the tool is not in contact with a surface. Circumventing this safety feature significantly increases the risk of unintended nail discharge, potentially leading to serious injury.
- Sequential Trigger
A sequential trigger system mandates a specific order of operation: the contact safety must be engaged first, followed by pulling the trigger. This sequence prevents accidental firing if the trigger is pulled while the nose is in the air. This is a crucial safety feature that reduces the possibility of unintentional nail expulsion during handling or repositioning.
- Locking Trigger
Some finishing nailers incorporate a locking trigger mechanism that physically prevents the trigger from being pulled when engaged. This is often used when the tool is not in use or during maintenance, adding an extra layer of security against accidental discharge. The locking trigger ensures that the tool remains inactive until intentionally unlocked and ready for operation.
- Work Contact Element Adjustment
The work contact element (nosepiece) often has an adjustable depth setting. While primarily designed for controlling nail depth, it also contributes to safety. A properly adjusted nosepiece ensures consistent contact with the work surface, preventing misfires caused by inconsistent pressure. This ensures the tool only fires when intended, contributing to a safer work environment.
The collective effectiveness of these safety mechanisms relies on adherence to manufacturer guidelines and proper maintenance. Tampering with or disabling these features negates their intended protective function, substantially increasing the likelihood of accidents. Understanding and consistently utilizing these features are fundamental to operating safely.
5. Maintenance requirements
Maintenance requirements are inextricably linked to the operational lifespan and consistent performance of a craftsman finishing nail gun. The tool’s reliance on pneumatic power and rapid mechanical action necessitates a regimen of preventative measures to mitigate wear and tear, prevent malfunctions, and ensure user safety. The absence of regular maintenance directly contributes to decreased efficiency, increased risk of accidental discharge, and premature tool failure. For instance, neglecting to lubricate the tool’s internal components leads to increased friction, resulting in reduced power output and potential seizing of the piston mechanism. Similarly, failure to regularly clean the nail magazine can cause jamming, interrupting workflow and potentially damaging the tool’s internal components.
Practical examples further illustrate this connection. In a high-volume woodworking shop, where a finishing nail gun is used daily, the effects of inadequate maintenance are quickly amplified. Air compressor moisture can infiltrate the tool, causing corrosion and leading to inconsistent nail depth. Neglecting to check and replace worn O-rings and seals results in air leaks, reducing power and increasing compressor run time. These seemingly minor oversights accumulate, significantly diminishing the tool’s reliability and ultimately requiring costly repairs or replacements. Conversely, diligent adherence to a maintenance schedule, including daily lubrication, regular cleaning, and periodic inspection of critical components, extends the tool’s operational life and maintains its optimal performance.
In conclusion, the maintenance requirements of a finishing nail gun are not merely optional recommendations but rather essential conditions for its safe, reliable, and efficient operation. By acknowledging and addressing these needs through proactive maintenance practices, users can minimize downtime, reduce the risk of accidents, and maximize the value derived from their investment. The challenge lies in integrating these practices into the daily workflow, recognizing that consistent maintenance is a fundamental aspect of responsible tool ownership. The information above is specific to the craftsman finishing nail gun.
6. Material Compatibility
Material compatibility, in the context of a craftsman finishing nail gun, refers to the ability of the tool to effectively and safely drive nails into various types of wood and composite materials without causing damage or compromising the integrity of the workpiece. This consideration is not merely a matter of convenience but a critical determinant of project success and long-term structural stability.
- Wood Density and Nail Penetration
The density of the wood directly influences the depth of nail penetration. Softwoods, such as pine or fir, require lower air pressure settings to prevent over-driving the nails, which can result in unsightly craters or weakening of the material. Conversely, hardwoods, such as oak or maple, necessitate higher pressure to ensure proper nail seating. Failing to adjust the tool settings according to the wood’s density can lead to either protruding nails, requiring manual correction, or inadequate fastening, compromising the joint’s strength. An improper setting might also cause the nail to bend or break within the wood, necessitating removal and creating further damage.
- Material Thickness and Nail Length
The thickness of the material dictates the appropriate nail length to prevent nail points from protruding through the back surface or failing to provide adequate holding power. When working with thin materials, such as plywood or delicate trim, shorter nails are essential to avoid visible protrusions. Conversely, thicker materials require longer nails to ensure sufficient engagement and a secure connection. Utilizing nails of inappropriate length can lead to aesthetic flaws, structural weakness, and potential safety hazards if the protruding nail points pose a risk of injury.
- Wood Grain Orientation and Splitting
The orientation of the wood grain relative to the nail’s insertion point affects the likelihood of splitting. Driving nails parallel to the grain, particularly near the edges of the material, increases the risk of causing splits or cracks. Using finer-gauge nails and adjusting the nailer’s angle can mitigate this risk, but careful consideration of the wood’s grain pattern is always necessary. Certain wood species, such as redwood, are more prone to splitting than others, requiring even greater attention to detail. Pre-drilling pilot holes can be used as an alternative solution to prevent wood splitting when working with a craftsman finishing nail gun.
- Composite Materials and Fastener Selection
Composite materials, such as MDF or particleboard, present unique challenges due to their heterogeneous composition. These materials often lack the natural grain structure of solid wood and can be more susceptible to crumbling or delamination if not properly fastened. Selecting the appropriate nail type, such as those with barbed shanks, and adjusting the nailer’s depth setting are crucial for ensuring secure fastening without damaging the material. Furthermore, some composite materials may contain adhesives that can affect the nail’s holding power over time, necessitating the use of specialized fasteners designed for composite applications.
The effectiveness of a craftsman finishing nail gun is thus intricately tied to the user’s understanding and application of material compatibility principles. Choosing the appropriate nail gauge and length, adjusting the tool settings to match the material’s density and thickness, and considering the wood grain orientation are all essential steps in achieving professional-quality results and ensuring the long-term integrity of the finished project. Improper consideration can lead to project failure, material waste, and user injuries.
7. Application scope
The application scope of a craftsman finishing nail gun defines the range of tasks for which it is ideally suited. Understanding this scope is crucial for selecting the right tool for a given project, ensuring both efficiency and quality in the finished product.
- Trim and Molding Installation
This is a primary application. Installing baseboards, crown molding, door casings, and window trim requires precise nail placement and minimal surface damage. The small-gauge nails used by this tool leave only small holes that are easily concealed, resulting in a clean, professional finish.
- Cabinetry and Furniture Assembly
Assembling cabinet components, drawer boxes, and furniture frames often necessitates a fastener that provides adequate holding power without being overly conspicuous. A finishing nail gun offers a suitable balance, allowing for strong joints while minimizing the visibility of nail holes, which is essential in high-quality woodworking.
- Decorative Projects and Crafts
Smaller-scale projects, such as picture frames, shadow boxes, and decorative trim work, benefit from the precision and control offered by a finishing nail gun. The tool’s ability to drive nails accurately into delicate materials without causing splitting is particularly valuable in these applications.
- Paneling and Wainscoting Installation
Attaching paneling or wainscoting to walls requires a fastening solution that is both secure and aesthetically pleasing. The finishing nail gun provides a means of attaching these materials without the large, visible nail heads associated with framing nailers, resulting in a more refined appearance.
The versatility of this type of nail gun makes it a valuable asset in both professional woodworking environments and for home improvement enthusiasts. By understanding the application scope and selecting the appropriate tool for the task, users can achieve high-quality results and ensure the longevity and aesthetic appeal of their projects.
Frequently Asked Questions
The following questions address common inquiries and misconceptions regarding Craftsman finishing nail guns, providing clarity for prospective and current users. These answers aim to provide technical information and are not substitutes for consulting the tool’s official documentation.
Question 1: What is the ideal air pressure for operating a Craftsman finishing nail gun?
The recommended operating pressure varies depending on the specific model; however, a general range of 70-100 PSI is typical. Consult the tool’s manual for precise pressure specifications. Exceeding the maximum pressure can damage the tool and lead to unsafe operation.
Question 2: What gauge of nails is compatible with Craftsman finishing nail guns?
Craftsman finishing nail guns typically accept 15- or 16-gauge finishing nails. The nail gauge is a critical specification, and using the incorrect gauge can cause jamming, tool damage, or unsafe operation. Always refer to the tool’s manual for nail gauge compatibility.
Question 3: How often should a Craftsman finishing nail gun be lubricated?
Daily lubrication is recommended for optimal performance and longevity. Before each use, apply a few drops of pneumatic tool oil into the air inlet to ensure smooth operation of internal components. Neglecting lubrication can lead to increased friction and premature wear.
Question 4: What are the common causes of nail gun jamming and how can this issue be resolved?
Common causes of jamming include using incorrect nail gauges, bent or damaged nails, and debris accumulation within the magazine. Disconnecting the air supply, disassembling the magazine, and removing the obstruction usually resolves the issue. Regular cleaning and using quality nails can prevent future jamming.
Question 5: What safety precautions should be observed when operating a Craftsman finishing nail gun?
Always wear appropriate eye and ear protection. Keep hands and body parts clear of the firing zone. Engage the contact safety mechanism before firing, and never point the tool at oneself or others. Disconnect the air supply when performing maintenance or clearing jams.
Question 6: How can the depth of drive be adjusted on a Craftsman finishing nail gun?
Most models feature an adjustable depth-of-drive mechanism, typically a dial or knob located near the nose of the tool. Rotating this adjuster allows the user to control the depth at which the nail is driven, ensuring consistent and flush nail placement. Test the setting on a scrap piece of wood before proceeding with the final application.
In summary, understanding these frequently asked questions is essential for safe, effective, and responsible operation. Consulting the tool’s manual provides comprehensive information and ensures adherence to manufacturer recommendations.
The following section will address troubleshooting common problems.
Craftsman Finishing Nail Gun
This discussion has presented a thorough examination of the pneumatic tool designed for precise fastening in woodworking and construction. From its core operational principles to critical maintenance requirements and multifaceted safety mechanisms, this analysis has illuminated the essential aspects of this specialized implement. The exploration of material compatibility, nail gauge range, and depth adjustment underscores the tool’s versatility and the user’s responsibility in ensuring optimal performance.
As a fundamental element in achieving professional-quality results, the craftsman finishing nail gun warrants careful consideration and diligent application of the principles outlined. Mastery of this tool requires a commitment to safety, a thorough understanding of its capabilities, and a dedication to maintaining its operational integrity, ensuring both project success and the user’s long-term satisfaction.


