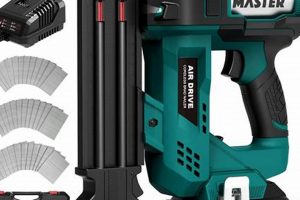
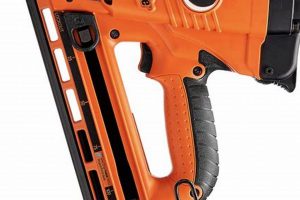
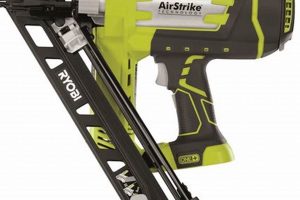
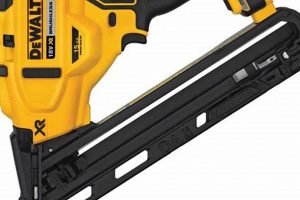
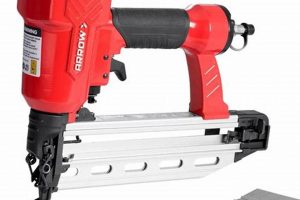
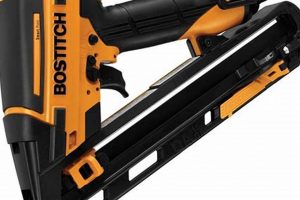
A pneumatic or cordless electric tool, commonly utilized in woodworking and carpentry, drives fasteners into materials for joining or securing them. These tools are designed to countersink nails, leaving a minimal surface mark, ideal for applications where aesthetics are important. Cabinet making, trim work, and detailed woodworking projects frequently employ this type of equipment.
Employing a tool designed for fine woodworking offers several advantages. It increases efficiency and speed compared to manual hammering, delivering consistent results and reducing the risk of damaging delicate materials. Historically, similar tools relied heavily on manual power. Contemporary models leverage compressed air or battery power, providing increased precision, power, and user comfort. This evolution has significantly improved project completion times and overall finish quality.
Subsequent sections will delve into specific models, performance characteristics, maintenance procedures, and application scenarios relevant to selecting and utilizing this class of tool effectively. Considerations will also be given to safety protocols and proper operational techniques.
Operating and Maintaining Finish Nailers
Effective utilization and maintenance of this specialized tool are paramount for achieving optimal performance and longevity. Adherence to the following guidelines ensures both user safety and the quality of finished projects.
Tip 1: Select the Appropriate Fastener. The gauge and length of the nail must correspond to the material thickness and density. Employing an incorrect fastener can result in either inadequate holding power or material splitting.
Tip 2: Adjust Depth Settings. Prior to initiating a project, conduct test drives on scrap material. Adjust the depth setting to ensure the fastener is consistently countersunk to the desired level without damaging the surrounding surface.
Tip 3: Maintain Consistent Air Pressure. For pneumatic models, regulating air pressure according to the manufacturer’s specifications is critical. Fluctuations in pressure can affect driving force and lead to inconsistent results.
Tip 4: Lubricate Regularly. Pneumatic tools require regular lubrication to prevent internal wear and ensure smooth operation. Use pneumatic tool oil as directed by the manufacturers instructions.
Tip 5: Clean the Tool Regularly. Remove accumulated debris, such as sawdust or adhesive, from the nose and magazine. This prevents jams and ensures reliable fastener feeding.
Tip 6: Store the Tool Properly. When not in use, store the tool in a dry and secure location. Disconnect air hoses and remove batteries to prevent accidental actuation.
Tip 7: Wear Appropriate Safety Gear. Eye protection and hearing protection are mandatory. Consider wearing work gloves to improve grip and reduce vibration fatigue.
Following these operational and maintenance procedures ensures consistently high-quality results and extends the lifespan of this valuable woodworking tool. Proper care contributes directly to project efficiency and minimizes the risk of equipment malfunction.
The subsequent sections will address specific troubleshooting scenarios and advanced application techniques.
1. Fastener Compatibility
The operational effectiveness of a finishing tool is significantly dependent on its fastener compatibility. This characteristic dictates the types and sizes of nails that can be reliably driven by the tool, thereby limiting or expanding its application range.
- Gauge Range
The gauge of a nail, denoting its thickness, directly influences the material to which it can be applied. A tool accepting a wider gauge range provides greater versatility. For example, a tool compatible with 15-gauge nails may be suited for heavier trim work, while one limited to 18-gauge nails is better suited to delicate applications. Improper gauge usage can lead to material splitting or insufficient fastening strength.
- Nail Length
Maximum and minimum nail lengths supported by the device determine the range of material thicknesses that can be joined. A tool with a limited length capacity may be unsuitable for certain projects involving thicker materials. Conversely, using overly long nails on thin stock can result in nail protrusion and aesthetic compromises.
- Nail Collation
The collation type the method by which nails are held together in a strip or coil must be compatible with the tool’s magazine. Incorrect collation can lead to jams and misfires, disrupting workflow and potentially damaging the tool. Common collation types include angled strip, straight strip, and coil, each requiring a specific magazine design.
- Nail Head Style
The style of the nail head influences the final appearance and holding power of the fastener. Some tools are designed for specific head styles, such as brad nails with minimal heads or finish nails with slightly larger heads for improved grip. Mismatched head styles can affect the quality of the finish and the overall structural integrity of the joint.
In conclusion, fastener compatibility represents a key consideration when selecting a finishing tool. Careful evaluation of gauge range, nail length capacity, collation type, and head style ensures the tool aligns with the specific requirements of the intended applications, maximizing performance and minimizing potential complications.
2. Power Source
The power source of a finish nailer significantly influences its portability, performance characteristics, and overall suitability for various applications. Understanding the options available and their respective implications is crucial for selecting the appropriate tool.
- Pneumatic (Compressed Air)
Pneumatic finish nailers utilize compressed air as their power source. These tools offer consistent power delivery and are typically lighter than their cordless counterparts, which enhances maneuverability. However, they require an air compressor and hose, which can limit portability and workspace flexibility. Examples include framing work, where consistent power is needed for longer periods. Operation demands the tool be connected to an external compressor.
- Cordless Electric (Battery Powered)
Cordless electric finish nailers offer increased portability due to their self-contained power source. These tools rely on rechargeable batteries, typically lithium-ion, to drive fasteners. Battery capacity and voltage affect the tool’s runtime and power output. While offering convenience, cordless models may be heavier than pneumatic versions, and their performance can degrade as the battery discharges. This is often used by contractors on remodeling work.
- Hybrid (Dual Power)
Some models offer hybrid functionality, capable of operating either with compressed air or battery power. This provides flexibility in various work environments, allowing users to switch between power sources depending on the availability of compressed air and the need for portability. These are less common.
Selecting the appropriate power source hinges on balancing portability, power requirements, and operational constraints. Pneumatic models offer consistent power and lighter weight but require an external compressor. Cordless models provide greater portability at the expense of potential performance degradation and increased weight. Hybrid models attempt to bridge the gap, offering versatility at a higher price point.
3. Depth Adjustment
Depth adjustment is a critical function integrated into the design of a fastening tool. This feature enables precise control over the degree to which a fastener is driven into the workpiece. The absence of accurate depth adjustment can result in either insufficient fastening, where the nail head protrudes above the surface, or overdriving, which causes damage to the surrounding material. As a component of a fastening tool, the efficacy of the depth adjustment mechanism directly impacts the quality and aesthetic appeal of the finished product. For instance, when installing delicate trim, a depth adjustment mechanism allows the user to countersink nails to a precise level, preventing marring of the wood surface.
The mechanism for depth adjustment typically involves a dial or lever located on the tool body. This allows the user to modify the driving force or stroke length, thereby controlling the depth of nail penetration. For example, when working with hardwoods, increased driving force may be necessary to achieve proper countersinking. Conversely, softer materials require reduced force to prevent overdriving. The ability to fine-tune this setting is particularly crucial in applications where consistency is paramount, such as cabinet making or furniture assembly. Incorrect depth setting affects structural integrity; a nail not driven deep enough fails to hold the material.
In summary, the depth adjustment feature serves as a pivotal control element within a fastening tool. It permits the operator to tailor the driving force to match the material characteristics, ensuring both secure fastening and aesthetically pleasing results. Understanding the nuances of this feature and its impact on project outcomes is essential for any operator seeking to achieve professional-grade results.
4. Nose Design
The nose design on a finishing tool directly influences its accessibility and precision in various applications. Different nose configurations cater to specific scenarios, affecting the tool’s maneuverability and the quality of the finished result.
- Contact Tip Shape and Size
The contact tip’s shape and size determine the tool’s ability to access tight corners and recessed areas. A narrow, pointed tip facilitates precise placement in intricate trim work, while a broader tip provides stability on flat surfaces. The contact tips design affects visibility of the fastener placement. An oversized contact tip can obstruct the user’s view, resulting in misaligned fasteners.
- Nose Piece Material and Durability
The material composition of the nose piece impacts its durability and resistance to wear. Hardened steel or composite materials are commonly used to withstand repeated impact and abrasion. A damaged or worn nose piece can lead to inconsistent fastener placement and potential damage to the workpiece.
- Nail Jam Clearing Mechanism
The design of the nose area often incorporates a mechanism for quickly clearing nail jams. Easily accessible jam-clearing features reduce downtime and maintain workflow efficiency. Complex or poorly designed mechanisms can exacerbate the problem, prolonging interruptions.
- Depth-of-Drive Adjustment Integration
Some nose designs integrate with the depth-of-drive adjustment mechanism, allowing for precise control over fastener penetration. A seamless integration ensures consistent and accurate results across various material densities and thicknesses. A poorly integrated design can lead to inconsistent depth settings and compromised finish quality.
The specific nose design directly correlates with the tool’s suitability for diverse finishing tasks. A well-designed nose enhances precision, accessibility, and ease of use, contributing to superior results and improved productivity. A poorly considered design can hinder these aspects, diminishing the tool’s overall value.
5. Safety Mechanisms
The inclusion of safety mechanisms in a tool of this type is not merely a regulatory compliance issue, but a critical element in mitigating potential user injury and ensuring controlled operation. The forceful nature of the tool, designed to rapidly drive fasteners, necessitates robust safeguards. Contact trip mechanisms, for example, prevent unintended firing by requiring the nose of the tool to be fully depressed against the work surface before actuation. Without such a mechanism, accidental discharge poses a significant risk. An individual working in a confined space, for instance, could inadvertently trigger the tool, leading to serious injury. In the absence of safeguards, the potential for accidental nail discharge escalates dramatically.
Beyond contact trip mechanisms, other critical safety features include lockout switches, designed to disable the tool when not in active use, and directional exhaust ports, which deflect compressed air away from the operator’s face. The presence and effectiveness of these features are paramount in preventing injury. Improperly functioning or absent safety mechanisms can have dire consequences, particularly on construction sites or in woodworking shops where these tools are frequently used in close proximity to others. Defective mechanisms on heavy-duty finishing models have resulted in catastrophic outcomes, including permanent disability.
In summary, the integration of comprehensive safety mechanisms represents a fundamental aspect of responsible tool design and operation. These features are not optional add-ons but essential components that protect users from inherent risks. A thorough understanding of these mechanisms, coupled with strict adherence to safety protocols, is vital for safe and effective utilization. Prioritizing safety features mitigates potential risks and fosters a secure working environment, minimizing the potential for accidents. The implementation, testing, and adherence to these mechanisms are all paramount to avoid injuries or fatalities.
6. Ergonomics
Ergonomics, concerning the efficiency of individuals in their working environment, represents a crucial consideration in the design and selection of a finishing tool. Prolonged use of a poorly designed tool can lead to musculoskeletal disorders, diminished productivity, and increased user fatigue. Therefore, ergonomic considerations are paramount in mitigating these risks. The tools weight, grip design, balance, and vibration dampening all contribute to its ergonomic profile. A tool with excessive weight, for example, can rapidly induce fatigue in the user’s arm and shoulder, especially during overhead applications such as installing crown molding. Similarly, a grip that does not conform comfortably to the hand can cause strain and discomfort, reducing precision and control. An improperly balanced tool requires additional effort to maintain its position, further contributing to fatigue. Insufficient vibration dampening can transmit excessive vibrations to the user’s hand and arm, potentially leading to long-term health issues. Tools without ergonomic design may lead to occupational overuse syndrome.
Practical applications of ergonomic design principles manifest in several key features. Lightweight construction, often achieved through the use of magnesium or composite materials, reduces the overall burden on the user. Contoured grips, designed to fit the natural curvature of the hand, distribute pressure evenly and minimize strain. Balanced weight distribution ensures the tool remains stable and requires minimal effort to control. Vibration-dampening mechanisms, incorporating rubber or gel inserts, absorb vibrations and reduce their transmission to the user’s hand. Swivel air hose fittings help keep the air hose from getting in the way. Each feature works to enhance usability and reduce physical strain, allowing users to work more comfortably and efficiently for extended periods. The tool design should also be in mind of safety, the user should not be putting themselves in danger while using it.
In summary, ergonomic design elements are integral to the performance and safety aspects. The selection of such tool demands careful consideration of its weight, grip design, balance, and vibration dampening capabilities. Prioritizing tools with optimized ergonomic features not only enhances user comfort and productivity but also mitigates the risk of work-related injuries. This translates to cost savings through reduced worker compensation claims and improved overall efficiency. Therefore, integrating ergonomic principles into tool selection is a strategic investment, for individuals and organizations to consider.
Frequently Asked Questions
The following section addresses common inquiries concerning the operation, maintenance, and capabilities of specialized fastening tools. These questions aim to clarify misconceptions and provide concise answers to practical concerns.
Question 1: What type of maintenance is required for pneumatic versions of this tool?
Pneumatic models necessitate regular lubrication of internal components with pneumatic tool oil. Additionally, draining the air compressor tank prevents moisture buildup, which can corrode the tool’s internals.
Question 2: What is the appropriate air pressure setting for operating a pneumatic finish nailer?
The recommended air pressure typically ranges from 70 to 120 PSI, but the manufacturer’s specifications should be consulted for precise settings. Air pressure varies dependent on use case.
Question 3: Can different brands of nails be used?
While dimensionally similar nails may appear interchangeable, utilizing fasteners not specifically designed for a given tool may result in jams, misfires, or damage to the tool itself. Confirm the nail type to tool is important before using it.
Question 4: How does one clear a nail jam in such a tool?
Most models incorporate a quick-release mechanism for clearing jammed nails. This typically involves opening the magazine and removing the obstruction with pliers or a similar tool. Always disconnect the power source before attempting to clear a jam.
Question 5: What safety precautions should be observed when operating such equipment?
Eye protection is mandatory, as is hearing protection. Hands should be kept clear of the firing zone. The tool should never be pointed at oneself or others, even when unloaded.
Question 6: What factors affect the tool’s driving power?
For pneumatic models, air pressure is the primary determinant of driving power. For cordless electric models, battery voltage and the tool’s internal mechanism influence the force with which fasteners are driven.
These FAQs provide a basic understanding of key considerations associated with specialized fastening tools. Proper usage and maintenance are crucial for safety and optimal performance.
The subsequent section will explore the various applications for this type of tool, covering a range of projects and materials.
Conclusion
The preceding analysis has detailed the essential aspects of finish nailers, encompassing operational mechanics, power source considerations, safety protocols, and ergonomic design. These elements collectively determine a tool’s efficacy and suitability for diverse woodworking and construction applications. Careful consideration of fastener compatibility, nose design, and depth adjustment mechanisms is crucial for achieving professional-grade results.
A thorough understanding of these principles empowers informed decision-making, facilitating the selection of tools that optimize performance, safety, and long-term value. Continued adherence to best practices in operation and maintenance ensures the longevity and reliability of such equipment, maximizing return on investment and minimizing potential risks. Prioritize comprehensive research and rigorous adherence to safety guidelines when incorporating such tools into any professional or personal project.


