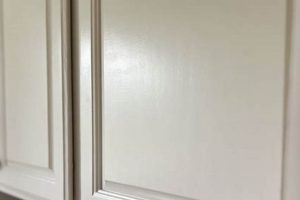
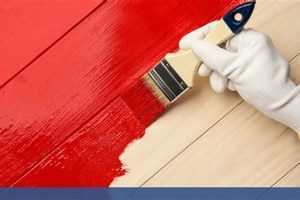
Achieving a flawless, glass-like coating on plywood requires meticulous preparation and application. The process involves addressing the inherent texture of the wood and ensuring each layer of primer and paint is uniformly applied and properly cured. This results in a surface free from visible imperfections, providing an aesthetically pleasing and durable finish.
A superior coating enhances the visual appeal and protective qualities of the plywood. It creates a resilient barrier against moisture, wear, and tear, extending the lifespan of the project. Historically, achieving this level of smoothness was a time-consuming task requiring advanced skills, but modern techniques and materials have made it more accessible.
The subsequent sections will outline the essential steps, from initial surface preparation and priming to the selection of appropriate paints and application methods, needed to create a coating free of imperfections on plywood.
Achieving a Flawless Surface
The following are strategies for achieving a defect-free coating on plywood. Careful adherence to these practices will significantly improve the final result.
Tip 1: Sanding is Essential: Begin with coarse-grit sandpaper (80-120) to address any initial imperfections or unevenness on the plywood surface. Progress to finer grits (180-220) for smoothing. A final sanding with 320-grit sandpaper prior to priming is highly recommended.
Tip 2: Proper Wood Filler Application: Fill any knots, gouges, or imperfections with high-quality wood filler. Overfill slightly to allow for sanding back to a flush surface. Ensure the filler is completely dry before sanding.
Tip 3: Seal the Edges: Plywood edges are porous and prone to absorbing moisture. Use a specialized edge banding or apply multiple coats of a high-build primer, sanding between each coat, to create a sealed and smooth edge.
Tip 4: Use a High-Quality Primer: A solvent-based or high-build primer is crucial for creating a uniform base for paint. Apply in thin, even coats to avoid drips or runs. Allow sufficient drying time between coats.
Tip 5: Consider Spray Application: Spraying paint, whether with an airless sprayer or HVLP system, provides a more even and consistent finish than brushing or rolling. Practice proper technique to prevent runs or orange peel texture.
Tip 6: Thin the Paint: If brushing or rolling, thin the paint slightly according to the manufacturer’s instructions. This reduces brush strokes and allows the paint to level more effectively.
Tip 7: Sand Between Coats: Lightly sand each coat of primer and paint with very fine-grit sandpaper (320-400) to remove any imperfections or dust nibs. This ensures a smooth surface for the subsequent coat.
Tip 8: Dust Control: Dust is the enemy of a smooth coating. Thoroughly vacuum and wipe down the work area and the plywood surface before each coat of primer and paint. Use a tack cloth to remove any remaining dust particles.
By implementing these techniques, a superior surface can be achieved, greatly enhancing the appearance and longevity of the painted plywood.
The following section will discuss advanced techniques and troubleshooting common issues encountered during the process.
1. Surface Preparation
Surface preparation is intrinsically linked to the attainment of a flawlessly smooth painted surface on plywood. Its role transcends mere cleaning; it’s a foundational process that directly influences the adhesion, appearance, and longevity of the subsequent coating. Inadequate preparation invariably leads to visible imperfections and premature coating failure. For instance, applying paint to unsanded plywood, with its inherent roughness, results in a textured finish that amplifies the wood grain and any existing surface defects. Similarly, failure to fill nail holes or knots will leave indentations visible through the paint layers, detracting from the desired smoothness. The absence of proper cleaning to remove dust, grease, or contaminants hinders paint adhesion, causing peeling and chipping.
The practical significance of meticulous surface preparation is evident in various applications. Consider the painting of custom cabinetry crafted from plywood. Proper sanding with progressively finer grits eliminates surface irregularities, while thorough cleaning ensures a pristine base for the primer. This attention to detail translates into a finish that rivals factory-produced coatings. Conversely, in a scenario involving rapid, low-budget painting of shelving units, shortcuts in surface preparation, such as skipping sanding or cleaning, will manifest as a rough, uneven finish, susceptible to damage and aesthetically unappealing. Examples can be also found at exterior signage painting of plywood, or decorative facade paintings, all of them demand good surface preparation to endure prolonged exposore to severe weather.
In summary, surface preparation dictates the ultimate quality and durability of a painted surface on plywood. The challenges associated with achieving the desired coating often stem from overlooking the importance of this initial stage. By investing time and effort in thorough sanding, filling, and cleaning, one establishes a solid foundation for a result characterized by exceptional smoothness and lasting beauty. Ultimately, success in achieving the required painting on plywood depends on recognizing surface preparation not as a preliminary step but as an integral component of the entire process.
2. Primer Selection
Primer selection is a critical determinant in achieving a flawless coating on plywood. The primer serves as an intermediary layer between the porous wood and the topcoat, influencing adhesion, surface uniformity, and the overall aesthetic outcome. Selecting the appropriate primer requires careful consideration of the plywood type, paint chemistry, and desired finish.
- Adhesion Promotion
Primers are formulated to create a strong bond with both the plywood substrate and the subsequent paint layers. Insufficient adhesion leads to peeling, chipping, and an uneven finish. For instance, applying latex paint directly to untreated plywood can result in poor adhesion due to the wood’s absorbency. A suitable primer, such as a bonding primer or a shellac-based primer, penetrates the wood fibers, creating a stable base for the paint to adhere to effectively.
- Surface Sealing
Plywood, particularly its edges, exhibits significant porosity. Primers function to seal these pores, preventing excessive paint absorption and promoting a uniform sheen. Failure to properly seal the surface results in an inconsistent paint finish, with some areas appearing dull and others glossy. High-build primers are especially useful for sealing plywood edges, creating a smooth, level surface for painting.
- Stain Blocking
Certain types of plywood may contain tannins or other extractives that can bleed through the paint, causing discoloration. Stain-blocking primers prevent these substances from migrating to the surface, preserving the integrity of the paint color. Examples include using a stain-blocking primer on redwood plywood to prevent tannin bleed-through, or on plywood with knots to prevent knot discoloration.
- Undercoat Uniformity
A high-quality coating requires a consistent undercoat. Primers fill minor imperfections and create a uniform surface for the paint to adhere to, thus helping to minimize brush strokes. Tinted primers can also enhance the paint’s color and coverage, resulting in a deeper, more vibrant final finish. The use of a gray-tinted primer under a dark-colored paint is a common practice to achieve better color saturation and hiding power.
The selection of an appropriate primer is an indispensable step in achieving a superior coating on plywood. Each primer typebonding, sealing, stain-blocking, or tintedaddresses specific challenges inherent in plywood, contributing to a smoother, more durable, and visually appealing painted surface. Choosing the correct primer is a direct investment in the quality and longevity of the final result.
3. Paint Quality
The characteristics of the paint selected exert a profound influence on the attainment of a uniformly smooth surface on plywood. Paint quality encompasses factors affecting leveling, sheen, and durability, all critical to the final aesthetic.
- Leveling Properties
High-quality paints exhibit superior leveling, referring to the paint’s ability to flow and eliminate brush strokes or roller marks during application. Paints with poor leveling characteristics will leave a textured surface, detracting from the desired smoothness. An example of this is observing how premium enamel paints flow out to a glass-like surface compared to cheaper latex paints that may dry with visible imperfections. The implications here are that higher-quality paints require less effort in application and sanding to achieve a smooth finish.
- Pigment Concentration and Distribution
Paints with higher pigment concentrations provide better coverage and hiding power. Uniform pigment distribution ensures consistent color and sheen across the surface. Inferior paints often have low pigment concentrations, leading to the need for multiple coats to achieve adequate coverage, which can exacerbate surface imperfections. For instance, a high-end paint may fully cover a dark stain in two coats, whereas a low-quality paint may require four or more, increasing the likelihood of drips, runs, and uneven texture. The impact of even pigment distribution is evident in how evenly the colour comes up with less effort.
- Sheen Consistency
The consistency of the sheen across the painted surface directly impacts the perceived smoothness. High-quality paints maintain a uniform sheen, minimizing variations that highlight imperfections. Lower-quality paints may exhibit uneven sheen, creating a patchy appearance that detracts from the overall smoothness. A real-world example is comparing a satin finish from a reputable brand with one from a discount brand. The higher-quality paint will exhibit a consistent satin sheen across the entire surface, while the lower-quality paint may show dull spots or areas with higher gloss. This is further enhanced when it comes to the finish of exterior paints when applied to plywood, where the surface suffers a huge weatherization impact.
- Durability and Film Formation
Paint quality is correlated to its capacity to develop a resilient film that resists scratches, stains, and wear over time. Low-quality paints can form weak films that are easily scratched, or are prone to moisture ingress, diminishing aesthetic appeal and requiring frequent maintenance. Premium paints create durable barriers that maintain their aesthetic appeal for the duration of the product.
The selection of paints with superior leveling, pigment properties, sheen consistency, and overall durability is a critical determinant in attaining a defect-free coating on plywood. The inherent qualities of high-grade paints minimize the labor required for sanding and application, resulting in a superior, long-lasting finish.
4. Application Technique
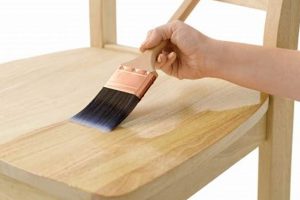
Application technique is a crucial factor in achieving a glass-like coating on plywood. The method of paint delivery directly influences the uniformity, thickness, and overall smoothness of the final surface. Improper application leads to visible imperfections that compromise the aesthetic goal. Variations in pressure, speed, and overlap contribute to uneven paint distribution, resulting in brush strokes, roller marks, or orange peel texture. An example is the application of paint with a low-quality brush or roller, resulting in streaking or air bubbles trapped within the drying paint film. Similarly, inconsistencies in spray gun technique, such as fluctuating distance from the surface or inadequate overlap, can result in an uneven coating with varying sheen levels.
Successful application necessitates the selection of appropriate tools and the mastery of specific techniques. The choice between brushing, rolling, or spraying should align with the paint type, project size, and desired level of finish. Brushing is suitable for smaller areas and detailed work, requiring long, even strokes to minimize brush marks. Rolling is effective for larger surfaces, employing overlapping passes to ensure uniform coverage, using the correct nap roller is also important. Spraying, either with an airless or HVLP system, offers the most consistent application, provided the equipment is properly adjusted and the operator maintains a steady hand. Thinning paint appropriately is necessary for all applications and is of even greater importance when spraying. Proper control of the application pressure ensures the required smooth result, whether rolling or spraying, especially when using the correct tips.
In summary, mastering painting techniques is integral to achieving a flawless surface on plywood. Consistent application, achieved through the selection of appropriate tools and the adherence to proper methods, minimizes surface imperfections and contributes significantly to the overall quality and appearance of the finished product. Overcoming the challenges of inconsistent application requires practice, attention to detail, and a thorough understanding of the paint’s properties and application requirements. Therefore it is important to plan for several trials.
5. Sanding Proficiency
Sanding proficiency is inextricably linked to achieving a flawlessly smooth coated surface on plywood. It represents the procedural knowledge and practiced skill necessary to refine the plywood surface to an optimal condition for paint adhesion and finish quality. Sanding is not simply an initial step, but an iterative process performed between coats of primer and paint to eliminate imperfections and create a uniform substrate. Inadequate sanding, conversely, results in a finish marred by visible scratches, unevenness, and a reduction in the paint’s long-term durability. An example of the detrimental impact of poor sanding proficiency is evident in projects where coarse-grit sandpaper is used aggressively without progressing to finer grits. This leaves deep scratches that remain visible even after multiple coats of paint. These defects compromise the finish and reduce the coating’s lifespan.
The application of sanding proficiency extends beyond mere surface smoothing. It involves understanding the properties of different sandpaper grits, the optimal pressure to apply, and the appropriate sanding patterns to achieve a uniform surface. It also encompasses the ability to identify and address specific imperfections, such as raised wood grain, filled nail holes that require leveling, or dust nibs that necessitate careful removal between coats. For example, consider the preparation of plywood cabinet doors for a high-gloss finish. Expert sanding, employing progressively finer grits and meticulous dust removal, creates a surface that reflects light evenly, resulting in a deep, flawless gloss. In contrast, a poorly sanded surface will exhibit visible imperfections that detract from the intended aesthetic.
In summary, sanding proficiency is a non-negotiable skill for those seeking to achieve a high-quality painted finish on plywood. While challenges may arise from selecting incorrect sanding materials or applying improper techniques, mastering the art of sanding contributes directly to improved paint adhesion, uniform sheen, and enhanced durability of the coating. It serves as a fundamental component in the broader strategy of obtaining a defect-free surface, significantly impacting the long-term appearance and structural integrity of the painted plywood.
6. Environmental Control
The surrounding environment exerts a significant influence on the outcome of paint application. Precise regulation of factors such as temperature, humidity, and airborne particulate matter is paramount in achieving a smooth, flawless finish on plywood. Failure to maintain optimal conditions can lead to a range of defects, compromising both the appearance and durability of the painted surface.
- Temperature Regulation
Temperature directly impacts the viscosity and drying rate of paints and primers. Application outside the manufacturer’s recommended temperature range can result in poor leveling, increased brush marks, and improper film formation. For instance, painting in excessively cold temperatures can cause the paint to become too thick, leading to uneven coverage and prolonged drying times. Conversely, high temperatures can cause rapid solvent evaporation, resulting in a finish with orange peel texture. Controlling temperature within the optimal range ensures proper flow and leveling, promoting a smooth, uniform surface.
- Humidity Management
High humidity levels can interfere with the drying process, causing the paint film to remain tacky for extended periods. This increases the likelihood of dust and debris adhering to the surface, creating imperfections. In contrast, extremely low humidity can accelerate drying, leading to poor adhesion and cracking. Maintaining moderate humidity levels allows for proper drying and curing, resulting in a more durable and aesthetically pleasing finish. For water-based paints, the use of a humidifier in a dry environment can mitigate rapid drying and improve leveling. Conversely, a dehumidifier can be used to reduce moisture during humid days.
- Airborne Particulate Matter Mitigation
Dust, dirt, and other airborne particles are detrimental to a defect-free surface. These contaminants can settle on the wet paint, becoming embedded in the finish and creating visible imperfections. Measures to minimize airborne particles include using a dedicated paint booth, employing air filtration systems, and thoroughly cleaning the work area before painting. Covering surfaces not being painted with plastic sheeting can also prevent dust accumulation. Tack cloths are effective for removing residual dust from the plywood surface prior to each coat.
- Ventilation Control
Adequate ventilation is critical for removing paint fumes and ensuring proper drying. Insufficient ventilation can lead to the accumulation of volatile organic compounds (VOCs), posing health risks and potentially affecting the curing process. However, excessive ventilation can introduce dust and other contaminants into the work area. A balanced approach is required, ensuring sufficient airflow to remove fumes while minimizing the risk of airborne contamination. The use of exhaust fans and respirators is recommended when working with solvent-based paints.
Maintaining rigorous environmental control is an integral component of achieving a glass-like coating on plywood. Regulating temperature, humidity, airborne particles, and ventilation directly impacts the flow, drying, and adhesion of paints and primers. Prioritizing environmental management minimizes defects and maximizes the quality and longevity of the painted surface. By controlling these variables, it increases the possibility of a professional and smooth outcome, with lasting beauty.
Frequently Asked Questions
The following questions address common concerns and challenges encountered while striving for a defect-free painted surface on plywood.
Question 1: What is the optimal sandpaper grit progression for preparing plywood for painting?
The recommended progression starts with 80-120 grit sandpaper to remove initial imperfections, followed by 180-220 grit for smoothing, and culminates with 320-400 grit for final surface refinement before priming.
Question 2: What type of primer is best suited for sealing porous plywood edges?
A high-build primer or a specialized edge banding is recommended for sealing porous plywood edges. Multiple coats of primer, with sanding between each coat, may be necessary to achieve a smooth, non-absorbent edge.
Question 3: How can brush strokes be minimized when painting plywood?
Employing high-quality brushes, thinning the paint according to the manufacturer’s instructions, and maintaining long, even strokes in the same direction can minimize brush strokes. Sanding lightly between coats also contributes to a smoother finish.
Question 4: Is spray application superior to brushing or rolling for achieving a superior outcome?
Spray application, whether with an airless sprayer or HVLP system, generally yields a more uniform and consistent finish compared to brushing or rolling, minimizing texture and imperfections, provided that the operator has sufficient skill.
Question 5: What environmental conditions should be controlled to optimize painting results?
Temperature, humidity, and airborne dust should be carefully controlled. Painting within the manufacturer’s recommended temperature range, maintaining moderate humidity levels, and minimizing dust are crucial for achieving a defect-free surface.
Question 6: How often should sanding be performed during the painting process?
Sanding should be performed after the initial surface preparation, between each coat of primer, and between coats of paint. Light sanding with fine-grit sandpaper removes imperfections and ensures proper adhesion of subsequent coats.
These FAQs highlight critical considerations for successfully achieving a high-quality coating on plywood, emphasizing the importance of preparation, technique, and environmental control.
The following section will explore advanced techniques for addressing specific challenges encountered during the plywood painting process.
Achieving Coating Perfection on Plywood
This exposition has detailed the critical factors involved in achieving a superior coating on plywood, ranging from meticulous surface preparation and primer selection to precise paint application techniques and environmental control. Adherence to these outlined procedures will significantly enhance the likelihood of obtaining a defect-free surface, characterized by exceptional smoothness and durability.
The pursuit of coating excellence on plywood necessitates a comprehensive understanding of materials and methods. Continued refinement of these skills, coupled with a commitment to rigorous quality control, will enable consistent achievement of professional-grade results. Diligence in these practices translates directly to an elevated standard of craftsmanship and a prolonged lifespan for painted plywood projects.


