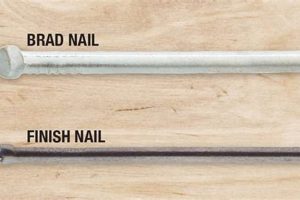
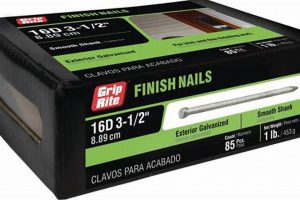
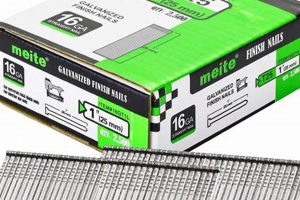
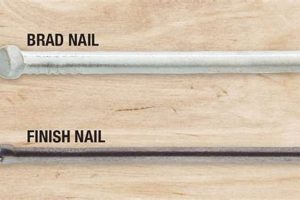
The selection between different sizes of finish nails is a critical consideration in woodworking and construction. These nails, typically employed for fastening trim, molding, and other delicate pieces, are differentiated primarily by their gauge, which denotes their thickness. A higher gauge number indicates a thinner nail, while a lower gauge number signifies a thicker nail. For example, a 15-gauge nail is thicker than a 16-gauge nail.
The gauge of a finish nail directly influences its holding power and the visibility of the resulting hole. Thicker nails offer greater strength for securing materials but leave a more conspicuous entry point that requires more filling and finishing. Conversely, thinner nails minimize surface disruption, making them ideal for projects where aesthetics are paramount. Historically, the choice was dictated by the materials being joined and the desired balance between strength and appearance. Contemporary applications still adhere to these fundamental principles.
Understanding the nuances of nail gauge is essential for achieving optimal results in various projects. The following sections will delve into the specific characteristics, applications, and trade-offs associated with selecting the appropriate gauge for different tasks.
Tips
The following tips provide guidance on the appropriate selection and utilization of different gauge finish nails for various woodworking and construction applications. Proper application ensures both structural integrity and aesthetic quality.
Tip 1: Material Density: When working with hardwoods, consider using a 15-gauge nail. The increased thickness provides better holding power in dense materials, reducing the likelihood of the nail bending or failing to penetrate fully. Conversely, for softwoods, a 16-gauge nail may suffice, minimizing the risk of splitting the wood.
Tip 2: Trim Thickness: For thicker trim pieces, a 15-gauge nail offers superior holding strength, preventing the trim from detaching or shifting over time. For thinner, more delicate trim, a 16-gauge nail minimizes visible nail holes and reduces the potential for damage.
Tip 3: Aesthetic Considerations: When appearance is paramount, prioritize the use of 16-gauge nails. The smaller nail hole is less noticeable and requires less filler, resulting in a cleaner, more professional finish. This is particularly important for stain-grade projects where the filled nail holes will be visible.
Tip 4: Nailer Compatibility: Ensure the nailer being used is compatible with the chosen gauge. Attempting to use the incorrect gauge can damage the nailer or result in improperly driven nails. Refer to the nailer’s manual for specified gauge ranges.
Tip 5: Angle vs. Straight Finish Nailers: Angle finish nailers, often utilizing 15-gauge nails, provide enhanced access to tight corners and confined spaces. Straight finish nailers, typically used with 16-gauge nails, are better suited for general applications and long, straight runs of trim.
Tip 6: Examine the nail quality: Ensure its manufactured from quality raw materials. Cheap nails could have inconsistency issues which could damage your nail gun.
Tip 7: Holding Power Requirements: Assess the structural demands of the project. If the trim or molding will be subjected to significant stress or impact, a 15-gauge nail is preferable. For purely decorative applications, a 16-gauge nail may be adequate.
Appropriate gauge selection balances holding power and aesthetic finish. Prioritizing material density, trim thickness, visual requirements, and tool compatibility allows for optimal results.
The following sections will elaborate on specific use cases and further refine the decision-making process when selecting finish nails.
1. Nail Diameter
Nail diameter serves as the foundational differentiator when evaluating finish nails. The gauge number assigned to a nail directly corresponds to its diameter; a lower gauge indicates a larger diameter, influencing both the holding power and aesthetic outcome.
- Gauge Measurement and Dimensional Variance
Gauge numbers represent an inverse relationship to the nail’s physical size. A 15-gauge nail, for instance, possesses a diameter that is measurably larger than a 16-gauge nail. This dimensional variance, though seemingly minor, significantly impacts the fastener’s performance. Actual measurements may vary slightly based on the manufacturer, but the relative difference between gauges remains consistent. In practice, this means a 15-gauge nail will displace more material upon entry than its 16-gauge counterpart.
- Impact on Holding Strength
The increased diameter of a lower-gauge nail translates directly to enhanced holding strength. The larger shaft provides a greater surface area for friction against the surrounding material, resisting pull-out forces more effectively. In applications requiring secure fastening, such as attaching thick molding or trim to a stud, the superior holding strength of a 15-gauge nail is advantageous. Conversely, when fastening more delicate pieces, the increased force could lead to splitting.
- Visibility and Cosmetic Considerations
Nail diameter is inextricably linked to the visual impact on the finished product. A larger diameter nail creates a more prominent entry hole, necessitating more substantial filling and finishing to achieve a seamless surface. This is particularly critical in stain-grade projects where any imperfections are readily apparent. The smaller diameter of a 16-gauge nail minimizes this disruption, resulting in a cleaner appearance and reducing the labor required for finishing.
- Material Displacement and Splitting Risk
The larger diameter of a 15-gauge nail exerts more force on the surrounding wood fibers during insertion. While beneficial for holding power in dense materials, this increased force elevates the risk of splitting in softer woods or when nailing close to the edge. The smaller diameter of a 16-gauge nail reduces this risk, making it a more suitable option for delicate or easily split materials. Pre-drilling pilot holes can further mitigate splitting, regardless of the nail gauge selected.
The interplay between nail diameter, holding strength, and aesthetic considerations forms the core of the decision-making process when selecting between 15-gauge and 16-gauge finish nails. Understanding these nuances enables professionals to choose the optimal fastener for each specific application, balancing structural integrity with visual appeal.
2. Holding Strength
Holding strength, a crucial determinant in fastener selection, dictates a finish nail’s capacity to resist withdrawal from the material it secures. The gauge significantly influences this capacity; variations in nail diameter translate directly to differences in holding power.
- Nail Diameter and Surface Area
The primary driver of holding strength is the nail’s diameter. A 15-gauge nail, being thicker than a 16-gauge nail, possesses a larger surface area in contact with the surrounding wood fibers. This increased surface area generates greater friction, thereby enhancing resistance to pull-out forces. For example, securing a heavy crown molding typically requires the superior holding power of a 15-gauge nail to prevent sagging or detachment over time.
- Material Density and Nail Gauge Interaction
The density of the material being fastened significantly impacts the effectiveness of different gauge nails. In dense hardwoods like oak or maple, a 15-gauge nail can penetrate and grip the fibers more effectively, maximizing holding strength. Conversely, in softer woods like pine or fir, the increased force exerted by a 15-gauge nail may lead to splitting, making a 16-gauge nail a more appropriate choice. The selection must therefore account for material properties to optimize the connection.
- Nail Shank Design and Coating
Beyond gauge, the design of the nail shank and any applied coating also contribute to holding strength. Ring-shank nails, for example, feature annular rings that provide mechanical locking within the wood fibers, increasing resistance to pull-out. Similarly, coated nails, often with a resin or adhesive, create a stronger bond between the nail and the wood. These features can partially compensate for the difference in holding strength between 15-gauge and 16-gauge nails, but the gauge remains a primary factor.
- Application Requirements and Load Considerations
The specific requirements of the application dictate the necessary holding strength. For purely decorative applications, where the fastened material bears minimal load, a 16-gauge nail may suffice. However, in structural applications or where the fastened material is subject to significant stress, a 15-gauge nail is generally preferred to ensure long-term stability and prevent failure. Assessing the potential forces acting on the joint is essential for making an informed decision.
In conclusion, the choice between these nail gauges hinges on a balance between holding strength requirements, material properties, and aesthetic considerations. While a 15-gauge nail generally offers superior holding power, a 16-gauge nail may be more suitable for delicate materials or purely decorative applications. Understanding these nuances allows professionals to select the optimal fastener for each specific task, ensuring both structural integrity and a visually appealing finish.
3. Aesthetic Impact
The aesthetic impact of finish nails is a critical consideration in woodworking and trim work, particularly in projects where visual appeal is paramount. The gauge of the nail directly influences the visibility and overall finish quality of the project.
- Nail Hole Size and Visibility
The primary aesthetic consideration is the size of the hole left by the nail. A 15-gauge nail, being thicker, creates a larger hole than a 16-gauge nail. This larger hole is more noticeable and requires more filler to conceal effectively. In projects such as fine furniture or high-end trim, the increased visibility of nail holes from 15-gauge nails can detract from the overall appearance.
- Filling and Finishing Requirements
The gauge of the nail directly impacts the amount of filling and finishing work required to achieve a seamless surface. Larger holes necessitate more filler, and the filling process itself can introduce imperfections if not done carefully. Sanding and blending the filler to match the surrounding wood requires additional time and skill. The smaller holes left by 16-gauge nails minimize these requirements, reducing labor and the potential for visible flaws.
- Stain-Grade vs. Paint-Grade Applications
The choice between nail gauges is heavily influenced by whether the project is intended for staining or painting. In stain-grade projects, the natural wood grain is meant to be visible, making imperfections such as filled nail holes more conspicuous. A 16-gauge nail is generally preferred in these cases to minimize the size and visibility of the holes. In paint-grade projects, where the surface is fully covered, the aesthetic impact is less critical, and the choice can be based more on holding strength.
- Wood Species and Grain Patterns
The species of wood and its grain pattern can also influence the aesthetic impact of nail holes. In woods with prominent grain patterns, larger nail holes can disrupt the visual flow and be more difficult to conceal. Softer woods are also more prone to splintering around the nail hole, further exacerbating the issue. A 16-gauge nail is often a better choice for these materials, minimizing disruption and maintaining the integrity of the grain.
Ultimately, the selection between finish nails based on the aesthetic impact involves balancing the desired level of visual perfection with the structural requirements of the project. While 15-gauge nails offer greater holding strength, 16-gauge nails often provide a superior aesthetic finish, particularly in high-end or stain-grade applications. Careful consideration of these factors is essential for achieving optimal results.
4. Material Compatibility
Material compatibility is a critical factor in determining the appropriate gauge of finish nails for a given application. The selection process must account for the physical properties of the materials being joined to ensure secure fastening and prevent damage.
- Softwoods vs. Hardwoods
Softwoods, such as pine and fir, are less dense and more prone to splitting than hardwoods like oak or maple. When working with softwoods, a 16-gauge nail is generally preferred to minimize the risk of splitting the wood during nail insertion. The smaller diameter exerts less force on the surrounding fibers. Conversely, hardwoods often require the increased holding power of a 15-gauge nail to ensure a secure and lasting connection.
- Density and Nail Penetration
The density of the material directly affects nail penetration. A 15-gauge nail may be necessary for adequate penetration and holding strength in dense hardwoods, while it may cause over-penetration or splitting in less dense materials. Proper nail penetration is essential for a secure and durable connection, and the gauge must be selected accordingly. Testing on scrap material is advisable to determine the optimal nail gauge for a specific wood species.
- Trim Thickness and Material Type
The thickness of the trim being attached also influences the gauge selection. Thicker trim pieces generally require the increased holding power of a 15-gauge nail, regardless of the material. However, if the trim is made of a delicate or easily split material, a 16-gauge nail may be a better choice, even for thicker pieces. The goal is to strike a balance between holding strength and the risk of damaging the trim.
- Pre-Drilling Considerations
In certain situations, pre-drilling pilot holes can mitigate the risk of splitting, allowing for the use of a thicker gauge nail in a material that would otherwise be prone to damage. Pre-drilling is particularly useful when working with hardwoods or when nailing close to the edge of a board. By creating a pilot hole, the nail can be inserted without exerting excessive force on the surrounding wood fibers.
The interaction between material properties and nail gauge is a fundamental aspect of woodworking and construction. Careful consideration of these factors is essential for achieving secure, durable, and aesthetically pleasing results. Selecting the appropriate gauge ensures that the nails provide adequate holding power without causing damage to the materials being joined.
5. Nailer Type
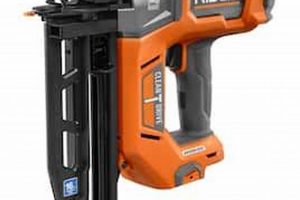
The selection of a nailer directly influences the choice between finish nail gauges. Nailers are designed to accommodate specific gauge ranges, and using the incorrect gauge can result in tool malfunction and improper fastening. Understanding nailer compatibility is therefore essential for effective and safe operation.
- Straight vs. Angled Nailers
Straight finish nailers typically accept 16-gauge nails, while angled nailers are often designed for 15-gauge nails. The angled magazine allows access to tighter corners and confined spaces, making 15-gauge angled nailers suitable for intricate trim work. Straight nailers, using 16-gauge nails, are commonly used for general trim and molding applications. The tool’s design dictates the compatible nail gauge, limiting interchangeability.
- Magazine Capacity and Nail Collation
Nailer magazine capacity and nail collation (the way nails are held together in a strip or coil) vary depending on the gauge. 16-gauge nailers often have higher magazine capacities due to the smaller nail diameter, allowing for more nails to be loaded at once. Nail collation also differs; 15-gauge nails are frequently held together with an adhesive at an angle, while 16-gauge nails are typically straight and collated with glue or wire. The nailer’s design is tailored to the specific collation and dimensions of the intended nail gauge.
- Power Source and Driving Force
Pneumatic nailers, powered by compressed air, are common for both 15-gauge and 16-gauge nails. However, the required air pressure and driving force can vary. 15-gauge nailers may require slightly higher air pressure to drive the thicker nails into dense materials. Cordless nailers, powered by batteries, are also available, but their power output may be a limiting factor when driving larger 15-gauge nails into hardwoods. The power source and driving mechanism must be matched to the nail gauge for consistent and reliable performance.
- Tool Weight and Maneuverability
Nailer weight and maneuverability can be influenced by the gauge of nails they are designed to use. 15-gauge nailers, often built with more robust mechanisms to drive the thicker nails, may be heavier and less maneuverable than their 16-gauge counterparts. This difference can be significant in prolonged use or in applications requiring precise placement. The tool’s overall design, including weight distribution and ergonomics, should be considered in relation to the intended nail gauge and application.
The relationship between nailer type and gauge is interdependent. The nailer’s design, power source, and intended application all influence the choice of nail gauge. Matching the nailer to the appropriate gauge ensures efficient operation, optimal fastening, and minimizes the risk of damage to the tool or workpiece. Selecting a nailer without considering the compatible nail gauge can lead to suboptimal results and potential safety hazards.
Frequently Asked Questions
The following addresses common inquiries regarding the selection and application of different gauge finish nails. This information is intended to provide clarity and guidance for professionals and serious hobbyists.
Question 1: What is the primary difference?
The fundamental distinction lies in the nail diameter. A 15-gauge nail possesses a larger diameter than a 16-gauge nail. This difference influences holding strength, visibility, and material compatibility.
Question 2: When should a 15-gauge nail be preferred?
A 15-gauge nail is generally favored when superior holding power is required, particularly in dense hardwoods or for securing thicker trim pieces. Applications where structural integrity is paramount benefit from the increased grip provided by the larger diameter.
Question 3: Under what circumstances is a 16-gauge nail more suitable?
A 16-gauge nail is typically recommended for delicate materials, softer woods, or applications where aesthetic considerations are paramount. The smaller diameter minimizes the risk of splitting and reduces the visibility of nail holes, resulting in a cleaner finish.
Question 4: Does the nailer type influence the gauge selection?
Yes. Nailers are designed to accommodate specific gauge ranges. Straight finish nailers generally use 16-gauge nails, while angled nailers often utilize 15-gauge nails. Using the incorrect gauge can damage the tool or result in improper fastening.
Question 5: How does the material being fastened affect the choice?
The material’s density and susceptibility to splitting are critical factors. Softer woods are best suited for 16-gauge nails, while hardwoods may require the increased holding power of a 15-gauge nail. Pre-drilling can mitigate splitting in certain situations.
Question 6: Are there aesthetic trade-offs to consider?
Yes. The larger diameter of a 15-gauge nail creates a more visible hole, requiring more filling and finishing work. A 16-gauge nail minimizes this disruption, resulting in a cleaner appearance, particularly in stain-grade projects.
The selection between nail gauges necessitates a careful assessment of project requirements, material properties, and desired aesthetic outcome. Prioritizing these factors ensures optimal results.
The next section will provide a comparative analysis of real-world applications.
Conclusion
This exploration has elucidated the critical distinctions between 15 gauge vs 16 gauge finish nails. The decision-making process hinges on a careful evaluation of holding power requirements, material characteristics, aesthetic considerations, and nailer compatibility. A higher gauge denotes a thinner nail, impacting both its strength and visibility. Effective selection ensures structural integrity and a professional finish.
Mastery of fastening techniques elevates the quality and longevity of woodworking and construction projects. Continual assessment and adaptation to specific project needs will yield optimal results. Further research into specialized fasteners and advanced techniques will expand the professional’s capabilities and address evolving industry demands.


