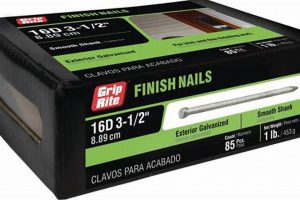
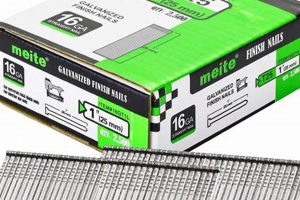
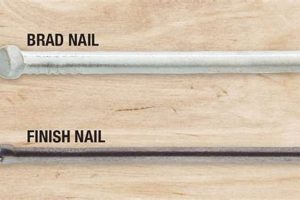
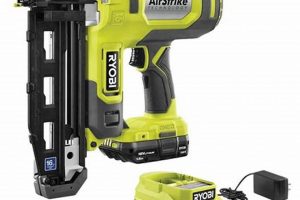
Two common pneumatic tools used in woodworking and construction for fastening trim are those designed to drive either finish nails or brads. Finish nails are typically thicker, ranging from 15 to 16 gauge, while brads are finer, usually 18 gauge. These tools are essential for securing decorative moldings, casing, and other delicate components where minimizing visible nail heads is a priority.
The selection between these tools impacts the overall aesthetic and structural integrity of the project. Utilizing a tool appropriate for the material thickness and desired holding power results in a cleaner, more professional appearance and reduces the likelihood of splitting or damaging the trim. Their development has significantly streamlined the trim installation process, replacing manual nailing and improving efficiency.
The following sections will examine the specific advantages and disadvantages of each type of tool, offering guidance on selecting the optimal option based on the nature of the trim work being performed. Considerations such as material type, nail size, and desired finish will be discussed.
Tips for Selecting the Right Tool
Proper selection and usage are crucial for achieving optimal results when working with trim. Several factors should be carefully considered before employing either type of nailer.
Tip 1: Assess Material Thickness: Thicker trim pieces, such as substantial baseboards or crown molding, often necessitate the superior holding power of a finish nailer. Conversely, thinner, more delicate trim may be better suited to the finer gauge of a brad nailer to prevent splitting.
Tip 2: Consider Nail Visibility: If minimizing visible nail holes is paramount, a brad nailer offers an advantage. The smaller gauge nails leave a less conspicuous mark, requiring less filler and touch-up work.
Tip 3: Evaluate Holding Power Requirements: For trim applications that demand greater structural integrity, such as securing door or window casing, a finish nailer is generally preferred due to the increased nail diameter and subsequent holding force.
Tip 4: Check Air Pressure Settings: Maintaining the correct air pressure is critical for both types of nailers. Overly high pressure can lead to nail over-driving and damage the trim, while insufficient pressure may result in nails not being fully set.
Tip 5: Utilize Appropriate Nail Length: Selecting the appropriate nail length ensures adequate penetration into the substrate without protruding through the back of the trim. A general rule of thumb is to choose a nail length that allows for at least two-thirds penetration into the underlying framing or wall.
Tip 6: Employ a Consistent Nailing Pattern: Consistent spacing between nails provides uniform support and prevents warping or shifting of the trim. Maintain a regular interval based on the specific trim profile and installation requirements.
Tip 7: Test on Scrap Material: Before committing to the final installation, testing the chosen nailer and nail size on scrap pieces of the same material is advisable. This allows for fine-tuning of air pressure and adjustments to the nailing pattern.
Careful consideration of these tips allows for informed decisions, enhancing the quality and longevity of trim installations. Proper planning and technique contribute significantly to achieving a professional and aesthetically pleasing outcome.
The following section will delve into common mistakes and troubleshooting techniques associated with both types of nailers.
1. Gauge
Gauge, in the context of pneumatic nailers, refers to the thickness of the nail being driven. It is a crucial factor in determining which type of nailer, either a finish nailer or a brad nailer, is most appropriate for a given trim application.
- Definition of Gauge
Gauge is expressed as a numerical value, with higher numbers indicating a thinner nail. Finish nailers typically utilize 15 or 16 gauge nails, while brad nailers use 18 gauge nails. This difference in thickness directly impacts the nail’s holding power and the visibility of the nail head after installation.
- Impact on Holding Power
The thicker gauge of finish nails provides greater holding power, making them suitable for securing heavier or more structurally critical trim elements such as door casings and baseboards. The reduced diameter of brad nails, on the other hand, offers less holding strength, but is adequate for lightweight trim like decorative moldings and paneling where a strong mechanical bond is not paramount.
- Aesthetic Considerations
Because brad nails are thinner, they leave smaller holes in the trim surface. This is advantageous when minimizing the visual impact of the fasteners is desired. Less filling and sanding are typically required when using a brad nailer, resulting in a smoother, more professional finish. Finish nails, due to their larger diameter, create more noticeable holes that necessitate more extensive filling and touch-up.
- Material Suitability
The gauge of the nail must be appropriate for the material being fastened. Using a finish nailer on thin, delicate trim can cause splitting or damage. Conversely, using a brad nailer on thick, dense trim may not provide sufficient holding power, leading to loose or unstable installations. The material composition and thickness should guide the selection of the appropriate nailer.
The selection of nailer hinges significantly on the gauge of the nails it utilizes. Understanding the implications of nail gaugeits effect on holding power, visual impact, and material compatibilityis fundamental to achieving a secure and aesthetically pleasing trim installation, and is a key differentiator between employing a finish nailer versus a brad nailer.
2. Holding Power
Holding power, the ability of a fastener to resist withdrawal from the material it secures, is a primary consideration when choosing between a finish nailer and a brad nailer for trim work. The required holding power is directly related to the material being fastened, the intended purpose of the trim, and the long-term stability of the installation.
- Nail Shank Diameter and Material Density
A larger nail shank diameter inherently provides greater surface area for friction against the surrounding material. Finish nailers, utilizing nails with a larger gauge (typically 15 or 16 gauge), offer superior holding power compared to brad nailers (18 gauge). This is especially relevant when working with denser materials such as hardwood trim or when securing trim to solid wood framing. A higher density material offers more resistance and, therefore, requires a nail with greater shank diameter to ensure a secure hold. Failure to use a fastener with sufficient holding power can result in the trim detaching over time due to seasonal wood movement or applied stress.
- Nail Length and Penetration Depth
Holding power is also influenced by the length of the nail and the depth of its penetration into the substrate. Longer nails, driven to a greater depth, provide a more secure mechanical connection. When selecting between a finish nailer and a brad nailer, the thickness of both the trim and the substrate must be considered. The nail should penetrate deeply enough into the substrate to ensure adequate holding power. For instance, securing thick crown molding to a wall stud requires longer finish nails for a robust connection, while attaching thin decorative trim to drywall may only necessitate shorter brad nails.
- Head Type and Pull-Through Resistance
The head of the nail plays a role in resisting pull-through, which is the tendency for the nail head to sink into the trim material under stress, eventually leading to fastener failure. While both finish nails and brad nails typically have small heads designed to be minimally visible, the slightly larger head of a finish nail can offer better pull-through resistance, particularly when working with softer trim materials like pine or MDF. The increased surface area of the head distributes the load over a wider area, reducing the likelihood of the nail sinking into the material.
- Adhesive Augmentation
In situations where maximizing holding power is critical, or when working with inherently unstable materials, construction adhesive can be used in conjunction with either finish nails or brad nails. The adhesive provides an additional layer of bonding, supplementing the mechanical holding power of the nails. While adhesive can enhance the overall strength of the connection, it is important to select the appropriate nailer based on the material thickness and aesthetic requirements of the project. Using adhesive does not negate the need for selecting an appropriate nail gauge and length.
Ultimately, the determination of whether a finish nailer or brad nailer offers sufficient holding power is dependent upon a comprehensive assessment of the specific trim application, the materials involved, and the desired level of long-term stability. Factors such as wood movement, applied stress, and aesthetic considerations must be carefully weighed to ensure a successful and durable trim installation.
3. Material thickness
Material thickness is a critical determinant in the appropriate selection of a pneumatic fastening tool for trim installation. The thickness of the trim piece directly influences the required nail length and gauge. A mismatch between nail size and material thickness can lead to compromised structural integrity or aesthetic imperfections. For instance, attempting to secure thin, delicate trim with a finish nailer, designed for thicker stock, frequently results in splitting or unsightly nail holes. Conversely, employing a brad nailer on substantial trim, like baseboards or crown molding exceeding one inch in thickness, may provide insufficient holding power, leading to eventual separation from the substrate.
Consider the scenario of installing quarter-round molding along the base of a wall. This type of trim is often thin, typically less than 3/4 inch. Using a finish nailer in this application would likely cause the quarter-round to fracture or split, rendering it unusable. In contrast, an 18-gauge brad nailer would provide adequate fastening without compromising the integrity of the trim. Conversely, when installing a substantial piece of crown molding, often exceeding 1 inch in thickness, the superior holding power of a finish nailer becomes essential. The thicker nails penetrate deeply into the framing, ensuring a secure and lasting bond. A brad nailer would offer insufficient support, potentially resulting in the molding detaching over time, particularly due to seasonal expansion and contraction of the materials.
In summary, understanding material thickness is paramount when choosing between a finish nailer or a brad nailer for trim applications. Selecting a nailer with the appropriate gauge and nail length, based on the thickness of the trim, ensures both structural stability and a visually appealing finish. Ignoring this fundamental principle can lead to costly errors and compromised project quality. The interplay between material thickness and fastener selection directly impacts the success and longevity of trim installations.
4. Aesthetic requirements
Aesthetic requirements significantly influence the choice between a finish nailer or a brad nailer for trim work. The visibility of fasteners directly impacts the overall visual appeal of the finished product. When minimal disruption to the trim surface is desired, a brad nailer typically presents a superior option. The finer gauge of brad nails results in smaller entry points, thereby reducing the need for extensive filling and touch-up work. This is particularly crucial when working with pre-finished trim, where color matching and seamless repairs are often difficult to achieve. Conversely, when structural integrity outweighs concerns about minor surface imperfections, a finish nailer may be deemed more appropriate.
The selection process should also consider the type of trim being installed. Ornate or intricately detailed trim pieces often benefit from the use of a brad nailer. The reduced risk of splitting or damage associated with the smaller gauge nails helps preserve the integrity of the design. However, for simpler, more robust trim profiles, such as baseboards or door casings, a finish nailer can provide adequate holding power without significantly detracting from the aesthetic appeal, provided that nail holes are properly filled and concealed. The use of stain-grade versus paint-grade trim also affects the decision. With stain-grade trim, the nail holes are more noticeable, increasing the advantage of using a brad nailer.
Ultimately, the choice hinges on balancing structural needs with the desired aesthetic outcome. Careful consideration of the trim material, design complexity, and finishing method is essential. While a finish nailer offers greater holding power, the resulting larger nail holes necessitate more extensive cosmetic repairs. If aesthetic perfection is paramount, the minimal intrusion of a brad nailer makes it the preferable selection, even if it necessitates supplemental adhesive or other reinforcing techniques to achieve the required level of structural support.
5. Tool versatility
Tool versatility, in the context of selecting between a finish nailer or a brad nailer for trim applications, refers to the range of tasks each tool can effectively perform. While both tools are designed for securing trim, their inherent limitations and strengths dictate their suitability for specific projects. A finish nailer, due to its ability to drive larger gauge nails, exhibits greater versatility in handling thicker and denser trim materials. Conversely, a brad nailer excels in applications requiring minimal surface disruption on delicate or intricate trim profiles. The degree of versatility required is therefore contingent upon the scope and variety of trim work anticipated.
The practical implications of tool versatility become apparent when considering a contractor’s needs. A contractor who frequently installs a wide range of trim, from substantial baseboards to fine decorative molding, may benefit from owning both a finish nailer and a brad nailer. This allows for optimal tool selection based on the specific demands of each job. A homeowner undertaking occasional trim projects, however, may prioritize a single tool that offers a reasonable compromise across various applications. In such cases, factors like material cost and storage space may influence the decision to favor one tool over the other. Some combination nailers offer limited ability to switch between brad and finish nails, but their performance often does not match dedicated tools.
Ultimately, the evaluation of tool versatility involves a careful assessment of project requirements and the user’s skillset. While a finish nailer possesses greater inherent power, its suitability diminishes when working with delicate trim that is prone to splitting. A brad nailer offers improved finesse but lacks the robust holding power needed for certain heavy-duty applications. The optimal choice reflects a balanced understanding of the tools’ respective capabilities and the anticipated spectrum of trim tasks.
6. Application specificity
Application specificity plays a pivotal role in determining the ideal pneumatic fastening tool for trim installation. The nuances of each project, from material type to structural requirements, dictate whether a finish nailer or a brad nailer will provide the most effective and aesthetically pleasing outcome. Understanding these specific demands is crucial for achieving professional-quality results and avoiding potential pitfalls.
- Material Density and Hardness
The density and hardness of the trim material significantly influence nailer selection. Hardwoods, such as oak or maple, often necessitate the driving power of a finish nailer to ensure adequate penetration and holding strength. Softwoods, such as pine or fir, or composite materials like MDF, are more susceptible to splitting and may benefit from the finer gauge of a brad nailer. Matching the tool to the material prevents damage and ensures a secure fastening.
- Trim Profile and Intricacy
The complexity of the trim profile affects the ease of fastening and the potential for damage. Intricate moldings with delicate details are best secured with a brad nailer to minimize the risk of splitting or crushing the fine features. Simpler, more robust profiles can typically withstand the force of a finish nailer, provided that proper techniques are employed to avoid overdriving the nails.
- Structural Requirements and Load-Bearing Capacity
The structural demands of the trim installation directly impact the required holding power. Trim pieces that serve a load-bearing function, such as door casings or stair railings, necessitate the superior holding strength of a finish nailer. Decorative trim elements that primarily serve an aesthetic purpose can often be adequately secured with a brad nailer, as the load-bearing requirements are minimal.
- Finishing Techniques and Surface Preparation
The intended finishing techniques influence the acceptable size of the nail holes. When using a clear finish or stain, the smaller holes created by a brad nailer are less noticeable and require less filling. Painted trim allows for greater flexibility, as larger nail holes can be easily concealed with filler and paint. However, even with painted trim, minimizing the size of the nail holes can reduce the amount of surface preparation required.
In summary, application specificity necessitates a comprehensive evaluation of the trim material, design, structural demands, and finishing techniques. By carefully considering these factors, installers can make informed decisions regarding tool selection, resulting in durable, aesthetically pleasing, and professionally executed trim installations. The careful consideration of these application-specific factors are at the heart of the decision between utilizing a finish nailer versus a brad nailer.
Frequently Asked Questions
This section addresses common inquiries regarding the selection and application of finish nailers and brad nailers for trim work. The answers provided offer guidance on making informed decisions to achieve optimal results.
Question 1: What is the primary distinction between a finish nailer and a brad nailer?
The fundamental difference lies in the gauge of the nails they utilize. Finish nailers typically use 15- or 16-gauge nails, while brad nailers employ 18-gauge nails. This difference impacts holding power, nail head visibility, and the potential for splitting the trim material.
Question 2: When is a finish nailer the preferred choice over a brad nailer?
A finish nailer is generally preferred for thicker, denser trim materials and applications requiring greater holding power, such as securing door or window casings. Its larger gauge nails provide a more robust connection compared to the finer brad nails.
Question 3: In what situations is a brad nailer more suitable than a finish nailer?
A brad nailer is more appropriate for thinner, more delicate trim pieces and situations where minimizing visible nail holes is a priority. Its finer gauge nails reduce the risk of splitting the trim and leave a less conspicuous mark on the surface.
Question 4: Can either tool be used interchangeably for all trim applications?
While both tools can be used in some overlapping scenarios, they are not entirely interchangeable. The selection should be based on the specific requirements of the project, considering factors such as material thickness, desired holding power, and aesthetic considerations.
Question 5: Does nail length impact the effectiveness of either tool?
Yes, nail length is a crucial factor. The nail length should be sufficient to penetrate adequately into the substrate behind the trim, ensuring a secure and lasting connection. Using excessively long nails can result in them protruding through the back of the substrate, while using nails that are too short may not provide adequate holding power.
Question 6: Is it possible to use adhesive in conjunction with either type of nailer?
Yes, construction adhesive can be used in conjunction with either finish nails or brad nails to enhance the holding power and stability of the trim installation. This is particularly beneficial when working with inherently unstable materials or in situations where maximum holding power is critical.
In summary, the optimal choice between a finish nailer and a brad nailer hinges on a thorough assessment of the specific trim application and a clear understanding of the tools’ respective capabilities. Careful consideration of these factors ensures a successful and aesthetically pleasing outcome.
The subsequent section will address common troubleshooting issues encountered when using these tools.
Conclusion
The determination of whether a finish nailer or brad nailer for trim is the appropriate tool rests upon a multifaceted evaluation. Factors such as material density, trim profile, structural requirements, and aesthetic preferences must be carefully weighed. The 15- or 16-gauge fasteners driven by a finish nailer offer superior holding power, while the 18-gauge fasteners utilized by a brad nailer minimize surface disruption. Selecting the incorrect tool for the application can compromise both the structural integrity and visual appeal of the finished product.
A comprehensive understanding of these variables is essential for achieving professional-quality results in trim installation. Continued diligence in assessing project-specific needs and adhering to best practices will ensure durable and aesthetically pleasing outcomes. The informed and judicious application of these tools contributes significantly to the overall quality and longevity of interior and exterior finishes.


