The process of applying protective and aesthetic coatings to lumber derived from the Juglans nigra tree is a common practice in woodworking. This treatment enhances the material’s inherent beauty and provides a barrier against environmental factors. A completed table, for instance, benefits from this treatment, showcasing the wood’s grain and color while resisting moisture damage.
Proper surface treatment yields several advantages. It significantly extends the lifespan of the product, preventing wear and tear from daily use. Historically, artisans understood the value of this procedure, employing various techniques to preserve and enhance the visual appeal of their creations. The resulting durability and aesthetic improvements contribute to the long-term value and desirability of the finished item.
The selection of appropriate materials and methods is critical to achieving a successful outcome. Considerations include the desired sheen level, the need for color enhancement or alteration, and the level of protection required. Subsequent sections will delve into specific techniques, highlighting best practices and potential pitfalls to avoid.
Tips for Superior Surface Treatment
Achieving optimal results necessitates careful planning and execution. The following tips provide guidance for producing a durable and aesthetically pleasing surface.
Tip 1: Preparation is Paramount: Thoroughly sand the wood to the desired grit level before applying any coating. Uneven surfaces or remaining imperfections will be amplified by the finish.
Tip 2: Consider Pore Filling: Walnut often exhibits open grain. Using a pore filler, especially on flat surfaces, creates a smoother, more uniform appearance and reduces the amount of subsequent coatings needed.
Tip 3: Test the Finish: Always test your chosen finish on a small, inconspicuous area of the wood. This allows you to evaluate the color and sheen before committing to the entire project.
Tip 4: Apply Thin Coats: Multiple thin coats are preferable to a single thick coat. This minimizes runs, drips, and bubbles, leading to a more even and durable surface.
Tip 5: Sand Between Coats: Lightly sand between coats with fine-grit sandpaper (e.g., 320-grit or higher) to remove any imperfections and create a better bond for the subsequent layer. Ensure thorough dust removal after sanding.
Tip 6: Control the Environment: Apply the finish in a clean, well-ventilated area, free from dust and excessive humidity. These factors can negatively impact the final result.
Tip 7: Allow Adequate Drying Time: Adhere to the manufacturer’s recommended drying times for each coat. Rushing the process can lead to a soft, tacky finish.
These best practices represent a foundation for achieving a high-quality, lasting result. Careful attention to each step will contribute significantly to the overall beauty and longevity of the finished product.
The following sections will explore advanced techniques and troubleshooting common issues.
1. Preparation
Surface preparation constitutes the foundational stage in the process of enhancing lumber derived from Juglans nigra. Its thorough execution directly influences the adhesion, appearance, and long-term durability of the subsequent surface coatings. Insufficient or improper preparation compromises the quality of the final product, regardless of the sophistication of the materials employed.
- Sanding: Achieving a Uniform Surface
Sanding serves to remove imperfections, level the surface, and create a texture conducive to coating adhesion. Progressing through a series of increasingly finer grits (e.g., from 80-grit to 220-grit) is essential. Failure to adequately sand results in visible scratches, uneven stain absorption, and a lack of smoothness. Examples include orbital sanders for large surfaces and detail sanders for intricate areas.
- Cleaning: Removing Contaminants
The removal of dust, dirt, oil, and other contaminants is crucial prior to coating application. Residue interferes with adhesion, causing imperfections such as fish eyes or bubbling. Techniques include vacuuming, wiping with a tack cloth, and using specialized wood cleaners. Contaminants from fingerprints or sanding residue are common causes of finish defects.
- Repairing Imperfections: Addressing Flaws
Addressing cracks, dents, and other structural imperfections before coating application is necessary for a professional finish. Wood fillers or epoxy resins are used to repair these flaws. Failure to do so results in an unsightly appearance and potential structural weakness. The selection of the appropriate filler material depends on the size and nature of the imperfection.
- Testing and Evaluation: Assessing Readiness
Prior to applying the surface coating, a test area should be prepared and assessed. This allows for verification of sanding quality, stain absorption, and adhesion. Observing the wood under raking light reveals imperfections that may have been missed. This proactive evaluation prevents costly rework and ensures a consistent final result.
These preparatory steps, while often perceived as tedious, are indispensable for realizing the full potential of walnut lumber. Careful attention to sanding, cleaning, repair, and testing translates directly to an enhanced aesthetic and a durable, long-lasting surface, validating the investment in high-quality materials and application techniques.
2. Pore Filling
Pore filling, in the context of surface treatments applied to Juglans nigra, addresses the wood’s characteristic open grain. This process aims to create a smooth, uniform surface prior to the application of topcoats, thereby enhancing the aesthetic appeal and durability of the resulting finish.
- Enhanced Surface Smoothness
Open-grained woods, like walnut, possess visible pores that can create a textured surface even after sanding. Pore fillers occupy these voids, resulting in a level surface ideal for achieving a high-gloss or satin finish. Without pore filling, multiple coats of topcoat are required to fill the pores, increasing material usage and labor time. An example is furniture pieces where a glass-like, reflective surface is desired; pore filling is essential to achieving this effect.
- Improved Finish Clarity
Uneven surfaces resulting from unfilled pores can diffract light, reducing the clarity and depth of the final finish. Pore fillers create a uniform substrate that allows light to reflect evenly, enhancing the wood’s natural color and grain patterns. The difference is particularly noticeable when using tinted or dyed finishes, as the color appears more consistent and vibrant. Consider a musical instrument, where the clarity of the finish directly impacts its visual appeal and perceived value.
- Reduced Finish Absorption
Porous wood absorbs a significant amount of finish, leading to increased material consumption and potentially uneven sheen levels. Pore fillers minimize this absorption, allowing for more predictable and efficient finish application. This is particularly relevant for large projects or when using expensive finishes. The economic benefits of reduced finish consumption are substantial for high-volume manufacturers.
- Structural Stability of Finish
In extreme environments or climates, it leads to the integrity of wood in general. By using pore filler, it minimizes the open nature of the pores in walnut wood to be affected by environmental changes by filling in. Therefore, using pore filler strengthens the surface structure and adds stability for finishing walnut wood.
The strategic application of pore fillers represents a crucial step in achieving a professional-grade surface enhancement on Juglans nigra. By addressing the wood’s inherent porosity, the resulting finish exhibits improved smoothness, clarity, and durability, ultimately contributing to the long-term value and aesthetic appeal of the finished item. Omitting pore filling on such open-grained wood frequently leads to a substandard surface treatment, necessitating rework or resulting in a less desirable final product.
3. Color Tone
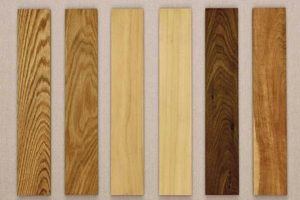
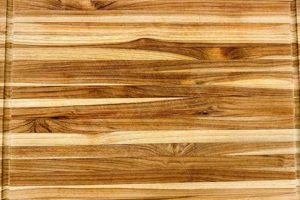
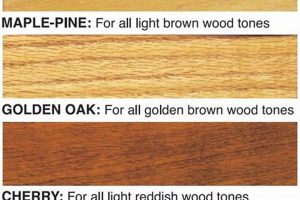
The selection of a color tone is a critical determinant in the process of surface treatments applied to Juglans nigra. The inherent color characteristics of walnut wood, ranging from light brown to dark chocolate hues, interact significantly with stains, dyes, and tinted topcoats. The chosen color tone dictates the final aesthetic, influencing the perceived warmth, formality, or contemporary nature of the finished piece. The impact of color extends beyond mere aesthetics; it affects how the wood’s grain patterns are emphasized or subdued, ultimately contributing to the overall visual impact.
The practical application of color tone selection involves a nuanced understanding of wood finishing materials and their interactions with walnut. For instance, a light, natural oil finish enhances the existing wood color, accentuating grain patterns and preserving a warm, organic feel. Conversely, a dark stain, such as an ebony or dark walnut, dramatically alters the color, creating a more formal or modern aesthetic while often masking some of the finer grain details. The choice depends on the desired end result and the context in which the finished piece will be displayed. A common issue arises when the selected color is too dissimilar to the natural wood, leading to a superficial or artificial appearance. Careful testing on sample pieces is crucial to avoid undesired results.
In conclusion, color tone plays a pivotal role in shaping the final appearance of walnut. The interaction between the wood’s natural characteristics and the applied color significantly impacts the aesthetic outcome. Challenges exist in accurately predicting color interactions and achieving consistent results. The successful integration of color tone into the enhancement process requires thoughtful consideration, careful material selection, and rigorous testing. A deliberate approach to color ensures that the finished piece aligns with the intended design and enhances the inherent beauty of Juglans nigra.
4. Topcoat selection
The choice of a topcoat represents a decisive stage in treatments applied to lumber derived from Juglans nigra. It determines not only the aesthetic qualities of the surface, but also its resilience to wear, moisture, and chemical exposure. The correct selection necessitates a thorough understanding of the characteristics inherent to walnut and the performance attributes associated with various topcoat types.
- Durability and Protection
Topcoats provide a barrier against physical abrasion, liquid penetration, and ultraviolet (UV) light damage. Polyurethane finishes, for example, offer superior abrasion resistance, making them suitable for high-traffic surfaces such as tabletops. Lacquer finishes, while aesthetically pleasing, are less durable and require more frequent maintenance. The selection should align with the intended use and environmental conditions to which the finished piece will be exposed. Consider the difference between a decorative box, where aesthetic takes precedence, and a kitchen countertop, where durability is paramount.
- Aesthetic Properties
Topcoats influence the sheen level (gloss, satin, matte) and can enhance or subdue the natural color and grain patterns of walnut. Oil-based finishes often impart a warmer tone and amplify grain depth, while water-based finishes tend to retain the wood’s natural color more faithfully. The choice depends on the desired visual effect and the overall design aesthetic. A high-gloss finish accentuates the figure of highly figured walnut, whereas a matte finish provides a more subdued, contemporary look.
- Application Characteristics
Topcoats vary significantly in their ease of application, drying time, and required application equipment. Lacquer finishes, for instance, typically require specialized spray equipment and careful environmental control, while oil-based finishes can be applied with brushes or cloths. The selection should consider the available equipment, skill level of the applicator, and production constraints. A small-scale craftsman might opt for a brush-applied oil finish, while a large manufacturing operation may favor a spray-applied lacquer for speed and efficiency.
- Chemical Resistance
The topcoat provides a level of chemical resistance and determines suitability to certain environment. For a lab workbench for example, the choice must include epoxy to make sure it holds against any chemical reaction. Then, oil-based finish such as tung oil gives the best protective qualities
In summary, the selection of a topcoat is a multi-faceted decision that significantly impacts the outcome of treatments applied to Juglans nigra. Consideration of durability, aesthetics, application characteristics, and regulatory compliance is essential for achieving a surface that is both visually appealing and functionally robust. The improper selection can lead to premature failure, aesthetic dissatisfaction, or regulatory violations, underscoring the importance of informed decision-making in this critical step.
5. Application technique
The success of any surface enhancement on Juglans nigra is inextricably linked to the application technique employed. Regardless of the quality of the wood, preparation, or chosen materials, improper application can compromise the integrity and aesthetic appeal of the final finish. Achieving a professional result necessitates adherence to best practices tailored to the specific finish being applied.
- Spraying Techniques and Atomization
Spraying, whether with compressed air or airless systems, requires precise control of fluid viscosity, air pressure, and spray pattern. Improper atomization leads to orange peel texture or runs, necessitating rework. Consistent gun distance and overlapping passes are crucial for even coverage. An example is a catalyzed lacquer finish, where inconsistent spray patterns can cause uneven curing and a mottled appearance.
- Brushing and Leveling
Brushing, typically used for oil-based finishes, requires selecting the correct brush type and employing techniques that minimize brush strokes. Proper leveling ensures a smooth, even surface as the finish dries. An example is applying polyurethane with a natural bristle brush; incorrect brushing leads to visible brush marks and an uneven sheen. Self-leveling properties of the finish must be taken into account.
- Wiping and Padding
Wiping techniques, often used for oil and stain applications, involve applying the material and then removing the excess with a clean cloth. The speed and pressure of wiping affect the color intensity and uniformity of the finish. Padding involves applying a thin layer of finish with a pad, building up the finish gradually. An example is applying a stain to walnut; uneven wiping results in blotchy color and inconsistent grain definition.
- Environmental Control During Application
Ambient temperature, humidity, and dust levels significantly impact the outcome. Elevated humidity retards drying, while dust contamination mars the surface. Adequate ventilation is crucial when using solvent-based finishes. Maintaining a clean, climate-controlled environment ensures optimal application conditions. An example is applying lacquer in a humid environment, which causes blushing (a milky appearance) due to trapped moisture.
These diverse application methods underscore the critical role that technique plays in achieving a superior surface on walnut. Recognizing the nuances of each method and adapting to the specific finish being used are essential for professional-quality results. Mastery of application technique transforms raw materials into durable, aesthetically pleasing surfaces that showcase the natural beauty of Juglans nigra.
Frequently Asked Questions
This section addresses common inquiries related to surface enhancement practices for walnut wood. These questions are designed to clarify procedures, address potential concerns, and provide a deeper understanding of the complexities involved.
Question 1: Is sanding always necessary when preparing walnut for finishing?
Yes, sanding is an essential step. It removes imperfections, opens wood pores for better finish adhesion, and creates a smooth surface. Skipping sanding can lead to uneven finish absorption and a poor final appearance.
Question 2: Why is pore filling recommended for walnut, and are there alternatives?
Walnut has open grain, which can result in a textured surface if unfilled. Pore filling creates a smooth, level base for the finish. Alternatives include applying multiple coats of finish or using a grain filler with a different consistency.
Question 3: What are the advantages and disadvantages of oil-based versus water-based finishes on walnut?
Oil-based finishes enhance the wood’s natural color and grain but are slower drying and emit higher VOCs. Water-based finishes dry faster, have lower VOCs, but may not provide the same depth of color enhancement.
Question 4: How does ambient humidity affect the finishing process, and what precautions should be taken?
High humidity can slow drying times, cause blushing in lacquer finishes, and promote mold growth. Work in a climate-controlled environment or use dehumidifiers to maintain optimal conditions.
Question 5: What is the proper method for disposing of used finish-soaked rags?
Used rags soaked in oil-based finishes can spontaneously combust. Lay them flat to dry in a well-ventilated area or store them in a sealed, water-filled metal container before disposal.
Question 6: How can a blotchy or uneven stain application be corrected on walnut?
Light sanding to remove the stain, followed by a pre-stain conditioner, can minimize blotching. Apply the stain evenly and wipe off excess promptly. Gel stains may also provide more even color penetration.
These answers provide a foundation for understanding surface enhancement techniques. Applying this knowledge contributes to successful outcomes and a prolonged lifespan.
Next, we will look at common troubleshooting scenarios encountered while working on finishing walnut wood.
Conclusion
The preceding discourse has comprehensively explored the intricacies of the surface treatment process as it pertains to Juglans nigra. Key areas of focus included preparation, pore filling, color tone selection, topcoat application, and the critical role of appropriate techniques. A thorough understanding of these elements is paramount for achieving aesthetically pleasing and durable results. Successful outcomes hinge upon meticulous attention to detail and a commitment to adhering to established best practices.
Mastering the art of finishing walnut wood, therefore, represents a significant investment in the longevity and aesthetic value of finished pieces. Continued exploration of advanced techniques and a dedication to refining application methods will undoubtedly yield superior results. Further research and experimentation in this domain are encouraged to unlock new possibilities and push the boundaries of surface enhancement for this valuable material.


![Top Pick: Best Cherry Wood Finish Options [Guide] Best Final Touch: Elevate Your Projects with Professional Finishing Top Pick: Best Cherry Wood Finish Options [Guide] | Best Final Touch: Elevate Your Projects with Professional Finishing](https://bestfinaltouch.com/wp-content/uploads/2025/11/th-168-300x200.jpg)
