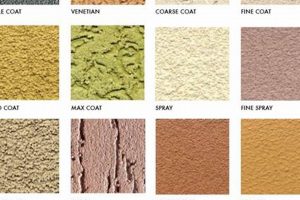
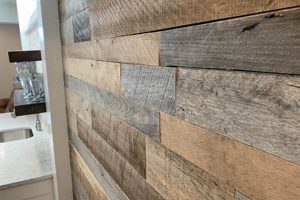
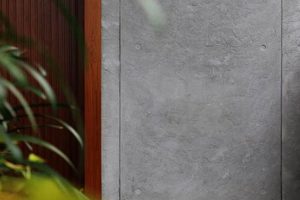
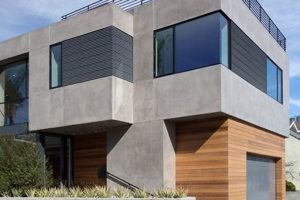
Decorative painting techniques that replicate the appearance of materials like marble, wood, or fabric are frequently employed to enhance interior spaces. These methods, often referred to as simulated or artificial finishes, provide an alternative to using genuine materials, allowing for greater design flexibility and cost-effectiveness. For example, a glaze applied over a base coat can mimic the texture and veining of marble, adding a touch of elegance to a room without the expense of installing actual marble slabs.
The application of these techniques offers a multitude of advantages, including the ability to customize the aesthetic of a room, conceal imperfections on wall surfaces, and create unique visual textures. Historically, such decorative treatments have been utilized to imbue spaces with a sense of luxury and sophistication, reflecting the tastes and preferences of the inhabitants. They represent a practical way to achieve a high-end look while managing budget and material constraints. The durability and ease of maintenance are also key factors contributing to their widespread appeal.
A detailed exploration of different types of application methods, necessary tools and materials, surface preparation techniques, and the advantages and disadvantages of specific styles will be presented in the following sections. Understanding these elements is crucial for successfully incorporating this decorative art form into interior design projects.
Essential Application Guidelines
The subsequent advice offers pertinent guidelines for successfully employing decorative painting treatments. Adherence to these recommendations can significantly improve the final aesthetic and longevity of the applied finish.
Tip 1: Surface Preparation is Paramount: Prior to beginning any application, ensure the wall surface is clean, dry, and free from imperfections. Fill any holes or cracks with appropriate patching compound and sand smooth. A properly prepared surface is essential for optimal adhesion and a professional-looking finish.
Tip 2: Priming for Success: Apply a high-quality primer to the prepared surface. The primer creates a uniform base, improves adhesion of subsequent layers, and can help conceal minor imperfections. Selecting a tinted primer that complements the base coat color can enhance the final result.
Tip 3: Experiment with Techniques: Before applying a technique to the entire wall, practice on a sample board to refine technique and color combinations. This allows for experimentation and prevents costly mistakes on the final surface.
Tip 4: Employ Quality Materials: Utilize high-quality paints, glazes, and tools. Inferior materials can compromise the final appearance and durability of the treatment. Invest in durable brushes, rollers, and applicators designed for specific application techniques.
Tip 5: Control the Environment: Maintain consistent temperature and humidity levels during application and drying. Extreme temperature or humidity can affect drying times and the overall appearance of the finish.
Tip 6: Proper Glaze Dilution: When working with glazes, dilute them according to the manufacturer’s instructions. Proper dilution ensures adequate workability and prevents the glaze from drying too quickly, allowing sufficient time for manipulation.
Tip 7: Sealing the Finish: Once the decorative layer is completely dry, apply a protective sealant or topcoat. This protects the finish from wear and tear, enhances durability, and makes the surface easier to clean.
These guidelines are designed to maximize the success of applying decorative painting treatments, ensuring both aesthetic appeal and long-term durability. A thorough understanding and application of these principles are vital for achieving professional results.
With these techniques established, the article will now conclude with a summary of the key benefits and applications of these finishes.
1. Texture and depth
The creation of realistic and visually compelling simulated finishes hinges significantly on the manipulation of texture and depth. The absence of these elements renders the imitation flat and unconvincing. Texture, in this context, refers to the tactile quality of the surface, while depth relates to the illusion of three-dimensionality. The interplay between these two characteristics dictates the perceived authenticity of the simulation. For example, imitating aged plaster requires not only the correct color palette but also the addition of subtle raised areas and recessed portions to replicate the natural variations in the original material. These effects are often achieved through layering techniques or the use of textured additives within the paint medium.
Different application methods contribute differently to these qualities. Sponging, rag rolling, and stippling are techniques frequently employed to introduce textural variations. Glazes, applied over a base coat, can be manipulated to create depth by allowing some areas of the base color to show through, creating highlights and shadows. A practical example includes using a sea sponge to apply a diluted glaze over a base coat of cream to mimic the appearance of travertine stone, thereby adding both visual texture and the illusion of depth reminiscent of the natural material. The careful selection of tools and the controlled application of layering techniques are critical for achieving the desired effect.
Achieving the correct balance between texture and depth presents a significant challenge in decorative painting. Overdoing the texture can result in an artificial appearance, while insufficient depth can make the imitation seem flat and lifeless. The key lies in observing the characteristics of the material being replicated and carefully applying techniques that mimic those natural variations. The successful integration of texture and depth is paramount for achieving the desired level of realism and visual impact. Ultimately, the goal is to deceive the eye and create an immersive and convincing illusion of a specific material or surface.
2. Color Layering Effects
Color layering effects constitute a fundamental aspect of achieving realistic and visually compelling results in the realm of decorative wall finishes. The strategic application of multiple hues and tones, built upon a foundational base coat, serves to replicate the subtle variations and inherent complexities found in natural materials, thereby enhancing the overall aesthetic impact.
- Creating Depth and Dimension
Layering colors introduces a sense of depth and dimension that is often lacking in single-coat applications. By applying glazes or washes in varying shades over a base color, the surface gains visual interest and complexity, mimicking the nuances found in materials such as marble, wood, or stone. For instance, applying a darker glaze over a lighter base can accentuate textures and create shadows, enhancing the three-dimensional illusion.
- Replicating Natural Variations
Natural materials are rarely uniform in color; they exhibit subtle shifts, gradients, and imperfections. Color layering allows for the replication of these natural variations, resulting in a more authentic and believable simulated finish. For example, simulating the look of aged plaster involves layering multiple tones of beige and gray to recreate the mottled appearance of the original material.
- Enhancing Texture and Pattern
Color layering can be used to accentuate the textures and patterns created by various application techniques. Applying a contrasting glaze over a textured surface, such as one created with a sponge or rag, will highlight the raised areas and recede into the valleys, thereby enhancing the visibility and impact of the underlying texture.
- Customization and Personalization
The ability to layer colors provides a high degree of customization and personalization in interior design. By carefully selecting and combining different hues, it is possible to create finishes that perfectly complement the existing dcor and reflect the desired aesthetic. This allows for the creation of unique and bespoke finishes that are tailored to individual preferences.
The strategic employment of color layering effects serves as a cornerstone in achieving realistic and visually engaging simulations. These techniques afford a level of customization and depth that far exceeds the capabilities of single-coat applications, resulting in surfaces that possess both aesthetic appeal and a convincing illusion of natural materials. The skillful manipulation of color remains paramount in achieving superior results.
3. Surface preparation crucial
The success of decorative wall treatments is inextricably linked to the quality of surface preparation. The application of simulated finishes upon improperly prepared substrates invariably results in compromised aesthetics and reduced longevity, negating the intended visual enhancement. Thorough and meticulous groundwork is, therefore, not merely advisable but essential for realizing the full potential of any decorative treatment.
- Adhesion and Longevity
A clean, stable, and properly primed surface provides the necessary foundation for the paint or glaze to adhere correctly. Contaminants such as dust, grease, or loose paint fragments inhibit adhesion, leading to premature chipping, peeling, or blistering. Similarly, an unstable substrate with cracks or imperfections will transmit those flaws through the applied finish, undermining its structural integrity. Proper preparation extends the lifespan of the simulated finish and preserves its intended appearance over time. For instance, a peeling surface needs scraping, patching and priming to ensure good adhesion.
- Uniformity of Application
An uneven or porous surface will absorb paint or glaze inconsistently, resulting in uneven color distribution and variations in texture. Patched holes and bumps will be visible through even the most elaborately applied decorative treatments. Thorough sanding, patching, and priming are essential to create a uniform substrate that allows for consistent application and a smooth, even finish. A surface that has an existing glossy paint finish will need to be sanded or primed with a special bonding primer to ensure adequate adhesion of subsequent coats.
- Accurate Color Representation
The color of the underlying surface can significantly influence the perceived color of the applied simulated finish. A dark or heavily tinted substrate will alter the appearance of lighter colors, while an uneven surface can create shadows that distort the true hue. Priming with a neutral-toned primer is crucial for creating a uniform base that allows for accurate color representation. This step ensures that the intended color is faithfully reproduced on the wall surface, leading to a more predictable and satisfactory outcome.
- Enhanced Visual Impact
A flawlessly prepared surface serves as a blank canvas, allowing the textures, colors, and patterns of the applied treatment to stand out without distraction. Imperfections in the substrate diminish the visual impact of the simulated finish, drawing the eye to the flaws rather than the intended aesthetic effect. Meticulous surface preparation elevates the overall visual appeal and creates a more refined and professional result, enhancing the immersive quality and believability of the decorative effect.
In conclusion, surface preparation constitutes the bedrock upon which the success of decorative painting techniques rests. It is not simply a preliminary step but an integral component that directly influences the adhesion, longevity, uniformity, color representation, and overall visual impact of the applied finish. The investment of time and effort in meticulous surface preparation is, therefore, a critical determinant of the final aesthetic outcome.
4. Appropriate sealant protection
The application of appropriate sealant protection is a critical and often overlooked step in the successful implementation of decorative wall treatments. While meticulous surface preparation and skillful application of specialized techniques are essential, the selection and application of a suitable sealant determine the longevity, durability, and cleanability of the simulated finish. The sealant acts as a protective barrier, shielding the underlying paint layers from environmental factors and physical wear.
- Enhanced Durability and Longevity
Sealants provide a protective layer that shields the simulated finish from abrasion, impact, and general wear and tear. This is particularly important in high-traffic areas or environments prone to moisture or temperature fluctuations. Without adequate sealant protection, the decorative paint layers are susceptible to damage, leading to premature fading, chipping, or peeling. A durable sealant extends the lifespan of the simulated finish, preserving its aesthetic appeal for an extended period. For example, a polyurethane sealant is often used in kitchens or bathrooms to protect against moisture and grease.
- Improved Cleanability and Maintenance
Many decorative paint techniques create textured surfaces that are difficult to clean. Sealants create a smooth, non-porous surface that is resistant to stains and dirt. This makes the wall easier to clean and maintain, preventing the buildup of grime that can dull the appearance of the finish. A wipeable surface is essential for maintaining the aesthetic integrity of the simulated finish over time. For instance, a water-based acrylic sealant provides a scrubbable surface ideal for removing everyday marks.
- UV Protection and Color Retention
Exposure to ultraviolet (UV) radiation can cause fading and discoloration of paints and glazes. Sealants containing UV inhibitors help to protect the simulated finish from the damaging effects of sunlight, preserving its color and vibrancy over time. This is particularly important for walls exposed to direct sunlight or artificial UV light. Choosing a UV-resistant sealant ensures that the decorative finish maintains its intended color palette and aesthetic appeal for years to come. An example would be a sealant with UV absorbers, commonly used on exterior applications or interiors with large windows.
- Resistance to Moisture and Chemicals
In areas prone to moisture, such as bathrooms or kitchens, sealants provide a barrier against water damage, preventing mold growth and protecting the underlying substrate. Similarly, sealants can offer protection against chemical spills and splashes, preventing staining or damage from cleaning agents or other household products. Selecting a sealant appropriate for the specific environmental conditions ensures the long-term integrity of the simulated finish. Epoxy sealants, for example, offer excellent chemical resistance and are sometimes used in commercial settings.
The selection and application of a suitable sealant are essential for ensuring the longevity, durability, and maintainability of decorative wall finishes. The sealant acts as a protective barrier, shielding the underlying paint layers from environmental factors and physical wear. By carefully considering the specific environmental conditions and desired aesthetic, it is possible to select a sealant that enhances the visual impact and extends the lifespan of the simulated finish, preserving its beauty for years to come.
5. Artistic imitation
The correlation between artistic imitation and simulated wall finishes is fundamental. These finishes, by their very nature, represent an act of emulating a material or texture not inherently present on the underlying surface. Artistic imitation, therefore, serves as the core principle guiding the entire process. The selection of a specific technique, color palette, and application method is dictated by the desire to convincingly reproduce the appearance of marble, wood, stone, or another chosen aesthetic. Without the intentional act of imitation, a simulated finish would be merely a decorative paint application, lacking the distinguishing characteristic of replicating another material. For example, the application of a glaze and veining pattern on a wall to replicate Carrara marble directly depends on the artist’s ability to imitate the characteristic patterns and colors of the stone. The success of the application hinges on this imitative skill.
The importance of artistic imitation extends beyond simply copying visual characteristics. It also involves understanding the underlying structure and properties of the material being simulated. A convincing faux wood finish, for instance, requires knowledge of wood grain patterns, knot formations, and the way light interacts with the surface. The artist must not only reproduce these features visually but also create a sense of depth and texture that mimics the tactile qualities of real wood. Further, artistic imitation necessitates a degree of creativity and interpretation. The goal is not to create a perfect replica, which is often impossible, but rather to capture the essence of the material and convey its aesthetic appeal. This involves making informed choices about color variations, texture enhancements, and the overall style of the finish.
In conclusion, artistic imitation is the driving force behind all simulated wall finishes. It is the ability to observe, analyze, and reproduce the characteristics of another material that transforms a simple paint application into a sophisticated decorative treatment. The challenges lie in achieving a balance between accurate representation and artistic interpretation, and in selecting techniques and materials that effectively convey the desired aesthetic. By understanding the fundamental role of artistic imitation, practitioners can elevate their skills and create simulated finishes that are both visually compelling and intellectually engaging.
Frequently Asked Questions
The following section addresses common inquiries regarding the application, benefits, and maintenance of simulated wall treatments, offering insights into this specialized area of interior design.
Question 1: What is the typical lifespan of a simulated finish applied to walls?
The lifespan of a simulated finish varies based on several factors, including the quality of materials used, surface preparation, application technique, and environmental conditions. Properly applied and maintained treatments can last for 5 to 10 years or longer. However, high-traffic areas or environments with excessive moisture or wear may necessitate more frequent reapplication.
Question 2: Are specific surface types better suited for simulated wall treatments than others?
Most interior wall surfaces, including drywall, plaster, and previously painted surfaces, can accommodate simulated finishes. However, proper surface preparation, including cleaning, patching, and priming, is crucial for ensuring adhesion and a uniform finish. Highly textured surfaces may require additional preparation to achieve a smooth, even substrate.
Question 3: How does the cost of simulated finishes compare to traditional painting methods?
Simulated finishes typically involve more labor and specialized materials than standard painting, resulting in a higher initial cost. However, the unique aesthetic and durability of simulated treatments can provide long-term value. The specific cost will depend on the complexity of the technique, the size of the area, and the professional fees involved.
Question 4: What maintenance is required to preserve the appearance of simulated wall treatments?
Regular cleaning with a mild detergent and water is typically sufficient to maintain the appearance of simulated finishes. Avoid abrasive cleaners or scrubbing pads, as these can damage the protective sealant layer. Periodic reapplication of the sealant may be necessary to maintain the finish’s durability and resistance to stains.
Question 5: Can simulated wall treatments be applied over existing wallpaper?
Generally, it is not recommended to apply simulated finishes directly over wallpaper. Wallpaper adhesive can compromise the adhesion and uniformity of the decorative treatment. Removal of the wallpaper and proper preparation of the underlying wall surface are essential for optimal results.
Question 6: Are there any environmental considerations associated with simulated wall treatments?
The environmental impact of simulated finishes depends on the specific materials used. Low-VOC (volatile organic compound) paints, glazes, and sealants are available and can minimize the release of harmful chemicals into the environment. Responsible disposal of waste materials is also important.
The information provided in this section aims to clarify common concerns and misconceptions surrounding simulated wall treatments. Understanding these aspects is crucial for making informed decisions and achieving successful outcomes in interior design projects.
The subsequent portion of this article will provide links to external resources and recommended reading for individuals seeking further knowledge on decorative painting techniques.
Conclusion
The preceding exploration of “faux finishes for walls” has underscored the technique’s versatility and impact within interior design. Surface preparation, material selection, application methods, and appropriate sealing have been identified as critical factors determining the longevity and aesthetic success of simulated finishes. Artistic imitation remains at the heart of these techniques, requiring both technical skill and an understanding of the materials being replicated.
As decorative trends evolve, understanding the principles and applications of simulated finishes remains a valuable asset for design professionals and homeowners alike. The enduring appeal of these techniques lies in their ability to transform interior spaces, adding character, depth, and a touch of artistry to otherwise conventional surfaces. Further research and experimentation within this realm of decorative painting will undoubtedly lead to innovative applications and refined aesthetic possibilities.


