A textured coating, often applied via aerosol, imparts a distinctive, slightly indented, and visually appealing surface reminiscent of hammered metal. This type of coating is used to conceal imperfections and add a decorative effect. For example, it can be applied to metal cabinets, toolboxes, and machinery housings.
The utility of such a coating lies in its ability to provide a durable and aesthetically pleasing finish while simultaneously masking surface flaws. Historically, this effect was achieved through labor-intensive manual hammering. Modern formulations offer a convenient and efficient alternative, providing similar visual characteristics with enhanced protection against rust and wear. Its application enhances the value and longevity of treated objects.
The subsequent discussion will delve into the optimal preparation techniques, application methods, and safety precautions associated with achieving a professional and long-lasting coating. This will include detailed consideration of environmental factors and various surface types suitable for this type of finish.
Application Guidance
The following guidance addresses key considerations for achieving a satisfactory outcome when utilizing this coating. Attention to these details minimizes the likelihood of common application errors and ensures a professional-looking result.
Tip 1: Surface Preparation is Paramount: Thoroughly clean and degrease the substrate. Remove any rust, scale, or loose paint with appropriate tools such as wire brushes or abrasive pads. A clean, sound surface is crucial for proper adhesion.
Tip 2: Primer Application is Recommended: Use a compatible primer, especially on bare metal. This enhances adhesion, prevents corrosion, and provides a uniform base color for the topcoat. Allow the primer to dry completely before applying the finish.
Tip 3: Environment Plays a Role: Apply the coating in a well-ventilated area with temperatures between 60F and 80F. Avoid applying in direct sunlight or high humidity, as these conditions can affect drying time and finish quality.
Tip 4: Apply Thin, Even Coats: Multiple thin coats are preferable to one thick coat. Hold the can approximately 10-12 inches from the surface and move it in a smooth, even motion. Avoid overlapping too much, which can lead to runs or sags.
Tip 5: Agitation is Essential: Shake the can vigorously for at least one minute before each application and periodically during use. This ensures that the pigments and additives are properly mixed, resulting in a consistent finish.
Tip 6: Drying Time Matters: Allow sufficient drying time between coats, as specified by the manufacturer. Rushing the drying process can lead to a soft or tacky finish that is prone to damage.
Tip 7: Nozzle Maintenance is Critical: After each use, invert the can and spray until only clear propellant is released. This prevents the nozzle from clogging and ensures that the product is ready for the next application.
Adherence to these guidelines will significantly improve the durability and aesthetic quality of the applied coating. Proper preparation, technique, and environmental control are key to achieving a professional result.
The subsequent section will examine specific project applications and troubleshooting techniques related to this type of coating.
1. Surface Preparation
Surface preparation is a foundational element for achieving a durable and aesthetically pleasing coating. Its meticulous execution dictates the success or failure of the final finish, particularly when utilizing this specialized textured coating. Neglecting this crucial stage invariably leads to compromised adhesion, premature failure, and an overall substandard appearance.
- Removal of Contaminants
The presence of grease, oil, rust, scale, and other contaminants on the substrate prevents proper bonding. These impurities create a barrier between the coating and the underlying surface, leading to peeling, blistering, and other defects. Thorough cleaning with appropriate solvents, detergents, or mechanical methods is essential to ensure a clean surface free of impediments.
- Creation of Surface Profile
A smooth, polished surface offers insufficient “tooth” for the coating to grip. Creating a surface profile, often through sanding, abrasive blasting, or chemical etching, introduces microscopic irregularities that increase the surface area available for adhesion. The appropriate profile depends on the substrate material and the specific coating being used.
- Addressing Pre-Existing Imperfections
Existing imperfections such as dents, scratches, or corrosion pits will be accentuated, not concealed, by the applied coating if left unaddressed. Filling these imperfections with appropriate fillers or body putty creates a uniform surface that allows the texture to be applied evenly, resulting in a professional and visually appealing outcome.
- Compatibility with Subsequent Coatings
The surface preparation process must consider the chemical and physical compatibility of the substrate with any primers or other coatings that will be applied. Incompatible cleaning agents or surface treatments can leave residues that interfere with adhesion or cause chemical reactions that compromise the integrity of the coating system.
The multifaceted nature of surface preparation underscores its pivotal role in achieving optimal results. Without rigorous attention to these details, the unique aesthetic and protective qualities inherent in this coating cannot be fully realized. Properly prepared surfaces enhance the durability, longevity, and overall appearance of the finished product.
2. Primer Compatibility
Primer compatibility is a critical factor influencing the success and longevity of a finish achieved with textured coatings. The primer serves as an intermediary layer between the substrate and the topcoat, promoting adhesion and providing a uniform base for the desired aesthetic effect. Incompatibility can lead to a range of problems, undermining the protective and decorative properties of the final finish.
- Adhesion Enhancement
A compatible primer chemically bonds to both the substrate and the topcoat. This interlocking action creates a robust adhesive layer that resists peeling, chipping, and cracking. For example, using an epoxy primer on metal substrates before applying the textured coating improves long-term adhesion compared to using a general-purpose primer. The selection of a primer formulated for the specific substrate material (e.g., metal, wood, plastic) is essential.
- Corrosion Resistance
Certain primers contain corrosion-inhibiting pigments that protect metal substrates from rust and oxidation. When using a textured coating on metal, a compatible corrosion-resistant primer is necessary to prevent the formation of rust beneath the coating. Red oxide and zinc-rich primers are commonly used for this purpose. Failure to use a corrosion-resistant primer can result in rust bleeding through the coating, compromising its appearance and structural integrity.
- Uniform Surface Preparation
Primers fill minor surface imperfections, such as scratches or pores, creating a smooth and uniform base for the textured topcoat. This ensures consistent texture and color across the entire surface. If the primer is incompatible, it may not level properly, resulting in an uneven surface that accentuates imperfections and detracts from the intended visual effect. Self-etching primers also promote adhesion and create a uniform surface profile.
- Chemical Compatibility
Chemical incompatibility between the primer and the textured coating can cause reactions that lead to blistering, wrinkling, or softening of the finish. It is imperative to choose a primer that is specifically recommended by the coating manufacturer. For instance, if a lacquer-based primer is used beneath an acrylic-based coating, the solvents in the topcoat may dissolve the primer, causing the finish to fail. Checking the technical data sheets of both products is crucial to ensure chemical compatibility.
In summary, primer compatibility is not merely a preparatory step but an integral component of a coating system designed to provide both aesthetic appeal and durable protection. The selection of a compatible primer that enhances adhesion, provides corrosion resistance, ensures uniform surface preparation, and avoids chemical reactions is essential for achieving a long-lasting and visually satisfactory finish. Ignoring this principle can lead to premature failure and necessitate costly rework.
3. Application Technique
The application technique employed directly dictates the resulting aesthetic and protective qualities of a hammered metal-effect coating. This textured finish, designed to mimic the appearance of hand-hammered metal, relies on precise application methods to achieve the desired visual outcome and ensure optimal performance. Deviations from recommended techniques invariably lead to undesirable results, such as an inconsistent texture, runs, sags, or compromised adhesion. For example, applying an insufficient amount of the coating will result in a sparse, uneven texture that fails to adequately conceal the underlying surface. Conversely, excessive application can cause the coating to run or sag, obliterating the intended textured effect and creating an unsightly finish.
The specific application technique, encompassing factors such as nozzle distance, spray pattern, and application speed, is critical for achieving the characteristic hammered effect. Maintaining a consistent distance between the nozzle and the substrate, typically within a range specified by the manufacturer, ensures uniform distribution of the coating. A consistent spray pattern, achieved through smooth and even motion, prevents the build-up of excess material in certain areas. Application speed must be carefully controlled to avoid both under-application, which results in a thin and incomplete finish, and over-application, which leads to runs, sags, and a loss of textural definition. Consider the case of refinishing a metal toolbox: if the operator sweeps the spray can too fast across the surface, they will fail to deposit enough material to allow the texturing agents within the coating to activate correctly, resulting in a flat, untextured appearance. However, if the operator lingers too long in one spot, the coating will pool and run, destroying the hammered effect.
In conclusion, achieving the desired hammered metal effect necessitates a meticulous and controlled application technique. Understanding the interplay between nozzle distance, spray pattern, application speed, and environmental conditions is paramount. Mastery of these elements is essential for realizing the aesthetic potential of the coating and ensuring its long-term durability and protective capabilities. Ignoring these considerations will invariably compromise the quality of the final finish and necessitate corrective measures.
4. Environmental Factors
Environmental factors exert a significant influence on the application and performance of coatings designed to impart a hammered metal-like finish. These conditions affect the viscosity, drying time, and overall quality of the resulting surface. Control and awareness of these factors are essential for achieving optimal results.
- Temperature
Temperature directly affects the viscosity and drying rate of the coating. Low temperatures increase viscosity, hindering proper atomization and flow, potentially leading to a rough or uneven finish. Conversely, high temperatures accelerate drying, which can prevent the coating from leveling properly, resulting in imperfections or reduced adhesion. An optimal temperature range, typically specified by the manufacturer, must be maintained for successful application. For instance, applying the coating in temperatures below 50F (10C) can cause the coating to thicken, leading to an orange-peel texture.
- Humidity
High humidity levels can impede the evaporation of solvents within the coating, prolonging drying time and potentially causing the finish to become cloudy or blister. The presence of moisture can also interfere with adhesion, particularly on metal substrates. Conversely, extremely low humidity may cause the coating to dry too quickly, preventing proper leveling and increasing the risk of cracking. Monitoring and controlling humidity levels, especially in enclosed spray environments, are necessary for consistent results. Consider that applying this coating on a humid day may trap moisture under the paint layer, leading to bubbling and premature failure.
- Ventilation
Adequate ventilation is crucial for removing solvent vapors released during application and drying. Insufficient ventilation can lead to the accumulation of these vapors, posing health hazards and increasing the risk of fire or explosion. Furthermore, poor ventilation can slow the drying process and affect the uniformity of the finish. Proper ventilation systems, including exhaust fans and air filters, are essential in enclosed spray booths. A well-ventilated area ensures that solvents evaporate effectively, promoting a smooth and durable coating.
- Airborne Contaminants
Airborne contaminants, such as dust, dirt, and overspray from other applications, can compromise the quality of the finish. These contaminants can settle on the wet coating, creating imperfections and affecting adhesion. Maintaining a clean and controlled environment, using air filters, and minimizing dust-generating activities are essential for preventing contamination. Proper surface preparation is negated if the wet coating is exposed to dust-laden air, resulting in a substandard appearance.
These environmental considerations underscore the importance of careful planning and execution when applying this type of coating. Consistent adherence to recommended temperature, humidity, ventilation, and cleanliness protocols ensures a durable, aesthetically pleasing, and long-lasting finish. Failure to account for these factors can lead to costly rework and unsatisfactory results.
5. Drying Time
The drying time associated with a hammered metal-effect coating is a critical parameter that influences the final finish’s durability, appearance, and performance characteristics. This specialized coating relies on a precise sequence of chemical and physical processes during the drying phase to achieve its characteristic textured surface. Premature or delayed drying can disrupt these processes, leading to imperfections and compromised properties. Factors such as ambient temperature, humidity, coating thickness, and solvent composition significantly impact drying time. For instance, applying a thick coat of the coating in a high-humidity environment will substantially extend the drying time, potentially resulting in sags, runs, and a loss of textural definition. An insufficient drying period before handling the coated object can lead to surface damage and incomplete hardening, reducing its resistance to scratches, impacts, and chemical exposure.
The practical significance of understanding drying time lies in its direct relationship to the coating’s protective qualities and aesthetic appeal. Properly dried coatings exhibit enhanced adhesion, ensuring that the finish remains firmly bonded to the substrate, preventing peeling and chipping. Moreover, adequate drying allows the texturing agents within the coating to fully activate, resulting in the desired hammered metal effect. Consider the application of this coating to a piece of machinery: if the machinery is put into service before the coating has fully dried, the uncured coating will be susceptible to damage from abrasion, impact, and chemical exposure, significantly reducing its service life and necessitating costly repairs. Conversely, allowing the coating to dry for the manufacturer-recommended time, often 24-48 hours, will ensure optimal hardness, adhesion, and resistance to environmental factors.
In summary, precise control over drying time is essential for realizing the full potential of a hammered metal-effect coating. Careful consideration of environmental conditions, application thickness, and the manufacturer’s specifications is crucial for achieving a durable, aesthetically pleasing, and long-lasting finish. Ignoring these considerations can lead to premature failure, reduced performance, and a compromised appearance, ultimately diminishing the value and utility of the coated object.
6. Nozzle Maintenance
Nozzle maintenance is a critical, and often overlooked, component in achieving a consistent and professional application of coatings exhibiting a hammered metal texture. The design of spray nozzles, particularly those dispensing textured coatings, is engineered for a specific flow rate and spray pattern. Obstructions within the nozzle, caused by dried paint or accumulated residue, disrupt this engineered flow, resulting in an uneven distribution of the coating. For example, a partially clogged nozzle may produce splattering or an inconsistent spray pattern, leading to variations in the hammered texture and an overall unprofessional appearance. This effect is magnified in coatings formulated to produce a specific surface texture, where consistent atomization is crucial for realizing the intended aesthetic.
Effective nozzle maintenance involves several key steps: immediate cleaning after each use is paramount. Inverting the can and spraying until only propellant is released clears the internal passages of residual paint. If clogging persists, the nozzle can be carefully removed and soaked in an appropriate solvent, such as mineral spirits or acetone, to dissolve accumulated residue. Mechanical cleaning with a fine wire or needle may be necessary for stubborn obstructions, but caution must be exercised to avoid damaging the nozzle orifice. The practical significance of this routine is evident in the reduction of wasted material, improved spray consistency, and extended lifespan of the spray can. Furthermore, proper nozzle maintenance minimizes the likelihood of encountering application problems mid-project, saving time and resources. For example, a professional refinisher who routinely cleans their nozzles can complete a cabinet refinishing project with a uniform hammered finish, while a neglectful counterpart may encounter inconsistent texture and require extensive rework.
In conclusion, the relationship between nozzle maintenance and the successful application of a hammered finish coating is direct and consequential. Neglecting this routine leads to compromised spray patterns, inconsistent texture, and a reduction in the overall quality of the finish. A consistent maintenance regimen ensures optimal performance of the spray nozzle, resulting in a more uniform and professional appearance, and extending the usable life of the coating. Overlooking nozzle maintenance introduces significant challenges in achieving the desired aesthetic and protective properties of the coating.
Frequently Asked Questions Regarding Hammer Finish Spray Paint
The following section addresses common inquiries concerning the application, characteristics, and usage of textured coatings designed to replicate a hammered metal appearance. These questions provide concise information to aid in achieving optimal results.
Question 1: What surface preparation is required prior to applying a hammer finish spray paint?
Prior to application, the surface must be clean, dry, and free of loose rust, scale, grease, or any other contaminants that could impede adhesion. Sanding or abrasive blasting may be necessary to create a suitable surface profile.
Question 2: Is a primer necessary before applying hammer finish spray paint?
The use of a primer is highly recommended, particularly on bare metal surfaces. The primer promotes adhesion, provides corrosion protection, and creates a uniform base for the textured coating.
Question 3: How many coats of hammer finish spray paint are typically required?
Two to three thin coats are generally recommended. Multiple thin coats allow for better texture development and prevent runs or sags, which can compromise the finish.
Question 4: What is the ideal drying time for hammer finish spray paint?
Drying time varies depending on environmental conditions and coating thickness. Refer to the manufacturer’s specifications for recommended drying times between coats and for complete curing.
Question 5: How should the nozzle be maintained to prevent clogging of hammer finish spray paint?
After each use, invert the can and spray until only clear propellant is released. This clears the nozzle of residual paint. If clogging occurs, remove the nozzle and soak it in an appropriate solvent.
Question 6: What safety precautions should be taken when using hammer finish spray paint?
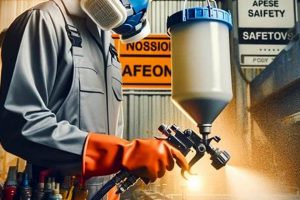
Application should occur in a well-ventilated area. Wear appropriate personal protective equipment, including a respirator, gloves, and eye protection, to minimize exposure to solvents and aerosols.
These answers provide a foundation for understanding and properly utilizing this specialized coating. Adherence to these guidelines will contribute to a satisfactory and durable finish.
The following section will cover troubleshooting techniques.
Conclusion
This exploration of hammer finish spray paint has detailed its unique properties, application techniques, and essential maintenance procedures. From the critical role of surface preparation and primer compatibility to the influence of environmental factors and the importance of nozzle maintenance, the information presented underscores the meticulous approach required to achieve a professional and durable finish. Proper application enhances both the aesthetic appeal and the protective qualities of coated surfaces.
Achieving optimal results with hammer finish spray paint demands diligent adherence to best practices. Mastery of these techniques ensures not only a visually appealing outcome but also contributes to the longevity and functionality of the treated item. Continued attention to detail and adherence to manufacturer guidelines will ensure consistent and satisfactory results across a range of applications.


