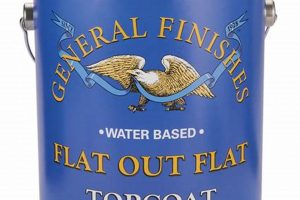
A pigmented coating, formulated as a thick, non-drip product, imparts a consistent grey hue to wood and other surfaces. This coating, often oil-based, allows users to achieve a stained appearance without the runs or drips commonly associated with thinner liquid stains. Consider its application to a set of raw wood drawers to achieve a modern, matte finish.
The product’s viscosity offers advantages over traditional staining methods. It provides greater control during application, minimizing waste and ensuring even color saturation, especially on vertical surfaces or intricate details. Historically, achieving consistent color on manufactured wood products or surfaces with varying grain patterns has presented challenges; this type of coating addresses those challenges directly, offering a reliable and aesthetically pleasing solution.
The following discussion will explore the specific properties, application techniques, and suitability of this particular coating for a range of projects, as well as detailing appropriate surface preparation and cleanup procedures.
Application Tips for Optimal Results
Achieving a professional finish necessitates careful technique and attention to detail. The following guidelines outline best practices for maximizing the aesthetic and protective qualities of the coating.
Tip 1: Surface Preparation is Paramount: Ensure the substrate is thoroughly cleaned and free from contaminants, such as grease, wax, or dust. A light sanding with fine-grit sandpaper (220-grit or higher) will improve adhesion and create a smoother surface for coating.
Tip 2: Application Method Matters: Employ a high-quality brush, foam applicator, or lint-free cloth for even distribution. Work in manageable sections and avoid over-application, which can lead to uneven drying or a tacky finish.
Tip 3: Multiple Thin Coats are Superior: Applying several thin coats, rather than one thick coat, yields a more uniform color and allows for better curing. Allow each coat to dry completely according to the manufacturer’s specifications before applying the next.
Tip 4: Proper Stirring is Crucial: Prior to application, thoroughly stir the coating to ensure the pigments are evenly dispersed. Avoid shaking, as this can introduce air bubbles that may affect the final finish.
Tip 5: Evaluate Temperature and Humidity: Optimal application conditions involve moderate temperatures and low humidity. Extreme temperatures or high humidity can impact drying time and the overall quality of the finish. Consult the product’s technical data sheet for recommended environmental parameters.
Tip 6: Test in an Inconspicuous Area: Before committing to a large project, test the coating on a small, hidden area to ensure the desired color and adhesion are achieved. This step can prevent costly mistakes and ensure satisfaction with the final product.
Tip 7: Proper Disposal is Essential: Adhere to local regulations for the disposal of oil-based coatings. Allow rags and applicators used with the coating to dry completely outdoors before discarding to prevent spontaneous combustion.
Adhering to these guidelines will contribute significantly to a durable and aesthetically pleasing outcome. Consistent application and meticulous preparation are key to realizing the full potential of the coating.
With the foundational principles established, the subsequent sections will address troubleshooting common issues and exploring advanced finishing techniques.
1. Color Consistency
Color consistency, a critical attribute of any staining product, directly impacts the aesthetic outcome of a project. With general finishes grey gel stain, this characteristic manifests as the degree to which the applied color remains uniform across varying wood grains, densities, and application thicknesses. Inconsistent color can lead to a blotchy or uneven appearance, particularly noticeable on large surfaces or when multiple pieces are assembled. Factors contributing to color inconsistency can include inadequate mixing of the stain prior to application, variations in the substrate’s porosity, or uneven application techniques. For example, if a cabinet door receives a thicker application of the product compared to its adjacent frame, the door may exhibit a darker shade of grey, undermining the desired uniformity.
The gel formulation aims to mitigate color inconsistencies often associated with liquid stains. Its viscosity helps to control penetration, reducing the likelihood of excessive absorption in porous areas. However, proper surface preparation remains essential. Sanding to a consistent grit level and applying a pre-stain wood conditioner can further minimize variations in absorption. Moreover, thorough stirring of the stain is vital to ensure pigments are evenly distributed throughout the medium. Practical application involves testing the product on a small, inconspicuous area to assess color accuracy and consistency before proceeding with the entire project. This allows for adjustments in application technique or substrate preparation to achieve the desired uniformity.
Achieving optimal color consistency with this stain requires a systematic approach encompassing meticulous surface preparation, diligent mixing of the product, controlled application techniques, and pre-project testing. While the gel formulation offers advantages in minimizing inconsistencies compared to traditional stains, these inherent characteristics are not a substitute for careful workmanship. The resulting uniform grey tone significantly contributes to the overall professional appearance and value of the finished product. Challenges may arise when working with highly varied wood types, necessitating specialized techniques and additional preparatory steps. This highlights the importance of understanding the product’s limitations and adapting the approach accordingly.
2. Application Viscosity
Application viscosity, concerning general finishes grey gel stain, is a pivotal physical property dictating its handling characteristics and ultimate finish quality. The stain’s semi-solid or gel-like consistency significantly differentiates it from traditional liquid stains and directly influences application methods and achievable results. This factor is crucial in understanding how the coating interacts with the substrate and how to manipulate it for optimal performance.
- Drip Resistance on Vertical Surfaces
The increased viscosity of the gel stain formulation inherently resists drips and runs, particularly on vertical surfaces. This property is beneficial when staining furniture legs, cabinet doors, or other upright components. A liquid stain, by comparison, would require more careful application and may still result in unwanted drips, necessitating additional cleanup and potentially leading to uneven color distribution. The gel’s controlled flow minimizes waste and contributes to a cleaner, more professional application process.
- Controlled Penetration into Wood Grain
The higher viscosity restricts the stain’s immediate penetration into porous wood grains. This controlled absorption allows for more even color distribution across surfaces with varying densities. Unlike liquid stains that can quickly saturate soft grain areas, leading to blotchiness, the stain offers a degree of forgiveness, allowing the applicator to manipulate the product and achieve a more uniform tone. This is particularly advantageous when working with woods known for uneven stain absorption, such as pine or maple.
- Extended Open Time for Blending
The slow-drying nature associated with its viscosity provides an extended “open time,” allowing the applicator more opportunity to blend the stain and correct any application inconsistencies. This is particularly useful when working on large surfaces or attempting to achieve a seamless transition between stained areas. The longer working time minimizes the appearance of lap marks and brush strokes, leading to a smoother, more consistent finish.
- Suitability for Intricate Detailing
The viscous nature facilitates application in intricate details and carvings. The stain remains where applied, minimizing the risk of running into adjacent areas. This is especially valuable when working on ornate moldings, carved furniture, or other projects with complex surface features. Liquid stains tend to pool in crevices, obscuring detail; its viscosity allows for precise color placement and enhances the definition of the design.
In conclusion, the application viscosity of this product is a defining characteristic that contributes significantly to its usability and effectiveness. The drip resistance, controlled penetration, extended open time, and suitability for intricate detailing collectively enhance the user’s ability to achieve a professional-quality finish. These advantages, stemming directly from the product’s physical properties, underscore the importance of selecting a stain formulation that aligns with the specific requirements of the project.
3. Penetration Depth
Penetration depth, in the context of wood finishing, refers to the extent to which a stain permeates the substrate. This attribute significantly influences color saturation, longevity, and the overall aesthetic of the finished piece. The penetration depth of general finishes grey gel stain is inherently limited by its gel-like consistency compared to traditional liquid stains.
- Influence of Viscosity on Penetration
The stain’s high viscosity acts as a barrier to deep penetration. This characteristic is both a limitation and a benefit. Reduced penetration minimizes blotching on porous woods, as the pigment primarily resides on the surface rather than sinking unevenly into the grain. However, it also means that the color is less embedded within the wood fibers, potentially affecting its long-term durability and resistance to wear. A lighter sanding may be required to promote adhesion.
- Impact on Color Saturation
Limited penetration depth directly affects the saturation of the grey hue. The pigment primarily coats the surface, resulting in a color that may appear less rich or deep compared to stains that deeply penetrate the wood. To achieve a desired level of grey saturation, multiple coats of the gel stain may be necessary. This layering effect builds up the color intensity on the surface, compensating for the lack of deep penetration. The user must be aware of the thickness of each coat.
- Considerations for Wood Type
The wood species significantly influences how the stain interacts with the surface. On hardwoods with tight grains, such as maple or birch, the limited penetration is less noticeable, as these woods are naturally less absorbent. However, on softwoods like pine, the shallow penetration may emphasize the grain pattern, leading to a more rustic or uneven appearance. Surface preparation, including the use of wood conditioners, becomes even more critical to manage the absorption rate and promote a more uniform color application. The quality of the wood affects penetration depth.
- Long-Term Durability Concerns
Since the pigment primarily resides on the surface, the finish’s long-term durability depends heavily on the integrity of the topcoat. A robust topcoat is essential to protect the stain from abrasion, moisture, and UV exposure. Without adequate protection, the color can fade or wear away over time, revealing the underlying wood. Therefore, selecting a high-quality topcoat compatible with gel stains is crucial for ensuring the longevity and appearance of the finished product. Protecting the wood from sun exposure is crucial for long term durability.
In summary, the limited penetration depth of this substance is a defining characteristic that necessitates careful consideration during the finishing process. While it minimizes blotching and offers greater control over color application, it also requires strategic layering and a robust topcoat to achieve desired color saturation and long-term durability. The choice of wood species and thorough surface preparation are equally important factors in maximizing the potential of general finishes grey gel stain and ensuring a professional-quality result.
4. Cure Time
Cure time, the period required for a coating to achieve its full hardness and durability, is a critical consideration when working with general finishes grey gel stain. Proper curing is essential for the finish to withstand wear and tear, resist solvents, and maintain its aesthetic appeal. Inadequate curing can lead to a soft, tacky surface susceptible to damage and premature failure.
- Environmental Factors and Their Influence
Temperature and humidity significantly affect the cure time of this substance. Lower temperatures and higher humidity levels can substantially extend the curing period, whereas warmer, drier conditions accelerate it. For instance, a project stained in a humid basement during winter may require several days longer to fully cure than the same project finished in a climate-controlled workshop during summer. Failing to account for these variables can result in a finish that remains soft and vulnerable for an extended period.
- Impact of Film Thickness on Curing
The thickness of the applied coat directly correlates with its cure time. Thicker coats require a longer duration to fully cure, as the solvents within the stain need more time to evaporate. Applying excessively thick coats in an attempt to expedite the finishing process is counterproductive, often resulting in a surface that remains tacky for an extended period and is prone to cracking or wrinkling. Adhering to the manufacturer’s recommended application thickness is crucial for optimal curing.
- Influence of Topcoat Application Timing
The timing of the topcoat application is contingent upon the stain’s cure time. Applying a topcoat before the stain is fully cured can trap solvents, impeding the curing process and compromising the adhesion of the topcoat. Premature topcoating can lead to a soft, easily damaged finish that requires rework. Allowing the stain to fully cure according to the manufacturer’s specifications before applying any subsequent coatings is paramount for a durable and long-lasting finish.
- Assessing Cure Completion: Practical Methods
Visually inspecting the surface and performing a fingernail test can provide an indication of cure completion. A fully cured finish should appear hard and smooth, without any tackiness or softness. Gently pressing a fingernail into the surface should not leave an indentation. If the surface remains soft or tacky, or if the fingernail leaves a mark, the finish requires additional curing time. These practical assessments help determine when the project is ready for handling, assembly, or the application of a topcoat.
Understanding and managing cure time is an integral aspect of achieving a successful finish. Failure to allow for complete curing can negate the benefits of careful surface preparation and precise application techniques. By accounting for environmental factors, film thickness, topcoat timing, and employing practical assessment methods, one can ensure the stain achieves its full hardness and durability, resulting in a long-lasting and aesthetically pleasing result.
5. Durability
Durability, in relation to general finishes grey gel stain, represents the resistance of the finished surface to wear, abrasion, chemical exposure, and environmental degradation over time. This attribute is not solely inherent to the stain itself, but rather a composite outcome influenced by factors including surface preparation, application technique, the choice of topcoat, and the intended use of the finished item. The stain’s role is primarily to impart color, while its longevity depends heavily on the protective barrier provided by subsequent coatings. For instance, a stained tabletop subjected to daily use without a robust topcoat will exhibit wear patterns more rapidly than a decorative item receiving minimal handling.
The relatively limited penetration depth of the gel stain necessitates careful selection and application of a durable topcoat. Polyurethane, varnish, or specialized water-based topcoats are often employed to provide a protective layer against scratches, spills, and UV radiation. The effectiveness of this protection is directly proportional to the quality of the topcoat and the number of coats applied. Consider a scenario involving kitchen cabinets finished with the stain and a low-grade varnish; exposure to frequent cleaning and moisture can lead to premature failure of the finish, manifesting as chipping, peeling, or discoloration. Conversely, using a high-performance polyurethane significantly extends the lifespan of the finish under similar conditions.
In summary, while general finishes grey gel stain contributes to the aesthetic appeal of a project, its durability is largely contingent upon external factors, most notably the quality and application of a suitable topcoat. Understanding this interdependence is crucial for achieving a long-lasting and visually pleasing finish. Challenges may arise in environments with extreme temperature fluctuations or high levels of abrasion, requiring specialized topcoats or modified application techniques. Therefore, prioritizing a comprehensive approach to finishing, rather than solely focusing on the stain itself, is essential for maximizing the longevity and resilience of the finished surface.
Frequently Asked Questions Regarding General Finishes Grey Gel Stain
This section addresses common inquiries and concerns surrounding the application, performance, and maintenance of this particular product.
Question 1: What surface preparation is required prior to applying general finishes grey gel stain?
The substrate must be clean, dry, and free from any existing finishes, waxes, or contaminants. Sanding with progressively finer grits is recommended to achieve a smooth, uniform surface that will promote optimal adhesion. A final sanding with 220-grit sandpaper is generally sufficient. The presence of residue or imperfections can compromise the finish’s integrity and aesthetic appearance.
Question 2: Can general finishes grey gel stain be applied over an existing finish?
Application over an existing finish is generally not recommended unless the existing finish is thoroughly sanded to create a sound, porous surface for adhesion. Failure to properly prepare the existing finish can result in poor adhesion, peeling, or an uneven color distribution. Complete removal of the prior finish is the preferred approach for optimal results.
Question 3: How many coats of general finishes grey gel stain are typically required?
The number of coats needed to achieve the desired color saturation and uniformity can vary depending on the wood species, the application technique, and personal preference. Two to three thin coats are generally sufficient. Applying excessively thick coats can prolong the drying time and potentially lead to an uneven finish. Testing on a small, inconspicuous area is advisable to determine the appropriate number of coats.
Question 4: What is the recommended drying time between coats of general finishes grey gel stain?
The recommended drying time between coats typically ranges from 24 to 48 hours, depending on environmental conditions such as temperature and humidity. Allow the surface to be dry to the touch before applying the next coat. Premature application of subsequent coats can trap solvents and compromise the curing process.
Question 5: What type of topcoat is compatible with general finishes grey gel stain?
A clear topcoat formulated for oil-based finishes is generally compatible. Polyurethane and varnish are common choices. It is essential to ensure the topcoat is fully compatible with the gel stain to prevent adhesion problems or discoloration. Consulting the manufacturer’s recommendations for compatible topcoats is advised.
Question 6: How should general finishes grey gel stain be cleaned up after application?
Mineral spirits or paint thinner is recommended for cleaning brushes, applicators, and spills. Dispose of used rags and applicators properly in accordance with local regulations to prevent spontaneous combustion. Proper ventilation is essential during cleanup due to the flammable nature of the solvents.
These responses provide a foundation for understanding and addressing common challenges associated with the product. Proper application techniques and adherence to manufacturer guidelines are paramount for achieving a durable and aesthetically pleasing finish.
The following section will detail case studies demonstrating successful applications of this stain in various projects.
Conclusion
This exploration has provided a comprehensive overview of general finishes grey gel stain, emphasizing its properties, application nuances, and considerations for achieving optimal results. The importance of surface preparation, understanding viscosity, managing penetration depth, accounting for cure time, and ensuring long-term durability were highlighted. Successful utilization of the product hinges on informed decision-making and meticulous execution.
The information presented should serve as a valuable resource for professionals and hobbyists alike seeking to leverage the unique characteristics of this coating. Continued adherence to best practices and a commitment to ongoing learning will undoubtedly contribute to the creation of enduring and aesthetically pleasing finished projects.


![Buy General Finishes Walnut Stain Online - [Year] Guide Best Final Touch: Elevate Your Projects with Professional Finishing Buy General Finishes Walnut Stain Online - [Year] Guide | Best Final Touch: Elevate Your Projects with Professional Finishing](https://bestfinaltouch.com/wp-content/uploads/2025/10/th-824-300x200.jpg)
