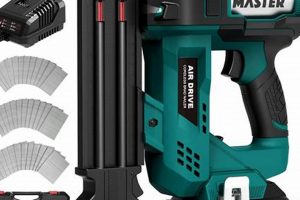
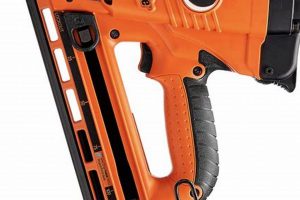
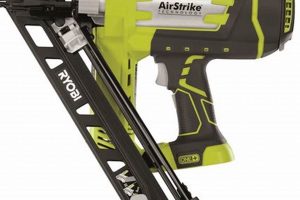
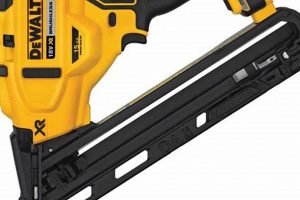
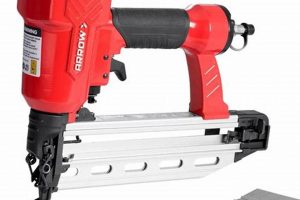
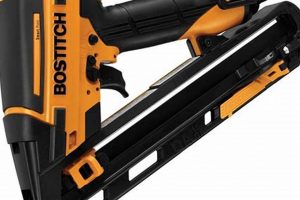
This tool represents a modern iteration of fastening technology, utilizing compressed air or an electric motor powered by a rechargeable battery to drive finishing nails into wood. These nails, characterized by their small head, are primarily used for securing trim, molding, and other fine woodworking elements where a minimal visual impact is desired. An example application is attaching decorative crown molding to a wall without leaving prominent nail marks.
The emergence of cordless models has significantly enhanced job site mobility and convenience, eliminating the need for air compressors or power cords. This advancement contributes to increased efficiency and reduced setup time, particularly beneficial in situations where access to power is limited or where portability is paramount. Historically, pneumatic versions were the standard, requiring hoses and compressors, which introduced limitations in maneuverability.
The subsequent sections will delve into the specific advantages of cordless operation, explore different battery technologies used, compare the performance characteristics of various models, and offer guidance on selecting the appropriate tool for diverse finishing applications.
Operating and Maintaining Cordless Finishing Nailers
The following recommendations promote the effective and safe utilization, as well as the longevity, of cordless finishing nailers.
Tip 1: Battery Care is Paramount: Adhere strictly to the manufacturer’s guidelines regarding battery charging and storage. Avoid overcharging or completely depleting batteries, as both practices can significantly reduce their lifespan. Store batteries in a cool, dry environment when not in use.
Tip 2: Select the Appropriate Nail Size: Using nails that are too long can result in pass-through, while nails that are too short may lack sufficient holding power. Consult the material specifications and project requirements to determine the optimal nail length.
Tip 3: Adjust Depth Settings Appropriately: Experiment with depth settings on scrap material before commencing work on the final piece. This ensures that nails are driven to the correct depth without damaging the surface or leaving nail heads exposed.
Tip 4: Wear Appropriate Safety Gear: Eye protection is mandatory to shield against flying debris. Ear protection is advisable, particularly during prolonged use, to mitigate noise exposure. Consider gloves for improved grip and hand protection.
Tip 5: Regular Cleaning and Maintenance: Periodically clean the nailer’s nosepiece and magazine to remove debris that could cause jams. Lubricate moving parts, as recommended by the manufacturer, to ensure smooth operation and prevent premature wear.
Tip 6: Understand the Sequential and Contact Actuation Modes: Familiarize with the differences between sequential (single shot) and contact (bump fire) actuation modes. Sequential mode provides increased precision, while contact mode offers faster nail placement for certain applications. Use the appropriate mode for the specific task.
Tip 7: Inspect the Workpiece for Obstructions: Before firing, carefully examine the area to ensure no hidden wires, pipes, or other obstructions exist beneath the surface. Failure to do so could result in serious injury or damage.
Consistent adherence to these guidelines will maximize the performance and lifespan of the cordless finishing nailer, while minimizing the risk of accidents and ensuring high-quality results.
The concluding section will offer a comprehensive summary and final thoughts on the benefits and applications of cordless finishing nailers.
1. Cordless
The term “cordless,” when applied to finishing nail guns, signifies a fundamental shift away from traditional pneumatic or corded electric models. This independence from external power sources defines a new paradigm of portability and operational flexibility for woodworking and construction applications.
- Enhanced Mobility and Accessibility
Cordless operation eliminates the constraint of air hoses or power cords, permitting unhindered movement across job sites. This is particularly advantageous in locations lacking readily available power outlets or where maneuvering around obstacles is necessary. The freedom extends to outdoor applications and remote areas where traditional power sources are inaccessible. Example: Installing trim in an attic without needing to run extension cords.
- Reduced Setup Time and Increased Efficiency
The absence of hoses and compressors significantly reduces setup and takedown time. Workers can commence projects more quickly, translating to increased overall productivity. The streamlined workflow also minimizes the risk of tripping hazards associated with cords and hoses. Example: Completing small punch-list items on a construction site without the delay of compressor setup.
- Battery Technology and Performance Considerations
The functionality of a cordless finishing nail gun is intrinsically linked to battery technology. Lithium-ion batteries are prevalent, offering a favorable power-to-weight ratio and extended runtime. Battery voltage and amp-hour rating directly influence the tool’s driving power and the number of nails that can be fired on a single charge. Example: A higher voltage battery allows for driving longer finishing nails into hardwoods without stalling.
- Ergonomics and Maneuverability
Cordless models often exhibit a more balanced weight distribution compared to their pneumatic counterparts, contributing to improved ergonomics. The absence of a dragging hose enhances maneuverability, particularly in confined spaces. This reduces user fatigue and improves precision during extended periods of use. Example: Installing intricate molding details in tight corners with greater control.
The cordless attribute is not merely a convenience; it fundamentally alters the way finishing tasks are approached. This innovation empowers professionals and DIY enthusiasts with greater autonomy, efficiency, and control, ultimately leading to enhanced project outcomes across a wide range of applications.
2. Battery Voltage
Battery voltage represents a critical performance determinant in battery-powered finishing nail guns. It directly influences the power output and, consequently, the tool’s capacity to consistently and effectively drive nails into various materials.
- Driving Power and Nail Penetration
Higher voltage batteries generally correlate with increased driving power. This translates to the ability to drive nails more reliably into denser materials, such as hardwoods, without stalling or requiring multiple attempts. A sufficient voltage ensures the nailer can overcome resistance encountered during the fastening process. Example: A 20V nailer is more likely to consistently sink nails into oak trim compared to a 12V model.
- Consistency of Performance
Maintaining a stable voltage output is crucial for consistent nail driving depth. Voltage sag under load can result in inconsistent nail placement, where some nails are set too deep while others remain proud of the surface. A battery with a stable voltage curve ensures uniform results across numerous fastening operations. Example: Avoiding inconsistent nail depths when installing baseboards along a long wall.
- Runtime and Nail Capacity
While not solely determined by voltage, a higher voltage system often complements a higher amp-hour (Ah) rating, resulting in extended runtime. This allows for driving more nails per battery charge, reducing the frequency of battery swaps and improving overall workflow efficiency. Example: Completing an entire trim installation project on a single battery charge with a higher voltage and Ah-rated battery.
- Compatibility and System Integration
Battery voltage dictates compatibility within a particular tool ecosystem. A specific voltage typically aligns with a dedicated battery platform, meaning batteries are only interchangeable within that brand’s product line. This influences purchasing decisions and the overall cost of ownership. Example: Investing in a 20V system means batteries and chargers are compatible across other 20V tools from the same manufacturer.
Understanding the relationship between battery voltage and these factors is essential for selecting a battery-powered finishing nail gun that meets the specific demands of the intended application. Considerations should include the types of materials to be fastened, the volume of work to be performed, and the compatibility of the battery system with existing tools.
3. Nail Gauge
Nail gauge, a standardized measurement indicating nail thickness, is fundamentally linked to the functionality of a battery-powered finishing nail gun. The nailer’s magazine and firing mechanism are designed to accommodate a specific range of nail gauges, directly impacting its compatibility with various finishing applications. A mismatch between the nail gauge and the nailer’s specifications can lead to jams, misfires, or damage to the tool. For example, a nailer designed for 16-gauge nails will not function correctly with 18-gauge nails, which are thinner and may not be properly fed into the firing chamber.
The selection of an appropriate nail gauge is crucial for achieving the desired aesthetic and structural integrity of the finished product. Thicker nails (lower gauge numbers) provide greater holding power but leave a more visible hole. Thinner nails (higher gauge numbers) minimize the visual impact but may compromise the strength of the joint. A common application involves using 16-gauge nails for securing heavier trim pieces, such as door casings, while 18-gauge nails are often preferred for attaching delicate moldings where concealment is paramount. The battery-powered aspect of the tool enables the user to efficiently switch between different nail gauges (requiring different nail types and potentially depth adjustments), providing versatility in diverse project settings.
In conclusion, nail gauge is an indispensable consideration when operating a battery-powered finishing nail gun. Selecting the correct gauge ensures both the proper functioning of the tool and the attainment of desired finishing results. Understanding this relationship allows for optimized performance, minimizing potential complications and maximizing the versatility of the nailer across a wide spectrum of woodworking and construction tasks. Challenges may arise in selecting the appropriate gauge for unfamiliar materials; therefore, testing on scrap pieces is always advisable.
4. Firing Modes
Firing modes on a battery-powered finishing nail gun dictate the sequence in which nails are driven, directly influencing speed, precision, and safety. The selection of an appropriate firing mode is paramount for optimizing performance and minimizing the risk of accidents.
- Sequential Actuation (Single Sequential)
Sequential actuation requires the user to depress the safety contact tip against the workpiece and then pull the trigger for each nail. This mode prioritizes precision and reduces the likelihood of unintentional nail discharge. It is particularly suitable for intricate work, detailed trim, or situations where precise nail placement is critical. For example, installing delicate crown molding often benefits from the controlled firing sequence of sequential mode to prevent misfires and workpiece damage.
- Contact Actuation (Bump Fire)
Contact actuation, also known as bump fire, allows for rapid nail placement. The trigger is held down, and nails are fired each time the safety contact tip is depressed against the workpiece. This mode is ideal for high-volume applications, such as framing or subflooring, where speed is prioritized over absolute precision. However, it requires a higher level of operator control and awareness to prevent accidental nail discharge. An example is quickly securing sheathing to wall studs during construction.
- Firing Mode Selection and User Safety
The choice between sequential and contact actuation should be based on a thorough assessment of the task requirements and potential hazards. Inexperienced users should prioritize sequential mode to develop proper technique and minimize the risk of injury. Some battery-powered finishing nail guns feature mode selection switches that allow users to easily toggle between firing modes. This versatility enhances the tool’s adaptability to diverse applications.
- Battery Power Considerations
While firing mode primarily influences speed and precision, it can also indirectly impact battery life. Contact actuation, due to its higher firing rate, may draw more power from the battery compared to sequential actuation. Users should be mindful of this when planning extended work sessions and consider using higher-capacity batteries or having spares available. In conditions where precise nail placement is crucial, the slower sequential mode can also prolong battery life due to the reduced overall firing rate.
The available firing modes on a battery-powered finishing nail gun offer a trade-off between speed and precision. Understanding the nuances of each mode and selecting the appropriate one for the task at hand is crucial for maximizing efficiency, ensuring user safety, and achieving high-quality results across a range of finishing applications.
5. Depth Adjustment
Depth adjustment is a critical feature on a battery-powered finishing nail gun, facilitating precise control over the nail’s penetration depth into the workpiece. This control is essential for achieving flush finishes and preventing damage to the surrounding material, thereby ensuring both aesthetic appeal and structural integrity.
- Achieving Flush Finishes
Depth adjustment allows the user to fine-tune the driving force, ensuring that the nail head sits perfectly flush with the surface. This eliminates the need for manual setting with a nail set, saving time and reducing the risk of marring the material. For example, when installing fine trim on cabinets, precise depth adjustment is crucial to avoid unsightly nail protrusions or depressions.
- Preventing Material Damage
Overdriving nails can damage delicate materials or cause splitting, while underdriving can leave nail heads exposed. Depth adjustment mitigates these risks by allowing the user to match the driving force to the density and thickness of the material. Consider securing thin wainscoting; proper depth adjustment prevents the nail gun from driving nails too deeply and damaging the panel.
- Types of Depth Adjustment Mechanisms
Battery-powered finishing nail guns employ various depth adjustment mechanisms, including thumbwheel dials and tool-free adjusters. Thumbwheel dials offer incremental adjustments, providing a high degree of precision. Tool-free adjusters allow for quick and easy depth changes without the need for additional tools, increasing efficiency on the job site. Example: A carpenter switches from installing baseboards to shoe molding and quickly adjusts the nail depth without needing a tool.
- Material Compatibility and Versatility
Depth adjustment enhances the versatility of a battery-powered finishing nail gun, enabling its use with a wider range of materials and nail sizes. This flexibility reduces the need for multiple tools, streamlining the workflow. For instance, the same nail gun can be used for both softwoods and hardwoods by simply adjusting the depth setting to compensate for the difference in density.
The integration of depth adjustment into battery-powered finishing nail guns empowers users to achieve consistent and professional results across a variety of finishing applications. The ability to precisely control nail penetration enhances the quality of workmanship and reduces the likelihood of costly errors, ultimately contributing to increased efficiency and customer satisfaction.
6. Ergonomics
Ergonomics is a crucial design consideration in battery-powered finishing nail guns, directly influencing user comfort, safety, and productivity. The inherent weight of the tool, combined with the repetitive nature of fastening tasks, necessitates careful attention to ergonomic factors to mitigate the risk of musculoskeletal disorders and enhance overall user experience. An imbalance in weight distribution, for example, can lead to premature fatigue in the wrist and forearm, negatively impacting precision and potentially causing long-term injury. The design of the handle, its grip texture, and the placement of controls all contribute to the ergonomic profile of the tool. A handle that is too large or too small can cause discomfort and reduce control, while poorly positioned controls may require awkward hand movements, increasing strain. Real-world examples include carpenters who experience carpal tunnel syndrome due to prolonged use of poorly designed nail guns and construction workers who suffer from shoulder pain as a result of repeatedly lifting and maneuvering heavy, unbalanced tools.
The integration of ergonomic principles extends beyond basic handle design. Vibration dampening technology reduces the transmission of vibrations to the user’s hand and arm, minimizing fatigue and the risk of vibration-induced white finger. The angle of the magazine and the orientation of the nail exit point influence the user’s posture and reduce the need for excessive bending or twisting. The availability of adjustable belt hooks and rafter hooks allows users to conveniently carry the tool, reducing strain during periods of inactivity. A well-designed battery-powered finishing nail gun should facilitate a natural and comfortable working posture, minimizing the physical demands of the task and maximizing efficiency. For example, a lightweight nail gun with a comfortable grip and a well-balanced design can significantly reduce fatigue and improve accuracy during extended trim installation projects.
In summary, ergonomics is not merely an added feature but an integral component of a high-quality battery-powered finishing nail gun. A focus on ergonomic design translates to increased user comfort, reduced risk of injury, and improved productivity. Challenges remain in balancing ergonomic considerations with other design constraints, such as power, runtime, and cost. However, manufacturers who prioritize ergonomics demonstrate a commitment to user well-being and create tools that are both effective and comfortable to use. This commitment benefits both the individual user and the construction industry as a whole by promoting safer and more sustainable work practices.
Frequently Asked Questions
The following section addresses common inquiries regarding battery-powered finishing nail guns, aiming to provide clarity and dispel misconceptions.
Question 1: What is the typical lifespan of a battery in a battery-powered finishing nail gun?
Battery lifespan varies significantly based on usage intensity, battery chemistry (typically lithium-ion), and storage conditions. Under moderate use, a well-maintained battery can last for several years. However, frequent heavy use will reduce its lifespan. Observe manufacturer recommendations for charging and storage to maximize battery longevity.
Question 2: Are battery-powered finishing nail guns as powerful as pneumatic models?
Advancements in battery technology have significantly closed the performance gap. High-voltage battery-powered models can deliver comparable power to many pneumatic nailers, particularly for common finishing tasks. Extremely demanding applications might still favor high-end pneumatic systems.
Question 3: What maintenance is required for a battery-powered finishing nail gun?
Maintenance primarily involves keeping the nail magazine clean and free of debris, inspecting the firing mechanism for wear, and adhering to battery care guidelines. Regular cleaning minimizes jams and ensures consistent performance. Consult the manufacturer’s manual for specific lubrication recommendations.
Question 4: Can battery-powered finishing nail guns be used in all weather conditions?
Extreme temperatures can affect battery performance and lifespan. Avoid prolonged exposure to direct sunlight or freezing temperatures. Refer to the manufacturer’s specifications for operating temperature ranges. Certain models are designed with weather-resistant features for added protection.
Question 5: What safety precautions should be observed when using a battery-powered finishing nail gun?
Eye protection is mandatory. Familiarize with the tool’s operating manual before use. Never point the nailer at oneself or others. Disconnect the battery when performing maintenance or changing nail sizes. Understand the firing modes and select the appropriate mode for the task.
Question 6: Are replacement parts readily available for battery-powered finishing nail guns?
Parts availability varies depending on the brand and model. Established manufacturers typically offer readily available replacement parts through authorized service centers and online retailers. Consider parts availability when selecting a nail gun to ensure long-term serviceability.
This FAQ section aims to provide a foundation for understanding the practical aspects of utilizing battery-powered finishing nail guns. Diligent adherence to safety guidelines and recommended maintenance practices will maximize performance and extend the tool’s operational life.
The subsequent section offers a concluding summary of the key advantages and applications of battery-powered finishing nail guns.
Conclusion
This exposition has illuminated the multifaceted attributes of the battery powered finishing nail gun, underscoring its operational flexibility, enhanced portability, and advancements in power equivalence to pneumatic counterparts. Examination of battery voltage, nail gauge compatibility, firing mode selection, precise depth adjustment, and ergonomic considerations reveals a sophisticated tool optimized for modern finishing applications.
The ongoing evolution of battery technology and tool design suggests a continued displacement of traditional pneumatic systems in favor of cordless solutions. Professionals and discerning consumers are encouraged to critically assess their specific needs and prioritize tools that offer a balance of performance, durability, and user-centric design. The informed adoption of the battery powered finishing nail gun represents a strategic investment in efficiency and precision within the woodworking and construction trades.


