This pneumatic tool, manufactured by Senco, drives fasteners into wood for trim and molding applications. An example application includes securing baseboards to walls or attaching decorative crown molding.
Its utility lies in providing a consistent and efficient method for fastening materials, significantly reducing manual labor and improving the overall speed of construction or woodworking projects. The tool’s history reflects advancements in pneumatic technology, evolving to offer increased precision and reduced workpiece damage.
The following sections will delve into specific models, features, maintenance requirements, and appropriate applications of these tools in more detail.
Operating a Senco Finish Nailer
The following are guidelines intended to maximize performance, ensure user safety, and prolong the operational lifespan of these pneumatic fastening tools.
Tip 1: Regulate Air Pressure: Always operate the tool within the manufacturer’s specified air pressure range. Exceeding this range can damage internal components and increase the risk of fastener blow-through. Use an inline regulator to precisely control pressure.
Tip 2: Select Appropriate Fasteners: Utilize fasteners that are compatible with both the tool model and the material being fastened. Employing incorrect fastener lengths or gauges can lead to jams, misfires, or structural instability.
Tip 3: Maintain a Consistent Angle: Hold the tool perpendicular to the work surface whenever possible. Deviations from a 90-degree angle can result in fasteners entering at an undesirable trajectory, compromising the integrity of the joint.
Tip 4: Lubricate Regularly: Pneumatic tools require regular lubrication to function optimally. Use air tool oil as directed in the manufacturer’s instructions, typically a few drops prior to each use, to prevent wear and corrosion of internal parts.
Tip 5: Clear Jams Immediately: If a fastener becomes jammed, immediately disconnect the air supply and follow the manufacturer’s instructions for clearing the obstruction. Forcing the tool with a jammed fastener can cause damage.
Tip 6: Wear Safety Glasses: Eye protection is mandatory when operating any pneumatic tool. Fasteners can ricochet or fragments can be ejected during use, posing a significant risk of eye injury.
Tip 7: Inspect Before Use: Prior to each use, thoroughly inspect the tool for any signs of damage, such as cracked housings, loose fittings, or worn components. Do not operate a damaged tool.
Adhering to these guidelines contributes to safer, more efficient, and more reliable operation. Consistent maintenance and careful usage practices extend the service life and enhance the performance of this tool.
The following sections will elaborate on specific applications and maintenance procedures to further optimize the use of this tool.
1. Gauge
Gauge, in the context of a Senco finish nailer, refers to the diameter of the fasteners the tool is designed to drive. It’s a critical specification, directly impacting the tool’s compatibility with different nail types and the suitability for various applications. A higher gauge number indicates a smaller diameter nail. Senco finish nailers commonly utilize 15-gauge or 16-gauge fasteners. The selection of an appropriate gauge depends on the material being fastened and the desired holding power. Using an incorrect gauge can lead to tool malfunctions, damaged workpieces, or inadequate joint strength. For example, a 15-gauge nailer provides a larger nail head, offering greater holding power in heavier trim applications, while a 16-gauge nailer produces a less visible hole, suitable for delicate molding where aesthetic considerations are paramount.
Failure to adhere to the gauge specification can result in several practical problems. Attempting to load a 15-gauge nail into a 16-gauge nailer will typically cause a jam, potentially damaging the tool’s internal mechanisms. Conversely, using a smaller gauge nail in a larger gauge nailer may result in misfires or inconsistent fastener depth. The gauge also influences the tool’s performance; heavier gauge fasteners require more driving force, potentially impacting the tool’s speed and efficiency. The choice of gauge is intrinsically linked to the intended application, requiring careful consideration during project planning and tool selection.
In summary, understanding the relationship between gauge and the Senco finish nailer is essential for effective and safe operation. Selecting the correct gauge ensures compatibility, optimizes performance, and prevents potential damage to both the tool and the workpiece. Disregarding this specification can lead to project delays, increased material costs, and compromised structural integrity. The gauge represents a fundamental parameter that dictates the tool’s applicability and effectiveness across a range of finishing tasks.
2. Air Pressure
Air pressure is a critical operational parameter for pneumatic Senco finish nailers, directly influencing performance, safety, and tool longevity. Consistent and regulated air pressure delivery is essential for proper fastener driving and tool function.
- Optimal Operating Range
Each Senco finish nailer model specifies a recommended air pressure range, typically expressed in pounds per square inch (PSI). Operating within this range ensures the tool delivers sufficient force to drive fasteners fully without damaging the tool or workpiece. Exceeding the maximum PSI can lead to premature wear, internal damage, and increased risk of fastener blow-through, while insufficient pressure results in incomplete fastener insertion.
- Air Compressor Selection
The air compressor supplying the Senco finish nailer must be capable of delivering the required pressure and volume of air. A compressor with an inadequate tank capacity or insufficient output may result in pressure drops during continuous use, leading to inconsistent fastener driving. The compressor should also have a regulator to precisely control the air pressure delivered to the tool.
- Regulator and In-Line Filter
An in-line regulator is essential for maintaining a consistent air pressure supply to the nailer, compensating for fluctuations in the compressor’s output. An in-line filter removes moisture and debris from the compressed air, preventing corrosion and damage to the tool’s internal components. Regular draining of the filter is crucial to maintain its effectiveness.
- Hose Length and Diameter
The length and diameter of the air hose connecting the compressor to the Senco finish nailer can affect air pressure at the tool. Excessively long or narrow hoses can restrict airflow, resulting in pressure drops. Using a hose with an appropriate diameter and minimizing its length ensures optimal pressure delivery to the tool.
Therefore, proper management of air pressure is paramount for the reliable and safe operation of a Senco finish nailer. Selecting a suitable compressor, utilizing a regulator and filter, and ensuring appropriate hose specifications contribute to consistent performance, reduced tool wear, and improved project outcomes. Ignoring these aspects can lead to operational inefficiencies, increased maintenance requirements, and potential safety hazards.
3. Fastener Type
The selection of appropriate fasteners is paramount to the proper functioning and intended application of any Senco finish nailer. Incorrect fastener selection can result in tool malfunction, workpiece damage, and compromised structural integrity.
- Nail Gauge Compatibility
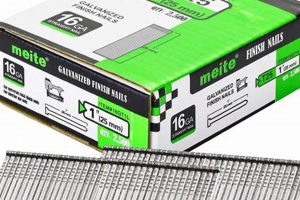
Senco finish nailers are engineered to accept specific nail gauges, typically 15- or 16-gauge. Using fasteners outside the designated gauge range can cause jams, misfires, and potential damage to the tool’s internal mechanisms. Adherence to the tool’s gauge specification is critical for reliable operation.
- Nail Length Considerations
The length of the fastener must be appropriate for the thickness of the materials being joined. Nails that are too short will not provide adequate holding power, while nails that are too long may protrude through the back of the workpiece, creating an undesirable aesthetic and potential safety hazard. The Senco finish nailer’s adjustable depth-of-drive feature can accommodate a range of nail lengths within the specified gauge.
- Head Style and Application
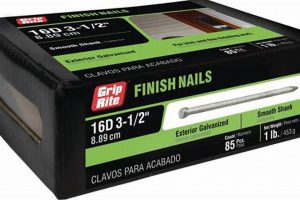
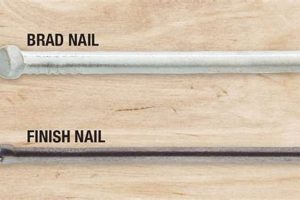
Finish nails are characterized by their small head size, designed to be easily concealed. However, head style variations exist, influencing the nail’s holding power and aesthetic impact. Some finish nails feature a slight head for increased holding power, while others are headless for minimal visibility. The selection of head style depends on the specific application and desired finish.
- Material Composition
Finish nails are available in various materials, including steel, stainless steel, and coated variations. Steel nails are suitable for general applications, while stainless steel nails offer corrosion resistance for exterior or high-humidity environments. Coated nails feature a resin or adhesive coating that enhances holding power and reduces the likelihood of nail withdrawal over time. The material composition should be selected based on the project’s environmental conditions and performance requirements.
The interplay between fastener type and the Senco finish nailer extends beyond mere compatibility. The correct choice of fastener optimizes the tool’s performance, minimizes the risk of damage, and ensures the successful completion of the intended application. Proper fastener selection is a fundamental aspect of achieving professional-quality results with this tool.
4. Applications
The utility of a Senco finish nailer is inextricably linked to its range of applications within woodworking, construction, and related fields. Its design allows for efficient and precise fastening in scenarios where aesthetics and minimal surface disruption are paramount. Cause and effect are evident: the tool’s design enables specific applications, and the demand for those applications drives the tool’s development. Applications serve as a defining component, shaping the tool’s specifications and features. For example, cabinet making utilizes the tool for assembling frames and attaching face frames, requiring precision and minimal splitting. Similarly, trim carpentry benefits from its ability to attach molding and baseboards securely with minimal visible nail holes. The choice of fastener type and gauge is directly driven by the intended application.
Further practical applications include installing door and window casings, where consistent depth driving is essential for a professional finish. Paneling installation also relies on this tool to fasten wood or composite panels to walls with minimal surface marring. Furniture construction employs the nailer for assembling frames, attaching decorative elements, and securing joints prior to permanent bonding with adhesives. Each application dictates the appropriate air pressure setting and fastener selection. For instance, securing hardwood trim necessitates higher pressure and potentially a heavier gauge fastener than attaching softwood paneling.
Understanding the relationship between applications and the Senco finish nailer is critical for maximizing its effectiveness and minimizing potential errors. While versatile, the tool is not a universal solution; applications requiring structural fastening or extreme holding power may necessitate alternative tools. Challenges arise when users attempt to utilize the tool for applications outside its intended scope, leading to compromised results or tool damage. A clear understanding of appropriate applications is therefore essential for ensuring professional outcomes and prolonging the tool’s lifespan.
5. Maintenance
Regular and thorough maintenance is not merely an ancillary task but an integral component of ensuring the reliable operation, longevity, and optimal performance of any Senco finish nailer. Adherence to a structured maintenance schedule minimizes downtime, reduces the likelihood of costly repairs, and contributes to a safer working environment.
- Lubrication of Internal Components
Pneumatic tools rely on consistent lubrication to minimize friction, prevent corrosion, and ensure smooth operation of internal moving parts. The application of air tool oil, as per the manufacturer’s recommendations, to the tool’s air inlet before each use is critical. Lack of lubrication leads to increased wear, reduced efficiency, and potential seizing of internal components. Example: Applying a few drops of air tool oil daily prevents premature wear of the piston and O-rings, extending the tool’s lifespan.
- Air Filter and Moisture Removal
Compressed air often contains moisture and particulate matter that can contaminate the tool’s internal mechanisms, leading to corrosion and malfunctions. Installing an in-line air filter and regularly draining accumulated moisture prevents these contaminants from entering the tool. Example: Routinely draining the air compressor tank and the in-line filter traps prevents rust and scale from damaging the nailer’s internal components.
- Fastener Track and Magazine Cleaning
Accumulated debris and fastener fragments within the nail magazine and fastener track can cause jams, misfeeds, and inconsistent fastener driving. Regular cleaning of these areas ensures smooth fastener advancement and prevents disruptions during operation. Example: Using compressed air or a small brush to remove nail shavings from the magazine prevents spring tension issues and reduces the likelihood of nail jams.
- Inspection and Replacement of Worn Parts
Periodic inspection of critical components, such as O-rings, bumpers, and driver blades, allows for the identification of wear or damage before it leads to operational failures. Timely replacement of worn parts prevents further damage and maintains the tool’s efficiency. Example: Inspecting and replacing worn O-rings in the tool’s air cylinder prevents air leaks, maintaining consistent driving power and reducing compressor workload.
The facets of maintenance detailed above represent a holistic approach to preserving the functionality and reliability of the Senco finish nailer. Neglecting these practices results in diminished performance, increased repair costs, and a shortened lifespan for the tool, ultimately impacting productivity and project outcomes. Consistent adherence to a well-defined maintenance protocol is therefore a sound investment in the tool’s long-term value and operational efficiency.
Frequently Asked Questions
The following addresses common inquiries regarding the operation, maintenance, and selection of these pneumatic fastening tools.
Question 1: What is the recommended air pressure range for a Senco finish nailer?
The recommended air pressure range varies depending on the specific Senco finish nailer model. Consult the tool’s manual or the manufacturer’s specifications. Generally, the range falls between 70 and 120 PSI. Exceeding this range can damage the tool; operating below it may result in incomplete fastener driving.
Question 2: What type of oil should be used to lubricate a Senco finish nailer?
Use a dedicated air tool oil specifically formulated for pneumatic tools. Avoid using general-purpose oils or penetrating lubricants, as these can damage internal seals and components. The oil should be lightweight and designed to prevent corrosion.
Question 3: How frequently should a Senco finish nailer be lubricated?
Lubricate the tool prior to each use. Place a few drops of air tool oil into the air inlet fitting. Regular lubrication ensures smooth operation and prolongs the tool’s lifespan.
Question 4: What causes a Senco finish nailer to jam?
Jams can result from several factors, including using incorrect fastener sizes, debris in the fastener track, insufficient air pressure, or worn internal components. Clearing the jam typically involves disconnecting the air supply, opening the fastener magazine, and removing the obstruction.
Question 5: Can a Senco finish nailer be used for structural fastening?
No, a Senco finish nailer is designed for finish and trim applications, not structural fastening. For structural applications, framing nailers or other specialized fastening systems are required.
Question 6: What safety precautions should be observed when operating a Senco finish nailer?
Always wear safety glasses to protect against flying debris. Ensure the tool is properly connected to an air compressor with regulated pressure. Never point the tool at oneself or others. Disconnect the air supply before performing maintenance or clearing jams.
Proper operation and regular maintenance are crucial for the safe and effective use of these tools.
The subsequent sections will provide detailed guidance on specific models and their applications.
Conclusion
This exploration has detailed the function, operation, maintenance, and applications of the Senco finish nailer. Key considerations include proper air pressure regulation, appropriate fastener selection, and consistent maintenance practices. These factors directly impact the tool’s performance, longevity, and the quality of the finished product.
A comprehensive understanding of the Senco finish nailer’s capabilities and limitations is essential for professionals and serious hobbyists alike. Diligent adherence to recommended operating procedures ensures both optimal results and a safe working environment. Continued vigilance regarding maintenance and proper application remains paramount for maximizing the return on investment in this tool.


