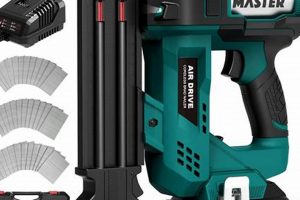
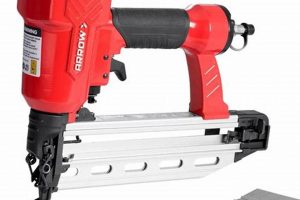
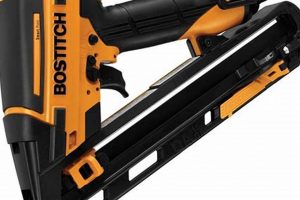
A specialized tool, driven by compressed air, is designed for precise and delicate fastening applications. It excels in securing trim, molding, and other fine woodworking elements where aesthetics are paramount and minimal material damage is desired. Common applications include installing baseboards, crown molding, door casings, and window frames, where the small nail head is less noticeable, leading to a smoother, more refined appearance.
This type of tool offers significant advantages in terms of speed and consistency compared to manual nailing. The power of compressed air ensures uniform nail depth, preventing overdriving or underdriving. Historically, these tools have evolved from heavier, less precise models to lighter, more ergonomic designs, contributing to increased efficiency and reduced user fatigue on job sites. Their adoption has transformed finish carpentry, enabling faster project completion and higher quality results.
The following sections will delve into the specific features, operation, maintenance requirements, and safety considerations associated with this category of pneumatic tool. Factors influencing nail selection and appropriate pressure settings will also be discussed, along with a comparison of different models and their suitability for various finish carpentry tasks.
Essential Usage Guidelines
Maximizing the effectiveness and longevity of this tool requires adherence to specific operational and maintenance practices. The following guidelines outline key considerations for optimal performance and user safety.
Tip 1: Regulate Air Pressure. Prior to operation, adjust the air compressor regulator to the manufacturer’s recommended pressure range. Excessive pressure can lead to nail overdriving and material damage, while insufficient pressure may result in incomplete nail insertion.
Tip 2: Select Appropriate Nail Gauge and Length. Match the nail gauge and length to the workpiece material and thickness. Using an incorrect nail size can compromise the integrity of the fastening or damage the surrounding surface.
Tip 3: Maintain Tool Cleanliness. Regularly clean the tool’s nosepiece and magazine to prevent debris buildup, which can impede nail feeding and driving. Use compressed air to remove dust and particulate matter.
Tip 4: Lubricate Moving Parts. Apply a few drops of pneumatic tool oil to the air inlet fitting before each use. Proper lubrication ensures smooth operation and extends the tool’s lifespan.
Tip 5: Implement Proper Safety Measures. Always wear appropriate eye and ear protection during operation. Disconnect the air supply when performing maintenance or changing nail sizes.
Tip 6: Store the Tool Properly. When not in use, store the tool in a clean, dry environment. Disconnect the air supply and empty the nail magazine to prevent accidental discharge.
Consistent adherence to these practices will promote efficient and safe operation, minimizing the risk of material damage and tool malfunction. Proper care translates to enhanced productivity and project quality.
The subsequent sections will cover troubleshooting common issues and advanced techniques for achieving professional-grade results.
1. Precision
In finish carpentry, precision is not merely a desirable attribute but a fundamental requirement. The effective deployment of a finishing pneumatic nail gun hinges critically on the tool’s capacity to deliver nails with accuracy and consistency, thereby impacting the aesthetic quality and structural integrity of the finished product.
- Nail Placement Accuracy
The placement of each nail must be exact, avoiding proximity to edges that could cause splitting or misalignment with underlying structures. The tools design and the operators skill in positioning it directly influence this aspect. Deviations from the intended nail location can necessitate rework, compromise the appearance, or weaken the joint.
- Depth Control Consistency
Maintaining consistent nail depth is crucial for a seamless finish. Variations in depth, whether overdriving or underdriving, result in visible nail heads or protrusions that detract from the overall appearance. The nail gun’s depth adjustment mechanism and the uniformity of air pressure contribute to achieving consistent and precise nail penetration.
- Minimized Material Damage
The tool’s precision directly affects the likelihood of damaging the workpiece. A nail gun lacking precision may cause splintering or cracking around the nail entry point. This is especially critical when working with delicate materials like softwoods or intricate moldings. Careful control over driving force and precise nail placement minimizes such damage.
- Consistent Firing Mechanism
A reliable firing mechanism is essential for delivering consistent performance. Irregular firing patterns or inconsistent nail delivery compromises precision. A well-maintained and properly functioning mechanism ensures that each nail is driven with the appropriate force and at the intended location, reducing the likelihood of errors and rework.
These facets highlight the critical role of precision in the effective use of a finishing pneumatic nail gun. Achieving a professional-grade finish depends on the tool’s capabilities, the operator’s proficiency, and adherence to best practices. The interrelationship of nail placement, depth control, material preservation, and consistent firing underscores the need for meticulous attention to detail in every application.
2. Air Pressure
The operational efficacy of a finishing pneumatic nail gun is intrinsically linked to air pressure. Compressed air serves as the motive force, driving the nail into the workpiece. Inadequate pressure results in incomplete nail insertion, leaving the nail head protruding and compromising the finish. Conversely, excessive pressure can lead to nail overdriving, potentially damaging the surrounding material and creating an unsightly appearance. The correct pressure level is therefore paramount for achieving a professional and aesthetically pleasing result. Air pressure settings are normally between 70 to 100 PSI, depending on density of wood.
Specific nail gun models necessitate particular pressure ranges, typically specified by the manufacturer. Adherence to these recommendations is crucial for optimal performance and longevity of the tool. A practical example is the installation of delicate trim; using excessively high pressure with a finishing nail gun can easily split the trim. Conversely, if installing hardwood trim you want to increase air pressure to drive nails at consistent depths and prevent them from sticking out from material.
Mastery of air pressure management constitutes a foundational skill for any user of a finishing pneumatic nail gun. The connection between the compressed air supply, the pressure regulator, and the tool’s performance cannot be overstated. Understanding and precisely controlling air pressure ensures effective operation, minimizes material damage, and contributes to the creation of high-quality finished carpentry projects.
3. Nail Gauge
The selection of an appropriate nail gauge is a critical determinant of success when using a finishing pneumatic nail gun. Nail gauge refers to the thickness of the nail, with higher numbers indicating thinner nails. The choice of gauge is dictated by the material being fastened and the desired aesthetic result, as thicker nails are more visible but provide greater holding power, while thinner nails are less conspicuous but may offer reduced strength.
- Material Compatibility
Different materials necessitate varying nail gauges to ensure proper fastening without causing damage. Softer woods, such as pine, typically require thinner gauge nails (e.g., 18 gauge) to prevent splitting. Denser materials, like oak, may necessitate slightly thicker gauges (e.g., 16 gauge) for adequate penetration and holding power. The selected gauge must be compatible with the density and fragility of the material to ensure a secure and aesthetically pleasing finish.
- Aesthetic Considerations
The visual impact of the nail head is a primary concern in finish carpentry. Thinner gauge nails leave smaller holes, minimizing the visibility of the fastener. An 18-gauge nail leaves a much less conspicuous mark than a 15-gauge nail. The trade-off is between aesthetics and holding power. Projects prioritizing a seamless appearance favor thinner nails, while those requiring greater structural integrity may necessitate a compromise with a slightly thicker gauge.
- Holding Power
The holding power of a nail is directly proportional to its gauge. Thicker nails possess greater shear strength and resistance to pull-out. In applications where structural integrity is paramount, such as securing heavy moldings or door casings, a thicker gauge nail provides a more reliable and durable connection. The specific demands of the project should guide the selection of a nail gauge that balances aesthetic considerations with the necessary level of holding power.
- Tool Compatibility
Finishing pneumatic nail guns are designed to accommodate specific nail gauges. Attempting to use a nail gauge outside the tool’s specified range can lead to malfunctions, such as jamming or misfiring. It is crucial to ensure that the selected nail gauge is compatible with the nail gun being used to prevent damage to the tool and ensure consistent and reliable performance. Consulting the tool’s manual is essential for determining acceptable nail gauge ranges.
The interplay between material compatibility, aesthetic considerations, holding power requirements, and tool compatibility dictates the optimal selection of nail gauge when employing a finishing pneumatic nail gun. Skilled carpenters recognize that mastering this decision-making process is fundamental to achieving high-quality, durable, and visually appealing results in a variety of finish carpentry applications.
4. Material Type
The material into which fasteners are driven profoundly influences the selection and operation of a finishing pneumatic nail gun. The inherent properties of the material, such as density, hardness, and susceptibility to splitting, dictate appropriate nail selection, air pressure settings, and handling techniques. Failure to account for these factors can compromise the integrity and aesthetic quality of the finished product.
- Wood Density
The density of wood, whether softwood like pine or hardwood like oak, directly impacts the required driving force. Denser materials necessitate higher air pressure settings to ensure complete nail penetration. Conversely, excessive pressure applied to softwoods can lead to overdriving and splitting. Proper air pressure adjustment, informed by the wood’s density, is critical for achieving a flush and secure fastening without damaging the material.
- Surface Hardness
Surface hardness affects the ease with which a nail can penetrate the material. Harder surfaces may require pre-drilling pilot holes to prevent nail bending or material cracking. This practice is particularly relevant when working with brittle materials or when driving nails close to edges. The combination of pre-drilling and precise nail gun operation minimizes the risk of damage and ensures accurate nail placement.
- Splitting Susceptibility
Some materials, particularly those with pronounced grain patterns or knots, are more prone to splitting under the stress of nail insertion. Selecting a smaller gauge nail and positioning it carefully, away from vulnerable areas, can mitigate this risk. In certain cases, blunt-nosed nails may be preferred, as they tend to displace fibers rather than sever them, reducing the likelihood of splitting. The operator’s skill in assessing material characteristics and adapting nailing techniques accordingly is essential for achieving successful results.
- Material Composition
Beyond wood, finishing pneumatic nail guns may be used with composite materials or thin metals. When working with these materials, specialized nails or brads designed for specific applications are required. Air pressure settings and driving depths must be carefully calibrated to avoid damaging the material or compromising the fastener’s holding power. Understanding the composition of the material and selecting appropriate fasteners and settings ensures a secure and aesthetically pleasing finish.
Consideration of material type is not merely a procedural step but a fundamental aspect of responsible and effective use of a finishing pneumatic nail gun. From wood density to splitting susceptibility, each material property demands a tailored approach. An informed operator can mitigate risks, optimize performance, and consistently achieve high-quality results across a range of finishing carpentry applications.
5. Maintenance
Sustained optimal performance of a finishing pneumatic nail gun is inextricably linked to consistent and meticulous maintenance. Neglecting routine upkeep initiates a cascade of detrimental effects, ranging from diminished operational efficiency to premature tool failure. The sophisticated mechanics of these tools demand diligent attention; accumulated debris, inadequate lubrication, and unchecked wear invariably impede the precise nail delivery essential for quality finish work.
Regular cleaning of the nail magazine, for instance, prevents misfeeds and jams that disrupt workflow and compromise nail placement accuracy. Lubricating internal components with pneumatic tool oil mitigates friction, ensuring smooth piston movement and preventing the development of performance-robbing wear. Periodic inspection of air hoses and fittings guards against leaks that diminish air pressure and lead to inconsistent nail driving. An example of the detrimental impact of neglecting this aspect is a carpenter working on an elaborate crown molding installation who, due to a poorly maintained nail gun, experiences frequent jams and inconsistent nail depths, leading to wasted material, added time, and a subpar final product. The result of neglect can significantly impact project quality and profitability.
In summary, the commitment to regular maintenance is not merely a matter of prolonging tool life; it represents a fundamental prerequisite for achieving professional-grade results with a finishing pneumatic nail gun. Addressing problems early on is vital to consistent operation, as well as reducing production time. Only then can it perform effectively.
6. Safety
The operation of a finishing pneumatic nail gun introduces inherent safety risks requiring careful mitigation. The tool’s high-velocity nail discharge presents a potential for serious injury to the operator and bystanders. Accidental nail discharge, resulting from unintended trigger activation or tool malfunction, can cause penetration wounds. Ricocheted nails, deflected by hard surfaces or knots in the wood, pose a similar hazard. Therefore, strict adherence to safety protocols is paramount when handling and using this tool. A case example of such an issue could be a nail glancing of the surface of hardwood, causing the nail to eject in an unpredicted direction, this may penetrate skin or tissue on a user.
Effective safety measures include the mandatory use of appropriate personal protective equipment (PPE), specifically safety glasses or a face shield, to guard against flying debris and ricocheting nails. Hearing protection is also recommended due to the loud noise generated during operation. Maintaining a safe working distance from other individuals is crucial to prevent accidental injury. Regular inspection of the tool for defects, such as damaged hoses or a malfunctioning safety mechanism, is essential. Furthermore, proper training on the tool’s operation and safety features is necessary to ensure that users understand the risks and can employ the tool safely and effectively. Lack of proper maintenance or lack of training can increase the risk of tool failure and associated injuries.
In conclusion, the safe use of a finishing pneumatic nail gun demands a proactive approach, encompassing both the implementation of robust safety protocols and a thorough understanding of the tool’s operational characteristics. Prioritizing safety not only minimizes the risk of injury but also contributes to a more productive and efficient work environment. The integration of safety as a core component of every task involving this tool is essential for preventing accidents and fostering a culture of responsible tool usage.
Frequently Asked Questions
This section addresses common inquiries regarding the use, maintenance, and safety aspects of finishing pneumatic nail guns.
Question 1: What is the optimal air pressure for a finishing pneumatic nail gun?
The recommended air pressure varies depending on the tool model and the material being fastened. Consult the tool’s manual for the manufacturer’s specified pressure range. As a general guideline, pressures typically range from 70 to 100 PSI. Adjustments may be necessary based on the density of the material.
Question 2: What nail gauge is appropriate for installing baseboards?
An 18-gauge or 16-gauge nail is generally suitable for baseboard installation. The selection depends on the thickness and density of the baseboard material and the underlying wall studs. Thinner baseboards may require 18-gauge nails to prevent splitting.
Question 3: How often should a finishing pneumatic nail gun be lubricated?
Lubrication should occur before each use. A few drops of pneumatic tool oil introduced into the air inlet fitting ensures smooth operation and prolongs the tool’s lifespan. Frequent use may necessitate more frequent lubrication.
Question 4: What safety precautions are essential when operating a finishing pneumatic nail gun?
Always wear safety glasses or a face shield to protect against flying debris and ricocheting nails. Hearing protection is also recommended. Ensure a safe working distance from others and inspect the tool for defects before each use.
Question 5: What causes a finishing pneumatic nail gun to jam?
Jams can result from debris buildup in the nail magazine, incorrect nail size, or insufficient air pressure. Regular cleaning of the magazine and ensuring proper nail selection and air pressure settings can prevent jams.
Question 6: How should a finishing pneumatic nail gun be stored when not in use?
Disconnect the air supply and empty the nail magazine. Store the tool in a clean, dry environment to prevent corrosion and damage. A carrying case or dedicated storage container is recommended.
Proper knowledge and adherence to these guidelines contribute to efficient, safe, and high-quality finishing carpentry.
The subsequent section will delve into common troubleshooting scenarios.
Concluding Remarks
This discourse has extensively examined the finishing pneumatic nail gun, elucidating its core functionalities, operational nuances, and crucial safety considerations. From the imperative of precise air pressure regulation to the strategic selection of appropriate nail gauges, each facet contributes to the tool’s effectiveness and the attainment of professional-caliber results. Consistent maintenance and unwavering adherence to safety protocols are not merely recommended practices but fundamental requirements for responsible tool ownership and operation.
Proficient application of the finishing pneumatic nail gun hinges upon a comprehensive understanding of its capabilities and limitations. Continued diligence in refining technique, coupled with a commitment to ongoing education regarding advancements in tool technology, will empower users to maximize the potential of this indispensable instrument in the realm of finish carpentry, ensuring the creation of enduring and aesthetically refined craftsmanship.


