This material is a fine-grained, often two-part compound employed to create a perfectly smooth and level surface. Typically applied after coarser fillers, it eliminates minor imperfections like pinholes, scratches, or unevenness present on a substrate. An example would be its use on an automotive body panel after initial body filler application, ensuring a flawless base for primer and paint.
Its significance lies in its ability to produce a professional-quality finish. By rectifying minute surface flaws, it enhances the aesthetic appeal and longevity of the final coating. Historically, similar compounds have been utilized for centuries in woodworking and construction, evolving from natural resins and pigments to sophisticated polymer-based formulations that offer superior adhesion, flexibility, and sandability.
The following sections will delve into the various types of this product, their specific applications, and best practices for achieving optimal results. We will also examine factors such as drying times, sanding techniques, and compatibility with different surface coatings.
Tips for Effective Use
Achieving a flawless surface requires careful application and technique. The following tips outline best practices for utilizing the material to its full potential.
Tip 1: Surface Preparation is Paramount: Ensure the substrate is clean, dry, and free of contaminants such as grease, wax, or loose particles. Abrade the surface to provide mechanical adhesion for the product.
Tip 2: Mix Ratios Must Be Precise: Strictly adhere to the manufacturer’s recommended mixing ratios for the hardener and the compound. Incorrect ratios can lead to improper curing, resulting in a soft, gummy, or brittle finish.
Tip 3: Apply in Thin, Even Coats: Avoid applying excessively thick layers. Multiple thin coats are preferable to minimize shrinkage, cracking, and trapped air bubbles. Allow each coat to dry thoroughly before applying the next.
Tip 4: Sanding Technique Impacts the Final Result: Begin with coarser grit sandpaper (e.g., 180-220 grit) to remove imperfections and gradually progress to finer grits (e.g., 320-400 grit) to refine the surface and eliminate sanding scratches.
Tip 5: Choose the Right Product for the Application: Different formulations exist for various substrates and environments. Select a product specifically designed for the intended use (e.g., automotive, marine, or woodworking).
Tip 6: Observe Drying Times: Allow sufficient drying time as specified by the manufacturer before sanding or applying subsequent coatings. Premature sanding can result in clogging of the sandpaper and damage to the uncured material.
Tip 7: Consider Environmental Conditions: Temperature and humidity can significantly affect curing times. Ensure the work area is adequately ventilated and within the recommended temperature range for the product.
Following these guidelines will maximize the effectiveness, leading to a smoother, more durable, and aesthetically pleasing final result.
The subsequent sections will discuss troubleshooting common issues and explore advanced application techniques.
1. Smoothness enhancement
The fundamental purpose of many surface preparation materials is smoothness enhancement. These materials are specifically formulated to rectify surface irregularities, such as scratches, pinholes, and minor dents, that detract from the final appearance and can compromise the integrity of subsequent coatings. The achievement of optimal smoothness is not merely an aesthetic consideration; it directly impacts the performance and longevity of the finished product. For example, in automotive refinishing, a smooth substrate ensures uniform paint coverage, prevents premature corrosion by eliminating potential moisture traps, and enhances the overall aerodynamic efficiency of the vehicle.
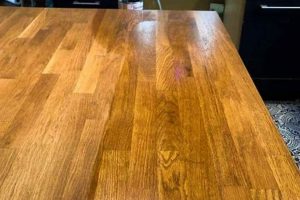
Without the contribution of this smoothing compound, achieving a high-gloss, defect-free surface would be exceptionally difficult, if not impossible, on many substrates. The compound fills the microscopic valleys and levels the peaks, creating a consistent plane that reflects light uniformly. Consider the application on a wooden surface intended for a high-end furniture piece. Despite meticulous sanding, wood grain patterns and minor imperfections may persist. The applied substance effectively creates a pristine canvas for the final varnish or lacquer, resulting in a showroom-quality appearance. The degree of achievable surface smoothness depends upon the grit rating of the sanding process.
In conclusion, smoothness enhancement constitutes a critical function that many materials offer, bridging the gap between imperfect substrates and flawless finishes. The ability to create a uniformly smooth surface directly translates into improved aesthetics, enhanced performance, and increased durability of the finished product. However, understanding the limitations of these materials, coupled with employing proper application techniques, is paramount for realizing its full potential and mitigating potential challenges such as shrinkage, cracking, or delamination.
2. Imperfection elimination
The primary function served by many types of surface finishing materials is imperfection elimination. It addresses minor defects present on a substrate that negatively impact the aesthetic appearance and structural integrity of the final product. These imperfections can range from minor scratches and pinholes to shallow dents and surface irregularities introduced during manufacturing or previous repair processes. The effectiveness in achieving a smooth, blemish-free surface is a key determinant of the overall quality and durability of the completed project. For instance, in the aerospace industry, surface defects on aircraft components can lead to increased drag, reduced fuel efficiency, and potential structural failure. Applying a material engineered to eliminate such imperfections is crucial for ensuring safe and efficient operation.
The practical significance of understanding this connection is multifaceted. Firstly, it allows for the informed selection of the appropriate type of material for a given application. Different formulations possess varying levels of filling capability, sandability, and adhesion characteristics, making it crucial to match the product to the specific type and severity of imperfections. Secondly, a thorough understanding of the material’s properties and limitations enables the user to employ proper application techniques, such as thin-layer application and appropriate sanding methods, to achieve optimal results. Consider the case of repairing cosmetic damage on a fiberglass boat hull. A product formulated for marine applications, possessing excellent water resistance and flexibility, is essential to prevent future cracking or blistering due to moisture exposure and hull flex.
In conclusion, the ability to effectively eliminate imperfections is intrinsically linked to the purpose and performance of many types of surface finishing materials. By carefully considering the nature of the imperfections, selecting the appropriate material, and employing proper application techniques, one can achieve a smooth, durable, and aesthetically pleasing surface that enhances the value and longevity of the final product. However, it is important to recognize that these materials are not a universal solution for all surface defects; severe damage or structural issues may require more extensive repair methods. Proper assessment and application are crucial.
3. Adhesion promotion
Adhesion promotion constitutes a critical aspect of finishing materials’ functionality. The success of any repair or finishing process hinges on the durable bond between the material and the substrate. Insufficient adhesion leads to premature failure, manifesting as chipping, cracking, or delamination, ultimately undermining the intended purpose of the process. The properties of the putty itself, as well as the preparation of the substrate, directly influence the strength and longevity of this bond. An improperly prepared surface, contaminated with oil or dust, will invariably result in a weakened adhesive interface, regardless of the putty’s inherent adhesive qualities. Similarly, a formula incompatible with the substrate material will likely exhibit poor adhesion, leading to a compromised finish.
The inclusion of specific additives or modifiers within many formulas directly promotes adhesion. These components function by increasing the surface energy of the material, enhancing its ability to wet and bond to the substrate. Furthermore, chemical reactions between the material and the substrate can create a stronger, more durable bond at the interface. For example, epoxy-based substances, widely used in automotive and marine applications, often incorporate adhesion promoters that react with metal or fiberglass surfaces, forming a robust chemical link. The practical significance of this understanding is that selecting the appropriate putty, formulated with adhesion promoters compatible with the substrate, is paramount for achieving a long-lasting, high-quality finish. The importance of substrate preparation, including cleaning and abrasion, cannot be overstated, as it directly influences the effectiveness of these adhesion-promoting additives.
In conclusion, adhesion promotion represents an indispensable component of many formulas and, therefore, successful application of the material. Achieving optimal adhesion requires a holistic approach, encompassing proper substrate preparation, selection of a compatible material, and adherence to the manufacturer’s recommendations regarding mixing ratios and curing times. Overlooking any of these factors can compromise the adhesive bond, leading to premature failure and necessitating costly repairs. This understanding is essential for ensuring the durability, longevity, and overall quality of the finished product, regardless of the specific application.
4. Durability improvement
Durability improvement, as it relates to finishing materials, directly concerns extending the lifespan and resilience of surfaces against various environmental and mechanical stressors. The application of surface finishing materials plays a crucial role in bolstering a substrate’s resistance to wear, corrosion, impact, and other forms of degradation, thereby enhancing its overall performance and longevity.
- Protection Against Environmental Factors
Many compounds provide a barrier against moisture, UV radiation, and chemical exposure, all of which can accelerate the deterioration of underlying materials. For instance, in marine applications, its utilization helps prevent osmotic blistering and corrosion of hulls exposed to saltwater. This protection extends the lifespan of the structure and reduces maintenance requirements.
- Resistance to Physical Damage
The application contributes to resistance against scratches, abrasions, and impacts. The material can absorb or deflect minor impacts, preventing damage to the underlying substrate. In automotive applications, it provides a degree of protection against stone chips and road debris, preserving the aesthetic appearance and structural integrity of the vehicle’s body panels.
- Improved Chemical Resistance
Many substances enhance resistance to various chemicals, preventing staining, discoloration, or degradation caused by exposure to solvents, acids, or alkalis. In industrial settings, equipment coated with these products benefits from increased resistance to harsh chemicals used in manufacturing processes, reducing the risk of corrosion or failure.
- Enhanced Structural Integrity
By filling surface imperfections and creating a smooth, uniform layer, it can reduce stress concentrations and prevent crack propagation, thus improving the overall structural integrity of the finished article. This is particularly important in applications where the substrate is subjected to repetitive stress or vibration, such as in aircraft components or machinery.
The facets mentioned demonstrate that compounds are instrumental in durability improvement by offering both physical protection and chemical resistance. These materials act as a safeguard, ensuring the longevity and reliability of surfaces across diverse applications, from automotive and marine to industrial and aerospace sectors. The degree of durability improvement is dependent on the selection of the appropriate material, its proper application, and the environmental conditions to which the finished product is exposed.
5. Surface preparation
Surface preparation is foundational to the successful application and performance of many surface finishing materials. It establishes the necessary conditions for optimal adhesion, durability, and aesthetic quality. Neglecting this critical step invariably leads to compromised results, necessitating rework and potentially jeopardizing the long-term integrity of the finish.
- Removal of Contaminants
The presence of oil, grease, wax, dust, or other contaminants hinders the proper bonding of a surface finishing material to the substrate. These substances create a barrier, preventing direct contact and reducing the adhesive strength. Effective removal methods include degreasing with solvents, washing with detergents, and abrasive cleaning. For instance, in automotive refinishing, thorough degreasing is essential to remove silicone-based waxes and polishes that can cause “fish eyes” (small craters) in the applied coating.
- Surface Abrasion
Abrading the surface creates a mechanical “key” that enhances adhesion. The rough texture provides a larger surface area for the compound to grip and increases the frictional force between the two materials. The choice of abrasive grit depends on the substrate and the type of compound used. For example, when working with metal, a coarser grit may be necessary to remove corrosion and create a suitable profile, while finer grits are appropriate for plastic or previously painted surfaces to avoid excessive material removal.
- Repair of Existing Damage
Addressing existing damage, such as rust, dents, or cracks, is crucial before applying material. These imperfections can compromise the structural integrity of the finish and create stress points that lead to premature failure. Depending on the severity of the damage, repairs may involve metalworking, welding, or the use of fillers and reinforcing materials. Failure to properly address existing damage will result in an inferior finish that is prone to cracking, peeling, and corrosion.
- Ensuring Surface Compatibility
Verifying the compatibility of the substrate and the compound is essential to prevent adverse reactions and ensure proper adhesion. Some materials are incompatible with certain substrates, leading to blistering, cracking, or poor adhesion. Manufacturers typically provide compatibility charts and guidelines to assist in material selection. For example, applying an acrylic lacquer over an enamel paint can cause the lacquer to lift and wrinkle, resulting in a complete failure of the finish.
These facets of surface preparation, when properly executed, maximize the benefits, enhancing its adhesion, durability, and aesthetic appearance. Conversely, inadequate preparation compromises its performance, leading to premature failure and necessitating costly repairs. Therefore, diligent attention to surface preparation is a prerequisite for achieving a professional-quality finish.
6. Curing process
The curing process constitutes a fundamental aspect of many formulas, directly influencing its final properties and performance. Curing refers to the chemical reactions that transform a liquid or semi-solid substance into a solid, cross-linked network. This transformation is critical for achieving the desired hardness, strength, chemical resistance, and adhesion characteristics. The specific curing mechanism and parameters (e.g., temperature, humidity, time) are dependent on the specific chemical composition of the substance. For example, two-part epoxy formulations require the precise mixing of a resin and a hardener, initiating a polymerization reaction that results in a rigid, durable solid. Deviations from the recommended mixing ratios or curing conditions can lead to incomplete curing, resulting in a soft, weak, and prone to degradation material.
The temperature at which this compound is cured has a marked effect on the ultimate hardness and durability. Many substances need a certain minimum temperature to cure completely. Also, post-curing is another type of curing process that includes heating a component with a certain material at a specific temperature for a period of time, in order to enhance certain attributes of the material. The practical implications of understanding this process are significant. In automotive body repair, premature sanding or painting of uncured substances can lead to paint defects, such as solvent popping or shrinkage. Similarly, in marine applications, incomplete curing can compromise the water resistance and structural integrity of the repaired area, leading to blistering or delamination.
In conclusion, the curing process is an inextricable element, influencing the final properties and performance characteristics. Adherence to the manufacturer’s recommendations regarding mixing ratios, curing times, and environmental conditions is paramount for achieving a durable, aesthetically pleasing, and long-lasting finish. The ability to properly control and manage the curing process is a key determinant of success in any application involving the substances. The challenges associated with this process often involve balancing the need for rapid curing with the desire to achieve optimal properties, requiring careful consideration of the specific requirements of each application and available technology to fulfill this need.
Frequently Asked Questions
The following addresses common inquiries regarding the properties, application, and performance of this substance.
Question 1: What is the optimal method for preparing a surface prior to applying finishing putty?
Prior to application, the surface should be thoroughly cleaned to remove any contaminants such as grease, oil, wax, or loose debris. Abrading the surface with sandpaper is recommended to create a mechanical key for improved adhesion.
Question 2: What is the appropriate mixing ratio for two-part products?
Adherence to the manufacturer’s specified mixing ratio is crucial for proper curing. Deviations from the recommended ratio can result in incomplete curing, leading to a soft, weak, and potentially unstable material. Use calibrated measuring tools to ensure accuracy.
Question 3: What is the ideal ambient temperature range during the curing process?
The optimal temperature range is typically specified by the manufacturer. Curing at temperatures outside this range can negatively impact the curing rate and the final properties of the hardened material. Refer to the product data sheet for specific recommendations.
Question 4: How long should be waited before sanding after application?
Allow adequate time, as specified by the manufacturer, for the substance to fully cure before sanding. Premature sanding can result in clogging of the sandpaper and damage to the uncured surface. A thorough cure ensures optimal sandability and prevents shrinkage or distortion.
Question 5: What type of sandpaper grit is recommended for sanding applications?
A progression of sandpaper grits is recommended for achieving a smooth, uniform surface. Start with a coarser grit (e.g., 180-220) to remove imperfections and gradually progress to finer grits (e.g., 320-400) to refine the surface and eliminate sanding scratches. Proper sanding technique is essential to avoid creating swirl marks or unevenness.
Question 6: How can air bubbles in the material be minimized during application?
Applying the substance in thin, even layers can minimize air entrapment. Using a flexible spreader and applying gentle pressure can help to force out any trapped air. Multiple thin coats are preferable to a single thick coat, as this reduces the risk of air bubbles and shrinkage.
The preceding answers provide a foundation for understanding the key aspects of working with these materials. Proper application and adherence to manufacturer’s guidelines are essential for achieving optimal results.
The following section will address troubleshooting common issues encountered during its utilization.
Finishing Putty
This exploration has detailed the essential role of finishing putty in achieving superior surface quality. From its composition and application techniques to its contribution to durability and aesthetics, the multifaceted nature of this material has been underscored. Proper surface preparation, precise mixing ratios, controlled curing processes, and appropriate sanding methods are all critical elements for realizing its full potential. The various types of finishing putty, each tailored to specific substrates and applications, further necessitate a discerning approach to material selection.
The information presented serves as a foundation for informed decision-making in various industries, from automotive refinishing to woodworking and beyond. Continued adherence to best practices, coupled with ongoing innovation in material science, will undoubtedly further enhance the capabilities of finishing putty and its contribution to the creation of durable, aesthetically pleasing products. Future advancements may focus on enhanced adhesion, reduced curing times, and increased environmental sustainability, further solidifying its position as an indispensable component in achieving high-quality finishes.


