The process of applying protective and aesthetic coatings to hardwood derived from a specific species of tree within the Quercus genus is a common practice in woodworking and construction. This procedure enhances the wood’s durability, highlights its natural grain patterns, and allows for customization to match desired color palettes. For example, a clear coat sealant can be applied to showcase the inherent reddish hue and prominent open pores of the wood.
This treatment offers several advantages. It provides a barrier against moisture, minimizing warping and cracking, thereby extending the lifespan of the wood product. Furthermore, it enhances the visual appeal, enriching the surface’s color and providing a smooth, even texture. Historically, various oils and waxes were used to achieve this, but modern techniques incorporate synthetic varnishes, polyurethanes, and lacquers for increased resistance to wear and environmental factors.
The subsequent sections will delve into surface preparation techniques, the selection of appropriate coating materials based on project requirements, and the application methods that yield optimal results, ensuring a long-lasting and aesthetically pleasing outcome for this popular hardwood.
Finishing Red Oak
Achieving a professional and durable result when implementing coatings on this specific hardwood requires meticulous attention to detail and adherence to best practices. The following tips offer guidance for maximizing the quality and longevity of the treated surface.
Tip 1: Prioritize Surface Preparation. Thorough sanding is paramount. Begin with a coarser grit (e.g., 80-grit) to remove imperfections, progressing to finer grits (e.g., 120-grit, then 180-grit, and finally 220-grit) to achieve a smooth, uniform surface. Vacuum thoroughly between each grit.
Tip 2: Address Open Grain. The pronounced grain pattern of this hardwood necessitates filling. Employ a grain filler specifically designed for open-pore woods to create a level surface for subsequent coating applications. Follow the manufacturers instructions diligently.
Tip 3: Select an Appropriate Sealer. Before applying the finish coat, use a quality sealer. This minimizes finish absorption, promoting uniform color and preventing blotching. Consider a dewaxed shellac or a sanding sealer specifically formulated for hardwoods.
Tip 4: Test the Stain. Due to variations in wood density, always test the chosen stain on an inconspicuous area or a scrap piece of wood to ensure the desired color and penetration are achieved. Adjust staining techniques accordingly to compensate for inconsistencies.
Tip 5: Apply Thin, Even Coats. Multiple thin coats of finish are preferable to a single thick coat. This minimizes runs, drips, and bubbles, resulting in a smoother and more durable surface. Allow each coat to dry completely before applying the next.
Tip 6: Consider the Environmental Conditions. Temperature and humidity significantly impact drying times and finish quality. Apply coatings in a well-ventilated area with stable environmental conditions, ideally between 65F and 75F (18C and 24C) and relative humidity between 40% and 60%.
Tip 7: Lightly Sand Between Coats. After each coat of finish has dried, lightly sand with a very fine grit sandpaper (e.g., 320-grit or 400-grit) to remove any imperfections and create a better bond for the subsequent coat. Vacuum the surface thoroughly after sanding.
Consistent execution of these techniques will promote a professional-grade treatment, enhancing both the aesthetic appeal and the protective qualities of the coated wood surface.
The following section will discuss the common problems encountered during this procedure and methods for their rectification.
1. Surface Preparation
Surface preparation is an indispensable precursor to successful coating application on hardwood derived from Quercus rubra. The open-grain structure of this particular species necessitates meticulous preparation to ensure optimal adhesion and a uniform aesthetic result. Failure to adequately prepare the surface invariably leads to a compromised finish, characterized by uneven stain absorption, visible imperfections, and diminished long-term durability. As an example, residual mill marks or sanding scratches will become accentuated under a clear coat, detracting from the wood’s natural appeal. Thus, the quality of the surface preparation directly correlates with the final outcome.
The process entails several critical steps. Initial sanding removes existing coatings, contaminants, and surface irregularities. Progressively finer grits are employed to create a smooth, consistent substrate, typically culminating in a 220-grit or finer finish. Following sanding, thorough dust removal is imperative; vacuuming followed by wiping with a tack cloth ensures a pristine surface. In cases where staining is desired, pre-stain conditioners can mitigate blotching, a common issue when applying stain to porous hardwoods. Ultimately, the objective is to create a receptive surface that allows the coating material to penetrate uniformly and bond effectively, minimizing defects and maximizing the protective qualities of the final layer.
In summation, meticulous surface preparation is not merely a preliminary step but rather a foundational element for achieving a high-quality, long-lasting treatment on Quercus rubra. Neglecting this phase introduces significant risks to the project’s overall success. It is an investment that directly translates into enhanced aesthetic appeal, improved durability, and reduced maintenance requirements for the finished product. The implications extend beyond visual appeal, influencing the long-term structural integrity and resistance to environmental factors.
2. Grain filling
The open-pore structure of red oak ( Quercus rubra) necessitates grain filling as a critical component of the finishing process. Without proper grain filling, the applied coating material will sink into these pores, resulting in an uneven surface texture and an increased consumption of finish. The cause of this effect lies in the wood’s inherent anatomy, with its large vessels readily absorbing liquids. For instance, if varnish is applied directly to unprepared red oak, multiple coats may be required to achieve a smooth, level surface, increasing project time and material costs. The importance of grain filling lies in its ability to mitigate these issues and provide a stable, uniform base for the final finish.
Practical application of grain fillers typically involves applying a paste-like substance designed to fill the pores. These fillers are available in various colors, allowing the craftsman to either match the wood’s natural tone or introduce subtle color variations. The filler is applied, allowed to partially dry, and then wiped off, leaving the pores filled and the surface relatively clean. Careful selection of the grain filler is important; oil-based fillers are often preferred for oil-based finishes, while water-based fillers are suitable for water-based finishes. Failure to match the filler to the finish type can result in adhesion problems or discoloration over time. This step reduces the amount of subsequent coats of stains and/or topcoats.
In conclusion, grain filling is an indispensable step in achieving a professional and durable finish on red oak. The challenges lie in selecting the appropriate filler and mastering the application technique to avoid excessive buildup or uneven color. By understanding the relationship between red oak’s porous nature and the necessity of grain filling, woodworkers can ensure a superior finished product, characterized by a smooth, uniform surface and enhanced longevity. The consideration of the proper grain filling contributes to a successful wood finishing project.
3. Sealer selection
The selection of an appropriate sealer is a critical step in the process, directly impacting the final appearance, durability, and overall success of the endeavor. The porous nature of this hardwood necessitates careful consideration of sealer characteristics to ensure optimal results.
- Pore Filling and Surface Leveling
Sealers contribute to filling the open pores, creating a smoother, more uniform surface for subsequent topcoats. The selection of a sealer with adequate filling properties can significantly reduce the number of topcoats required, saving time and materials. For example, a high-solids sealer will fill pores more effectively than a low-solids sealer, leading to a flatter, more even final surface.
- Adhesion Promotion
A sealer acts as an intermediary layer, promoting adhesion between the wood and the topcoat. Different sealers have varying levels of compatibility with different topcoat formulations. Using an incompatible sealer can lead to adhesion failures, such as peeling or cracking. Therefore, it is crucial to select a sealer that is specifically designed to work with the chosen topcoat system. An example is matching an oil-based sealer with an oil-based varnish.
- Stain Blocker and Color Control
Certain sealers can prevent the stain from penetrating too deeply or unevenly into the wood, leading to blotching or undesirable color variations. A quality sealer can create a uniform substrate, ensuring consistent stain absorption and predictable color development. Using a pre-stain conditioner, which acts as a sealer, before staining helps achieve a more even tone and prevents dark blotches, especially on woods prone to uneven staining.
- Moisture Barrier and Stability
Sealers provide a barrier against moisture absorption, which can cause warping, swelling, or cracking. This is particularly important for this hardwood in environments with fluctuating humidity levels. A moisture-resistant sealer helps to stabilize the wood, minimizing dimensional changes and extending the lifespan of the finished product. For example, epoxy-based sealers provide excellent moisture resistance compared to shellac-based sealers.
In summary, proper sealer selection is integral to achieving a high-quality, long-lasting treatment on the wood in question. The choice of sealer should be based on careful consideration of its pore-filling properties, adhesion characteristics, stain-blocking capabilities, and moisture resistance. By selecting the right sealer, one can enhance the wood’s natural beauty, improve the durability of the finish, and ensure a successful outcome. The implications of sealer selection reverberate throughout the finishing process, influencing every subsequent step.
4. Stain application
The process of stain application is integral to enhancing the aesthetic properties of hardwood derived from Quercus rubra. The selection and application technique of a stain directly influence the final color, depth, and overall visual appeal of the finished piece. Proper execution highlights the wood’s natural grain patterns while also providing a degree of protection. Improper application can result in blotching, uneven color distribution, and a compromised finish.
- Color Selection and Desired Aesthetic
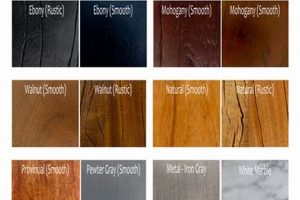
The choice of stain color dictates the ultimate visual outcome. Lighter stains accentuate the natural grain patterns, while darker stains impart a more dramatic and formal appearance. For example, a honey-toned stain might be chosen to create a warm, inviting ambiance in a kitchen, whereas a dark walnut stain could be selected to achieve a sophisticated look in a library. The selection is often guided by the existing dcor and the desired overall aesthetic.
- Understanding Wood Porosity and Absorption
Red oak’s open-pore structure influences stain absorption. Uncontrolled absorption can lead to uneven color, commonly referred to as blotching. Pre-stain conditioners are frequently used to mitigate this issue by partially sealing the wood’s surface, thus promoting more uniform stain penetration. If a conditioner is not used, the stain may saturate in certain areas more than others, producing an inconsistent result.
- Application Techniques and Their Effects
Various application methods, such as brushing, wiping, or spraying, affect the stain’s penetration and final appearance. Brushing typically results in deeper penetration, while wiping allows for more control over color intensity. Spraying provides a more even, consistent coating, particularly useful for large surfaces. An example of an inappropriate technique would be to leave excess stain on the surface, which will lead to a tacky or uneven finish.
- Wiping and Excess Stain Removal
Proper removal of excess stain is paramount to prevent a sticky or uneven surface. After allowing the stain to penetrate for the recommended time, a clean cloth should be used to wipe away any excess. Failure to do so results in a build-up of stain on the surface, leading to a prolonged drying time and a less durable finish. This step also contributes to the clarity and definition of the grain patterns.
These facets of stain application collectively contribute to the overall quality of work on Quercus rubra. Mastering these elements ensures a refined aesthetic and a durable, long-lasting result. Neglecting any of these aspects diminishes the potential and leaves the final product less than satisfactory. Consider the interplay between color choice and application technique to yield the most appropriate and desired results.
5. Finish coats
The application of finish coats represents the culminating stage in the process of treating hardwood originating from Quercus rubra. These coats, typically consisting of varnishes, lacquers, polyurethanes, or water-based acrylics, serve to protect the underlying wood and stain while imparting the desired sheen and durability. The selection and application of finish coats are dictated by several factors, including the intended use of the wood, environmental conditions, and desired aesthetic properties. Without proper finish coats, the underlying wood and any applied stain are vulnerable to scratches, moisture damage, and fading, substantially reducing the longevity and aesthetic appeal of the finished piece. For instance, a table constructed from Quercus rubra and treated with a stain will require several coats of a durable polyurethane to withstand daily use and resist spills.
The specific characteristics of Quercus rubra, particularly its open-pore structure, influence the choice of finish and the application technique. Multiple thin coats are generally preferred over a single thick coat, as this minimizes the risk of runs, drips, and uneven drying. The application of each coat is typically followed by light sanding with fine-grit sandpaper to remove any imperfections and create a smoother surface for the subsequent coat. This iterative process ensures a consistent and professional-looking finish. An example is the use of an oil-based varnish, which provides excellent penetration and durability but requires careful sanding between coats to achieve a smooth, even sheen. The environmental conditions during application, such as temperature and humidity, also play a crucial role in the drying and curing process, affecting the final hardness and clarity of the finish.
In essence, the finish coats represent the final protective layer and aesthetic enhancement applied to the underlying stain and wood. The selection of appropriate materials and proper application techniques are critical to preserving the integrity and beauty of the Quercus rubra substrate. Challenges can arise from improper surface preparation, incompatible finish materials, or adverse environmental conditions. Understanding the relationship between the characteristics of the wood and the properties of the finish coats is essential for achieving a durable, aesthetically pleasing, and long-lasting final product.
6. Drying conditions
The ambient conditions during the drying phase are critically linked to the ultimate success of finishing Quercus rubra. Variations in temperature, humidity, and air circulation exert significant influence on the curing process of coatings applied to this species. These factors directly affect the rate of solvent evaporation, the formation of the polymer film, and the overall adhesion of the finish to the substrate. For example, elevated humidity levels can impede solvent evaporation, prolonging drying times and potentially leading to a cloudy or uneven finish. Conversely, excessively high temperatures may cause the finish to dry too rapidly, resulting in bubbling, cracking, or poor adhesion.
Practical applications of this understanding are vital in woodworking and furniture manufacturing. Controlled environments, such as spray booths equipped with temperature and humidity regulation, are often employed to ensure consistent and predictable drying outcomes. Monitoring and adjusting these parameters allows for precise control over the curing process, minimizing the risk of defects and maximizing the durability of the finish. An example of a negative outcome is when a polyurethane finish, applied on a high humidity day, turns opaque or “milky”. This demonstrates the need to maintain proper drying settings in the surface coating process. Moreover, understanding the specific drying requirements of different finish types, such as oil-based versus water-based formulations, is crucial for selecting appropriate drying strategies.
In summary, the environmental aspects during the drying phase play a pivotal role in the effectiveness of treating red oak. Ignoring these variables can lead to a compromised finish and diminished longevity of the treated product. The key insights involve recognizing the impact of temperature and humidity on solvent evaporation, polymer film formation, and adhesion. Challenges include maintaining stable environmental conditions and adapting drying strategies to different finish types. This is a critical element of the overall finishing process, where proper execution directly translates into a higher quality and more durable final product.
7. Sanding between coats
The process of lightly abrading the surface between applications of finish is a critical step in achieving a high-quality coating on red oak. This practice, often overlooked, significantly impacts the final appearance, adhesion, and durability of the protective layer. Its importance is amplified by the open-grain nature of this hardwood, which can lead to imperfections and unevenness in the dried finish. Properly executed inter-coat sanding mitigates these issues, resulting in a smoother, more uniform, and visually appealing surface.
- Removal of Imperfections
Sanding between coats eliminates dust particles, air bubbles, and other minor imperfections that may become embedded in the finish during the drying process. These contaminants can create a rough or uneven texture, detracting from the visual appeal of the wood. For instance, dust settling on a drying coat of varnish will create small bumps that are only noticeable after the finish has hardened. Light sanding with fine-grit sandpaper removes these irregularities, providing a smooth surface for the subsequent coat.
- Enhancing Adhesion
Abrading the surface between coats creates microscopic scratches that provide a mechanical key for the next coat of finish to adhere to. This is particularly important for finishes like polyurethane, which can have a smooth, glossy surface that is difficult for subsequent coats to bond to. Sanding increases the surface area available for adhesion and promotes a stronger, more durable bond between layers. Without this step, the finish may be prone to peeling or chipping over time.
- Leveling the Surface
Each coat of finish may not dry perfectly level, especially on open-grain woods like red oak. Sanding between coats helps to level any unevenness or build-up, creating a smoother and more uniform surface. This is particularly important when applying multiple coats of a high-build finish, such as a thick varnish or epoxy coating. Consistent leveling ensures that the final surface is free from dips, ridges, and other imperfections that can detract from the overall aesthetic.
- Improving Clarity and Sheen
Sanding between coats can improve the clarity and sheen of the final finish. By removing imperfections and leveling the surface, sanding allows the finish to reflect light more evenly, resulting in a clearer and more lustrous appearance. This is particularly noticeable with high-gloss finishes, where any surface irregularities will be magnified. Fine-grit sanding, followed by polishing, can achieve a mirror-like sheen that enhances the natural beauty of red oak.
In summary, sanding between coats is an essential technique for achieving a professional, high-quality surface. Its impact extends beyond mere aesthetics, contributing to the long-term durability and performance of the finished piece. The benefits are particularly pronounced when working with open-grain hardwoods, where imperfections are more likely to occur. Adherence to proper sanding techniques ensures that the treatment will not only look beautiful but also withstand the rigors of everyday use.
Frequently Asked Questions
The following questions address common concerns and misconceptions related to the processes involved in surface treatments applied to Quercus rubra, aiming to provide clarity and guidance for achieving optimal results.
Question 1: What is the primary reason for sanding prior to applying any coating material?
Sanding creates a receptive surface, removing imperfections, contaminants, and existing finishes. This promotes proper adhesion of subsequent coats, ensuring a durable and uniform treatment.
Question 2: Why is grain filling often recommended for red oak prior to finishing?
Red oak exhibits a pronounced open-pore structure. Grain filling addresses this characteristic by filling the pores, creating a level surface that reduces finish absorption and yields a smoother final texture.
Question 3: What type of sealer is most appropriate for use on this species of wood?
The optimal sealer depends on the chosen finish. However, a dewaxed shellac or a sanding sealer specifically designed for hardwoods is generally recommended to minimize finish absorption and promote uniform color.
Question 4: What factors influence the choice of stain color?
The desired aesthetic outcome, existing dcor, and the wood’s inherent grain patterns all influence the selection. Lighter stains accentuate the grain, while darker stains impart a more dramatic effect.
Question 5: Why is it preferable to apply multiple thin coats of finish rather than a single thick coat?
Multiple thin coats minimize the risk of runs, drips, and bubbles, resulting in a smoother, more durable surface. This approach also allows for better control over the final sheen and appearance.
Question 6: How do environmental conditions, specifically temperature and humidity, impact the treatment?
Temperature and humidity significantly affect drying times and finish quality. Ideal conditions typically involve stable temperatures between 65F and 75F (18C and 24C) and relative humidity between 40% and 60%.
Understanding these key aspects contributes to the successful implementation of the coating treatment. Attention to these details ensures a professional, long-lasting finish.
The subsequent section will delve into common pitfalls to avoid when working with wood in Quercus genus.
The Importance of Sound Practices in Finishing Red Oak
This exploration has detailed the multifaceted process of finishing red oak, emphasizing surface preparation, grain management, material selection, and environmental considerations. Proper execution of each step is paramount to achieving a durable, aesthetically pleasing result. The intricacies of this treatment extend beyond mere surface application, deeply impacting the longevity and value of the finished product.
Adherence to established best practices represents a commitment to quality and long-term performance. Continued research and refinement of techniques remain essential to maximizing the potential of this versatile hardwood. The future relies on informed application to realize its full potential for years to come.


