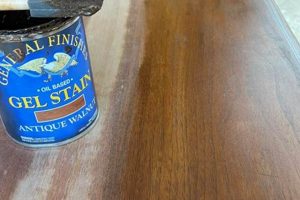
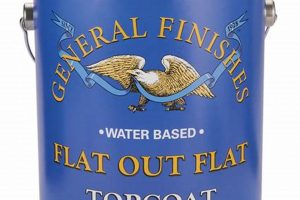
A specialized coating designed for wood surfaces, particularly softwoods, allows for the achievement of a rich, even color on substrates like pine. This product type, formulated with a thick consistency, is engineered to minimize penetration into the porous grain structure of pine, mitigating blotchiness often encountered with thinner stains. It offers a controlled application process, essential for uniform coloration.
Utilizing this specific type of coating presents advantages in projects where achieving a dark or intense color is desired on pine. The coating’s composition helps to prevent the wood from absorbing excessive amounts of pigment unevenly, resulting in a more professional and consistent appearance. Historically, achieving a quality stain finish on pine has been challenging, but this specific product addresses these inherent difficulties, offering a solution for both hobbyists and professionals.
The subsequent sections will delve into the practical aspects of surface preparation, application techniques, and topcoat selection to maximize the effectiveness of this type of finish on pine projects, allowing for a long lasting and beautiful result.
Essential Guidance for Optimal Results
Achieving a professional-grade finish on pine using a gel-based stain requires meticulous attention to detail and adherence to specific techniques. The following tips are crucial for ensuring a uniform, durable, and aesthetically pleasing outcome.
Tip 1: Surface Preparation is Paramount: Prior to application, the pine surface must be thoroughly sanded. Begin with a coarser grit (e.g., 120) to remove imperfections, and progressively move to finer grits (e.g., 220) to achieve a smooth, uniform texture. Insufficient sanding will result in an uneven stain absorption.
Tip 2: Address Pine’s Porosity: Pine is a softwood with inherently porous grain. To mitigate blotchiness, apply a pre-stain wood conditioner specifically designed for softwoods. This conditioner will partially seal the wood, promoting a more even stain absorption.
Tip 3: Application with the Grain: Apply the gel stain in thin, even coats, always working in the direction of the wood grain. Overlapping or excessive application can lead to an uneven finish and prolonged drying times.
Tip 4: Controlled Wiping Technique: After application, use a clean, lint-free cloth to wipe away excess stain. The wiping action should be consistent and uniform to ensure an even color distribution. Adjust wiping pressure to achieve the desired color intensity.
Tip 5: Multiple Thin Coats are Preferable: Achieving a deep, rich color is best accomplished through multiple thin coats rather than a single thick coat. Allow each coat to dry completely before applying the next. Lightly sand between coats with fine-grit sandpaper (e.g., 320) to maintain a smooth surface.
Tip 6: Complete Drying is Essential: Ensure adequate drying time between coats and before applying a topcoat. Premature application of subsequent layers can lead to adhesion problems and a compromised finish. Refer to the manufacturer’s specifications for recommended drying times.
Tip 7: Topcoat Selection for Protection: Protect the stained surface with a durable topcoat. Polyurethane, lacquer, or varnish are suitable options. Select a topcoat that is compatible with the gel stain and appropriate for the intended use of the project.
These guidelines prioritize meticulous preparation, controlled application, and thorough drying to minimize common issues associated with staining pine. The resulting finish will exhibit enhanced color uniformity, durability, and overall aesthetic appeal.
Subsequent sections will discuss troubleshooting potential problems, such as uneven color or blotchiness, and provide further recommendations for long-term maintenance and care of the finished surface.
1. Surface Preparation
Surface preparation is an indispensable stage in any wood finishing project, and it assumes heightened importance when working with pine and a gel-based stain. The characteristics of pine, combined with the properties of the stain, necessitate meticulous preparation to achieve a uniform, durable, and aesthetically pleasing result.
- Sanding for Uniformity
Sanding removes imperfections, levels the surface, and opens the wood pores, allowing for optimal stain absorption. With pine, uneven sanding results in inconsistent stain penetration, leading to blotchiness. Progressively finer grits are crucial to achieve a smooth, uniform surface texture. Failing to adequately sand leads to a substandard appearance.
- Cleaning to Remove Contaminants
The presence of dust, grease, or other contaminants on the pine surface inhibits stain adhesion and can cause discoloration or uneven color distribution. Thorough cleaning with a tack cloth or appropriate solvent removes these impurities, ensuring proper bonding between the stain and the wood fibers. Skipping this step undermines the integrity of the finish.
- Addressing Pre-Existing Finishes
If the pine surface has a pre-existing finish (paint, varnish, or stain), complete removal is essential for the gel stain to properly adhere and achieve the desired color. Incomplete removal results in uneven color and potential adhesion failure. Chemical strippers, sanding, or a combination of both may be required for complete removal.
- Evaluating and Repairing Damage
Prior to staining, all imperfections, such as dents, scratches, or gouges, should be addressed. Filling imperfections with wood filler or performing necessary repairs ensures a smooth and uniform surface. Failure to repair these defects results in visual blemishes in the final stained finish.
The effectiveness of the stain is directly correlated to the quality of the surface preparation. By meticulously sanding, cleaning, addressing pre-existing finishes, and repairing damage, one maximizes the potential for achieving a professional-looking, durable, and uniform finish on pine.
2. Pre-Stain Conditioner
The relationship between pre-stain conditioner and the application of a gel stain on pine is fundamentally one of mitigation and optimization. Pine, a softwood, exhibits a highly porous and uneven grain structure, resulting in inconsistent stain absorption. Without intervention, the gel stain, despite its viscosity, tends to penetrate the softer areas of the wood more rapidly than the denser regions, leading to a blotchy, uneven finish. A pre-stain conditioner addresses this issue by partially sealing the wood’s pores, creating a more uniform surface receptivity.
The selection of an appropriate pre-stain conditioner is crucial. Water-based conditioners raise the grain slightly, necessitating light sanding prior to staining. Oil-based conditioners, conversely, penetrate deeper into the wood, providing a more pronounced level of sealing. Consider a scenario involving a pine tabletop intended for a dark, rich finish. Absent the application of a pre-stain conditioner, the dark pigments in the gel stain would disproportionately saturate certain areas of the pine, resulting in an unattractive and unprofessional appearance. However, if a pre-stain conditioner is properly applied and allowed to dry, the subsequent application of the gel stain will yield a much more consistent and even coloration.
The use of a pre-stain conditioner in conjunction with gel stain on pine is not merely a cosmetic preference, but rather a practical necessity for achieving a high-quality finish. While it introduces an additional step to the finishing process, the benefits derived from its applicationnamely, improved color uniformity and enhanced aesthetic appealfar outweigh the additional effort. Disregarding this step often results in a finish that fails to meet professional standards, highlighting the critical role of pre-stain conditioner in achieving the desired outcome.
3. Application Technique
The application technique employed when using a specific gel stain on pine fundamentally dictates the final aesthetic outcome. Proper technique mitigates inherent challenges associated with pine’s porous nature, enabling a uniform and professional-quality finish. Conversely, improper technique exacerbates these issues, leading to blotchiness and an undesirable appearance.
- Brush Selection and Handling
The selection of an appropriate brush, typically a natural bristle brush for oil-based products, is paramount. The brush should be loaded consistently and strokes applied evenly, following the wood grain. Overloading the brush or applying excessive pressure results in uneven stain distribution and potential pooling, negatively impacting the final result when working with pine.
- Wiping Method and Timing
A crucial aspect of the application process is the controlled wiping of excess stain. The timing of the wiping action is critical; wiping too soon removes too much stain, resulting in an insufficient color depth, while wiping too late can lead to a sticky, uneven surface. Consistent, even wiping, using a lint-free cloth, ensures uniform color distribution across the pine surface.
- Layering and Build-Up
Achieving the desired color intensity often requires multiple thin coats of the gel stain. Each coat must be allowed to dry completely before applying the subsequent layer. Applying excessively thick coats, in an attempt to achieve the desired color in a single application, results in prolonged drying times and an increased risk of uneven coloration or cracking.
- Environmental Considerations
Ambient temperature and humidity levels significantly impact the application and drying processes. High humidity extends drying times, increasing the likelihood of dust contamination and other surface imperfections. Conversely, excessively high temperatures can cause premature drying, hindering proper stain penetration and leveling. Maintaining a controlled environment is essential for optimal results.
In conclusion, the application technique significantly influences the final appearance of gel stain on pine. By adhering to best practices regarding brush selection, wiping methods, layering, and environmental control, one can effectively manage the inherent challenges associated with staining pine and achieve a professional, durable, and aesthetically pleasing finish.
4. Wiping Consistency
The consistency with which excess gel stain is removed from pine surfaces directly determines the uniformity and aesthetic quality of the final finish. Inconsistent wiping practices amplify the natural variations in pine’s porosity, resulting in uneven color saturation and a blotchy appearance, detracting from the intended visual appeal.
- Pressure Modulation
Varying the pressure applied during the wiping process directly affects the amount of stain removed from the wood grain. Applying excessive pressure removes more stain, resulting in a lighter color, while insufficient pressure leaves behind more stain, leading to darker shades. Maintaining consistent pressure across the entire surface is crucial for achieving uniform color. For example, wiping with a light touch on end grain, which absorbs more stain, helps to balance color variations. Inconsistent pressure application inevitably leads to visible differences in color intensity across the pine surface.
- Cloth Material and Cleanliness
The type of cloth used for wiping and its cleanliness influence stain removal. Lint-free cloths are essential to prevent fibers from embedding in the finish. Soiled cloths transfer previously removed stain back onto the surface, causing streaking and uneven color. A consistent supply of clean, lint-free cloths ensures uniform absorption and removal of excess stain. The use of old t-shirts or shop rags, which may contain residual oils or detergents, can compromise the consistency of the wiping process and affect the final appearance.
- Stroke Direction and Overlap
The direction of the wiping strokes and the degree of overlap contribute significantly to the uniformity of the finish. Wiping with the grain minimizes the visibility of wiping marks. Consistent overlap ensures that no areas are missed. A haphazard approach to stroke direction and overlap leads to noticeable inconsistencies in color and sheen. In practical terms, this means moving the cloth in long, even strokes along the grain, slightly overlapping each pass to prevent visible lines.
- Timing and Saturation Level
The time elapsed between stain application and wiping, along with the saturation level of the wood, impacts the effectiveness of stain removal. Allowing the stain to dwell too long makes it more difficult to remove evenly. Similarly, attempting to wipe a heavily saturated area requires more effort and increases the risk of uneven color distribution. A balanced approach, where wiping commences shortly after application and excessive saturation is avoided, optimizes the consistency of the stain removal process. This principle translates to applying stain in manageable sections and wiping them immediately to prevent the stain from drying unevenly.
These elements underscore the importance of a methodical and controlled approach to wiping excess stain. A lack of attention to detail in any of these facets compromises the uniformity of the finish on pine, highlighting the direct correlation between wiping consistency and the overall quality of the final result. Consistent practices ensure that the natural beauty of the wood is enhanced, rather than obscured by uneven staining.
5. Drying Time
Drying time is a critical parameter in any finishing process, particularly when applying a gel stain to pine. The properties of both the stain and the wood interact to influence the duration required for complete curing, directly impacting the quality and durability of the final finish. Insufficient drying can lead to adhesion problems, uneven color, and a compromised protective layer.
- Environmental Factors Influence
Ambient temperature, humidity levels, and air circulation significantly alter the drying time. High humidity retards evaporation of solvents, prolonging the curing process and increasing the risk of dust contamination. Low temperatures similarly slow the chemical reactions necessary for the stain to fully harden. Conversely, excessively high temperatures can cause premature surface drying, trapping solvents beneath and leading to blistering or cracking. Therefore, a controlled environment optimizes drying.
- Coat Thickness and Layering
The thickness of each applied coat directly correlates with the required drying time. Thicker coats contain a greater volume of solvent that needs to evaporate, extending the duration. Multiple thin coats, while requiring more application time, dry faster and more uniformly, minimizing the risk of surface imperfections. Layering subsequent coats before the previous layer is fully cured traps solvents and can cause adhesion failure between layers. Manufacturer guidelines regarding coat thickness and drying intervals are imperative.
- Wood Porosity and Absorption Rate
Pine, as a softwood, exhibits varying degrees of porosity across its grain. Areas of higher porosity absorb more stain, requiring longer drying times for complete solvent evaporation. Conversely, denser areas require less time. Inconsistent drying across the surface leads to uneven color and potential adhesion issues with subsequent topcoats. The application of a pre-stain conditioner helps to equalize porosity and promote uniform drying.
- Solvent Type and Stain Formulation
The type of solvent used in the gel stain formulation influences drying time. Oil-based stains typically dry slower than water-based alternatives. The specific chemical composition of the stain also affects the rate of curing. Certain additives and resins can either accelerate or decelerate the drying process. Understanding the solvent type and stain formulation is essential for predicting and managing the drying time effectively.
Effective management of drying time during the application of a gel stain on pine requires careful consideration of environmental factors, coat thickness, wood properties, and stain formulation. Adherence to recommended drying intervals, combined with a controlled environment, maximizes the likelihood of achieving a durable, uniform, and aesthetically pleasing finish. Deviations from these guidelines increase the risk of compromised adhesion, uneven color, and premature failure of the finish.
6. Topcoat Selection
The selection of an appropriate topcoat is critical when working with a gel stain on pine, directly influencing the durability, aesthetics, and longevity of the finished surface. The gel stain, while providing color and depth, lacks the protective properties necessary for resisting abrasion, moisture, and UV damage. The topcoat serves as a sacrificial layer, protecting the stain from these elements and ensuring the preservation of the underlying color and detail. A mismatch between the stain and topcoat can lead to adhesion issues, clouding, or premature failure of the finish. For example, using a water-based topcoat over an improperly cured oil-based gel stain may result in poor adhesion and eventual peeling.
Consider the practical scenario of a pine coffee table finished with a gel stain. Without a topcoat, daily use would quickly mar the surface, leading to scratches, water rings, and fading from sunlight. A durable polyurethane topcoat, however, would provide a robust barrier against these threats, extending the lifespan of the finish and maintaining its visual appeal. The choice of topcoat also dictates the final sheen of the project. Options range from matte to high-gloss, allowing for customization based on aesthetic preferences. A matte topcoat offers a subtle, natural look, while a gloss topcoat enhances the richness and depth of the gel stain’s color. Compatibility is paramount. The manufacturer’s recommendations regarding topcoat selection for specific gel stain formulations should be carefully considered. Incompatible topcoats can react negatively with the stain, leading to discoloration, bubbling, or adhesion problems.
In summary, topcoat selection is not merely an afterthought but an integral component of the gel stain finishing process on pine. It directly impacts the protection, durability, and aesthetic appeal of the finished piece. Careful consideration of the intended use, desired sheen, and compatibility with the gel stain is essential for achieving a professional and long-lasting result. The challenges associated with topcoat selection primarily revolve around understanding the chemical properties of both the stain and topcoat and adhering to recommended application guidelines. Failure to do so can compromise the entire finishing project.
7. Environmental Conditions
Environmental conditions exert a significant influence on the application and curing of gel stain on pine, affecting the stain’s viscosity, absorption rate, drying time, and ultimately, the quality and longevity of the finish. Controlled environmental parameters are crucial for achieving optimal results with this finishing system.
- Temperature and Viscosity
Ambient temperature directly affects the viscosity of the gel stain. Lower temperatures increase viscosity, making the stain more difficult to apply evenly and potentially leading to brushstroke marks. Conversely, higher temperatures reduce viscosity, causing the stain to run or sag, particularly on vertical surfaces. Maintaining a stable temperature within the manufacturer’s recommended range is essential for proper application. A typical example involves applying stain in an unheated garage during winter, where the increased viscosity makes it challenging to achieve a smooth, uniform coat. Proper temperature management mitigates these issues.
- Humidity and Drying Time
High humidity significantly extends the drying time of gel stain, as it retards the evaporation of solvents. This prolonged drying period increases the risk of dust contamination and can lead to a soft, tacky finish. Conversely, extremely low humidity can cause the stain to dry too quickly, preventing proper penetration into the pine grain. Maintaining a moderate humidity level within the recommended range ensures optimal drying. Consider a scenario where a project is stained during a humid summer day; the extended drying time increases the likelihood of imperfections appearing in the final finish.
- Air Circulation and Solvent Evaporation
Adequate air circulation promotes the evaporation of solvents, accelerating the drying process and reducing the risk of solvent entrapment within the finish. Insufficient air circulation, such as in a poorly ventilated room, prolongs drying time and can lead to a soft, uncured finish. Conversely, excessive air circulation can cause the surface of the stain to dry too quickly, trapping solvents underneath and leading to bubbling or cracking. A balanced approach to air circulation is crucial for uniform drying.
- UV Exposure and Finish Degradation
Prolonged exposure to ultraviolet (UV) radiation can cause the gel stain to fade or discolor over time, particularly if the topcoat lacks UV inhibitors. Direct sunlight accelerates the degradation of the stain and the underlying wood. Shielding the finished piece from direct sunlight or using a UV-resistant topcoat is essential for preserving the color and integrity of the finish. For instance, a pine dresser placed near a sunny window will exhibit more rapid fading compared to one kept in a shaded area, highlighting the impact of UV exposure.
The influence of environmental conditions on the application and curing of gel stain on pine underscores the necessity of a controlled finishing environment. By carefully monitoring and managing temperature, humidity, air circulation, and UV exposure, one can mitigate potential problems and achieve a durable, aesthetically pleasing, and long-lasting finish. The successful application of this stain on pine hinges, in part, on the ability to regulate these external factors.
Frequently Asked Questions About Achieving Optimal Results
This section addresses common inquiries regarding the application and performance characteristics when applying a specialized coating on a specific type of wood.
Question 1: Is surface preparation truly necessary when applying this type of coating on this particular wood?
Surface preparation is not merely suggested, but an imperative step. Pine’s inherent porosity necessitates thorough sanding to promote uniform absorption. Failure to prepare the surface adequately results in uneven color distribution and a compromised finish.
Question 2: Why is a pre-stain conditioner recommended for a gel-based product?
Despite the gel’s viscous nature, pine’s variable density causes uneven penetration. A pre-stain conditioner mitigates this disparity, partially sealing the wood and promoting a more consistent color across the entire surface.
Question 3: What distinguishes a brush suitable for gel stain application from other types?
Natural bristle brushes are generally preferred. These brushes are designed to hold and release the thicker consistency of gel stains effectively, ensuring even distribution and minimizing brushstroke marks.
Question 4: How does the wiping technique impact the overall aesthetic?
Consistent, even wiping is paramount. Variations in pressure or stroke direction lead to uneven color and visible wiping marks. A uniform wiping technique ensures a consistent and professional appearance.
Question 5: What are the signs of inadequate drying before applying a topcoat?
Signs include a tacky or sticky surface, a lingering solvent odor, or clouding of the topcoat. Premature application of the topcoat traps solvents and leads to adhesion issues and a compromised finish.
Question 6: Can any topcoat be used over this specialized coating on this specific type of wood?
Compatibility is crucial. Polyurethane or varnish are often suitable, but one must consult the coating’s specifications to ensure compatibility. Incompatible topcoats can cause discoloration, bubbling, or adhesion failure.
The preceding answers underscore the importance of meticulous preparation, controlled application, and informed product selection. Adherence to these principles is essential for realizing a successful and enduring finish.
The next section will delve into long-term maintenance strategies, providing recommendations for preserving the quality and appearance of this type of finish on pine over time.
Concluding Remarks
The preceding analysis has detailed critical aspects associated with achieving a quality finish. Proper application techniques, surface preparation, and environmental control directly influence the final outcome. Consistent execution of these elements maximizes the stain’s potential, mitigating inherent challenges presented by pine. Careful adherence to recommended procedures ensures longevity and preserves the desired aesthetic.
The pursuit of optimal results necessitates ongoing diligence and a commitment to best practices. Continued observation and timely maintenance are essential for preserving the integrity of the finish. Future advancements in coating technology may offer improved formulations, but the fundamental principles outlined herein remain paramount for successful application and sustained performance.


![Buy General Finishes Walnut Stain Online - [Year] Guide Best Final Touch: Elevate Your Projects with Professional Finishing Buy General Finishes Walnut Stain Online - [Year] Guide | Best Final Touch: Elevate Your Projects with Professional Finishing](https://bestfinaltouch.com/wp-content/uploads/2025/10/th-824-300x200.jpg)
