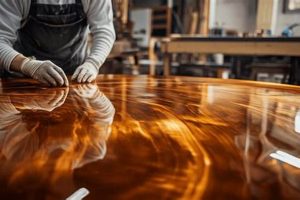
A coating that imparts a grey hue to wooden surfaces is a popular choice for enhancing the aesthetic appeal of furniture, flooring, and architectural details. This treatment involves a range of techniques, from applying specialized stains and paints to employing reactive agents that alter the wood’s natural color. A common example is the application of a diluted grey wood stain to a pine table, resulting in a weathered, understated appearance.
The utilization of such surface treatments offers several advantages. It can effectively conceal imperfections in the wood grain, provide a contemporary or rustic visual, and complement a wide array of interior design schemes. Historically, achieving this specific chromatic effect was often a byproduct of natural aging and exposure to the elements. Modern techniques, however, allow for precise control over the color intensity and uniformity, providing a durable and replicable solution. This aesthetic has seen increased adoption across various sectors, from residential interiors to commercial spaces, reflecting its versatility and enduring appeal.
Understanding the nuances of achieving the desired result necessitates careful consideration of wood species, preparation methods, and the specific product or technique employed. The following sections will delve into the diverse methods of application, the various wood types that are best suited for this type of treatment, and the necessary maintenance procedures to ensure longevity and visual appeal.
Practical Considerations for Achieving a Desired Grey Hue on Wood
Achieving the desired aesthetic requires careful consideration of multiple factors. The following tips offer guidance for a successful application and lasting results.
Tip 1: Wood Species Selection: Hardwoods, such as oak and maple, generally accept stains more uniformly than softwoods like pine. Porous woods may require a pre-stain conditioner to prevent blotching and ensure even color absorption.
Tip 2: Surface Preparation is Critical: Thorough sanding is essential. Begin with a coarser grit (e.g., 120) to remove imperfections, followed by finer grits (e.g., 180, 220) to achieve a smooth, consistent surface. Remove all sanding dust before application.
Tip 3: Test Stains in an Inconspicuous Area: Before applying any product to the entire project, test it on a hidden area or a scrap piece of the same wood. This allows for assessment of the color and application technique.
Tip 4: Apply Thin, Even Coats: Avoid applying too much product at once. Multiple thin coats are preferable to a single thick coat, as they promote even drying and prevent drips or runs.
Tip 5: Consider Reactive Stains: Reactive stains, such as those containing iron acetate, interact chemically with the tannins in the wood to produce a natural, aged effect. These stains often yield unique and unpredictable results.
Tip 6: Neutralize Alkaline Finishes: If using a lye-based product to create the effect, ensure thorough neutralization with a mild acid solution (e.g., diluted vinegar) to prevent further discoloration or damage to the wood.
Tip 7: Seal with a Protective Topcoat: Apply a durable topcoat, such as polyurethane or varnish, to protect the finish from wear and tear. Choose a matte or satin sheen to maintain the desired low-luster appearance.
By adhering to these principles, one can minimize potential pitfalls and maximize the likelihood of a successful outcome. Careful planning and execution are essential for achieving a durable and aesthetically pleasing result.
The subsequent sections will address common problems encountered during the finishing process and offer solutions for rectifying these issues.
1. Color Tone
The precise color tone is a foundational element in any application of a surface treatment replicating the appearance of aged wood. The selection of specific hues and their subsequent application dictate the final aesthetic outcome. A misjudged tone can result in a finish that appears artificial or incongruous with the intended design. For example, a tone that is too cool or blue-grey may evoke a modern, industrial feel, while a warmer, brown-grey tone tends to create a rustic or farmhouse aesthetic. The underlying wood species further influences the final perceived color, as the wood’s natural undertones will interact with the applied color.
Achieving the desired tone often necessitates a process of iterative adjustment. Staining and layering techniques are employed to modulate the shade and intensity of the grey hue. It is not uncommon to start with a lighter color and gradually build depth and complexity through multiple applications. For instance, a furniture restorer might apply a wash of diluted black paint over a base of light grey stain to create subtle variations and simulate the look of weathering. The choice of sealant, whether matte, satin, or gloss, will also modify the visual perception of the tone, influencing the overall reflectivity and perceived depth.
Ultimately, successful realization of a grey surface treatment hinges on a thorough understanding of color theory and the interplay between materials and techniques. Achieving the correct tone is not merely about applying a specific pigment; it involves a nuanced manipulation of color, light, and texture to create a compelling and authentic representation of aged wood. Challenges arise when matching existing finishes or replicating specific color samples. However, with careful attention to detail and a willingness to experiment, a precise and desirable color tone can be achieved, enhancing the overall appeal and value of the finished product.
2. Wood Species
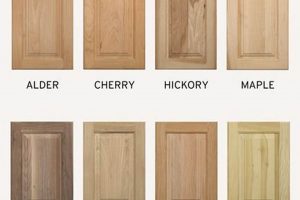
The type of wood employed is a fundamental determinant in the success and aesthetic outcome of any grey finishing process. The wood’s inherent characteristicsincluding grain pattern, density, porosity, and natural colorsignificantly influence how the grey finish is absorbed, appears, and ages over time. Therefore, careful consideration of the wood species is paramount.
- Grain Pattern and Texture
Different woods exhibit varying grain patterns, from the tight, uniform grain of maple to the open, pronounced grain of oak. This grain pattern directly impacts how the grey finish is absorbed and highlighted. For instance, in oak, the stain tends to settle more deeply into the open grain, creating a more textured and visually striking effect compared to maple where the stain absorption is more even. This variability necessitates adjusting application techniques to achieve a uniform grey coloration.
- Density and Porosity
The density and porosity of a wood affect how readily it absorbs the grey finish. Softwoods, such as pine, are generally more porous than hardwoods like cherry or walnut. This higher porosity can lead to over-absorption of the stain, resulting in an uneven or overly dark appearance. Conversely, denser woods may require more coats of stain to achieve the desired depth of color. Pre-stain conditioners are often employed to mitigate these issues by controlling the rate of absorption and promoting a more consistent finish.
- Natural Color Undertones
The natural color of a wood species plays a critical role in the final appearance of the grey finish. Reddish undertones in cherry or mahogany can subtly shift the grey towards a warmer, more muted tone. Yellowish undertones in pine or birch can create a more complex, aged appearance. Understanding these inherent undertones is essential for selecting the appropriate grey stain and adjusting the application to achieve the desired outcome without clashing with the wood’s natural coloration.
- Tannin Content
Certain wood species, notably oak, contain high levels of tannins, which can react chemically with some types of grey finish, particularly those containing iron acetate. This reaction can produce a darker, more intense grey, sometimes approaching black. This effect can be either desirable or undesirable depending on the intended aesthetic. Knowledge of the wood’s tannin content is crucial for selecting compatible finishing products and anticipating the final color outcome.
In summary, the choice of wood species represents a critical decision point in any grey finishing project. An informed understanding of each species’ unique properties, combined with careful selection of appropriate finishing products and application techniques, is essential for realizing a visually appealing and durable grey finished wood surface.
3. Application Method
The method of application significantly influences the final appearance and durability of a grey surface treatment on wood. The chosen technique affects color penetration, uniformity, and the overall aesthetic outcome, necessitating careful selection and execution.
- Brushing
Brushing involves applying the grey finish using a brush, typically a natural-bristle brush for oil-based stains and a synthetic-bristle brush for water-based stains. This method is suitable for smaller projects and intricate details. It allows for precise control over the application, enabling targeted staining of specific areas. However, brush strokes can be visible, potentially detracting from the desired smooth, uniform finish. Proper brushing technique, including applying thin, even coats and feathering out the edges, is crucial to minimize these effects. For example, brushing is often used to apply grey stain to trim work or furniture legs, allowing for detailed application around edges and corners.
- Spraying
Spraying, using either an airless or HVLP (High Volume Low Pressure) sprayer, offers a more uniform application compared to brushing. This method is advantageous for larger surfaces, such as doors or tabletops, where a consistent finish is desired. Spraying minimizes brush strokes and allows for faster coverage. However, it requires careful masking to protect surrounding areas and can result in overspray, leading to wasted material. Moreover, proper ventilation and safety precautions are essential due to the potential for airborne particles. An example is the application of grey lacquer to a large wooden cabinet using an HVLP sprayer to achieve a smooth, even, and durable finish.
- Wiping
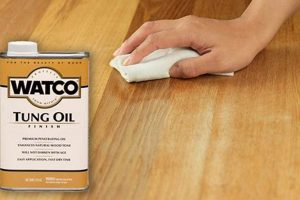
Wiping involves applying the grey finish with a cloth or rag. This method is often used with stains and oils, allowing the finish to penetrate the wood grain. Wiping is particularly effective for highlighting the natural texture of the wood. It also allows for easy removal of excess finish, preventing the build-up of thick layers. However, wiping can result in an uneven finish if not performed carefully, with variations in color intensity across the surface. A common application is using a rag to apply a grey oil stain to a wooden countertop, allowing the grain to show through and creating a rustic appearance.
- Dipping
Dipping involves submerging the wood into the grey finish. This method ensures complete coverage and is often used for smaller, regularly shaped items. Dipping provides a consistent color and can be more efficient than other methods for certain applications. However, it is not suitable for larger or irregularly shaped objects and requires a significant amount of finishing material. Furthermore, dipping can lead to excessive finish build-up, requiring subsequent wiping to remove excess and prevent drips. For example, small wooden components of a chair might be dipped in grey paint to ensure uniform coverage before assembly.
The selection of the appropriate application method directly influences the visual and tactile qualities of a grey finished wood surface. Each technique presents unique advantages and disadvantages, necessitating careful consideration of the project’s specific requirements and constraints. The effectiveness of any application method relies heavily on proper surface preparation and the correct choice of finishing materials.
4. Sealer Type
The choice of sealer exerts a significant influence on the long-term appearance and durability of a grey finish on wood. As a protective layer applied over the finished surface, the sealer’s primary function is to shield the underlying stain or paint from abrasion, moisture, and ultraviolet radiation. The type of sealer selected directly impacts the longevity of the grey finish and its resistance to environmental factors. For instance, a polyurethane sealer, known for its durability and water resistance, is commonly employed for flooring or furniture that experiences heavy use. Conversely, a wax sealer, while offering a softer sheen, provides less protection and is better suited for decorative items with minimal physical contact. The permeability of the sealer affects the wood’s ability to breathe, influencing its susceptibility to warping or cracking in fluctuating humidity conditions. The practical significance lies in preserving the intended aesthetic of the grey finish while ensuring the underlying wood remains structurally sound. In cases of exterior applications, sealers with UV inhibitors are crucial to prevent fading or discoloration of the grey pigment.
The compatibility of the sealer with the underlying grey finish is also a critical consideration. Certain sealers can react chemically with specific stain formulations, leading to undesirable color shifts or adhesion problems. For example, applying a water-based sealer over an oil-based stain may result in poor adhesion and premature failure of the finish. The sheen level of the sealer further contributes to the overall aesthetic. A matte sealer will subdue the grey tone, creating a muted, aged appearance, while a gloss sealer will enhance the color intensity and reflectivity. The selection of sealer therefore represents a crucial step in the finishing process, demanding careful consideration of material compatibility and desired visual outcome. Instances of misapplication, such as using an incompatible sealer, often necessitate complete stripping and reapplication of the entire finish, underscoring the importance of informed decision-making.
In conclusion, the sealer type functions as an integral component of a grey finish on wood, influencing its protective capabilities, aesthetic qualities, and overall lifespan. Challenges associated with sealer selection stem from the diversity of available products and the need for compatibility with the underlying finish. A thorough understanding of sealer properties and their interactions with different wood species and finishing materials is essential for achieving a durable and visually pleasing grey finish that withstands the test of time. Addressing potential issues proactively, through careful product selection and proper application techniques, mitigates the risk of premature failure and ensures the long-term preservation of the intended aesthetic.
5. Surface Preparation
Surface preparation constitutes a critical precursor to the successful application and longevity of a grey finish on wood. It establishes the foundation for optimal adhesion, uniformity, and the desired aesthetic outcome. Inadequate preparation invariably leads to compromised results, necessitating costly rework and diminished durability.
- Removal of Existing Finishes
The presence of prior coatings, such as paint, varnish, or stain, impedes the direct bonding of the grey finish to the wood substrate. Mechanical abrasion, chemical stripping, or a combination thereof is required to eliminate these pre-existing layers. Failure to completely remove old finishes results in uneven color absorption, peeling, and compromised adhesion. For example, attempting to apply a grey stain over a glossy polyurethane coating will yield a blotchy, inconsistent appearance and eventual delamination.
- Sanding and Smoothing
Sanding serves to create a smooth, uniform surface, eliminating imperfections such as scratches, dents, and raised grain. Progressively finer grits of sandpaper are employed, typically ranging from coarse (e.g., 80-grit) to fine (e.g., 220-grit), to refine the surface. Insufficient sanding leads to a rough texture, which detracts from the aesthetic appeal of the grey finish and compromises its protective properties. A poorly sanded surface will exhibit visible imperfections beneath the grey finish, diminishing the overall quality.
- Cleaning and Degreasing
Contaminants such as dust, dirt, oil, and wax interfere with the proper adhesion of the grey finish. Thorough cleaning with appropriate solvents or detergents is essential to remove these substances. Residue from sanding or handling can prevent the finish from bonding effectively, resulting in peeling, blistering, or other adhesion failures. For instance, fingerprints or oil from machining processes can create noticeable imperfections in the final grey finish.
- Application of Wood Conditioner (Optional)
Certain wood species, particularly softwoods like pine, exhibit uneven absorption of stains and finishes due to variations in density. A wood conditioner, also known as a pre-stain treatment, helps to equalize the porosity of the wood, promoting uniform color absorption. The use of a wood conditioner can prevent blotching and streaking, ensuring a consistent and aesthetically pleasing grey finish. Skipping this step on porous woods can result in a mottled appearance, undermining the desired aesthetic.
The diligent execution of surface preparation is not merely a preliminary step, but an integral component of achieving a high-quality grey finish on wood. Thorough removal of existing finishes, meticulous sanding, comprehensive cleaning, and the application of wood conditioner, when appropriate, are all essential for ensuring optimal adhesion, uniformity, and long-term durability. Neglecting these steps invariably compromises the final outcome, resulting in a substandard finish and diminished longevity.
6. Durability Requirements
The longevity and resilience of a grey finish on wood are inextricably linked to the specific demands of its intended environment and usage. Establishing clear durability requirements is paramount for selecting appropriate materials and application techniques, thereby ensuring the finished product can withstand anticipated wear and tear.
- Abrasion Resistance
Abrasion resistance is the capacity of the grey finish to withstand surface wear from friction, impacting applications such as flooring, furniture tops, and high-traffic areas. A finish with inadequate abrasion resistance will exhibit scratches, scuff marks, and eventual erosion of the grey layer, diminishing its aesthetic appeal and protective function. For example, a grey-stained hardwood floor in a commercial setting necessitates a robust, multi-layer polyurethane coating to resist the constant abrasion from foot traffic. Failure to meet this requirement results in premature wear and costly refinishing.
- Moisture Resistance
Moisture resistance pertains to the ability of the grey finish to repel water and prevent moisture penetration into the underlying wood. This is particularly critical in environments with high humidity, exposure to spills, or outdoor applications. Inadequate moisture resistance can lead to swelling, warping, cracking, and fungal growth, compromising both the aesthetic integrity and structural integrity of the wood. Consider a grey-painted wooden deck; it demands a weather-resistant sealant to prevent water damage and maintain its appearance. Absent this protection, the wood will deteriorate, requiring frequent repairs or replacement.
- UV Resistance
UV resistance refers to the capacity of the grey finish to withstand degradation from ultraviolet radiation, primarily from sunlight. Prolonged exposure to UV radiation can cause fading, discoloration, and embrittlement of the finish, altering its intended color and reducing its protective capabilities. This is especially important for exterior applications and items exposed to direct sunlight. A grey-stained wooden fence, for instance, requires a UV-resistant topcoat to prevent the color from fading or yellowing over time. Without such protection, the grey hue will degrade, resulting in an unsightly and uneven appearance.
- Chemical Resistance
Chemical resistance denotes the ability of the grey finish to withstand exposure to various chemicals, such as household cleaners, solvents, and acids, without degradation or damage. This is crucial for surfaces that are frequently cleaned or come into contact with potentially harmful substances. Insufficient chemical resistance can lead to staining, etching, and erosion of the finish, compromising its appearance and protective function. A grey-painted kitchen cabinet, for example, needs a chemical-resistant coating to withstand spills and cleaning agents. A failure to meet this need will lead to damage to the finish and potential harm to the wood substrate.
The durability requirements are not static but rather dynamically linked to the specific context in which the grey finish is employed. A purely decorative grey finish on a protected interior surface will have significantly lower durability demands compared to a grey finish on exterior decking. Thus, a thorough assessment of the anticipated environmental conditions and usage patterns is essential for selecting the appropriate finish and application techniques to ensure long-term performance and aesthetic satisfaction. Consideration of these requirements can guide decisions regarding the selection of appropriate sealers, the thickness of the finish layers, and the need for specialized treatments to enhance resistance to specific environmental factors. By aligning material selection and application methods with the anticipated demands, long-term durability and aesthetic appeal are maximized.
7. Maintenance Needs
The long-term viability and aesthetic appeal of a grey finish on wood are intrinsically linked to consistent and appropriate maintenance. The specific maintenance protocols necessary are dictated by several factors, including the type of grey finish applied (stain, paint, reactive treatment), the wood species, and the environmental conditions to which the wood is exposed. Neglecting maintenance can result in discoloration, degradation of the finish, and ultimately, damage to the wood itself, necessitating costly repairs or complete refinishing. A failure to regularly clean a grey-stained deck, for example, can lead to the accumulation of dirt, mildew, and algae, which can not only obscure the grey hue but also accelerate the deterioration of the wood, causing rot and structural instability.
Routine cleaning, using appropriate cleaning agents that will not damage the finish, is paramount. For interior applications, gentle dusting and occasional wiping with a damp cloth are generally sufficient. Exterior applications, however, demand more rigorous cleaning to remove accumulated dirt, debris, and biological growth. Periodic reapplication of a protective topcoat, such as a sealant or varnish, is also crucial for maintaining the finish’s integrity and resistance to moisture, UV radiation, and abrasion. The frequency of reapplication depends on the severity of environmental exposure and the durability of the topcoat. For instance, a grey-painted wooden exterior door subjected to harsh sunlight and frequent rain requires more frequent resealing than a grey-stained interior bookshelf. Repairing minor scratches and blemishes promptly is also essential to prevent them from worsening and compromising the finish’s protective properties. Specific maintenance recommendations vary based on the type of finish. For example, a wax finish might require periodic reapplication of wax, while a polyurethane finish may necessitate a more thorough cleaning with specialized cleaning products.
In conclusion, understanding and adhering to the specific maintenance needs of a grey finish on wood are essential for preserving its appearance and prolonging its lifespan. While the initial application of the finish is crucial, consistent maintenance is the ongoing investment that ensures long-term satisfaction and prevents costly repairs. The challenges lie in identifying the correct maintenance protocols for a given finish and adhering to those protocols consistently. A proactive approach to maintenance, coupled with a knowledge of the specific characteristics of the wood and the finish, will significantly contribute to the lasting beauty and durability of the grey-finished wood. Addressing potential issues proactively is preferable to reactive repairs, contributing to the overall value and longevity of the finished product.
Frequently Asked Questions
The following section addresses common inquiries and misconceptions regarding the application, maintenance, and performance of grey finishes on wood. These questions are designed to provide clarity and facilitate informed decision-making.
Question 1: What wood species are best suited for a grey finish?
While a grey finish can be applied to a wide array of wood types, hardwoods such as oak, maple, and ash generally exhibit superior results. Their tighter grain structure promotes more uniform stain absorption compared to softwoods like pine, which may require pre-stain conditioning to prevent blotching. The natural color undertones of the wood will also influence the final appearance of the grey finish.
Question 2: How can one prevent a grey stain from appearing blotchy on wood?
Blotching is a common issue, particularly with porous woods. Proper surface preparation, including thorough sanding and the application of a pre-stain wood conditioner, is critical. Applying thin, even coats of stain and wiping off the excess promptly can also minimize blotching. Testing the stain on an inconspicuous area beforehand is advisable.
Question 3: What are the primary differences between a grey stain and a grey paint for wood?
A grey stain penetrates the wood, highlighting the natural grain pattern, while a grey paint forms an opaque layer on the surface, obscuring the grain. Stains offer a more transparent, natural look, while paints provide more complete color coverage and greater protection against moisture and abrasion.
Question 4: How does one maintain a grey finish on wood flooring?
Regular cleaning with a pH-neutral wood floor cleaner is essential. Avoid harsh chemicals or abrasive cleaners that can damage the finish. Periodically reapply a protective topcoat, such as polyurethane, to maintain the floor’s durability and resistance to wear. Mats at entryways can minimize dirt and grit, further protecting the finish.
Question 5: Can a grey finish be applied to exterior wood surfaces?
Yes, but specialized exterior-grade stains and paints with UV inhibitors are necessary to prevent fading and discoloration from sunlight exposure. Additionally, a water-resistant sealant is crucial to protect the wood from moisture damage. Regular maintenance and reapplication of the protective topcoat are essential for long-term durability.
Question 6: How can one repair scratches or damage to a grey finish on wood?
Minor scratches can often be concealed with touch-up markers or wax sticks specifically formulated for wood finishes. Deeper scratches may require sanding the affected area, re-staining or painting, and applying a new topcoat. Consulting a professional wood finisher is recommended for complex repairs.
These FAQs offer a concise overview of key considerations related to achieving and maintaining a quality grey finish on wood. Adhering to best practices in surface preparation, material selection, and maintenance will contribute to a successful and long-lasting outcome.
The subsequent section will explore advanced techniques and specialized applications of grey finishes on wood.
Grey Finish on Wood
The preceding exploration has detailed the multifaceted nature of achieving and maintaining a desirable grey aesthetic on wooden surfaces. Key aspects include wood species selection, meticulous surface preparation, appropriate application methods, the selection of compatible sealers, and the establishment of robust maintenance protocols. Successfully implementing these elements is critical to realizing a durable and visually pleasing result.
The enduring popularity of the grey finish on wood underscores its versatility and aesthetic appeal across diverse applications. Understanding the underlying principles, coupled with diligent execution, empowers individuals and professionals to leverage this finish effectively. Future endeavors should prioritize ongoing research and development of innovative materials and techniques to further enhance the performance and longevity of grey finishes on wood. The judicious application of knowledge will ensure continued success in achieving desired outcomes.


