Wood coatings formulated to protect and enhance the appearance of wooden surfaces are a broad category encompassing a variety of products. These products, designed for application on interior and exterior wood projects, are available in different formulations that offer varying degrees of protection and aesthetic appeal. Examples include stains that penetrate the wood to impart color, sealers that protect against moisture and wear, and topcoats that provide a durable, attractive finish.
The application of protective coatings extends the lifespan of wooden furniture, cabinetry, flooring, and trim by guarding against scratches, water damage, and fading from ultraviolet light. These coatings also enhance the natural beauty of wood grain, allowing for customization of color and sheen. Historically, the use of wood finishes dates back centuries, with early applications employing natural oils and waxes. Modern formulations leverage advanced chemistry to provide superior durability and ease of application, catering to both professional woodworkers and DIY enthusiasts.
The following article delves into specific types of wood coatings, examining application techniques, best practices for surface preparation, and strategies for selecting the appropriate product for various projects. Additionally, it will explore the environmental considerations associated with different formulations and provide guidance on proper disposal methods.
Application Strategies
Effective application of wood coatings is critical for achieving a durable and aesthetically pleasing result. Prior preparation, proper technique, and appropriate product selection are essential.
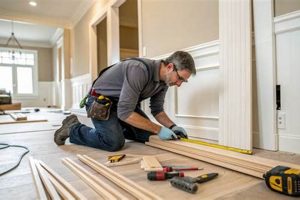
Tip 1: Surface Preparation. Thoroughly clean and sand the wood surface. Remove any existing finishes, dirt, or imperfections. Sanding should progress from coarser to finer grits, ensuring a smooth, even substrate for the coating. Uneven surfaces will result in an inconsistent finish.
Tip 2: Stirring and Mixing. Properly stir the coating to ensure a uniform consistency. Avoid shaking, as this can introduce air bubbles that may compromise the final finish. Follow the manufacturer’s instructions regarding mixing and thinning, if required.
Tip 3: Application Technique. Apply the coating in thin, even coats. Avoid applying excessive amounts in a single application, as this can lead to runs, drips, and prolonged drying times. Use a high-quality brush, roller, or sprayer appropriate for the chosen coating.
Tip 4: Drying Time. Allow adequate drying time between coats. Follow the manufacturer’s recommended drying times, as insufficient drying can compromise the adhesion and durability of subsequent coats. Ensure proper ventilation during the drying process.
Tip 5: Sanding Between Coats. Lightly sand between coats to remove any imperfections and create a smoother surface for the subsequent application. Use fine-grit sandpaper and avoid excessive sanding, which can remove too much of the previous coat.
Tip 6: Choosing the Right Applicator. The choice of applicatorbrush, roller, or sprayershould align with the coatings viscosity and the desired finish. Brushes offer control for detail work, rollers ensure uniform coverage on larger areas, and sprayers deliver a consistent finish with minimal brush strokes.
Tip 7: Environmental Considerations. Maintain a suitable temperature and humidity level in the work area. Extreme temperatures or humidity can negatively affect the drying time and the overall quality of the finish. Consult the product’s technical data sheet for optimal environmental conditions.
Adhering to these guidelines optimizes the performance and longevity of wood coatings, resulting in a professional-quality finish that enhances the wood’s natural beauty while providing lasting protection.
The concluding section of this article will address common troubleshooting issues and provide additional resources for further research.
1. Durability
The durability of wood coatings directly influences the lifespan and aesthetic appeal of treated surfaces. In the context of wood finishes, durability refers to the coating’s capacity to withstand wear, abrasion, impact, moisture, and chemical exposure without degradation. Wood finishing products formulated with robust resins and additives exhibit greater resistance to these factors, providing prolonged protection and reducing the need for frequent reapplication. The selection of a wood coating with appropriate durability characteristics is crucial in high-traffic areas, environments with high humidity, or locations exposed to direct sunlight. Conversely, insufficient durability leads to scratches, water damage, fading, and ultimately, the premature deterioration of the wood substrate.
Wood coating durability is often achieved through specific chemical compositions and application techniques. For instance, polyurethane coatings, known for their hardness and abrasion resistance, are frequently used on hardwood floors and furniture subjected to heavy use. Epoxy coatings, characterized by their chemical resistance and impermeability, are suitable for laboratory countertops or marine applications. The application of multiple coats and proper surface preparation further enhances the durability of the coating. Real-world examples include using a high-solids polyurethane on a kitchen table to withstand daily use and spills, or employing a spar varnish on exterior wood trim to protect against weathering.
In summary, understanding and prioritizing durability when selecting wood coatings is paramount for ensuring the long-term performance and appearance of treated wood surfaces. The choice of coating should align with the specific environmental conditions and anticipated use of the wood item. While factors like color and sheen are important, the inherent durability of the finish dictates its ability to protect and preserve the underlying wood. Ignoring durability considerations often leads to costly repairs, frequent recoating, and an overall reduction in the service life of the wood product.
2. Application Method
The success of achieving the desired outcome with wood finishes is inextricably linked to the chosen application method. Different wood finishing products exhibit specific characteristics that necessitate particular application techniques for optimal results. The correlation between the finish selected and the means by which it is applied directly impacts the coating’s adhesion, uniformity, and overall performance. Incorrect application can lead to issues such as blistering, uneven color distribution, and compromised durability. For instance, a thick-bodied varnish applied with an inappropriate brush may result in visible brush strokes and a non-uniform sheen, while a water-based stain applied too heavily may lead to grain raising. Understanding these relationships forms a cornerstone of proper wood finishing practices.
Consider the practical implications of selecting a spray application for a lacquer finish versus brushing. Spraying typically provides a smoother, more even coat, particularly on intricate surfaces. However, it requires specialized equipment, proper ventilation, and meticulous masking to prevent overspray. Brushing, on the other hand, offers greater control and precision, making it suitable for smaller projects or areas where overspray is a concern. The choice between these methods should consider the finish’s viscosity, drying time, and the complexity of the project. A gel stain, for example, is often best applied with a cloth or foam applicator due to its thickness, ensuring even distribution and preventing drips. Similarly, using the wrong type of spray nozzle with certain wood finishing products might lead to issues.
In conclusion, the application method is not merely a secondary consideration but an integral component of the wood finishing process. The careful selection of an appropriate application technique is paramount for realizing the full potential of wood finishing products. Challenges in this area often arise from a lack of knowledge regarding specific product requirements. A thorough understanding of the relationship between finish characteristics and application methods significantly contributes to the creation of durable, aesthetically pleasing wood surfaces. Mastering this correlation allows professionals and enthusiasts alike to achieve consistently superior results.
3. Color Selection
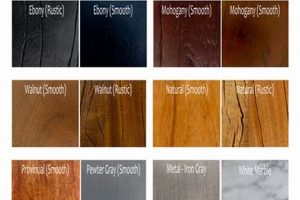
Color selection constitutes a critical phase in the application of wood finishes. The choice of color significantly impacts the final aesthetic of the treated wood surface, influencing the perceived value, style, and overall ambiance of the project. The selection of a color that complements the surrounding environment or existing dcor often dictates the perceived success of the finishing project. The available spectrum of color options allows for precise control over the visual outcome, enabling the creation of both subtle enhancements and dramatic transformations. For instance, a light stain may accentuate the natural grain of a wood, while a darker tone may provide a sense of formality and richness.
The interaction between the chosen finish and the underlying wood species presents a crucial consideration in color selection. Certain wood types absorb stains differently, resulting in variations in the final color. A cherry wood, for example, may exhibit a richer, warmer tone compared to pine when treated with the same finish. Therefore, conducting test applications on scrap wood is highly recommended before committing to a final color. Furthermore, the sheen level of the finish affects color perception, with glossier finishes typically appearing darker than matte finishes of the same hue. The impact of lighting conditions on color appearance requires consideration; natural light and artificial light can alter the perceived color, thus requiring adjustments to initial selections.
Therefore, the thoughtful integration of color selection into the wood finishing process is essential for achieving desired outcomes. Thorough assessment of wood species characteristics, finish properties, and environmental factors reduces the risk of unsatisfactory results and enables the creation of visually appealing and harmonious wood surfaces. The ability to manipulate color allows for the customization of wood products to align with individual preferences and design aesthetics, making color selection an indispensable aspect of wood finishing.
4. Wood Protection
The primary function of wood coatings is the provision of protection against environmental and physical stressors. This protective barrier mitigates damage from moisture, ultraviolet radiation, physical abrasion, and biological agents such as fungi and insects. The efficacy of this protection directly correlates with the longevity and aesthetic preservation of the underlying wood substrate. Without adequate shielding, wood is susceptible to warping, cracking, discoloration, rot, and insect infestation, leading to structural compromise and aesthetic degradation. Wood coatings, therefore, are critical for ensuring the durability and extending the lifespan of wood products. A deck coated with protective product, for example, endures weather exposure and foot traffic, while a tabletop remains resistant to spills and scratches.
Formulations commonly incorporate protective additives and specialized resins designed to enhance resistance to specific threats. Ultraviolet absorbers mitigate the fading and degradation caused by sunlight, while fungicides prevent the growth of mold and mildew. Water-repellent additives minimize moisture absorption, reducing the risk of swelling, cracking, and rot. Abrasion-resistant additives, such as ceramic particles, enhance the coating’s ability to withstand physical wear. The careful selection of a coating tailored to the specific environmental and usage conditions is crucial for achieving optimal protection. Using an exterior product on outdoor furniture protects it from the elements, while employing a high-gloss coating on a frequently cleaned surface enables easy stain removal. It can protect from moisture for example.
In summation, wood protection is an indispensable aspect of maintaining the structural integrity and aesthetic value of wooden items. The selection and proper application of protective products constitute a proactive strategy for mitigating the damaging effects of environmental factors, physical wear, and biological threats. By understanding the specific protective requirements of a given wood product and choosing a coating formulated to address those needs, users ensure the long-term preservation and enhancement of wooden surfaces. This extends the life of the wood surface, and delays the need for renovations and/or repairs.
5. Drying Time
Drying time constitutes a critical specification in the application of wood coatings, significantly influencing the final quality and durability of the applied finish. For wood finishing products, drying time refers to the duration required for the applied coating to transition from a liquid or semi-liquid state to a solid, tack-free film. The length of this period varies depending on the formulation of the coating, the ambient temperature, humidity levels, and the thickness of the applied layer. Insufficient drying can result in surface tackiness, increased susceptibility to damage, and compromised adhesion of subsequent coats. Conversely, excessively long drying times extend project completion timelines and can increase the risk of contamination from dust or other airborne particles. Therefore, understanding and adhering to the manufacturer’s recommended drying times is crucial for achieving optimal results. Example, a slow-drying varnish in high humidity may remain tacky for an extended period, attracting dust particles and affecting the final sheen.
The drying time is further influenced by the formulation chemistry. Water-based coatings typically exhibit faster drying times compared to oil-based coatings, due to the rapid evaporation of water. However, variations exist within these categories. Coatings formulated with advanced alkyd resins may exhibit improved drying characteristics compared to traditional oil-based varnishes. Furthermore, the addition of specific additives, such as driers, can accelerate the drying process, although their use must be carefully controlled to avoid compromising other properties of the finish. Practical application considerations include ensuring adequate ventilation to facilitate solvent evaporation and maintaining consistent temperature and humidity levels within the recommended range.
In summary, adherence to recommended drying times ensures the development of a robust and durable finish. Neglecting this aspect of the wood finishing process can lead to a range of issues, including surface imperfections, compromised adhesion, and reduced durability. Careful consideration of environmental conditions and product specifications is essential for achieving optimal outcomes and maximizing the performance of the applied coating. Mastering this consideration enables professionals and amateurs to achieve the best results in their respective projects and work areas.
6. Surface Preparation
Proper surface preparation is paramount for achieving optimal results with wood coatings. The application of wood finishing products, including those by Minwax, necessitates a well-prepared substrate to ensure adhesion, uniformity, and longevity of the final finish.
- Cleaning and Degreasing
The removal of contaminants such as dirt, grease, wax, and existing finishes is a critical first step. Residue left on the surface can impede the penetration of stains and prevent proper adhesion of topcoats. For instance, the presence of silicone-based furniture polish can cause “fish-eye,” a phenomenon where the coating retracts from contaminated areas. Cleaning with mineral spirits or a specialized wood cleaner is generally recommended prior to sanding. Minwax stains and finishes perform optimally on clean, bare wood.
- Sanding
Sanding creates a smooth, uniform surface, essential for even absorption of stain and proper adhesion of subsequent coats. Progressing through increasingly finer grits of sandpaper, typically from 120 to 220 grit, removes imperfections and opens the wood pores. Failure to sand adequately can result in blotchy stain absorption and a rough, uneven finish. Minwax offers a range of stains designed to penetrate the wood, making proper sanding vital for consistent color.
- Repairing Imperfections
Addressing any dents, scratches, or holes before applying a finish is crucial for a professional-looking result. Wood filler or putty can be used to repair these imperfections, ensuring a smooth, level surface. The filler must be compatible with the chosen wood finish and sanded flush with the surrounding wood. Neglecting this step will result in visible blemishes that detract from the final appearance. Minwax wood fillers are specifically designed to accept stains and finishes, providing a seamless repair.
- Dust Removal
Thorough dust removal after sanding is essential to prevent contamination of the finish. Even minute particles of dust can create a rough, uneven surface and impede adhesion. Vacuuming the surface and wiping it down with a tack cloth is recommended. Static electricity can attract dust, so using an anti-static tack cloth can be beneficial. Applying Minwax products to a dust-free surface ensures a smooth, professional-quality finish.
Effective surface preparation is not merely a preliminary step; it is an integral component of the wood finishing process. Proper preparation maximizes the aesthetic appeal and protective qualities of wood coatings, particularly those offered by Minwax. By adhering to these principles, users enhance the longevity and appearance of their wood projects.
7. Sheen Level
Sheen level, a measure of the light reflected from a finished surface, is an integral attribute of wood coatings. It significantly influences the perceived aesthetic of wood surfaces treated with Minwax products. The selection of an appropriate sheen level, ranging from matte to high gloss, directly impacts the visual characteristics of the wood, affecting factors such as color vibrancy, depth perception, and the visibility of surface imperfections. A higher sheen enhances reflectivity, amplifying the color intensity while also accentuating any blemishes or irregularities in the substrate. Conversely, a matte finish minimizes light reflection, creating a more subdued appearance and effectively concealing minor flaws. The choice of sheen, therefore, must align with the desired aesthetic outcome and the condition of the wood surface.
Minwax offers a spectrum of finishes with varying sheen levels to accommodate diverse project requirements. A high-gloss polyurethane may be selected for furniture requiring a durable, easily cleaned surface, albeit at the expense of increased visibility of scratches. A satin or semi-gloss polyurethane, commonly used on hardwood floors, provides a balance between durability and aesthetic appeal, offering moderate reflectivity without excessive glare. A matte or low-luster finish might be preferred for antique furniture or projects where a subtle, natural appearance is desired. Understanding the correlation between the specific Minwax finish and its corresponding sheen level is crucial for achieving the intended visual effect. Furthermore, consider that surface preparation, including sanding, can affect the sheen level. If imperfections are present, a higher sheen may enhance imperfections.
In summary, the sheen level is a key determinant of the aesthetic outcome when using Minwax wood finishes. The proper selection of sheen allows for the customization of wood surfaces to meet specific design objectives, balancing considerations of durability, visual appeal, and surface condition. Failure to account for sheen level can lead to unintended visual effects, detracting from the overall quality of the finished project. Therefore, careful consideration of sheen is essential for realizing the full aesthetic potential of Minwax wood coatings and protecting the wood surface.
Frequently Asked Questions Regarding Minwax Finishes
This section addresses common inquiries concerning the selection, application, and maintenance of wood coatings manufactured by Minwax. It aims to provide concise, informative answers to frequently encountered questions, thereby assisting users in achieving optimal results with these products.
Question 1: What is the optimal method for preparing a wood surface prior to the application of Minwax wood finish?
The preparation of the wood surface involves the removal of all existing finishes, dirt, grease, and other contaminants. Sanding should progress from coarser to finer grits, typically concluding with 220-grit sandpaper. The surface must then be thoroughly cleaned to remove all sanding dust. Proper preparation ensures optimal adhesion and a uniform finish.
Question 2: What factors influence the drying time of Minwax stains and topcoats?
The drying time is influenced by several factors, including ambient temperature, humidity levels, the thickness of the applied coat, and the specific formulation of the product. Higher temperatures and lower humidity generally accelerate drying. Thick coats require longer drying times. It is imperative to adhere to the drying times specified by Minwax on the product label.
Question 3: How should one select the appropriate sheen level for a Minwax polyurethane finish?
The selection of sheen level should align with the desired aesthetic and the intended use of the treated surface. High-gloss finishes offer greater durability and cleanability but accentuate imperfections. Satin or semi-gloss finishes provide a balance between durability and a more subdued appearance. Matte finishes minimize light reflection and conceal minor flaws.
Question 4: What is the recommended method for applying Minwax stain to prevent blotching?
To minimize blotching, it is advisable to use a wood conditioner prior to staining. This helps to equalize the absorption rate of the wood, resulting in a more uniform color. Apply the stain evenly and remove any excess after the recommended penetration time. Stirring the can well and following the product’s directions are important factors to consider.
Question 5: How can one ensure the durability of a Minwax finish on a high-traffic surface?
Durability on high-traffic surfaces can be enhanced by selecting a Minwax product specifically formulated for such applications, such as a polyurethane with high abrasion resistance. Applying multiple coats and allowing each coat to dry completely before applying the next will help the product last. Periodic maintenance and reapplication may be necessary to maintain optimal protection.
Question 6: What are the appropriate safety precautions to observe when using Minwax wood finishing products?
Safety precautions include working in a well-ventilated area, wearing appropriate personal protective equipment such as gloves and a respirator, and avoiding contact with skin and eyes. All Minwax products should be stored out of reach of children and pets. The product’s safety data sheet can provide further safety directions for use.
These FAQs offer guidance on key aspects of using wood coatings. Proper application and maintenance are crucial for achieving lasting results and maintaining the integrity of the treated wood surfaces.
The next section of this article will address troubleshooting common issues encountered during the finishing process and provide solutions for resolving these challenges.
Conclusion
This exposition has presented a comprehensive overview of wood coatings, emphasizing the selection, application, and maintenance considerations critical to achieving durable and aesthetically pleasing results. Key aspects, including surface preparation, sheen level, drying time, and color selection, have been addressed to provide a thorough understanding of the factors influencing the final outcome. The information presented aims to equip users with the knowledge necessary to make informed decisions regarding wood finishing projects.
Successful implementation of wood coatings demands adherence to best practices and a careful assessment of project-specific requirements. The longevity and visual appeal of treated wood surfaces are contingent upon the diligent application of these principles. Continued education and a commitment to quality craftsmanship are essential for maximizing the potential of wood finishing products and ensuring lasting value. Wood finishing is a skill that takes time, and effort to master. So be patient and remember every professional was once a beginner.


