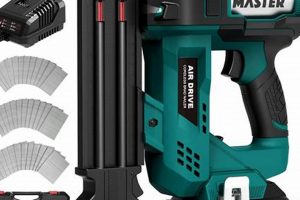
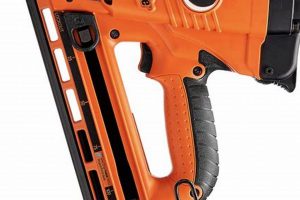
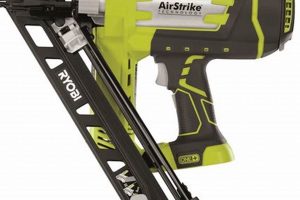
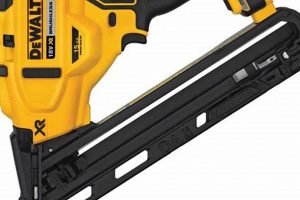
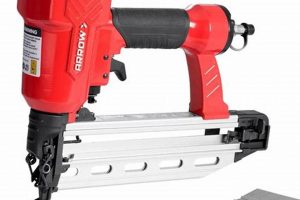
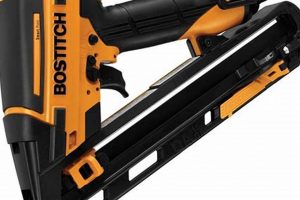
A specialized tool employing compressed air to drive fasteners, this device is commonly used in woodworking and construction for precise and delicate applications. It is designed to set nails flush with or slightly below the surface of the material, minimizing visible evidence of the fastening. An example includes attaching trim, molding, or cabinetry where a clean, professional appearance is paramount.
Its significance lies in its ability to provide a consistent, controlled nailing action, reducing the risk of splitting or damaging the workpiece. This tool enhances efficiency and precision compared to manual methods. Historically, it represents an advancement over traditional hammer-and-nail techniques, enabling faster project completion and improved overall quality in finish carpentry.
The following sections will delve into the specific features, operational considerations, maintenance procedures, and selection criteria relevant to this type of tool, providing a thorough understanding for both novice and experienced users.
Operation and Maintenance Tips
The effective and prolonged use of the tool necessitates adherence to specific operational and maintenance guidelines. Following these recommendations will ensure optimal performance and minimize the risk of equipment failure or injury.
Tip 1: Air Compressor Compatibility. Verify the air compressor’s output pressure and volume are within the tool’s specified operating range. Insufficient pressure can result in incomplete nail driving, while excessive pressure may damage the tool’s internal components.
Tip 2: Air Line Maintenance. Regularly inspect air lines for leaks, kinks, or damage. Leaks reduce the tool’s power and efficiency. Kinks can restrict airflow, impacting performance and potentially damaging the line itself.
Tip 3: Proper Fastener Selection. Use only the type and gauge of fasteners recommended by the manufacturer. Incorrect fasteners can jam the tool, damage the workpiece, or compromise the integrity of the finished product.
Tip 4: Depth Adjustment. Utilize the depth adjustment feature to precisely control the nail’s driving depth. This prevents overdriving or underdriving, ensuring a flush and secure finish without damaging the surrounding material.
Tip 5: Regular Lubrication. Apply pneumatic tool oil daily or as recommended by the manufacturer. Proper lubrication reduces friction, prevents wear, and extends the tool’s lifespan.
Tip 6: Storage Practices. When not in use, disconnect the tool from the air compressor and store it in a clean, dry environment. This prevents corrosion and accidental activation.
Tip 7: Safety Precautions. Always wear appropriate safety glasses or a face shield to protect against flying debris. Maintain a firm grip on the tool and keep hands and fingers clear of the firing mechanism.
By adhering to these operational and maintenance tips, users can maximize the performance, longevity, and safety of the tool. Consistent attention to these details will contribute to efficient project completion and professional-quality results.
The following sections will address common troubleshooting scenarios and advanced techniques for utilizing this versatile tool in a variety of applications.
1. Air Pressure
Air pressure serves as the fundamental driving force behind a pneumatic finish nail gun’s operation. It is the controlled energy source that propels fasteners with the necessary force for effective and precise application. Maintaining the correct pressure levels is paramount for both performance and tool longevity.
- Operational Efficiency
Adequate air pressure ensures consistent and reliable nail driving. Insufficient pressure results in incomplete fastener insertion, requiring manual correction and potentially compromising the integrity of the joint. Conversely, excessive pressure can lead to overdriving, damaging the surrounding material and leaving an unsightly finish. The correct pressure, as specified by the tool manufacturer, optimizes the tool’s power and speed, increasing productivity and reducing material waste.
- Tool Longevity
Consistent air pressure, within the recommended range, minimizes stress on the tool’s internal components. Fluctuations in pressure, especially spikes, can accelerate wear and tear on seals, pistons, and other critical parts, leading to premature failure. Using a pressure regulator and ensuring stable airflow from the compressor are essential for maintaining the tool’s operational lifespan.
- Safety Considerations
Proper air pressure contributes significantly to safe operation. Incorrect pressure settings can cause erratic nail firing, increasing the risk of injury to the user and bystanders. Over-pressurization can also lead to component failure and potential projectile hazards. Regularly checking and adjusting the air pressure, along with adhering to all safety guidelines, is crucial for preventing accidents.
- Material Compatibility
Different materials require varying levels of air pressure for optimal fastener insertion. Softer woods may require lower pressure settings to prevent splitting, while harder woods necessitate higher pressure for secure nail driving. Understanding the material being fastened and adjusting the air pressure accordingly ensures a professional and aesthetically pleasing finish.
In summation, air pressure is not merely a power source, but a critical operational parameter directly influencing efficiency, longevity, safety, and the quality of the finished product. A thorough understanding of its relationship with the pneumatic finish nail gun is essential for any user seeking to achieve optimal performance and professional results.
2. Nail Gauge
Nail gauge, a critical specification determining the diameter of the fastener, directly impacts the functionality and suitability of a pneumatic finish nail gun for various applications. Selecting the appropriate gauge is paramount for achieving secure fastening and preventing damage to the workpiece.
- Gauge and Material Thickness
The nail gauge must correspond to the thickness and density of the material being fastened. Thinner materials typically require a higher gauge (smaller diameter) nail to prevent splitting. Conversely, thicker, denser materials necessitate a lower gauge (larger diameter) nail for adequate holding power. Utilizing an inappropriate gauge can compromise the integrity of the joint and the aesthetic quality of the finish.
- Tool Compatibility and Capacity
Pneumatic finish nail guns are designed to accommodate specific nail gauge ranges. Attempting to load and fire nails outside of this range can result in tool malfunction, damage, or unsafe operation. Understanding the tool’s specified gauge capacity is crucial for preventing jams, misfires, and potential injury.
- Head Style and Visibility
The nail gauge influences the size and profile of the nail head, impacting the visibility of the fastener in the finished product. Higher gauge nails generally have smaller heads, offering a less conspicuous appearance suitable for delicate trim work. Lower gauge nails possess larger heads, providing greater surface area for holding power but also resulting in a more visible fastener.
- Holding Power and Joint Strength
Nail gauge directly correlates with the fastener’s holding power and the overall strength of the joint. Lower gauge nails, with their larger diameter, provide greater resistance to pull-out forces. The selection of an appropriate gauge ensures the structural integrity of the assembly and prevents premature failure.
In essence, nail gauge selection is an integral aspect of using a pneumatic finish nail gun effectively. Its interplay with material characteristics, tool capabilities, and desired finish outcomes dictates the success and longevity of the fastening process. Proper consideration of these factors ensures optimal performance and professional-quality results.
3. Depth control
Depth control is a critical feature on a pneumatic finish nail gun, enabling precise adjustment of the nail’s penetration depth into the material. This control is paramount for achieving a consistent and professional finish, preventing both protruding nail heads and surface damage from overdriving.
- Flush Finishing
The primary function of depth control is to allow for a flush finish, where the nail head is set even with the surface of the material. Achieving this eliminates the need for manual setting with a nail set, saving time and effort. An example includes installing trim or molding where a seamless transition is desired. Improper depth control can lead to visible nail heads that detract from the aesthetic appearance.
- Material Compatibility Adjustment
Different materials possess varying densities and resistances to nail penetration. Depth control allows the user to compensate for these differences. Softer woods require less driving force to achieve a flush finish, whereas harder woods necessitate greater force. Without adjustable depth, a single setting may result in nails being overdriven in softwoods and underdriven in hardwoods. This adjustability ensures consistent results across diverse materials.
- Overdrive Prevention
Overdriving occurs when the nail is set too deeply, potentially damaging the surrounding material or leaving an unsightly impression. Depth control mechanisms limit the driving force, preventing the nail head from sinking excessively into the material. This is particularly crucial when working with delicate or easily marred surfaces, such as pre-finished wood or thin veneers.
- Counter-sinking Capability
In certain applications, a slight countersinking of the nail head is desirable for filling and concealing. Depth control can be adjusted to achieve this, allowing for subsequent filling with wood filler or putty. This technique is frequently employed in cabinetry and furniture making to create a perfectly smooth and seamless surface.
The precision afforded by effective depth control enhances the versatility and utility of the pneumatic finish nail gun. It allows the operator to fine-tune the tool’s performance to match specific material properties and desired aesthetic outcomes, resulting in higher-quality workmanship and reduced rework.
4. Safety mechanism
The safety mechanism integrated into a pneumatic finish nail gun is a critical component designed to mitigate the risk of accidental nail discharge and subsequent injury. Its primary function is to prevent the tool from firing unless specific conditions are met, typically involving contact with the workpiece and activation of the trigger. This deliberate requirement reduces the likelihood of unintentional or negligent firing, which can result in serious bodily harm. For example, many models feature a nosepiece that must be fully depressed against a surface before the trigger can engage the firing mechanism, thus preventing discharge into open air.
The effectiveness of the safety mechanism directly influences the overall safety profile of the tool. A malfunctioning or bypassed safety feature significantly elevates the potential for unintended nail discharge, posing a substantial hazard to the operator and surrounding individuals. Real-world examples include instances where users, in an attempt to increase speed or convenience, disable or circumvent the safety, leading to accidental nailings and subsequent injuries, some of which necessitate medical intervention. Therefore, regular inspection and maintenance of the safety mechanism are paramount. Furthermore, users must adhere strictly to manufacturer guidelines and safety protocols to ensure its proper functioning.
In summary, the safety mechanism on a pneumatic finish nail gun is not merely an accessory but an integral safety feature vital for preventing accidental injuries. Its proper function relies on both the design integrity of the tool and the user’s commitment to safe operating practices. Understanding the mechanism’s purpose and limitations, coupled with consistent adherence to safety procedures, significantly reduces the risk associated with operating this potentially hazardous tool.
5. Maintenance schedule
The operational lifespan and consistent performance of a pneumatic finish nail gun are inextricably linked to adherence to a rigorous maintenance schedule. Neglecting scheduled maintenance precipitates a cascade of detrimental effects, ranging from diminished efficiency and increased risk of malfunction to complete tool failure. For example, failure to regularly lubricate the tool’s internal components can lead to increased friction, accelerated wear, and ultimately, seizure of critical mechanisms. A well-defined maintenance schedule, therefore, acts as a preventative measure, mitigating these risks and ensuring sustained optimal functionality. The schedule should encompass regular cleaning, lubrication, inspection of air lines and fittings, and replacement of worn components. The absence of such a schedule transforms a reliable tool into a liability, prone to breakdowns and inconsistent performance.
Practical application of a maintenance schedule involves several key actions. Daily lubrication with pneumatic tool oil is essential to reduce friction and prevent corrosion. Weekly inspection of air lines and fittings identifies and addresses leaks or damage that could compromise performance. Monthly disassembly and cleaning of the tool’s internal components remove accumulated debris and ensure smooth operation. Replacement of worn O-rings, seals, and other consumable parts, as indicated by inspection or performance decline, prevents catastrophic failures. These actions, when consistently implemented, significantly extend the tool’s service life and minimize downtime. A construction crew, for instance, relying on multiple nail guns for a large project, cannot afford unexpected equipment failures. A proactive maintenance schedule minimizes these disruptions, keeping the project on track and within budget.
In conclusion, a well-structured maintenance schedule is not an optional addendum but a fundamental requirement for the proper functioning and longevity of a pneumatic finish nail gun. Its implementation directly impacts the tool’s reliability, efficiency, and safety. Challenges to adherence often stem from time constraints and a perceived lack of immediate consequences. However, the long-term benefits, including reduced repair costs, minimized downtime, and improved overall performance, far outweigh the initial investment of time and effort. The relationship underscores the principle that preventative maintenance, though often overlooked, is a crucial determinant of equipment effectiveness and operational success.
6. Application Type
The selection and utility of a pneumatic finish nail gun are inextricably linked to the intended application type. The nature of the task dictates the specific features, power, and nail gauge required for optimal performance and desired results. Mismatched application and tool specifications can lead to inefficient operation, compromised structural integrity, and aesthetic imperfections. Understanding the nuances of various application types is therefore essential for effective tool selection and utilization. For instance, delicate trim work necessitates a lightweight tool with precise depth control and a small nail gauge to prevent splitting. Conversely, securing baseboards to wall studs requires a more powerful tool capable of driving larger nails into denser materials.
Practical examples further illustrate this connection. Cabinet construction, involving the assembly of various wood components, often benefits from a finish nailer that accepts brad nails. The small nail heads are easily concealed and minimize the risk of damaging the cabinet’s face. On the other hand, installing crown molding, which demands a strong and secure bond between the molding and the wall, may necessitate a larger gauge nail to ensure lasting stability. Ignoring these distinctions and using an inappropriate tool can result in weakened joints, visible nail heads, and ultimately, an unsatisfactory finished product. The success of any finish carpentry project depends on the careful matching of the tool’s capabilities to the demands of the specific application.
In summary, the application type serves as a primary determinant in selecting the appropriate pneumatic finish nail gun. A thorough understanding of the project requirements, including material type, desired finish, and structural load, is crucial for effective tool selection. Challenges arise when users prioritize cost or convenience over matching the tool to the application, resulting in compromised quality and potential safety hazards. The broader theme underscores the importance of informed decision-making and meticulous planning in all aspects of finish carpentry, where attention to detail is paramount for achieving professional and lasting results.
Frequently Asked Questions
The following addresses common inquiries regarding the operation, maintenance, and selection of the tool. The responses aim to provide clarity and ensure safe and effective use.
Question 1: What is the correct air pressure for a pneumatic finish nail gun?
The optimal air pressure varies depending on the specific model and the material being fastened. Consult the manufacturer’s specifications for the recommended pressure range. Exceeding the maximum pressure can damage the tool, while insufficient pressure may result in incomplete nail driving.
Question 2: How often should the tool be lubricated?
Daily lubrication with pneumatic tool oil is generally recommended to reduce friction and prevent wear on internal components. More frequent lubrication may be necessary under heavy use or in humid environments.
Question 3: What type of nails are compatible with a pneumatic finish nail gun?
The tool is designed to accept specific nail gauges and lengths. Refer to the manufacturer’s documentation for a comprehensive list of compatible fasteners. Using incorrect nails can cause jamming, misfires, and damage to the tool.
Question 4: How can nail depth be adjusted?
Most models feature an adjustable depth control mechanism. This allows for precise regulation of nail penetration, preventing overdriving or underdriving. Experimentation on scrap material is recommended to achieve the desired depth.
Question 5: What safety precautions should be observed when operating a pneumatic finish nail gun?
Always wear safety glasses or a face shield to protect against flying debris. Maintain a firm grip on the tool and keep hands and fingers clear of the firing mechanism. Disconnect the tool from the air supply when not in use or when performing maintenance.
Question 6: What are the common signs of a malfunctioning pneumatic finish nail gun?
Common indicators include inconsistent nail driving, air leaks, jamming, and a noticeable decrease in power. These symptoms may indicate the need for cleaning, lubrication, or component replacement.
The answers provided offer guidance for proper usage. Consult qualified professionals for complex issues.
The subsequent section will delve into troubleshooting scenarios.
Pneumatic Finish Nail Gun
This exploration of the pneumatic finish nail gun has elucidated its core functionalities, operational considerations, safety protocols, and maintenance requirements. Emphasis has been placed on the tool’s versatility, its impact on efficiency, and its integral role in achieving professional-grade results across diverse woodworking and construction applications. Key aspects, including air pressure management, nail gauge selection, and depth control precision, have been examined to underscore their direct influence on tool performance and overall project quality. The criticality of adhering to manufacturer guidelines and implementing a rigorous maintenance schedule has been reinforced to ensure longevity and prevent operational hazards.
The information presented serves as a foundational resource for both novice and experienced users seeking to maximize the capabilities of the pneumatic finish nail gun. A thorough understanding of its mechanics and adherence to safety practices are paramount for achieving consistent, reliable, and safe operation. Continued awareness of technological advancements and evolving safety standards within the industry remains essential for maintaining proficiency and ensuring optimal outcomes in all applications of this indispensable tool.


