The term describes products and techniques used to impart a vintage or aged appearance to wooden surfaces. This can involve simulating the effects of wear and tear, replicating the color palettes common in past decades, or employing application methods reminiscent of older craftsmanship. Examples include tinted varnishes designed to mimic the amber hues of aged shellac, distressing techniques that create the illusion of dents and scratches, and the use of milk paint to achieve a subtly uneven, historically accurate finish.
Achieving an older aesthetic on woodwork allows for the preservation of traditional design styles and the integration of contemporary pieces into historically themed environments. This approach can add character and depth to new constructions, enhancing their visual appeal and perceived value. The application also provides an opportunity to repurpose and revitalize older wooden furniture and fixtures, preventing them from ending up in landfills and reducing the demand for new materials.
The subsequent sections of this article will delve into specific product types, application methods, and safety considerations relevant to the achievement of a desired vintage aesthetic on wooden items. Detailed guidance on surface preparation, color selection, and sealing techniques will also be provided to ensure professional and durable results.
Guidance on Achieving a Vintage Aesthetic on Wood Surfaces
The following recommendations are presented to assist in effectively creating an aged or vintage appearance on wood through appropriate finishing techniques.
Tip 1: Surface Preparation is Paramount: Prior to application, ensure the wood is thoroughly cleaned and sanded. Imperfections will be accentuated by many vintage finishing methods, potentially detracting from the desired outcome. Proper preparation promotes even absorption and adhesion of the finishing product.
Tip 2: Consider the Wood’s Natural Tone: The inherent color of the wood will influence the final appearance. Lighter woods offer greater flexibility in color selection, while darker woods may require specialized techniques to achieve the desired vintage hue. Test samples on inconspicuous areas are advisable.
Tip 3: Embrace Layering Techniques: Applying multiple thin coats of different colors or finishes can create depth and visual complexity, mimicking the patina acquired through natural aging. Experiment with layering stains, glazes, and waxes to achieve unique effects.
Tip 4: Implement Controlled Distressing: Strategic distressing, such as light sanding along edges or the introduction of simulated wear marks, enhances the aged appearance. However, moderation is crucial; excessive distressing can appear artificial and detract from the overall aesthetic.
Tip 5: Utilize Appropriate Sealing Methods: After applying the desired finish, seal the surface with a clear coat to protect it and enhance durability. Consider using matte or satin finishes to maintain the vintage aesthetic, as high-gloss finishes can appear too modern.
Tip 6: Research Period-Specific Color Palettes: Accurately replicating a vintage style necessitates an understanding of the color schemes prevalent during the target era. Consult historical resources and sample books to inform color choices and ensure authenticity.
Tip 7: Experiment with Crackle Finishes: Crackle finishes create a network of fine cracks on the surface, simulating the effects of age and wear. This technique is particularly effective on painted surfaces and can add a distinctive vintage touch.
Careful adherence to these guidelines enhances the likelihood of achieving a visually appealing and authentic aged effect. Attention to detail throughout the process contributes to a higher quality, more convincing vintage finish.
The subsequent sections will explore specific product considerations, offering insights into selecting the optimal materials for achieving the desired aged aesthetic on wood surfaces.
1. Authenticity in color
The achievement of a convincingly aged appearance on wood through finishing techniques hinges significantly on the accurate reproduction of colors characteristic of the targeted era. The selection of hues dictates the perceived age and historical context of the finished piece, directly impacting its overall authenticity.
- Historical Pigment Availability
The range of pigments available historically influenced the palette of finishes achievable during different periods. Early finishes often relied on naturally derived pigments, resulting in a more muted and earthy color range compared to the vibrant, synthetic pigments introduced later. Replicating these earlier finishes requires careful consideration of available pigment sources and their resulting color properties. For example, accurately matching the ochre tones prevalent in early American furniture necessitates understanding the limitations of pigment technology during that period.
- Fading and Patina Simulation
Colors on aged wood undergo changes over time due to exposure to light, temperature fluctuations, and environmental pollutants. Finishes designed to simulate these effects must account for the subtle color shifts that occur naturally. This involves techniques like glazing or toning to introduce warm undertones that mimic the yellowing of varnishes or the gradual fading of pigments. The appropriate application of these techniques differentiates a credible aged finish from a simply colored surface. Consider, for instance, how UV exposure causes certain reds to fade, leaving behind a more subdued, almost pinkish hue replicating this effect is vital for authenticity.
- Regional Variations in Color Preferences
Color preferences and available materials varied considerably across different geographic regions throughout history. The types of wood readily available in a particular area often influenced the types of finishes employed, as well as the colors that were commonly used. For example, finishes in coastal regions might exhibit lighter, brighter colors due to the prevalence of lighter woods and a more vibrant aesthetic, while those in inland areas might feature darker, richer tones reflecting a different material base and cultural aesthetic. Understanding these regional nuances is essential for replicating finishes that accurately reflect a specific place and time.
- The Impact of Substrate Color
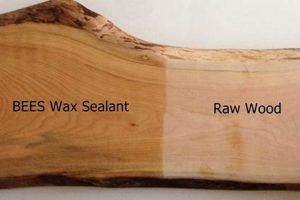
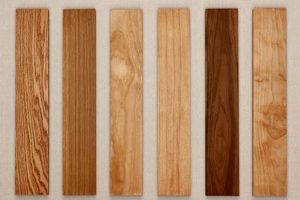
The underlying color of the wood significantly influences the final appearance of any applied finish. The same stain applied to different wood species will yield distinctly different results. Achieving authentic coloration requires an understanding of how the finish interacts with the wood’s natural tone. Lighter woods provide a cleaner palette, while darker woods can impart a richer, more subdued quality to the final finish. Careful consideration of the substrate color is crucial for selecting finishes that will produce the desired aged effect. For example, a cherry stain applied to pine will appear significantly different than when applied to mahogany, influencing the perception of age and authenticity.
The successful integration of color authenticity into a finish aimed at replicating aged wood requires a comprehensive understanding of historical pigments, the effects of time, regional variations, and the impact of the underlying wood itself. Consideration of these facets elevates a basic finish into a credible recreation of aged woodwork, enhancing the piece’s aesthetic value and historical resonance.
2. Distressing techniques
Distressing techniques are integral to achieving a credible vintage aesthetic when applying retro finishes to wood. These methods aim to simulate the wear and tear that occurs naturally over time, adding character and historical depth to newly finished surfaces.
- Simulating Physical Wear
This facet encompasses the intentional creation of marks and abrasions that mimic the effects of regular use. Examples include strategically placed dents, scratches, and worn edges achieved through the use of tools like chains, hammers, or sandpaper. The key is to apply these marks selectively, focusing on areas that would naturally experience the most wear, such as corners, edges, and areas around handles or knobs. The simulation of physical wear adds a tactile and visual element that contributes significantly to the perceived age of the wood.
- Chemical Distressing and Aging
Certain chemical treatments can accelerate the aging process of wood, creating a weathered appearance. For example, the application of lye or ammonia fumes can darken wood and raise the grain, mimicking the effects of prolonged exposure to the elements. Similarly, vinegar mixed with steel wool creates a solution that can stain wood with a gray, aged tone. Controlled application and neutralization are crucial to prevent damage to the wood and ensure the desired effect is achieved. Chemical distressing provides an alternative to physical methods, offering a nuanced approach to aging.
- Color Layering and Removal
Applying multiple layers of paint or stain and then selectively removing some layers creates a distressed appearance through contrasting colors and textures. This can be achieved by applying a base coat, followed by a topcoat, and then using sandpaper or other abrasive tools to reveal the underlying color in specific areas. This technique is particularly effective in creating a layered, time-worn look that reflects the history of the piece. The choice of colors and the method of removal can be tailored to achieve a specific vintage style.
- Glazing and Antiquing
Glazes and antiquing agents are translucent coatings that are applied over a base finish to highlight details and add depth. These materials are often applied and then partially wiped away, leaving residue in crevices and corners. This technique accentuates the texture of the wood and adds a subtle, aged tone. Glazes are typically oil-based or water-based and can be tinted to achieve a variety of effects, from subtle shading to dramatic contrasts. Antiquing creates a nuanced, aged look by emphasizing the wood’s natural imperfections.
These techniques, when applied thoughtfully, enhance the authenticity of finishes intended to replicate a vintage style. The successful integration of distressing methods creates a compelling narrative of age and use, elevating the aesthetic appeal of the finished piece.
3. Appropriate sheen level
The selection of an appropriate sheen level is a critical determinant in accurately replicating vintage aesthetics when applying retro finishes to wood. Sheen, defined as the degree to which a surface reflects light, significantly influences the perceived age, character, and historical authenticity of the finished piece. Careful consideration of sheen level is paramount to achieving a convincing retro look.
- Historical Finish Gloss Levels
Traditional wood finishes, prior to modern synthetic coatings, typically exhibited lower gloss levels. Shellac, wax, and oil finishes prevalent in earlier eras created surfaces that were more matte or satin in appearance. High-gloss finishes, associated with modern polyurethane or lacquer coatings, were largely unavailable. To emulate an authentic vintage aesthetic, finishes with a matte or satin sheen should be prioritized, replicating the characteristic look of older finishes. The use of contemporary high-gloss finishes can detract from the intended historical accuracy.
- Impact on Perceived Age and Wear
The sheen level influences the perception of wear and patina. Lower sheen finishes tend to mask minor imperfections and highlight the texture of the wood, contributing to the impression of age. Conversely, high-gloss finishes accentuate imperfections and create a more reflective, less organic appearance. In replicating a vintage finish, a matte or satin sheen allows for a more believable portrayal of aged surfaces, simulating the subtle wear patterns accumulated over time.
- Reflecting Light and Authenticity
High gloss surfaces reflect light more intensely, creating a stark and modern aesthetic. Lower sheen surfaces scatter light more diffusely, providing a softer, more subtle appearance congruent with historical styles. Utilizing a matte or satin sheen enhances the visual authenticity of the finished wood, aligning the light reflectance properties with traditional methods of craftsmanship.
- Practical Considerations and Durability
While historical accuracy is paramount, practical considerations and durability remain important. Modern matte and satin finishes often offer improved durability compared to traditional low-sheen finishes like wax. Selecting a modern finish with a matte or satin sheen allows for the achievement of a vintage aesthetic without sacrificing long-term protection and ease of maintenance. Consideration should be given to selecting finishes that offer a balance of historical accuracy and contemporary performance.
The choice of sheen level plays a vital role in the success of retro wood finishing. Selecting a matte or satin sheen is generally preferred to achieve a historically accurate and visually appealing aged look. Balancing historical accuracy with the practical considerations of durability ensures a finished product that is both aesthetically pleasing and long-lasting.
4. Surface preparation criticality
Effective surface preparation is a prerequisite for achieving a convincing and durable vintage aesthetic when applying retro finishes to wood. Inadequate preparation compromises adhesion, affects color uniformity, and undermines the overall authenticity of the finished piece. Therefore, meticulous surface preparation is not merely a preliminary step but an integral component of the entire retro finishing process.
- Removal of Existing Finishes
Prior to applying a retro finish, all existing coatings must be completely removed. Failure to do so can result in poor adhesion, uneven color absorption, and the potential for the new finish to react negatively with the old. Chemical strippers, sanding, or a combination of both are commonly employed. The choice of method depends on the type of existing finish and the condition of the wood. Thorough removal ensures a clean, uniform surface for the retro finish to properly bond.
- Addressing Imperfections
The character of many vintage finishes is defined by subtle imperfections, but uncontrolled flaws detract from the overall aesthetic. Prior to finishing, all significant dents, scratches, and other surface irregularities must be addressed. Wood fillers can be used to repair larger imperfections, while sanding can smooth out minor flaws. The goal is to create a surface that is generally smooth and uniform, allowing the retro finish to highlight the desired characteristics of age and wear, rather than unwanted blemishes.
- Achieving Proper Wood Porosity
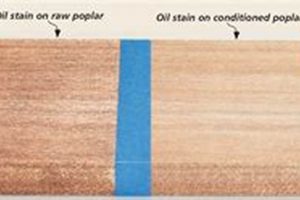
The porosity of the wood surface directly impacts the absorption of stains, glazes, and other finishing products. Closed-grain woods require less preparation, while open-grain woods may necessitate the application of a grain filler to achieve a smooth, even finish. Proper sanding techniques are also crucial for opening the wood pores and allowing for optimal penetration of the finish. The desired level of porosity is dependent on the specific finish being applied and the desired final appearance.
- Ensuring a Clean Substrate
Contaminants such as dust, grease, and wax can interfere with the adhesion and appearance of retro finishes. Prior to application, the wood surface must be thoroughly cleaned. Mineral spirits or other appropriate solvents can be used to remove grease and wax, while a tack cloth effectively removes dust particles. A clean substrate ensures optimal bonding and prevents the formation of unsightly blemishes in the final finish.
The correlation between meticulous surface preparation and the successful application of a retro finish on wood cannot be overstated. The preparatory steps outlined above directly influence the durability, aesthetic appeal, and overall historical authenticity of the finished piece. Neglecting surface preparation inevitably compromises the final result, undermining the intended vintage character and potentially leading to premature failure of the finish.
5. Historical accuracy
The effectiveness of any finishing technique aimed at replicating a vintage aesthetic on wood is intrinsically linked to its historical accuracy. The application of a so-called “retro finisher for wood” without a grounding in historical context is prone to producing results that, while superficially aged, lack the authenticity necessary to convincingly evoke a specific era. This relationship operates on a cause-and-effect principle: diligent research and faithful adherence to period-specific materials and methods directly result in a finish that resonates with the intended historical period, while disregard for these details leads to a pastiche that fails to capture the nuances of the chosen style. For example, attempting to create a mid-century modern finish using pigments and application techniques developed for colonial-era furniture would yield a result demonstrably incongruous with the intended design period.
The significance of historical accuracy extends beyond mere aesthetic appeal. The selection of appropriate finishes and techniques has implications for the conservation and restoration of antique wooden artifacts. Improper finishing methods can irreversibly damage historical pieces, diminishing their value and obscuring their historical provenance. Conversely, the judicious application of historically accurate finishes can preserve the integrity of these artifacts, ensuring their longevity and maintaining their cultural significance. The restoration of a Queen Anne-style chair, for instance, requires the use of shellac-based finishes and hand-rubbing techniques consistent with the period to avoid devaluing the piece with modern, incompatible materials.
In conclusion, the achievement of a truly effective “retro finisher for wood” relies upon a rigorous commitment to historical accuracy. This necessitates careful consideration of the materials, techniques, and aesthetic preferences characteristic of the target period. While modern finishes may offer improvements in durability and ease of application, their use without regard for historical context compromises the authenticity of the result. The application of historical knowledge in the field of wood finishing is therefore not merely an academic exercise but a critical component of producing aesthetically pleasing and historically resonant results.
6. Layering complexity
The degree of layering employed in applying a finish directly influences the authenticity and perceived depth of the vintage aesthetic achieved. Applying multiple layers of different materials, such as stains, glazes, and sealers, creates nuances that mimic the effects of age and natural wear. Each layer interacts with those beneath, resulting in a complexity that a single-coat finish cannot replicate. For example, a base coat of stain might be followed by a glaze to accentuate grain patterns, then sealed with a tinted varnish to impart a specific hue and level of sheen. This layered approach simulates the patina accumulated over years of use and exposure.
A crucial aspect of layering complexity is the intentional introduction of subtle variations between layers. This can involve slight differences in color, sheen, or application technique. For instance, a distressed finish might involve applying a darker stain in certain areas and then lightly sanding it back to reveal the underlying wood and base stain colors. The strategic use of multiple coats of different materials with varying degrees of opacity simulates the uneven wear patterns characteristic of aged wood surfaces. The careful selection and application of each layer contribute to a finish with greater visual interest and historical plausibility.
The relationship between layering complexity and successful retro wood finishing is direct: a higher degree of layering, executed with precision and an understanding of historical materials, typically results in a more convincing vintage appearance. While simpler finishing methods may suffice for some applications, achieving a truly authentic retro finish often requires a multi-layered approach that captures the subtle nuances of age and wear. However, complexity must be balanced with skill and control; excessive or poorly executed layering can result in a finish that appears artificial or muddled, undermining the intended aesthetic.
7. Protective sealing
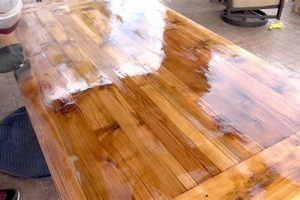
Protective sealing is an indispensable component of any retro finishing process applied to wood. While the primary objective of a retro finish is to emulate the aesthetic qualities of aged or vintage wood, the long-term preservation of that finish, and the underlying wood substrate, hinges on the proper application of a protective sealant. The cause-and-effect relationship is direct: the absence of a suitable sealant results in premature wear, damage, and degradation of the carefully crafted retro finish, undermining the intended aesthetic and compromising the integrity of the wood. Consider, for instance, a distressed milk paint finish applied to a tabletop; without a protective sealant, the porous nature of milk paint renders it highly susceptible to staining, scratching, and moisture damage, rapidly eroding the vintage aesthetic.
The selection of an appropriate sealant must consider the specific characteristics of the retro finish applied and the intended use of the wooden item. Sealants range from traditional waxes and oils to modern polyurethane and acrylic coatings. Each offers varying degrees of protection against moisture, abrasion, UV radiation, and chemical exposure. Historically accurate sealants, such as shellac or wax, may be favored for preserving the authenticity of antique reproductions, but they often require more frequent maintenance and offer less robust protection compared to modern alternatives. For example, a retro finish applied to a high-traffic flooring surface necessitates a durable, abrasion-resistant sealant such as polyurethane, even if it slightly compromises the historical accuracy of the finish. A balance must be struck between aesthetic fidelity and practical durability.
In summary, protective sealing is not merely an ancillary step but a crucial element in ensuring the longevity and aesthetic integrity of a retro finish on wood. The choice of sealant must be informed by the specific finish applied, the intended use of the item, and a consideration of historical accuracy versus practical durability. While the emulation of a vintage aesthetic is the initial goal, the enduring success of any retro finishing project depends on the effective protection afforded by a properly selected and applied sealant. The challenges lie in striking the right balance between aesthetic authenticity and long-term preservation, requiring careful consideration of the available options and their respective properties.
Frequently Asked Questions
The following questions address common inquiries and misconceptions regarding the application and selection of finishes designed to impart a vintage aesthetic to wood.
Question 1: What constitutes a “retro finisher for wood,” and how does it differ from a standard wood finish?
A “retro finisher for wood” is a product or technique specifically formulated to replicate the appearance of aged or vintage wood. Unlike standard finishes that prioritize uniform coverage and durability, these finishers often incorporate techniques such as distressing, antiquing, and the use of historically accurate color palettes to simulate the effects of time and wear.
Question 2: Is surface preparation more critical when applying a “retro finisher for wood” compared to a modern finish?
Yes. Surface preparation is often more critical when applying a finish intended to replicate a vintage style. Existing imperfections, if not properly addressed, can be accentuated by distressing techniques or the application of certain stains, resulting in an uneven or undesirable appearance. Thorough cleaning, sanding, and repair are essential for a successful outcome.
Question 3: How does one ensure the historical accuracy of a “retro finisher for wood” project?
Achieving historical accuracy requires research into the finishing materials, techniques, and color palettes prevalent during the target era. Consulting historical resources, such as furniture catalogs and paint sample books, can provide valuable guidance. Matching pigments and application methods to the specific period is crucial for replicating an authentic vintage aesthetic.
Question 4: Are “retro finishers for wood” less durable than modern finishes?
The durability of a “retro finisher for wood” depends on the specific products used and the application techniques employed. While some traditional finishing methods, such as wax or shellac, may offer less protection than modern polyurethane coatings, many contemporary products are formulated to provide both a vintage aesthetic and adequate durability. The selection of an appropriate topcoat is critical for ensuring long-term protection.
Question 5: What are some common mistakes to avoid when applying “retro finishers for wood?”
Common mistakes include inadequate surface preparation, excessive distressing, the use of historically inaccurate color palettes, and the failure to apply a protective sealant. Over-distressing can result in a finish that appears artificial, while neglecting to seal the finish can compromise its durability. Attention to detail and careful execution are essential for avoiding these pitfalls.
Question 6: Can a “retro finisher for wood” be applied to all types of wood?
While most “retro finishers for wood” can be applied to a variety of wood species, the specific results may vary depending on the wood’s grain pattern, porosity, and natural color. Open-grained woods may require the application of a grain filler to achieve a smooth finish, while darker woods may necessitate adjustments to the color palette to achieve the desired vintage aesthetic. Testing the finish on a small, inconspicuous area is recommended prior to full application.
In summary, successful application of a “retro finisher for wood” involves a combination of careful preparation, informed material selection, and precise execution. Attention to detail and a commitment to historical accuracy are essential for achieving a convincing and durable vintage aesthetic.
The subsequent section will explore the environmental considerations associated with wood finishing, examining the impact of various finishing products and techniques on ecological sustainability.
retro finisher for wood
The preceding exploration has illuminated the multifaceted nature of finishes intended to replicate aged or vintage aesthetics on wooden surfaces. The analysis encompassed surface preparation, color selection, distressing techniques, sheen level considerations, historical accuracy, layering complexity, and the necessity of protective sealing. Each of these elements contributes critically to the creation of a convincing and durable final product. The achievement of a truly authentic retro finish necessitates a balance between artistic expression and a rigorous understanding of both historical context and material properties.
The pursuit of a vintage aesthetic through specialized finishes presents both challenges and opportunities. Practitioners are encouraged to approach this endeavor with a commitment to research, experimentation, and a measured application of the principles outlined. Continued advancements in materials science and finishing techniques hold the potential to further refine the art of replicating historical styles, ensuring both the preservation of traditional aesthetics and the sustainable use of wood resources. Understanding the implications of “retro finisher for wood” is essential for conservation, restoration, and the creation of new pieces that resonate with the past.


