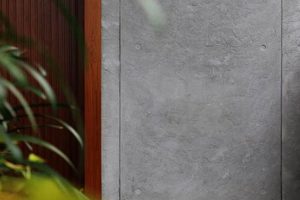
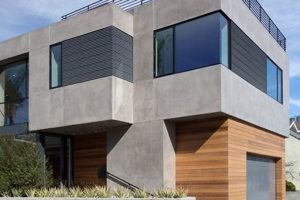
A surface treatment resulting in a flat, even plane, free from texture or imperfections, creates a refined aesthetic on interior and exterior walls. This outcome is achieved through careful application of plaster, drywall compound, or other specialized coatings, often requiring multiple layers and meticulous sanding to eliminate any irregularities. An example of such a treatment is a Level 5 drywall finish, considered the highest standard in the industry.
The implementation of such a surface offers numerous advantages. It provides an ideal base for paint, ensuring uniform color distribution and enhanced adhesion. Furthermore, it contributes to a modern, clean appearance, increasing the perceived value of a space. Historically, achieving this level of refinement required skilled artisans and painstaking labor; however, modern materials and techniques have made it more accessible and efficient to implement.
Therefore, understanding the various methods, materials, and techniques involved in achieving this refined surface is essential for both construction professionals and homeowners seeking to improve the appearance and value of their properties. The following sections will delve into the specific processes, materials, and considerations necessary for achieving this desirable outcome.
Essential Considerations for Achieving a Refined Wall Surface
Achieving a flawlessly even wall plane requires careful planning and execution. The following tips outline crucial aspects to consider when aiming for a smooth and consistent surface.
Tip 1: Substrate Preparation is Paramount: Prior to applying any finishing materials, the underlying surface must be clean, dry, and free of debris. Any existing imperfections, such as cracks or holes, should be properly filled and leveled to ensure a uniform base.
Tip 2: Material Selection Impacts Outcome: The choice of plaster, drywall compound, or other coating significantly affects the final result. Selecting high-quality materials specifically designed for smooth applications is essential. Consider the specific requirements of the environment and the desired level of durability.
Tip 3: Layering Technique Minimizes Imperfections: Applying multiple thin layers, rather than one thick layer, allows for better control and reduces the likelihood of air pockets or unevenness. Each layer should be allowed to dry completely before the next is applied.
Tip 4: Sanding is a Critical Step: Thorough and precise sanding is necessary to eliminate any ridges, bumps, or imperfections. Utilize appropriate grit sandpaper for each stage of the process, progressing from coarser grits to finer grits. Dust removal is crucial after each sanding session.
Tip 5: Lighting Reveals Flaws: Employ adequate lighting during the application and sanding process. Direct light at various angles will reveal imperfections that might otherwise be missed. This allows for corrective action before proceeding to the next stage.
Tip 6: Consider a Primer for Uniformity: Applying a high-quality primer after sanding creates a uniform surface for paint application. This ensures consistent color absorption and enhances the adhesion of the paint.
Tip 7: Patience and Precision Yield Superior Results: Rushing the process invariably leads to imperfections. Taking the time to meticulously apply and sand each layer is essential for achieving a truly refined surface. Consider seeking professional assistance for complex projects.
These considerations emphasize the importance of meticulous preparation, careful material selection, and precise execution in achieving a flawless wall plane. Adhering to these guidelines will result in a visually appealing and durable surface.
The subsequent sections will explore specific techniques and materials in greater detail, providing a comprehensive guide to achieving a high-quality wall treatment.
1. Preparation
The foundational element for achieving a refined wall surface lies in meticulous preparation. Without proper attention to this initial stage, the final result will inevitably be compromised, regardless of the quality of materials or skill of the applicator. Preparation encompasses a range of activities designed to create an ideal substrate for the subsequent application of finishing materials.
- Surface Cleaning and Debris Removal
The existing wall surface must be thoroughly cleaned to remove any dust, dirt, grease, or other contaminants. These substances can interfere with the adhesion of the finishing material, leading to peeling, bubbling, or other imperfections. For example, walls previously exposed to cooking environments often require degreasing before any further work can commence. Neglecting this step will almost certainly result in a compromised and uneven surface.
- Repair of Imperfections
Any cracks, holes, or other surface irregularities must be properly repaired before applying the final coating. These imperfections can be filled with patching compound or joint compound, depending on the size and nature of the damage. Proper filling and leveling of these areas are crucial for creating a uniform plane. Failing to address these issues will result in visible blemishes that detract from the overall appearance of the finish.
- Priming for Uniform Adhesion
Applying a primer to the prepared surface is often a necessary step, especially on porous or uneven substrates. Primer creates a uniform surface for the finishing material to adhere to, ensuring consistent color absorption and preventing inconsistencies in the final appearance. For instance, priming a wall previously painted with a glossy finish will improve the adhesion of subsequent coats. This step minimizes potential issues such as uneven sheen and paint failure.
- Assessment of Existing Substrate Condition
A comprehensive assessment of the existing wall condition is paramount. Identifying potential issues such as water damage, mold, or unstable surfaces allows for appropriate remediation before applying finishing materials. Addressing these underlying problems is critical for ensuring the long-term integrity and appearance of the final finish. For example, ignoring signs of water damage can lead to recurring issues and premature deterioration of the wall surface.
In conclusion, preparation is not merely a preliminary step; it is an integral component of achieving a refined wall surface. The time and effort invested in thoroughly cleaning, repairing, priming, and assessing the existing substrate will be directly reflected in the quality and longevity of the final outcome. Without this foundation, even the most skilled application of high-quality materials will be unable to compensate for underlying deficiencies.
2. Materials
The selection of appropriate materials is paramount in achieving a refined wall surface. The inherent properties of these materials directly influence the final texture, durability, and aesthetic appeal of the finish.
- Joint Compound Composition and Grade
Joint compound, also known as drywall mud, is available in various formulations, each designed for specific purposes. All-purpose compound serves general needs, while lightweight compound is easier to sand. Setting-type compounds harden chemically, offering greater durability and reduced shrinkage. The grade of the compound, whether topping, taping, or all-purpose, affects its consistency and suitability for different stages of the finishing process. For example, a topping compound’s smooth texture is ideal for the final coat, minimizing imperfections.
- Plaster Type and Application Properties
Plaster, a traditional wall finishing material, offers a durable and aesthetically pleasing surface. Different types of plaster, such as gypsum plaster and lime plaster, possess unique characteristics. Gypsum plaster sets quickly and provides a smooth surface, while lime plaster offers greater flexibility and breathability, reducing the risk of cracking. The application properties, including workability and drying time, influence the ease of achieving a refined surface. Improperly mixed or applied plaster can result in an uneven or textured finish.
- Primer Selection and Compatibility
Primer plays a crucial role in preparing the wall surface for paint and ensuring proper adhesion. Different types of primers are available, each designed for specific substrates and conditions. Latex primers are suitable for most interior walls, while oil-based primers offer better stain blocking and adhesion to glossy surfaces. The compatibility of the primer with the chosen paint is essential for preventing issues such as peeling, blistering, or uneven color absorption. Using an incompatible primer can compromise the integrity of the wall finish.
- Paint Formulation and Sheen Level
The final layer of material, paint, determines the color, sheen, and overall appearance of the wall surface. Different paint formulations, such as latex, acrylic, and oil-based paints, offer varying levels of durability, washability, and resistance to moisture. The sheen level, ranging from flat to high gloss, affects the reflectivity and perceived smoothness of the surface. A flat sheen minimizes imperfections, while a high-gloss sheen highlights any surface irregularities. Selecting the appropriate paint formulation and sheen level is critical for achieving the desired aesthetic and functional properties.
These material considerations are integral to achieving a high-quality wall treatment. Careful selection and application, based on the desired aesthetic and functional requirements, ensure a durable and visually appealing result. Choosing the wrong materials can lead to a subpar finish, requiring costly repairs and rework.
3. Technique
Achieving a surface free from imperfections is inextricably linked to the employed methodology. The manner in which materials are applied, manipulated, and refined directly determines the resulting smoothness. For instance, the “feathering” technique, used in drywall finishing, involves gradually thinning the edges of joint compound applications to create seamless transitions. Improper feathering will inevitably result in visible ridges and an uneven plane. The correct technique minimizes the accumulation of material at the seams, thus reducing the amount of sanding required and improving the overall smoothness.
Similarly, the angle and pressure applied during sanding significantly impact the final result. Consistent pressure and the utilization of appropriate sanding tools, such as sanding blocks or poles, ensure uniform material removal and prevent the creation of dips or gouges. A common error is applying excessive pressure to a specific area, resulting in an uneven surface. Conversely, insufficient pressure may fail to remove imperfections effectively. The choice of tools and their proper use is vital to achieving a homogenous wall plane.
Ultimately, the success of achieving a refined wall depends heavily on the applicator’s mastery of applicable methods. This understanding includes knowledge of material properties, proper tool utilization, and meticulous execution. Deficiencies in methodology will invariably compromise the finished product, necessitating rework or resulting in an unsatisfactory result. Therefore, emphasizing the importance of skilled application is crucial for achieving the desired result and maintaining the longevity of the finish.
4. Sanding
Sanding, in the context of achieving a smooth wall surface, represents a critical refinement process. Following the application of plaster or joint compound, imperfections inevitably arise. Sanding serves as the primary method for eliminating these irregularities and creating a uniformly level plane, a prerequisite for a high-quality, visually appealing wall treatment.
- Grit Selection and Progression
The selection of appropriate sandpaper grit is paramount. A progression from coarser grits to finer grits allows for efficient removal of larger imperfections followed by a refinement of the surface texture. Initiating the process with overly fine sandpaper can be ineffective and time-consuming, while using overly coarse sandpaper can create unwanted scratches. For example, 80-grit sandpaper may be used initially to address significant ridges, followed by 120-grit and then 220-grit to achieve a progressively smoother surface. The proper selection and progression of grits are essential for achieving a consistent and smooth finish.
- Technique and Pressure Application
The sanding technique, encompassing the angle, pressure, and pattern of movement, significantly impacts the final outcome. Consistent pressure and overlapping strokes are necessary to avoid creating dips or uneven areas. Utilizing a sanding block or pole sander can aid in maintaining a consistent plane and applying even pressure. Applying excessive pressure to one area can result in localized material removal and an uneven surface. Mastering the correct sanding technique requires practice and attention to detail.
- Dust Removal and Surface Inspection
The removal of dust generated during sanding is crucial for accurate surface inspection and subsequent coat application. Accumulated dust obscures imperfections, making it difficult to assess the progress of the sanding process. Regular dust removal, using a vacuum or damp cloth, allows for thorough inspection and identification of areas requiring further attention. Failure to remove dust can lead to an uneven finish and compromised paint adhesion.
- Tool Selection and Maintenance
The selection and maintenance of sanding tools influence the efficiency and effectiveness of the sanding process. Sanding blocks provide a flat, stable surface for even pressure application, while pole sanders extend reach and facilitate sanding of ceilings and high walls. Maintaining sanding tools, such as replacing worn sandpaper and cleaning sanding blocks, ensures optimal performance and prevents the creation of unwanted scratches. Selecting the appropriate tools and maintaining them in good condition is essential for achieving a professional-quality surface.
In conclusion, sanding is not merely a perfunctory step but a vital process requiring careful planning, execution, and attention to detail. The selection of appropriate grits, the mastery of sanding techniques, the regular removal of dust, and the utilization of well-maintained tools all contribute to achieving a uniformly even and visually appealing plane. Proper sanding ensures optimal paint adhesion and enhances the overall aesthetic of the surface.
5. Application
The effectiveness of achieving a refined wall plane is intrinsically linked to the method and precision with which finishing materials are applied. The application stage directly impacts the uniformity, texture, and overall aesthetic of the wall surface. Deviations from established techniques inevitably compromise the quality of the final result.
- Layer Thickness and Consistency
The thickness of each applied layer of joint compound or plaster significantly affects the smoothness of the finished wall. Uneven or overly thick layers create irregularities that necessitate extensive sanding. Consistent application, ensuring uniform thickness across the entire surface, minimizes the potential for imperfections. A common example is the “skim coat,” a thin layer of joint compound applied to create a completely even base for painting. Consistency is the key to achieving a uniform surface profile, thus minimizing sanding needs and maximizing the aesthetic of the surface.
- Tool Selection and Proficiency
The choice of application tools, such as trowels, knives, and rollers, directly influences the quality of the wall surface. Utilizing the appropriate tool for each stage of the application process is crucial. For example, a wide taping knife is typically used for applying joint compound to drywall seams, while a smaller knife is used for detail work. Proficiency in handling these tools is essential for achieving a smooth and even application. Inexperienced users may leave tool marks or create uneven surfaces, requiring additional corrective measures.
- Environmental Control during Application
The surrounding environment, including temperature and humidity, can significantly impact the drying and curing of applied materials. Extreme temperatures or high humidity can affect the setting time and consistency of joint compound or plaster, leading to cracking, shrinkage, or other imperfections. Maintaining a stable and controlled environment during the application process is essential for achieving optimal results. For instance, applying joint compound in excessively humid conditions can prolong drying time and increase the risk of mold growth.
- Blending Techniques for Seamless Transitions
Achieving a uniform wall surface requires skillful blending of applied materials, especially at seams and corners. Blending involves feathering the edges of each application to create a seamless transition with the surrounding surface. Improper blending results in visible lines or ridges, detracting from the overall aesthetic of the finish. Techniques such as “wet blending,” where new material is applied to still-wet existing material, help to create a virtually imperceptible transition.
Therefore, meticulous attention to application techniques, tool selection, environmental control, and blending methods is crucial for achieving a refined wall plane. Each element contributes to creating a wall surface that is visually appealing, durable, and aesthetically integrated with the surrounding environment. Ignoring any of these factors compromises the aesthetic and visual effect of the wall.
6. Durability
The longevity of a wall’s surface treatment is a critical consideration, especially when pursuing a visually refined outcome. A refined wall surface, characterized by its smoothness and lack of imperfections, demands sustained integrity to retain its aesthetic appeal. Factors influencing structural integrity, resistance to wear, and environmental conditions all play a crucial role in its long-term preservation.
- Material Resistance to Impact and Abrasion
The inherent resistance of finishing materials to physical damage dictates the long-term appearance of the wall. Materials prone to chipping, scratching, or denting compromise the smoothness and uniformity of the surface. For example, a high-traffic area requires materials with enhanced impact resistance to prevent damage from accidental contact. Selecting materials with superior abrasion resistance ensures the surface retains its refined texture and appearance over time. Consequently, material choice directly correlates with the sustained aesthetic of the wall surface.
- Resistance to Moisture and Environmental Factors
Exposure to moisture, temperature fluctuations, and ultraviolet radiation can significantly degrade a wall surface. Moisture intrusion leads to blistering, peeling, and the growth of mold, all of which compromise the integrity and appearance. Materials that exhibit resistance to moisture penetration and expansion/contraction due to temperature changes are essential for maintaining a long-lasting refined finish. Walls exposed to direct sunlight necessitate materials with UV inhibitors to prevent fading and discoloration. The longevity of the surface treatment depends on the material’s capacity to withstand the environmental conditions to which it is exposed.
- Surface Cleanability and Stain Resistance
The ease with which a wall can be cleaned and its resistance to staining are important factors in maintaining its appearance. Surfaces that readily attract dirt, dust, or stains require frequent cleaning, potentially damaging the surface over time. Selecting materials with a smooth, non-porous surface facilitates effortless cleaning and minimizes stain penetration. Coatings that offer inherent stain resistance reduce the need for harsh cleaning agents, preserving the integrity and appearance of the finished wall. Therefore, cleanability and stain resistance significantly extend the lifespan of the refined surface.
- Adhesion and Cohesion Properties of the Finish
The ability of the finishing material to adhere strongly to the substrate and to maintain its internal cohesion is crucial for preventing cracking, peeling, or bubbling. Proper surface preparation, including cleaning and priming, enhances adhesion. Materials with high cohesive strength resist internal stresses caused by temperature fluctuations or impacts, preventing surface defects. Inadequate adhesion or cohesion leads to premature failure of the finish, compromising the smoothness and uniformity of the wall surface. The long-term integrity of the wall hinges on the material’s ability to maintain a strong bond with the substrate and to resist internal stresses.
These interwoven factors contribute to the overall endurance of a wall’s visual appeal. Consideration of these components will ensure that the achieved outcome remains not only refined but also enduring, thus maximizing the investment and minimizing the need for frequent renovations or repairs.
Frequently Asked Questions
The following addresses common inquiries regarding the processes, materials, and considerations involved in creating a wall surface characterized by its evenness and lack of texture.
Question 1: What distinguishes a Level 5 drywall finish from other levels?
A Level 5 finish represents the highest standard of drywall surface preparation. It involves applying a thin skim coat of joint compound over the entire surface, ensuring a uniformly smooth substrate for paint. This level is typically specified for areas requiring critical lighting or where a high degree of aesthetic refinement is desired.
Question 2: Is it possible to achieve a perfectly level surface on older walls with existing imperfections?
Achieving a perfectly level plane on older walls often requires extensive preparation. Filling cracks, repairing damage, and potentially applying multiple layers of skim coat may be necessary. The extent of the required preparation depends on the severity of the existing imperfections. A professional assessment is recommended to determine the most appropriate course of action.
Question 3: What are the potential drawbacks of opting for an extremely shiny finish?
High-gloss finishes, while aesthetically appealing to some, tend to accentuate any surface imperfections. Minor dents, bumps, or unevenness become more visible under direct light. Furthermore, high-gloss finishes are more susceptible to showing fingerprints and smudges, requiring more frequent cleaning.
Question 4: What is the optimal temperature and humidity range during the application of joint compound?
The recommended temperature range typically falls between 65F and 75F (18C and 24C). Humidity levels should be moderate, ideally below 70%. Excessive humidity can prolong drying times and increase the risk of mold growth, while extreme temperatures can affect the setting and curing of the compound.
Question 5: Are there alternative methods to achieve a smooth surface besides traditional plaster or drywall compound?
Alternative methods include Venetian plaster, microcement, and certain specialized coatings. These materials offer unique textures and aesthetic properties, but they also require specific application techniques and may be more costly than traditional methods. Their suitability depends on the desired appearance and functional requirements.
Question 6: How can one minimize the amount of dust generated during the sanding process?
Minimizing dust generation involves utilizing dust-collecting sanding tools, such as sanders connected to vacuum systems. Additionally, working in a well-ventilated area and covering surrounding surfaces can help contain the dust. Wet sanding techniques, while less common, can also reduce dust dispersal.
In summary, achieving a refined wall plane requires careful consideration of materials, techniques, and environmental factors. Addressing common questions and misconceptions is essential for making informed decisions and achieving optimal results.
The next section will address emerging trends and innovative solutions in the field of smooth wall finishing.
Conclusion
The preceding exploration has underscored the critical aspects involved in achieving a smooth wall finish. From meticulous surface preparation to precise material application and careful refinement techniques, each stage contributes to the final aesthetic and durability. Understanding the nuances of substrate assessment, material properties, sanding methods, and environmental control is paramount for any professional or homeowner seeking to create a refined and visually appealing wall surface.
The pursuit of this seamless surface represents a commitment to quality and attention to detail. While modern materials and techniques have streamlined the process, a true commitment to excellence necessitates a thorough understanding of the underlying principles. Further research and continued refinement of skills are essential to consistently achieve this standard of surface treatment, ensuring lasting value and enduring aesthetic appeal for any project.


