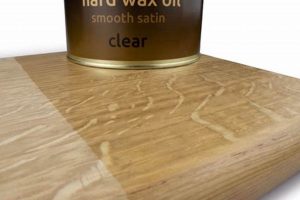
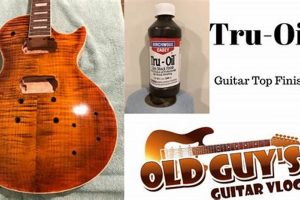
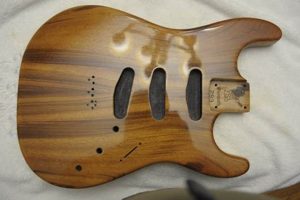
A specific type of oil-based wood finish, popular among woodworkers and gunsmiths, offers a thin, protective coating. It is valued for its ability to enhance the natural grain and color of wood while providing a satin or low-gloss sheen. Application typically involves multiple thin coats, each allowed to dry thoroughly before the next is applied. An example of its use includes application on a rifle stock to protect the wood from moisture and wear, while showcasing the beauty of the wood grain.
The value of this finishing method lies in its ease of application, repairability, and the natural aesthetic it imparts to wood surfaces. Historically, similar oil-based finishes have been used for centuries to protect and beautify wooden objects. The creation of a durable yet aesthetically pleasing surface contributes significantly to the longevity and visual appeal of the finished piece, whether it’s a piece of furniture or a firearm.
This versatile finishing option necessitates a thorough understanding of proper application techniques, drying times, and safety precautions to achieve optimal results. Subsequent sections will detail preparation methods, application steps, troubleshooting common issues, and considerations for ongoing maintenance and care of surfaces treated with this type of finish.
Application Guidance
Achieving a flawless surface requires careful attention to detail and adherence to best practices. The following guidelines will maximize the potential of this particular wood finishing method.
Tip 1: Surface Preparation is Paramount. Thoroughly sand the wood surface, progressing through increasingly finer grits of sandpaper. Remove all dust and debris prior to application to ensure optimal adhesion and a smooth final appearance.
Tip 2: Apply Thin Coats. Multiple thin coats are superior to a single thick coat. Thin layers dry more evenly and minimize the risk of runs, drips, and prolonged drying times. Allow each coat to dry completely before applying the next.
Tip 3: Use Lint-Free Application Materials. Employ lint-free cloths or applicators to prevent contaminants from becoming embedded in the finish. Avoid using shop towels or other materials that may shed fibers.
Tip 4: Control Environmental Conditions. Apply the finish in a well-ventilated area with a stable temperature and humidity level. Extreme temperatures or high humidity can negatively affect drying times and the overall quality of the finish.
Tip 5: Allow Adequate Drying Time. Adhere to the manufacturer’s recommended drying times between coats. Rushing the drying process can result in a soft, tacky finish that is prone to damage.
Tip 6: Consider Lightly Buffing Between Coats. After each coat has dried, lightly buff the surface with fine steel wool or a very fine abrasive pad. This helps to smooth out any imperfections and improve the adhesion of subsequent coats.
Tip 7: Final Buffing for Desired Sheen. Once the final coat has fully cured, buff the surface to achieve the desired level of sheen. Different buffing compounds and techniques can be used to create a satin, semi-gloss, or high-gloss finish.
These techniques contribute to a durable, attractive, and professional-quality wood finish. Precise execution yields a superior outcome, enhancing the natural beauty of the wood while providing long-lasting protection.
The subsequent sections will address common problems encountered during the finishing process, offering troubleshooting advice and preventative measures.
1. Surface Preparation
Surface preparation is a foundational step in achieving a professional and durable application of an oil-based wood finish. The quality of the prepared surface directly influences the final appearance, longevity, and protective qualities of the coating. Neglecting proper surface preparation can lead to a range of undesirable outcomes, undermining the intended benefits.
- Adhesion Enhancement
Thorough sanding creates a mechanical key, increasing the surface area and providing a better anchor for the finish. This process removes imperfections, such as scratches and planer marks, that would otherwise be amplified by the finish. For instance, applying to a raw, unsanded wooden stock results in poor bonding and potential peeling over time.
- Even Absorption
Consistent sanding ensures uniform porosity across the wood surface. This allows the finish to penetrate evenly, preventing blotchy or uneven coloring. Failure to adequately prepare can lead to some areas absorbing more finish than others, resulting in a mottled appearance. Consider a tabletop where some areas are heavily sanded and others are not the variation in finish absorption will be readily apparent.
- Contaminant Removal
Surface preparation includes the removal of dust, dirt, grease, and other contaminants that can interfere with finish adhesion. These contaminants can create barriers that prevent proper bonding and can lead to imperfections in the final finish. An example is leaving behind sanding dust, which then gets trapped under the finish layer, resulting in a grainy or uneven surface.
- Grain Raising Mitigation
The initial application of the finish can cause the wood grain to swell, resulting in a rough texture. A light sanding after the first coat helps to knock down the raised grain, creating a smoother surface for subsequent coats. If grain raising is not addressed, the finished piece will feel rough and appear less refined. This is particularly relevant for open-pored woods such as oak and ash.
Therefore, meticulous surface preparation is not merely an aesthetic consideration; it is a critical determinant of the finish’s overall performance. A properly prepared surface ensures optimal adhesion, even absorption, contaminant elimination, and grain raising mitigation, ultimately resulting in a finish that is both visually appealing and functionally sound. The success of this finishing method is inextricably linked to the thoroughness of this initial phase.
2. Thin Coat Application
The application of oil-based wood finishes, including the specifically named product, relies heavily on the principle of applying multiple thin coats rather than a single thick layer. This technique is not merely a preference but a fundamental requirement for achieving a durable, aesthetically pleasing, and functionally sound result. A thick coat application leads to inherent problems, stemming from the inherent properties of the finish and the wood itself. Specifically, a thick layer tends to dry unevenly, resulting in a soft, tacky surface underneath a seemingly hardened exterior. This can lead to cracking, wrinkling, and prolonged drying times, compromising the integrity of the finish. Furthermore, thick coats are more susceptible to runs and drips, creating an uneven and unprofessional appearance. The use of thin coats mitigates these issues. Multiple thin layers allow for uniform drying and penetration of the finish into the wood pores, improving adhesion and enhancing the wood’s natural grain. For instance, applying a thick coat to a gun stock can result in a finish that remains soft and easily damaged, whereas several thin coats produce a hard, durable surface resistant to moisture and wear.
The practical significance of understanding this lies in the control it offers over the final outcome. A craftsman employing thin coats has greater control over the sheen and depth of the finish. Each thin layer builds upon the previous, allowing for incremental adjustments to the appearance. Light sanding or buffing between coats further refines the surface, removing imperfections and ensuring optimal adhesion. An example is the refinishing of antique furniture. Applying thin coats allows the restorer to gradually build up the finish, preserving the original character of the piece while enhancing its beauty and protecting it from further damage. This meticulous approach requires patience and attention to detail, but it ultimately yields a superior result compared to the faster, but ultimately flawed, approach of applying a single, heavy coat.
In summary, the efficacy of this particular wood finish is inextricably linked to the practice of applying thin coats. This technique ensures even drying, optimal adhesion, and enhanced aesthetic control. While the application process may be more time-consuming than applying a single thick coat, the resulting finish is significantly more durable, visually appealing, and resistant to damage. The understanding and proper execution of thin coat application are therefore essential for achieving the desired outcome.
3. Lint-Free Materials
The attainment of a flawless finish with a specific oil-based wood treatment is inextricably linked to the utilization of lint-free materials during application. The presence of lint, fibers, or particulate matter introduced from the application materials directly compromises the smoothness and clarity of the final surface. The interaction of these contaminants with the finish results in imperfections that detract from the overall aesthetic and may negatively impact the protective qualities of the coating. The application process necessitates the transfer of a thin, even film of the treatment to the wood surface, and the intrusion of extraneous materials disrupts this process. For example, the employment of a common shop towel, which tends to shed fibers, can embed these fibers within the finish as it dries, creating a rough or textured surface that requires additional sanding and correction. This leads to increased labor and potential damage to the underlying wood. Therefore, the utilization of lint-free materials is not merely a cosmetic consideration, but rather a critical factor in achieving a professional and durable result.
Practical applications demonstrate the significance of this consideration. When finishing intricate carvings or delicate wooden instruments, the use of lint-free cloths or specialized applicators is paramount. The small crevices and complex contours of these items make the removal of embedded lint particularly challenging. Lint-free materials, such as microfiber cloths or foam brushes specifically designed for finishing, minimize the risk of contamination and ensure a uniform coating. Furthermore, the selection of lint-free materials extends beyond the application tool itself. The wiping of surfaces prior to application to remove sanding dust or other debris must also be executed with lint-free cloths to avoid reintroducing contaminants. The choice of materials becomes especially crucial when applying multiple coats, as each subsequent layer can trap any pre-existing lint, exacerbating the issue. This iterative process highlights the ongoing necessity of using clean, non-shedding materials throughout the entire finishing procedure.
In summation, the selection and conscientious use of lint-free materials represent a critical component of achieving a desirable and long-lasting finish with the oil-based wood treatment in question. The presence of lint compromises the smoothness and clarity of the finish, necessitating additional labor and potentially damaging the underlying wood. Mitigation of this issue requires the employment of specialized lint-free cloths, foam brushes, and meticulous cleaning practices throughout the entire application process. While seemingly a minor detail, the utilization of appropriate materials contributes substantially to the overall quality and aesthetic appeal of the finished product, ultimately linking to a successful execution. The consistent use of specified materials guarantees a superior outcome that enhances the natural beauty and protects it from wear.
4. Environmental Control
Environmental control during the application and curing processes is a critical factor influencing the ultimate quality and durability of a specific oil-based wood finish. Optimal environmental conditions promote proper drying, minimize surface defects, and ensure a resilient final product. Deviation from recommended parameters can lead to various complications, compromising the integrity of the finish.
- Temperature Stability
Consistent temperature regulation is crucial for even drying. Extremes of heat or cold can disrupt the curing process, leading to uneven hardening, tackiness, or the formation of blisters. For example, applying the finish in a room that fluctuates significantly in temperature can result in a finish that remains soft in some areas and overly brittle in others. A stable temperature, typically between 65F and 75F (18C and 24C), ensures a consistent and predictable curing rate.
- Humidity Management
Humidity levels significantly impact the drying time and overall finish quality. High humidity can impede the evaporation of solvents, prolonging drying times and potentially causing the finish to become cloudy or hazy. Conversely, very low humidity can cause the finish to dry too quickly, leading to cracking or shrinking. Maintaining a relative humidity level between 40% and 60% is generally recommended. An instance where this would be important is when applied to wood stock where the outside climate and humidity change rapidly.
- Ventilation
Adequate ventilation is necessary to facilitate the evaporation of solvents and prevent the buildup of harmful fumes. Proper airflow promotes even drying and reduces the risk of fire or explosion from flammable vapors. Inadequate ventilation can also lead to health problems from prolonged exposure to solvent fumes. A well-ventilated workspace ensures a safer and more effective application process. A shop with poor ventilation may result in extended drying times and increased exposure to potentially harmful organic compounds, requiring the use of respirators.
- Dust and Particulate Control
Maintaining a dust-free environment is essential to prevent surface contamination. Airborne particles can settle on the wet finish, creating imperfections and detracting from the final appearance. Measures such as using air filters, dampening the work area, and wearing clean clothing can help minimize dust contamination. For instance, performing finishing work in a dusty environment, such as a woodworking shop without proper dust collection systems, will inevitably result in a finish marred by embedded particles.
In summary, environmental control represents a critical element of achieving a high-quality finish. Temperature stability, humidity management, ventilation, and dust control collectively contribute to a consistent and durable coating. Neglecting these factors can compromise the integrity and aesthetic appeal of the finished product. Therefore, meticulous attention to environmental conditions is essential for optimal results.
5. Drying Time Adherence
The successful application of a specific oil-based wood finish hinges critically on strict adherence to recommended drying times. These drying times, provided by the manufacturer, represent the minimum duration required for each coat to properly cure and harden before subsequent coats are applied. Deviation from these prescribed intervals introduces a cascade of potential problems. Premature application of another layer traps solvents, impeding complete hardening and resulting in a soft, tacky finish. This, in turn, renders the surface susceptible to scratches, dents, and other forms of damage. The underlying layers may remain uncured for extended periods, compromising the finish’s protective qualities. A real-life example involves rushing the application of on a gunstock, which can result in the stock becoming sticky and prone to attracting dirt and debris, ultimately affecting its handling and appearance. The functional integrity and aesthetic appeal of the finished product are therefore directly reliant on respecting the specified drying times.
Furthermore, adequate drying time is not merely a matter of surface hardness. The curing process involves complex chemical reactions as the oils polymerize and cross-link, creating a durable and protective barrier. Shortening this process disrupts these reactions, preventing the formation of a robust finish. This can lead to issues such as cracking, crazing, or peeling over time. Moreover, premature handling of the finished item can leave fingerprints or other marks on the soft surface, requiring costly and time-consuming repairs. Consider the application to fine furniture. Insufficient drying can lead to “print-through,” where the texture of underlying materials, such as cloth used to wipe the finish, becomes permanently imprinted on the surface. The subsequent repair or refinishing will require skilled labor and specialized materials.
In conclusion, adherence to recommended drying times constitutes an indispensable element of achieving a high-quality and lasting application of the oil-based wood finish. Ignoring these guidelines introduces a range of potential problems, including a soft, tacky surface, compromised durability, and aesthetic imperfections. By strictly respecting the specified drying intervals, craftsmen ensure that the finish properly cures and hardens, providing optimal protection and enhancing the natural beauty of the wood. While patience is required, the resulting finish is significantly more resilient and aesthetically pleasing, justifying the investment of time. Neglecting drying times compromises the integrity of the entire finishing process, potentially leading to costly rework and dissatisfaction.
6. Inter-Coat Buffing
Inter-coat buffing is a critical step in the application of oil-based finishes, including the described product, serving to refine the surface and enhance adhesion between successive layers. The process involves lightly abrading the surface of a cured coat prior to applying the subsequent coat. This action removes imperfections, such as dust nibs or minor surface irregularities, that inevitably occur during the drying process. Without inter-coat buffing, these imperfections become permanently embedded within the finish, compromising the smoothness and clarity of the final product. This step also creates a mechanical key, providing a better surface for the subsequent coat to adhere to. A real-world example would be the refinishing of a guitar neck. Applying a new coat without inter-coat buffing could result in a finish that lacks depth and smoothness, and is more prone to chipping or peeling due to poor adhesion. Therefore, the practical significance of this step lies in its ability to transform a potentially flawed finish into a professional-quality product.
The choice of abrasive material for inter-coat buffing is crucial. Fine steel wool (typically 0000 grade) or ultra-fine abrasive pads are commonly used. These materials are gentle enough to remove imperfections without scratching the underlying finish. The buffing action should be light and even, applying consistent pressure across the entire surface. After buffing, it is imperative to thoroughly remove all dust and debris before applying the next coat. Compressed air or a tack cloth can be used for this purpose. Improper dust removal can negate the benefits of buffing, as the debris will simply become incorporated into the next layer of finish. The specific number of coats requiring buffing will vary depending on the desired level of refinement, typically two or three will benefit greatly.
In summary, inter-coat buffing represents an essential component of a successful finishing process with oil-based products. It serves to remove imperfections, enhance adhesion, and improve the overall smoothness and clarity of the finish. While requiring additional time and effort, the benefits of inter-coat buffing far outweigh the costs, resulting in a superior and long-lasting product. The most significant challenge lies in executing the buffing process properly, selecting appropriate materials, and thoroughly removing debris. Neglecting this step will lead to a finish that lacks the depth, clarity, and durability that is characteristic of a professional application. The overall performance of the finish is improved.
7. Final Sheen Buffing
Final sheen buffing is a critical determinant of the aesthetic outcome of an oil-based wood finish application. This process involves the controlled abrasion of the cured finish surface to achieve a specified level of gloss or sheen. The effectiveness of the buffing stage is directly correlated with the inherent properties and the preceding application steps. With a specific oil product, a successful finish culminates in a choice of satin, semi-gloss, or high-gloss, depending on the desired aesthetic. Failing to implement proper buffing leaves a surface that lacks the intended visual depth and tactile smoothness. For example, a gun stock treated but not subjected to this finishing process may appear dull and lack the luster characteristic of a professionally finished piece.
The selection of appropriate buffing compounds and techniques is essential for achieving the desired effect. Finer compounds and softer buffing wheels are employed for achieving a satin or matte finish, while coarser compounds and stiffer wheels are used for higher gloss levels. The buffing process must be executed with care and precision to avoid scratching or damaging the underlying finish. The application of too much pressure or the use of an overly aggressive compound can result in swirl marks or an uneven sheen. An example of practical application involves furniture finishing, where a meticulously buffed surface enhances the grain and color of the wood, thereby contributing to the overall aesthetic appeal and perceived value of the piece. An improper technique will reduce the visual quality of the piece.
In conclusion, final sheen buffing is inextricably linked to the successful application and visual appeal of wood finishes. The process allows craftsmen to tailor the aesthetic characteristics of the finish, achieving a range of gloss levels to meet specific design requirements. While demanding skill and attention to detail, final sheen buffing elevates the final product, imbuing it with a professional quality and enhancing the natural beauty of the wood. Omission or improper execution of buffing compromises the aesthetic quality. The final product will not realize its potential in terms of visual appeal and market value. The understanding and proper execution is a critical component.
Frequently Asked Questions About Oil-Based Wood Finishes
This section addresses common inquiries regarding the application, performance, and maintenance of a specific type of oil-based wood finish. The information provided aims to clarify misconceptions and offer guidance for achieving optimal results.
Question 1: What distinguishes this finish from other types of wood coatings?
Unlike varnish or lacquer, this finish penetrates the wood fibers, creating a durable, yet flexible barrier. It is known for its ability to enhance the wood’s natural grain and color, resulting in a low-gloss or satin sheen. Other finishes tend to form a hard film on the surface.
Question 2: Is it suitable for all types of wood?
While generally compatible with most wood species, the finish may react differently depending on the wood’s density and porosity. Dense hardwoods may require more coats for adequate protection, while porous woods may absorb more finish. Testing on a sample area is always recommended.
Question 3: How does temperature and humidity affect the application?
Extreme temperatures and high humidity can negatively impact drying times and the overall quality of the finish. Ideal conditions involve moderate temperatures (65-75F or 18-24C) and relative humidity levels between 40-60%. Application under unfavorable conditions can result in a cloudy, tacky, or uneven finish.
Question 4: Can the finish be applied over existing coatings?
The finish is best applied to bare wood. Existing coatings should be completely removed to ensure proper adhesion and penetration. Applying over existing finishes may result in poor bonding and an unsatisfactory appearance.
Question 5: What is the recommended method for cleaning surfaces treated with this finish?
Surfaces should be cleaned with a soft cloth dampened with mild soap and water. Harsh chemicals or abrasive cleaners should be avoided, as they can damage the finish. Regular waxing can help maintain the luster and protect the wood.
Question 6: How can damaged surfaces be repaired?
Minor scratches or blemishes can often be repaired by lightly buffing the affected area and applying a thin coat. More extensive damage may require sanding down to bare wood and reapplying the finish. Spot repairs can be challenging to blend seamlessly with the existing finish.
In summary, is valued for its ease of application and ability to enhance the natural beauty of wood. Success hinges on proper surface preparation, environmental control, and adherence to recommended drying times.
The subsequent section will provide information on long-term maintenance strategies.
Conclusion
This exploration has detailed the attributes and application methodologies associated with the specific wood finish. The preceding sections have emphasized the importance of proper preparation, the necessity of thin coat application, the imperative of utilizing lint-free materials, the criticality of environmental control, the significance of drying time adherence, the benefits of inter-coat buffing, and the refinement achieved through final sheen buffing. Comprehension of these elements is paramount to achieving a durable and aesthetically pleasing outcome.
Therefore, the informed application and diligent maintenance of a coating should be undertaken with a meticulous approach. The value imparted by the preservation and enhancement of wood surfaces warrants careful consideration and dedicated execution. Continued adherence to best practices ensures both the longevity and enduring beauty of finished wood pieces, whether functional or decorative. Further research into specific wood species and their interaction is recommended for specialized applications.


