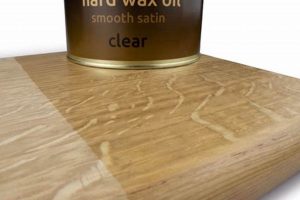
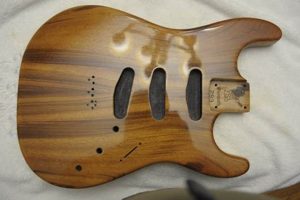
A natural, drying oil extracted from the seeds of the tung tree, it provides a durable and water-resistant finish for wood surfaces. Applying this oil involves multiple thin coats, each allowed to cure before the next application. This process results in a hard, matte or satin sheen that enhances the wood’s natural grain and color, offering a protective barrier against moisture and wear.
The method is valued for its penetrating properties, which saturate the wood fibers from within, promoting dimensional stability and preventing cracking or warping. Historically, it has been used to protect wooden boats and outdoor furniture due to its resistance to water damage. Its natural origin also makes it a preferred choice for those seeking environmentally friendly finishing options.
The following sections will delve into the preparation of wood surfaces for oil application, the step-by-step process of applying the oil, the methods for achieving different sheen levels, and the best practices for maintaining a surface protected by this natural finish.
Application Techniques for Wood Protection
Achieving optimal results with this protective oil requires careful attention to detail and adherence to proven techniques. The following tips offer guidance for preparing surfaces, applying the oil, and ensuring a long-lasting, beautiful finish.
Tip 1: Sand Wood to a Fine Grit: Prior to application, thoroughly sand the wood surface using progressively finer grits of sandpaper (e.g., 120, 180, 220). This creates a smooth, uniform surface that allows for even oil penetration and a consistent sheen.
Tip 2: Dilute First Coat: Thin the initial coat with a solvent such as mineral spirits or citrus solvent. This promotes deeper penetration into the wood pores, enhancing adhesion and providing a solid foundation for subsequent coats.
Tip 3: Apply Thin Coats: Multiple thin coats are preferable to a single thick coat. Apply the oil sparingly using a lint-free cloth or brush, ensuring even coverage and avoiding drips or puddles.
Tip 4: Allow Sufficient Drying Time: Each coat requires ample drying time before the next application. The drying time will vary depending on humidity, temperature, and the specific product used. Consult the manufacturer’s instructions for recommended drying times.
Tip 5: Wipe Off Excess Oil: After allowing the oil to penetrate for 20-30 minutes, thoroughly wipe off any excess oil from the surface. This prevents a sticky or uneven finish.
Tip 6: Steel Wool Between Coats (Optional): For an exceptionally smooth finish, lightly buff the surface with 0000 steel wool between coats. This removes any imperfections and enhances the sheen of the final finish.
Tip 7: Consider Ambient Conditions: Avoid applying the oil in direct sunlight or high humidity. Ideal conditions are moderate temperatures and low humidity to promote proper drying and curing.
By following these guidelines, individuals can maximize the protective and aesthetic qualities, ensuring long-lasting beauty and durability. Proper preparation, thin coats, and adequate drying time are essential for achieving a professional-quality result.
The subsequent sections will cover topics such as troubleshooting common application issues and long-term maintenance strategies.
1. Wood Preparation
Surface preparation is a foundational step significantly impacting the outcome and longevity of wood protection. A properly prepared surface allows for optimal oil penetration, adhesion, and ultimately, the desired aesthetic and protective qualities. Neglecting thorough surface preparation can compromise the entire finishing process, leading to unsatisfactory results.
- Sanding for Optimal Absorption
Sanding the wood creates microscopic pores, enhancing the ability of the oil to penetrate deeply into the wood fibers. Progressively finer grits of sandpaper (e.g., 120, 180, 220) are typically used to achieve a smooth, uniform surface free of imperfections. Without proper sanding, the oil may only sit on the surface, resulting in poor adhesion and a blotchy appearance.
- Cleaning to Remove Contaminants
The presence of dust, dirt, wax, or existing finishes on the wood surface can impede oil penetration and adhesion. Thorough cleaning with a suitable solvent or tack cloth is essential to remove these contaminants. Residual contaminants can create barriers, preventing the oil from properly bonding with the wood, and ultimately weakening the protective layer.
- Moisture Content Management
The moisture content of the wood significantly influences the effectiveness of the protective oil. Wood with excessive moisture can hinder oil absorption, while overly dry wood may absorb the oil too quickly, leading to uneven application. Ideally, the wood should have a stable moisture content appropriate for its intended environment before application.
- Repairing Surface Defects
Any existing imperfections, such as scratches, dents, or cracks, should be addressed before application. Filling these defects with appropriate wood filler ensures a smooth, even surface for the oil to adhere to. Ignoring these flaws will not only detract from the aesthetic appearance but also potentially compromise the integrity of the protective layer.
The correlation between surface preparation and the resulting finish underscores the importance of meticulously executing these preliminary steps. These efforts guarantee a strong, durable, and visually appealing surface coating. Failing to dedicate sufficient attention to these preparatory actions almost certainly diminishes the quality and longevity of the resulting wood surface.
2. Oil Penetration
Oil penetration is a critical determinant of the success and longevity of the finishing process. It is the mechanism by which the oil permeates the wood’s cellular structure, facilitating a durable and protective barrier against moisture, abrasion, and environmental factors. Inadequate penetration results in a superficial layer prone to cracking, peeling, and diminished resistance to water damage. Conversely, thorough penetration strengthens the wood fibers from within, promoting dimensional stability and preventing warping or shrinking.
The depth and uniformity of oil penetration are influenced by several factors, including the wood’s species and density, the oil’s viscosity, and the surface preparation techniques employed. For example, hardwoods with tighter grain patterns often require more meticulous sanding and thinning of the initial oil coats to facilitate deeper penetration. A real-world application can be seen in boat building, where proper penetration is paramount in protecting wooden hulls from constant water exposure. Instances of delamination and wood rot are often directly attributable to insufficient oil penetration during the finishing stages. Furthermore, different application methods, such as brushing, wiping, or immersion, can also significantly impact the extent of oil absorption, highlighting the importance of selecting the appropriate technique based on the specific project requirements.
In conclusion, the relationship between oil penetration and durable protective finish is direct and undeniable. Optimizing this aspect through careful wood preparation, proper oil selection, and meticulous application is essential for achieving a high-quality finish. Addressing potential challenges related to varying wood densities and environmental conditions is also vital. Comprehending and mastering the principles of oil penetration is key to maximizing the protective and aesthetic benefits.
3. Curing Time
The curing time is an indispensable element in the proper execution of surface treatments. This period, during which the applied oil undergoes a complex process of oxidation and polymerization, directly influences the final hardness, durability, and protective qualities of the finish. Insufficient time can result in a soft, tacky surface susceptible to damage, while a properly cured finish forms a robust barrier against moisture, abrasion, and solvents. For example, a tabletop finished with insufficient drying time is prone to water rings and scratches, whereas a fully cured surface demonstrates greater resistance to these common hazards.
The duration of the curing process is affected by several factors, including ambient temperature, humidity levels, and the specific formulation of the oil. Higher temperatures and lower humidity generally accelerate the process, while cooler temperatures and higher humidity can significantly prolong it. Therefore, monitoring and controlling the environment is crucial for consistent results. Furthermore, the number of coats applied also impacts the overall curing time, as each layer must fully polymerize before the subsequent coat is applied. Real-world examples can be observed in furniture restoration. Restorers often utilize controlled environments to accelerate the curing process, ensuring timely completion and optimal quality.
In summary, curing time is not merely a passive waiting period, but an active phase critical to the development of a durable and protective finish. Understanding the factors that influence curing time and implementing appropriate measures to optimize the process are essential for achieving long-lasting and visually appealing results. Neglecting this aspect can compromise the integrity of the finish, leading to premature failure and the need for costly repairs. Therefore, careful attention to curing time is an investment in the longevity and performance of a wooden surface.
4. Coat Thickness
The thickness of each coat during application directly influences the effectiveness and appearance of the finish. Excessively thick coats impede proper curing, leading to a soft, tacky surface prone to wrinkling and extended drying times. This occurs because the oil polymerizes from the surface inward, and a thick layer restricts oxygen penetration, hindering complete hardening throughout the coat’s depth. Conversely, overly thin coats may not provide adequate protection, resulting in a finish that is susceptible to scratches, water damage, and UV degradation. Consider antique furniture restoration: If restorers apply the finish too thickly, the piece may never fully cure, attracting dust and remaining sticky for years.
Maintaining an appropriate thickness involves careful application techniques and diligent wiping of excess oil. Thin, even coats, applied with a lint-free cloth or brush, allow for optimal oxygen exposure and uniform curing. This approach facilitates the formation of a durable, resilient barrier that accentuates the wood’s natural grain and luster. A well-executed finish enhances the inherent beauty of the wood while providing long-term protection against environmental factors. Proper coat thickness can be achieved through practices of multiple thin coats rather than single thick coats. Each applied coat is then adequately dried, then a subsequent coat is applied.
In summary, coat thickness is a critical variable in the successful application of the protective oil. Balancing the need for adequate protection with the necessity for complete curing requires meticulous attention to detail and a thorough understanding of the oil’s properties. Prioritizing thin, even coats and adhering to recommended drying times ensures a finish that is both aesthetically pleasing and functionally robust. Disregarding the impact of coat thickness will negatively affect the final outcome.
5. Application Method
The method employed for applying this oil directly influences the uniformity, penetration, and ultimate protection afforded to the wood surface. Different techniques, such as brushing, wiping, or even immersion, yield varying results depending on the specific characteristics of the wood and the desired aesthetic. For instance, brushing may be suitable for intricate carvings where controlled application is crucial, while wiping is often preferred for larger, flat surfaces to ensure even distribution and minimize brushstrokes. Improper application, such as using the wrong brush type or failing to wipe off excess oil, can lead to uneven sheen, prolonged drying times, and compromised protective qualities. In the construction of traditional wooden boats, meticulous application via layering and specialized tools is vital to create a watertight and durable hull. The choice of method, therefore, constitutes a critical decision point in the finishing process.
The selection of an appropriate technique often involves consideration of the oil’s viscosity and the wood’s porosity. A more viscous oil may benefit from being thinned slightly to enhance penetration, particularly when applied to dense hardwoods. Conversely, a thinner oil may require multiple coats to achieve sufficient build-up and protection, especially on softer woods. Careful attention to these factors, combined with proper surface preparation, allows for a tailored application process that maximizes the benefits of the oil. Furthermore, the skill and experience of the applicator play a significant role in achieving optimal results. A steady hand, consistent pressure, and a keen eye for detail are essential for ensuring a smooth, uniform finish free from imperfections.
In conclusion, the application method is not merely a procedural step but an integral determinant of the success of the finishing endeavor. Its proper selection and execution are paramount to ensuring that the oil penetrates effectively, cures uniformly, and provides lasting protection and aesthetic enhancement to the wood surface. A thorough understanding of various techniques, coupled with careful consideration of the oil’s properties and the wood’s characteristics, is essential for achieving a high-quality result. The knowledge and practical implementation will lead to lasting durability and the desired look.
6. Sheen Control
Sheen control refers to the ability to manipulate the level of gloss or reflectivity achieved by a protective surface coating. In the context of wood protection, sheen control is particularly relevant due to its impact on the aesthetic appearance and perceived quality. Understanding and managing sheen is crucial for achieving a desired visual outcome, ranging from a matte finish to a high-gloss luster.
- Buffing Techniques and Sheen Adjustment
Buffing plays a significant role in adjusting the sheen. Light buffing with fine abrasives, such as 0000 steel wool or fine-grit sandpaper, can reduce the gloss, creating a satin or matte finish. Conversely, polishing with specialized compounds and buffing wheels can increase the sheen, achieving a high-gloss appearance. Cabinet makers, for instance, often use buffing techniques to customize the sheen of their finished pieces, tailoring the look to meet client preferences.
- Influence of Application Method
The method of application also affects the resulting sheen. Brushing tends to produce a slightly more textured surface, resulting in a lower sheen compared to wiping, which promotes a smoother, more reflective surface. Spraying can achieve a very smooth, even finish, allowing for precise control over the final gloss level. Furniture restorers often choose application methods based on the desired sheen level and the original appearance of the piece.
- Impact of Topcoats and Additives
Applying a topcoat can further refine sheen. Matte topcoats can reduce the gloss of a previously applied oil finish, while gloss topcoats can enhance it. Additives, such as flattening agents, can be incorporated into the oil to directly control the sheen during application. Historically, artisans added natural resins to alter gloss.
- The Role of Surface Preparation
Meticulous surface preparation is fundamental to achieving uniform sheen. Any imperfections in the wood surface, such as scratches or uneven sanding, will be magnified by the oil, resulting in an inconsistent gloss level. Proper sanding with progressively finer grits of sandpaper ensures a smooth, even surface that reflects light uniformly, allowing for predictable sheen control. Musical instrument makers dedicate significant time to surface preparation to achieve a flawless finish and an even level of gloss across the instrument’s surface.
These facets demonstrate that sheen control is not an isolated aspect of the process, but rather an integrated element. By carefully managing these factors, it is possible to achieve a broad range of aesthetic outcomes, from the subtle warmth of a matte finish to the striking brilliance of a high-gloss luster, making sheen control a crucial skill for wood finishers seeking to achieve precise and aesthetically pleasing results.
7. Maintenance
Sustaining the protective and aesthetic qualities achieved requires consistent and informed maintenance practices. Maintenance, in this context, is not merely a reactive measure but a proactive strategy to prolong the life and enhance the appearance of a finished wood surface.
- Regular Cleaning Protocols
Routine cleaning is essential to remove surface dirt, dust, and grime that can dull the finish and potentially abrade the surface over time. Gentle cleaning with a soft, damp cloth and mild soap solution is generally recommended. Harsh chemicals and abrasive cleaners should be avoided, as they can strip away the oil and damage the underlying wood. The frequency of cleaning depends on the environmental conditions and the level of use the surface experiences. For example, furniture in high-traffic areas requires more frequent cleaning than items in less frequented spaces.
- Periodic Re-oiling Requirements
Over time, the protective oil layer gradually degrades due to exposure to UV radiation, moisture, and physical wear. Periodic re-oiling is necessary to replenish the oil and maintain its protective properties. The frequency of re-oiling depends on various factors, including the intensity of sunlight exposure, the humidity levels, and the amount of use the surface receives. Signs that re-oiling is needed include a dull appearance, increased susceptibility to water stains, and a general loss of the finish’s protective qualities. This is often done on wooden boats which require recoating more often than furniture due to more environmental wear.
- Addressing Minor Damage and Scratches
Minor scratches and blemishes can be addressed with localized repairs. Lightly buffing the affected area with fine-grit sandpaper, followed by the application of a small amount of oil, can often effectively conceal or minimize the appearance of these imperfections. For deeper scratches or gouges, a wood filler may be necessary before re-oiling. Addressing damage promptly prevents further degradation and maintains the overall appearance of the surface. Proper restoration, for instance, is vital in high-value antiques.
- Environmental Control Considerations
Controlling the environmental conditions surrounding a finished wood surface can significantly extend its lifespan. Maintaining stable temperature and humidity levels helps to prevent warping, cracking, and other forms of damage. Protecting the surface from direct sunlight can also reduce the rate of oil degradation. In museums, environmental control is a top priority in preserving wood artifacts for centuries.
These facets highlight the interconnectedness of maintenance and the enduring beauty and functionality of protected wood. Neglecting these practices compromises the integrity and visual appeal. Proactive maintenance is an investment that safeguards the long-term value and enjoyment of the wooden objects and structures.
Frequently Asked Questions about Tung Oil Finishing
The following section addresses common inquiries regarding this protective treatment, providing clarity on application, maintenance, and performance expectations.
Question 1: What is the expected lifespan of a finish on exterior wood surfaces?
The longevity varies based on climate exposure and wood type. Reapplication may be needed annually in harsh conditions or every 2-3 years in moderate climates.
Question 2: Is it food-safe for use on wooden kitchen utensils or cutting boards?
While considered food-safe once fully cured, potential allergens exist. Verify the product specifically states “food-safe” and ensure thorough curing before use.
Question 3: How does it compare to other wood finishes, such as varnish or polyurethane?
It offers a more natural look and feel, penetrating the wood rather than forming a surface film. It is less durable than varnish or polyurethane but is easier to repair.
Question 4: Can it be applied over existing finishes?
Generally, no. Existing finishes must be completely removed through sanding or stripping to allow proper penetration and adhesion.
Question 5: What are the best practices for storing the oil to prevent spoilage?
Store in a cool, dark place in an airtight container. Introducing marbles into the container to raise the oil level can minimize air exposure and prolong shelf life.
Question 6: What is the proper disposal method for rags used during application?
Rags soaked in the oil can spontaneously combust. Spread them out to dry in a well-ventilated area or submerge them in water before disposal to prevent fire hazards.
Proper application, maintenance, and safety precautions are crucial for achieving optimal results and ensuring the longevity of protected wood surfaces.
The next section explores common problems encountered during the finishing process and offers troubleshooting solutions.
Conclusion
The preceding exploration has detailed the multifaceted nature of this protective application. From surface preparation to maintenance protocols, each step significantly impacts the final outcome. The inherent properties of the oil, coupled with appropriate application techniques, determine the level of protection and aesthetic enhancement achieved. Success hinges on a thorough understanding of these variables.
The enduring value of utilizing this method lies in its ability to preserve and enhance the natural beauty of wood. Continued adherence to best practices and a commitment to ongoing research will ensure its continued relevance in woodworking and preservation efforts. Understanding the steps highlighted will lead to lasting results.


