The application of specialized painting techniques to interior surfaces, replicating the aesthetic of aged plaster and sun-drenched landscapes characteristic of a specific region, can transform a space. The result is a textured and layered appearance that evokes warmth and rustic charm, offering a distinct alternative to flat, uniform color applications.
This approach to interior design introduces depth and character to rooms, creating an inviting and comfortable atmosphere. Its enduring appeal stems from its ability to mimic historical architectural elements while concealing minor wall imperfections. Furthermore, it provides a versatile backdrop that complements a variety of decorative styles, enhancing the overall visual interest of the home.
The following sections will detail the specific techniques involved, the materials required, and practical considerations for achieving a successful outcome, enabling homeowners to bring this desired aesthetic into their living spaces.
Essential Considerations for Achieving a Successful Aesthetic
The successful application of this style hinges on careful preparation, precise execution, and an understanding of the desired outcome. The following tips provide guidance for achieving a visually appealing and durable finish.
Tip 1: Surface Preparation is Paramount: Ensure the wall surface is clean, dry, and free of loose paint or debris. Patch any imperfections with appropriate filler and sand smooth. A properly prepared surface will enhance adhesion and the overall appearance of the final finish.
Tip 2: Select High-Quality Materials: Opt for premium paints and glazes designed for decorative finishes. Cheaper materials may not provide the desired depth of color or durability, resulting in an unsatisfactory outcome.
Tip 3: Experiment with Techniques on a Test Area: Before applying the finish to the entire wall, practice the chosen technique on a small, inconspicuous area or a piece of cardboard. This allows for refining the method and color combinations before committing to the larger surface.
Tip 4: Layer Colors for Depth and Interest: Employ multiple shades of complementary colors to create a sense of depth and dimension. Start with a base coat and then apply subsequent layers of glaze or paint using various techniques, such as rag rolling, sponging, or stippling.
Tip 5: Maintain a Wet Edge: When working with glazes, it is crucial to maintain a wet edge to prevent unsightly lap marks. Work in small sections and blend each section seamlessly into the next.
Tip 6: Consider Lighting: The appearance of the finish will vary depending on the lighting conditions. Evaluate the finished surface under both natural and artificial light to ensure the desired effect is achieved.
Tip 7: Seal the Finish for Durability: Once the finish is dry, apply a clear sealant to protect the surface from dirt, moisture, and abrasion. This will extend the lifespan of the finish and make it easier to clean.
By adhering to these guidelines, individuals can increase the likelihood of attaining a professional-looking, long-lasting decorative treatment. These are crucial for achieving a look that enhances the space and increases its aesthetic value.
The subsequent sections will delve into the application process, providing detailed instructions and addressing common challenges encountered during the implementation of this decorative technique.
1. Color Palette
The selection of an appropriate color palette is paramount in achieving an authentic and aesthetically pleasing representation of a specific interior design. The colors chosen dictate the overall mood and directly influence the success of replicating the desired regional aesthetic.
- Earthy Undertones
The core of this palette lies in replicating natural pigments found in the environment. Colors such as burnt sienna, ochre, raw umber, and various shades of terracotta evoke the sun-baked landscapes and aged plaster commonly found. These undertones provide a sense of warmth and authenticity crucial to the overall impression.
- Accents of Natural Pigments
Subtle variations and accent colors derived from natural sources, such as the greens of olive groves or the blues of distant hills, provide visual interest. These accent colors should be used sparingly to complement, not overshadow, the dominant earthy tones, creating a balanced and harmonious scheme.
- Light Reflectance Value (LRV) Considerations
The light reflectance value of the chosen colors significantly impacts the perceived brightness and spaciousness of the room. Lighter shades of terracotta or cream can brighten smaller spaces, while darker, more saturated colors are better suited for larger, well-lit areas. An understanding of LRV ensures the color scheme enhances, rather than diminishes, the room’s natural light.
- Color Layering and Depth
The desired visual texture and depth are achieved through layering different shades of the base colors. This technique mimics the natural variations found in aged plaster and stone. Glazes and washes, in complementary colors, are often applied to further enhance the layering effect, creating a more realistic and dynamic finish.
The successful application of the design, therefore, relies heavily on a nuanced understanding and careful selection of colors that accurately reflect the characteristic hues. The skillful blending of earthy tones, subtle accents, and strategic layering techniques culminate in a finish that authentically captures the essence.
2. Texture Techniques
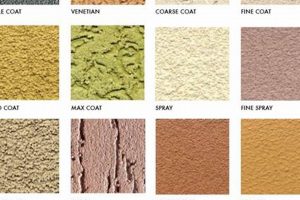
The replication of the desired rustic aesthetic is intrinsically linked to the application of specific texture techniques. These methods are instrumental in creating the depth, variation, and aged appearance characteristic of interiors. The skillful employment of these techniques is paramount to achieving a convincing representation.
- Rag Rolling
This method involves rolling a paint-soaked rag across the surface, leaving behind a mottled pattern. The result mimics the irregular textures found in aged plaster. The tightness of the rag roll and the pressure applied influence the texture’s prominence, offering considerable control over the final appearance. For example, a loosely rolled, absorbent rag yields a softer, more diffused texture, suitable for creating a subtle, aged effect.
- Sponging
The application of paint or glaze using a sponge, either natural or synthetic, imparts a stippled texture. This technique introduces visual interest and breaks up the uniformity of the base coat. Varying the pressure and type of sponge affects the density and size of the stipples. A sea sponge, for instance, creates a more organic and irregular texture compared to a synthetic sponge, contributing to a more authentic replication.
- Stippling
Stippling employs a specialized brush to create a textured surface composed of small dots or peaks. This method allows for a greater degree of control over the density and distribution of the texture, enabling the creation of more intricate patterns. The angle and pressure applied to the stippling brush determine the height and prominence of the stipples, influencing the overall visual effect. This approach is often used to mimic the look of rough, uneven plaster.
- Troweling
Troweling involves the application of plaster or joint compound in a layered fashion, creating a raised, uneven surface. This technique can be used to replicate the look of aged walls where the plaster has naturally deteriorated over time. The direction and pressure applied with the trowel determine the pattern and depth of the texture. This approach is particularly effective in creating a highly tactile and visually striking finish.
The application of these texture techniques, either individually or in combination, is crucial for achieving the desired aesthetic. Each method offers unique characteristics and varying degrees of control over the final appearance. Mastery of these techniques is essential for replicating the depth, variation, and aged appearance associated with the aesthetic.
3. Glaze Application
Glaze application is integral to achieving the depth and luminosity characteristic of the aesthetic. These specialized coatings, typically translucent or semi-transparent, are applied over a base coat to enhance texture and introduce subtle color variations, mimicking the aged and weathered appearance of traditional surfaces. The strategic use of glazes transforms a flat, uniform surface into a dynamic, visually engaging element.
The process involves selecting a glaze color that complements or contrasts with the base coat. For example, a dark umber glaze applied over a beige base can accentuate texture and create shadows, enhancing the three-dimensional effect. Conversely, a metallic glaze can impart a subtle sheen, replicating the look of polished plaster or stone. Techniques for glaze application vary widely, including rag rolling, sponging, and color washing. Each technique yields a unique texture and degree of color variation. Success relies on controlled application and blending, preventing harsh lines and ensuring a seamless transition between glazed and unglazed areas.
The longevity and visual appeal of the decorative treatment is directly linked to the correct application of glaze. Improper application can lead to uneven color distribution, highlighting surface imperfections rather than concealing them. Moreover, the type of glaze selected must be compatible with the base coat and any subsequent protective sealers. This element offers a sophisticated means to introduce depth, texture, and subtle color nuances, significantly enhancing the overall visual impact. The mastery of glaze application is essential for replicating an authentic interior design.
4. Surface Preparation
Surface preparation is a foundational step in achieving a durable and visually appealing aesthetic. Its importance cannot be overstated, as it directly impacts the adhesion, texture, and overall longevity of the finished surface.
- Cleaning and Degreasing
The removal of dirt, dust, grease, and other contaminants is essential for ensuring proper paint adhesion. Failure to adequately clean the surface can result in peeling, bubbling, or other adhesion failures. For example, kitchen walls often accumulate grease, which must be thoroughly removed with a degreasing solution before any painting can commence. Neglecting this step compromises the integrity of the entire finishing process.
- Repairing Imperfections
Any cracks, holes, or other imperfections must be repaired before applying any paints or glazes. These imperfections will become more pronounced, rather than concealed, by most faux finishing techniques. Patching compounds or spackle are typically used to fill these voids, followed by sanding to create a smooth, even surface. Skimping on the repair process undermines the visual effect, resulting in an unprofessional appearance.
- Priming for Adhesion and Uniformity
Priming is a crucial step, particularly when painting over previously painted surfaces or bare drywall. Primer creates a uniform surface, improves paint adhesion, and can also block stains from bleeding through the finish. Selecting the correct primer for the specific surface is vital; for example, an oil-based primer is often recommended for blocking stains, while a latex primer is suitable for general use. Bypassing priming risks poor adhesion and an uneven color appearance.
- Sanding for Texture Control
Sanding after priming creates a smooth surface that is more conducive to faux finishing techniques. Sanding also affects the final texture. A coarser grit sandpaper creates a slightly rougher surface, while a finer grit produces a smoother one. The choice of sandpaper grit depends on the desired texture of the finish. Failing to sand properly leads to an inconsistent texture that detracts from the aesthetic.
These components of surface preparation are interconnected and equally important. Neglecting any one of these elements undermines the entire faux finishing process, resulting in a compromised aesthetic that is both visually unappealing and potentially less durable. Proper preparation is therefore an investment in the quality and longevity of the finish. The better the preparation, the more convincing and long-lasting the faux finish will be, ultimately enhancing the aesthetic appeal.
5. Lighting Effects
Lighting significantly influences the perceived color, texture, and depth of decorative interior surfaces. The interplay between light and shadow accentuates the nuances of these specialized finishes, impacting the overall aesthetic and the degree to which the desired atmosphere is realized.
- Directional Lighting and Texture Amplification
Directional light sources, such as spotlights or sconces, cast shadows that emphasize the surface irregularities created by various faux finishing techniques. For example, grazing light across a surface treated with a troweled texture dramatically highlights the peaks and valleys, enhancing the sense of depth and dimension. Conversely, diffuse lighting minimizes texture, creating a softer, more subtle effect. Understanding how directional lighting interacts with the textured surface is critical for achieving the desired visual impact.
- Color Temperature and Hue Perception
The color temperature of the light source affects the perceived hues of the decorative finish. Warm-toned lighting, typically associated with incandescent bulbs, can enhance the earthy tones, making the finish appear richer and more inviting. Cool-toned lighting, such as that produced by some LED bulbs, may desaturate the colors, resulting in a cooler, more subdued appearance. Careful selection of light sources with appropriate color temperatures ensures accurate color representation and maintains the desired warmth.
- Ambient Lighting and Overall Atmosphere
Ambient lighting, which provides general illumination, contributes significantly to the overall atmosphere. Soft, diffused ambient light creates a relaxing and inviting environment, ideal for spaces intended for relaxation. Brighter, more direct ambient light can energize a space, making it suitable for activities requiring focus. The interplay between ambient lighting and the decorative finish influences the perceived size and mood of the room. A space with deep colored walls with the design may seem small. The right ambiance is necessary for the finish to look its best.
- Layered Lighting Schemes and Visual Depth
Combining multiple lighting types, such as ambient, task, and accent lighting, creates visual depth and highlights specific features. Accent lighting can draw attention to particular areas, such as niches or artwork, while task lighting provides illumination for specific activities. Layered lighting enhances the three-dimensionality of the decorative surface, creating a more dynamic and visually engaging space. Without light to compliment the design, it may come off as dull or boring. The right light transforms everything.
The strategic integration of lighting is essential for maximizing the aesthetic impact of this kind of decorative finish. By understanding how different lighting types and characteristics interact with the surface texture and color palette, individuals can create visually compelling and harmonious spaces.
6. Protective Sealer
The application of a protective sealer is a crucial final step in the process, significantly influencing the longevity and maintainability of the finished product. The inherent textures and porous nature of these specialized finishes make them particularly susceptible to damage from moisture, stains, and abrasion. A suitable sealer forms a durable barrier, safeguarding the underlying layers and preserving the desired aesthetic qualities over time. For example, in high-traffic areas like hallways or kitchens, where walls are more likely to be bumped or exposed to spills, a robust sealant prevents premature wear and tear, ensuring the longevity of the application.
Selection of the appropriate sealer type is paramount. Water-based sealers offer ease of application and low VOC content, making them environmentally friendly. However, they may not provide the same level of protection as solvent-based sealers in moisture-prone environments like bathrooms. Solvent-based sealers offer superior water resistance and durability, but require careful ventilation due to their higher VOC content. The choice between matte, satin, or gloss finishes also impacts the overall aesthetic. A matte sealer preserves the rustic character of the finish, while a gloss sealer adds a sheen and enhances light reflectivity. This is important as a wrong application for the protective sealer could harm the finish instead of protecting it.
In summary, the protective sealer is not merely an optional add-on, but an essential component of the process. It directly addresses the inherent vulnerabilities of these textured finishes, extending their lifespan and maintaining their aesthetic appeal. Proper selection and application of the sealer are critical for ensuring the long-term success and satisfaction with the decorative treatment. Neglecting this final step can lead to premature degradation, diminishing the value and beauty of the application and increasing future maintenance costs.
Frequently Asked Questions Regarding Tuscan Faux Finish Paint Walls
The following questions and answers address common inquiries and misconceptions concerning the application, maintenance, and characteristics of a specific style of interior wall finishing.
Question 1: What is the typical lifespan of this particular finish compared to traditional paint?
The lifespan depends largely on the quality of materials used, surface preparation, and the application of a protective sealant. When properly executed and maintained, the lifespan is comparable to, or even exceeds, that of traditional paint. However, the textured nature may make it more susceptible to damage from impacts.
Question 2: Is this type of finish suitable for high-humidity environments like bathrooms?
While applicable in bathrooms, careful surface preparation, the use of moisture-resistant primers and paints, and a durable, water-resistant sealant are crucial. Poor ventilation can still lead to moisture damage over time.
Question 3: Can this finish be applied over existing wallpaper?
Applying directly over wallpaper is generally not recommended. The wallpaper’s adhesive may fail over time, causing the new finish to peel or bubble. Removal of the wallpaper and proper surface preparation are necessary for optimal results.
Question 4: What is the approximate cost compared to standard painting techniques?
The cost is typically higher than standard painting due to the specialized materials, techniques, and labor involved. However, this can bring a rich and long lasting finish.
Question 5: How does one clean and maintain this type of finish?
Cleaning should be done with a soft, damp cloth and a mild detergent. Avoid abrasive cleaners or harsh chemicals, as these can damage the finish. Regular dusting helps prevent the buildup of dirt and grime.
Question 6: Can the color or texture be easily altered or repaired if desired in the future?
While touch-ups are possible, achieving a seamless match can be challenging due to the textured nature of the finish. Significant alterations may require a complete reapplication.
In summary, the successful implementation and long-term enjoyment of this finishing technique depend on careful planning, proper execution, and diligent maintenance. Addressing these common concerns helps ensure a satisfactory outcome.
The following sections provide information on alternative decorative wall finishes, offering a broader perspective on options available for interior design.
Considerations for Decorative Wall Treatments
The preceding sections have detailed the intricacies of replicating a specific aesthetic, emphasizing the importance of meticulous surface preparation, strategic color selection, skillful texture application, and appropriate lighting. The application of “tuscan faux finish paint walls” is more than a superficial coating; it’s a detailed process requiring expertise and diligence to achieve an authentic and enduring result.
The successful adoption of this finish requires careful consideration of the environment, budget, and long-term maintenance commitments. This article serves as a guide for homeowners and professionals seeking to create a visually appealing and historically evocative space. Informed decision-making ensures that the investment in labor and materials yields a space that is not only aesthetically pleasing but also stands the test of time.


