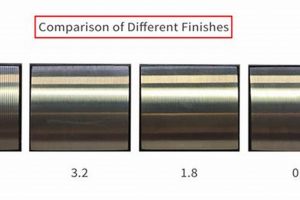
Indications related to the desired surface contour and texture of a completed joint are communicated through standardized graphical representations added to a welding symbol. These indications provide essential manufacturing information, specifying requirements such as flatness, smoothness, or specific surface treatments necessary for the intended function of the welded component. For example, a symbol might call for a flush weld surface achieved through grinding, or specify a particular roughness average (Ra) value to ensure proper fit or prevent stress concentrations.
Clear communication of surface requirements minimizes ambiguity and reduces the likelihood of rework, leading to increased efficiency and cost savings in welding operations. They facilitate consistent adherence to design specifications, contributing to the overall structural integrity and aesthetic quality of the finished product. Their evolution reflects advancements in welding technology and a growing emphasis on precise control over weld characteristics.
Further examination of these representations reveals the detailed nuances involved in specifying surface preparation techniques, acceptable deviation ranges, and the connection to broader quality control procedures within welding fabrication.
Guidance on Interpreting Surface Profile Notations
Effective application of these markings is essential for precise weld execution. The following points provide guidance for proper understanding and implementation.
Tip 1: Identify the Basic Symbol Elements: Familiarize oneself with the foundational components of the standardized graphic representations. These typically include the basic weld symbol, supplementary symbols indicating the required finish method (e.g., grinding, machining), and any associated dimensions or surface roughness values.
Tip 2: Correlate Surface Profile With Functionality: Understand the relationship between the specified surface profile and the intended function of the welded component. A smooth, ground surface may be required for fatigue resistance, while a rougher surface might be acceptable or even desirable for enhanced friction or bonding.
Tip 3: Decipher Finish Method Indicators: Accurately interpret supplementary symbols that designate the required finish method. Distinguish between symbols for grinding, machining, hammering, and other processes. The chosen method directly impacts the final surface characteristics and dimensional accuracy of the weld.
Tip 4: Interpret Surface Roughness Values: Pay close attention to any numerical values associated with surface roughness, typically expressed as Ra (average roughness) or Rz (ten-point height). These values provide quantitative limits on acceptable surface variations and must be strictly adhered to.
Tip 5: Consider the Welding Process: Recognize that the welding process itself influences the achievable surface finish. Certain processes, such as Gas Tungsten Arc Welding (GTAW), inherently produce smoother welds compared to others, such as Shielded Metal Arc Welding (SMAW). Select the welding process accordingly to minimize the need for extensive post-weld finishing.
Tip 6: Consult Relevant Standards: Refer to applicable welding standards (e.g., AWS, ISO) for detailed definitions, conventions, and tolerance limits related to these representations. These standards provide comprehensive guidance and ensure consistency in interpretation and application.
Proper utilization leads to improved weld quality, reduced rework, and enhanced overall structural performance. Careful attention to detail in their interpretation is a crucial aspect of welding fabrication.
This understanding now allows for a deeper dive into specific applications and best practices for integrating them into welding workflows.
1. Surface Roughness Control
Surface Roughness Control is inextricably linked to weld surface specifications, serving as a quantifiable characteristic defined, in part, by indications added to a weld symbol. The weld surface indication dictates the acceptable range of surface imperfections, frequently expressed as Ra (Average Roughness) or Rz (Mean Roughness Depth) values. Failure to control surface roughness can lead to premature fatigue failure, compromised sealing performance, or unacceptable aesthetic appearance. For instance, welds in pressure vessels requiring smooth internal surfaces necessitate rigorous control to prevent turbulence and erosion; this requirement would be conveyed via the weld symbol through a specified Ra value and a finishing method, such as grinding.
The role of weld surface indications extends beyond simply specifying roughness values. It also communicates the method by which the desired roughness should be achieved. This distinction is critical, as different finishing processes (e.g., grinding, machining, polishing) yield varying surface profiles and introduce different levels of residual stress. In the aerospace industry, for example, welds on aircraft components must meet stringent surface roughness requirements achieved through carefully controlled machining processes, as indicated on engineering drawings via the weld surface symbols, to mitigate stress concentrations and ensure structural integrity.
In summary, weld finish symbols are used for control of surface roughness . These indications communicate the degree of acceptable surface variation, the methods used to achieve it, and the acceptable range of dimensional tolerance for the weld. Correct interpretation and implementation of these requirements are vital for achieving design intent, ensuring structural integrity, and minimizing the risk of premature component failure.
2. Finishing Method Designation
Finishing method designation, when communicated using standardized weld finish symbols, provides essential information for achieving the desired surface characteristics of a weld. It transcends simply specifying a surface roughness; it dictates the precise process required to attain that surface, influencing both the functional properties and aesthetic aspects of the finished weldment.
- Symbol Interpretation and Process Selection
The initial step involves accurately interpreting the weld finish symbol to determine the specified finishing method. Symbols designate processes like grinding, machining, hammering, or polishing. Incorrect interpretation can lead to the application of an inappropriate finishing method, resulting in a surface that does not meet design requirements. For example, a symbol indicating “grinding to a smooth finish” necessitates selecting the correct grinding wheel grit and technique to avoid overheating and surface damage.
- Influence on Surface Properties
The selected finishing method directly impacts the surface properties of the weld. Grinding, for example, can create a smooth, uniform surface, but can also introduce residual stresses if not performed correctly. Machining offers higher precision and control over dimensional tolerances but may not be suitable for all weld geometries. Hammering can be used to relieve stress but can also alter the surface texture. Consequently, the symbol-designated finishing method must align with the desired mechanical and metallurgical properties of the weld.
- Relationship to Dimensional Tolerance
Finishing method designation is intertwined with dimensional tolerance requirements. Certain methods, such as machining, allow for tighter dimensional control compared to others, like grinding. The weld finish symbol will often implicitly or explicitly specify the required dimensional tolerance after the finishing process. Therefore, the selection of a finishing method must consider its ability to meet the specified dimensional accuracy. For instance, if a weldment requires a highly precise surface finish and tight dimensional tolerances, the symbol will likely call for a machining operation followed by inspection to verify compliance.
- Cost and Efficiency Considerations
The designated finishing method significantly impacts the cost and efficiency of the welding fabrication process. Machining, while offering precision, is often more time-consuming and costly than grinding. The weld finish symbol should ideally specify a finishing method that balances the required surface characteristics with practical considerations of cost and efficiency. Over-specifying the finishing requirements can lead to unnecessary expenses and delays, whereas under-specifying can compromise the functionality and lifespan of the weldment.
Ultimately, the effective use of weld finish symbols for specifying finishing methods demands a comprehensive understanding of the relationships between symbol interpretation, process capabilities, surface properties, dimensional tolerances, and cost considerations. Adherence to standards and careful planning are essential for achieving optimal results in welding fabrication.
3. Dimensional Tolerance Compliance
Dimensional Tolerance Compliance is intrinsically linked to weld finish symbols. These symbols not only indicate desired surface texture but also directly influence the dimensional accuracy of the finished weldment. The specified finishing method, often dictated by the symbol, determines the level of control achievable over final dimensions. For example, a weld requiring a high degree of flatness might necessitate a grinding operation designated by the symbol, influencing the dimensional outcome. Conversely, a weld symbol lacking specific finishing requirements may result in unacceptable dimensional deviations, leading to potential fit-up issues or structural weaknesses in the assembled component.
Consider a scenario involving the fabrication of a structural steel frame. The weld finish symbols on the engineering drawings specify the need for flush welds on certain joints, achieved through grinding. This requirement directly impacts dimensional tolerance compliance by ensuring that the welded connections do not protrude beyond the specified surface plane. Failure to adhere to this specified finish could result in misalignment during assembly, compromising the overall structural integrity of the frame. Similarly, in precision machining applications, weld finish symbols may dictate the use of machining to achieve tight dimensional tolerances on welded components, ensuring proper function within a larger assembly.
In conclusion, weld finish symbols serve as critical communicators of both surface texture and dimensional requirements. Accurate interpretation and implementation of these symbols are paramount for achieving dimensional tolerance compliance in welding fabrication. Challenges arise when symbols are misinterpreted or when the selected finishing method is not appropriate for achieving the required dimensional accuracy. Ultimately, understanding this connection contributes to improved weld quality, reduced rework, and enhanced overall structural performance.
4. Symbol Interpretation Accuracy
Accurate interpretation of weld finish symbols is paramount in welding fabrication, directly impacting the quality, functionality, and structural integrity of welded components. Misinterpretation can lead to deviations from design specifications, resulting in costly rework, compromised performance, or even catastrophic failures. This underscores the critical need for proficiency in deciphering these standardized graphical representations.
- Role of Standardized Conventions
Standardized conventions, such as those defined by AWS or ISO, provide the framework for weld finish symbols. These conventions dictate the precise meaning of each symbol element, including the basic weld symbol, supplementary symbols for finishing methods (e.g., grinding, machining), and associated dimensions or surface roughness values. Adherence to these standards is essential for consistent and accurate symbol interpretation across different projects and organizations. For example, a symbol indicating a specific grinding direction relative to the weld axis has a defined meaning that must be understood to ensure proper execution.
- Impact on Process Selection
The finishing method designated by the symbol directly influences the selection of appropriate welding and post-welding processes. An incorrectly interpreted symbol can lead to the use of an unsuitable finishing technique, resulting in a surface that does not meet the required specifications. For instance, a symbol intended to specify machining may be misread as allowing grinding, leading to an inadequate surface finish and potential fit-up problems with mating components. Selecting the correct process, based on accurate symbol interpretation, is critical for achieving the desired outcome.
- Influence on Quality Control
Accurate symbol interpretation is crucial for effective quality control throughout the welding fabrication process. Inspectors rely on these symbols to verify that the finished weld meets the specified requirements. A misinterpretation of the symbol can lead to either the acceptance of a non-conforming weld or the unnecessary rejection of a compliant one. For example, if a surface roughness value is misinterpreted, the inspector may use an incorrect acceptance criterion, leading to inconsistent quality assessments.
- Consequences of Misinterpretation
The consequences of inaccurate symbol interpretation can range from minor aesthetic defects to significant structural failures. In critical applications, such as aerospace or pressure vessel fabrication, a misinterpretation can have severe repercussions. A seemingly small deviation from the specified finish can introduce stress concentrations, reduce fatigue life, or compromise the integrity of the welded joint. Therefore, ongoing training and meticulous attention to detail are essential to minimize the risk of misinterpretation and ensure the reliability of welded structures.
The multifaceted implications of symbol interpretation accuracy highlight its importance in welding fabrication. As processes and standards evolve, continued emphasis on training and understanding is crucial to ensure that weld finish symbols effectively communicate design requirements and contribute to safe and reliable welded structures. Practical exercises, clear documentation, and readily accessible resources can all assist in reducing the likelihood of errors and improving overall welding quality.
5. Process Selection Impact
The selection of a welding process has a direct and significant impact on the final surface characteristics and dimensional accuracy achievable, thereby inextricably linking it to weld finish symbols. These symbols define desired surface profiles, and the chosen welding technique must be capable of producing a weld that can be finished to meet those specifications efficiently. For example, a weld finish symbol calling for a smooth, ground surface may necessitate the selection of Gas Tungsten Arc Welding (GTAW) due to its inherent ability to produce cleaner, more consistent welds than Shielded Metal Arc Welding (SMAW), thus reducing the amount of material removal required during grinding. The symbol’s requirements directly constrain process selection decisions.
The impact is further amplified by considering the post-weld finishing operations. A process like Plasma Arc Welding (PAW) might offer deep penetration and narrow weld beads, but could also create a rough surface requiring extensive machining to meet specified finish symbol requirements. This could make PAW less economically viable than a process like Submerged Arc Welding (SAW), which may deposit a smoother surface even if it requires slightly more weld metal. In applications involving high-strength alloys, the welding process can induce heat-affected zone (HAZ) changes which necessitate specific finishing techniques to restore surface properties. Therefore, the weld finish symbol dictates not only the finishing process itself but implicitly influences the acceptable welding process based on its impact on material properties and surface condition.
In summary, the intended weld finish, as indicated by graphical notations, fundamentally constrains welding process selection. Ignoring this relationship leads to inefficient fabrication, increased costs due to excessive finishing, and potential compromise of structural integrity or functional performance. Understanding the reciprocal influence between weld finish symbols and welding process capabilities is paramount for effective welding design and fabrication.
Frequently Asked Questions About Weld Finish Symbols
The following addresses common inquiries regarding graphical indications for surface preparation after welding.
Question 1: What is the fundamental purpose of these graphical indications?
They communicate the required surface characteristics of a completed joint, ensuring that the weld meets specific performance or aesthetic criteria.
Question 2: Where are these indications typically located on engineering drawings?
These are added to the welding symbol, which is connected to the weld joint by a leader line. The placement and orientation of supplementary symbols denote the type of finish required.
Question 3: What types of surface finish methods are commonly indicated by these representations?
Commonly indicated methods include grinding, machining, chipping, hammering, and as-welded condition. Each method achieves a different surface profile and dimensional accuracy.
Question 4: How does surface roughness get defined in these graphical indications?
Surface roughness is typically defined using Ra (average roughness) or Rz (ten-point height) values. These values provide quantitative limits on acceptable surface variations and are often specified adjacent to the finish method symbol.
Question 5: Are there standardized conventions that govern creation and interpretation of these indicators?
Yes, standards such as those published by the American Welding Society (AWS) and the International Organization for Standardization (ISO) define the conventions used in creation and interpretation. Adherence to these standards is crucial for consistent communication.
Question 6: What potential consequences arise from misinterpreting a specification about the surface finish?
Misinterpretation can lead to the use of an inappropriate finishing technique, resulting in compromised performance, reduced fatigue life, fit-up problems, or even structural failures.
Understanding weld finish symbols is critical for all stakeholders involved in welding fabrication, from design engineers to welders and inspectors.
This understanding now allows for a deeper dive into real world case studies, showing effective implementation of the weld finish symbols.
Conclusion
This exploration has detailed the importance of standardized indications for defining surface requirements after welding. These symbols, when accurately interpreted and applied, are critical for achieving design intent, ensuring structural integrity, and optimizing the performance of welded components. A consistent understanding of these graphical representations is paramount across all stages of fabrication, from initial design to final inspection.
Continued emphasis on training, adherence to established standards, and careful consideration of process selection in relation to weld finish symbols are essential for advancing welding technology and maximizing the reliability of welded structures in diverse engineering applications. Further research and development may refine these representations to improve clarity, efficiency, and integration with advanced manufacturing processes.


