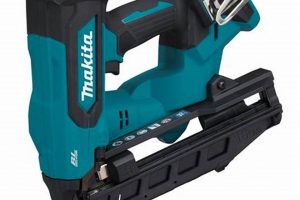
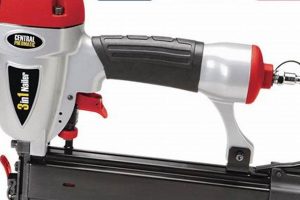
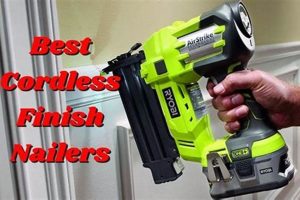
A power tool designed for driving smaller-gauge nails into wood trim and molding to create a seamless and aesthetically pleasing finish, this device offers a method for securing materials without prominent nail heads. For example, it is commonly used to install baseboards, crown molding, door casings, and other fine woodworking applications, leaving a near-invisible point of entry.
The utilization of such a tool provides several advantages, including increased efficiency, precision, and a reduced risk of damaging delicate surfaces. Its historical significance is found in its evolution from manual hammering techniques to a faster, more controlled approach, leading to improved project completion times and a higher standard of workmanship. It is a vital component for achieving professional-grade results in construction and renovation projects.
This article will examine the various models available, key features to consider when selecting one, and best practices for safe and effective operation, ensuring optimal performance and longevity of the equipment.
Operation and Maintenance Best Practices
Effective use and proper maintenance are crucial for maximizing the performance and lifespan of this tool. The following tips outline key considerations for both operation and long-term care.
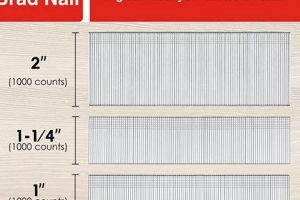
Tip 1: Select the Correct Nail Gauge and Length: Employing the appropriate nail size is critical for ensuring secure fastening without damaging the workpiece. Refer to the manufacturer’s recommendations for specific material thicknesses and joint types.
Tip 2: Adjust the Depth Setting: Precise depth adjustment ensures consistent nail placement, minimizing the need for filling or rework. Begin with a conservative setting and gradually increase until the desired level is achieved.
Tip 3: Maintain Proper Air Pressure: Operating within the recommended air pressure range prevents damage to internal components and ensures consistent driving power. Regularly check and adjust the pressure as needed.
Tip 4: Utilize Appropriate Safety Gear: Eye and ear protection are essential during operation to guard against potential injuries from debris or loud noise. Consider gloves to improve grip and reduce fatigue.
Tip 5: Clean and Lubricate Regularly: Periodic cleaning of the nail magazine and driver mechanism prevents jams and ensures smooth operation. Apply a light coat of pneumatic tool oil to internal components as recommended by the manufacturer.
Tip 6: Inspect the Air Hose and Fittings: Routine inspection of the air hose and fittings will prevent leaks which can reduce performance and power. Replace damaged or worn components immediately.
Tip 7: Store Properly When Not in Use: Store the device in a clean, dry environment to protect it from corrosion and physical damage. Disconnect the air supply and remove any remaining nails from the magazine.
Adhering to these recommendations will promote safety, improve operational efficiency, and contribute to the longevity of the equipment.
In conclusion, mastering the techniques and maintenance outlined above will enable users to achieve professional results and maximize the return on investment in this valuable tool.
1. Nail Gauge
Nail gauge, referring to the diameter of the nail shank, is a fundamental consideration when utilizing a finishing nailer. The appropriate gauge selection directly impacts the quality of the finished product and the longevity of the tool. Understanding the relationship between nail gauge and the intended application is essential.
- Material Compatibility
Thinner nail gauges, such as 18-gauge, are suitable for delicate trim work where minimizing surface damage is paramount. Using a heavier gauge in such applications can lead to splitting or unsightly nail holes, thus compromising the aesthetic of the finished piece.
- Holding Power
Nail gauge directly correlates with holding power. While thinner gauges are ideal for delicate work, they offer less resistance to pull-out compared to thicker gauges. Selecting a gauge that balances concealment with adequate fastening strength is crucial for structural integrity.
- Nailer Mechanism
Finishing nailers are designed to accommodate specific nail gauge ranges. Attempting to use nails outside the specified range can cause jamming, damage to the tool’s internal components, and inconsistent nail driving. Consult the manufacturer’s specifications to ensure compatibility.
- Project Requirements
The demands of the project dictate the appropriate nail gauge. For instance, securing thicker baseboards may necessitate a heavier gauge for added support, while attaching decorative molding may warrant a thinner gauge to preserve the material’s integrity and visual appeal.
Proper nail gauge selection is not merely a matter of convenience but a critical aspect of achieving a professional finish and ensuring the longevity of both the workpiece and the finishing nailer itself. Consideration of material type, desired holding power, and the tool’s specifications will optimize performance and minimize potential complications.
2. Depth Adjustment
Depth adjustment is a critical function in a finishing nailer, directly influencing the quality and appearance of the final product. Precise control over nail depth is paramount for achieving a professional, seamless finish, and it is a key differentiator among models on the market.
- Flush Fastening
The primary role of depth adjustment is to ensure nails are driven flush with the material surface, creating a clean, unblemished appearance. Without accurate depth control, nails may protrude, requiring manual setting and increasing the risk of damage, or be overdriven, leaving unsightly depressions. Installing delicate trim often requires careful adjustment to ensure the material isn’t damaged.
- Material Density Compensation
Different wood species and materials possess varying densities. Depth adjustment allows the user to compensate for these differences, ensuring consistent nail penetration regardless of the material being fastened. A setting suitable for soft pine will likely result in overdriving nails in hardwood, necessitating precise recalibration.
- Minimizing Surface Damage
Accurate depth setting minimizes the potential for surface damage. Overdriving nails can cause unsightly craters, while underdriving can result in unstable or weakened joints. Achieving the optimal balance between secure fastening and surface preservation is essential for high-quality finish work.
- Efficiency and Productivity
Properly adjusted depth settings contribute to increased efficiency and productivity. Eliminating the need for manual nail setting or touch-up work saves time and reduces material waste. This directly impacts project completion time and overall cost-effectiveness.
Depth adjustment contributes significantly to the utility and versatility of a finishing nailer. Its effective utilization not only enhances the aesthetic appeal of the finished product but also improves efficiency, reduces material waste, and enhances the overall quality of workmanship. The quality of the depth adjustment mechanism is something to consider when buying one of these tools.
3. Air Pressure
Air pressure is a critical operational parameter for pneumatic finishing nailers. Appropriate air pressure ensures consistent and effective nail driving, while deviations from the recommended range can lead to performance issues and potential damage to the tool.
- Optimal Operating Range
Each finishing nailer model is designed to operate within a specific air pressure range, typically measured in pounds per square inch (PSI). Adhering to this range is essential for achieving consistent nail penetration and preventing damage to internal components. Operating below the minimum pressure can result in incomplete nail sets, while exceeding the maximum pressure can lead to premature wear or breakage of parts. This range is carefully calibrated during the manufacturing process.
- Influence on Driving Power
Air pressure directly correlates with the driving force exerted by the nailer. Insufficient pressure translates to reduced power, leading to nails that are not fully embedded in the material. Conversely, excessive pressure can cause overdriving, resulting in unsightly marks or damage to the workpiece. Properly regulated air pressure delivers the optimal balance for secure and aesthetically pleasing fastening.
- Impact on Tool Longevity
Maintaining consistent air pressure within the recommended range contributes to the longevity of the finishing nailer. Fluctuations in pressure place undue stress on internal components, accelerating wear and potentially leading to malfunctions. Regular monitoring and adjustment of the air pressure are therefore essential for prolonging the tool’s service life.
- Air Compressor Compatibility
The air compressor used in conjunction with a finishing nailer must be capable of delivering the required pressure and volume of air. An undersized compressor may struggle to maintain consistent pressure during extended use, resulting in inconsistent performance. Selecting a compressor with adequate capacity is crucial for reliable operation.
In summary, careful attention to air pressure is paramount for maximizing the performance, longevity, and safety of a finishing nailer. Proper regulation ensures consistent nail driving, minimizes the risk of damage to both the tool and the workpiece, and contributes to the overall efficiency of woodworking and construction projects.
4. Safety Mechanisms
Safety mechanisms are integral to the design and operation of a finishing nailer, serving to mitigate potential hazards associated with the use of a high-powered fastening tool. These mechanisms are engineered to prevent accidental nail discharge, minimize the risk of user injury, and contribute to a safer work environment. The absence or malfunction of such safeguards can lead to unintended nail firings, resulting in physical harm or damage to surrounding objects. A common example is the dual-action trigger, which requires both the nose piece to be pressed against the work surface and the trigger to be engaged before a nail is released, preventing unintentional firing if the tool is dropped or mishandled.
Consider a scenario where the contact trip mechanism, a type of safety feature, is disabled or malfunctioning. In such a case, a slight bump or accidental trigger pull could result in the nailer firing without being pressed against a work surface. This presents a significant risk of injury to the user or bystanders. Furthermore, the proper functioning of the safety mechanisms also impacts the tool’s efficiency. Features like the lock-off switch, which prevents the tool from operating when not in use, contribute to overall safety and prevent unintentional operation during storage or transport. Makita designs the tool with safety as a priority.
In conclusion, safety mechanisms represent a critical component of a finishing nailer. Their reliable operation is paramount for preventing accidents, minimizing risk of injury, and ensuring a safe working environment. Regular inspection and maintenance of these mechanisms are essential to verify their functionality and address any potential issues promptly. Understanding and adhering to safety protocols when operating a finishing nailer is a responsibility for all users.
5. Maintenance Schedule
A structured maintenance schedule is integral to the longevity and optimal performance of the tool. This schedule outlines routine tasks designed to prevent malfunctions, maintain efficiency, and ensure user safety. Neglecting scheduled maintenance often results in diminished performance, increased repair costs, and a heightened risk of accidents during operation.
The core of a maintenance schedule for a pneumatic finishing nailer typically includes regular cleaning of the air filter to prevent reduced air flow, lubrication of internal components to minimize friction, and inspection of the air hose for leaks. Air leaks, for example, can reduce nail-driving power and cause the compressor to cycle more frequently, leading to increased wear. Proper cleaning of the nail magazine prevents jams, which saves time and increases productivity. Ignoring these procedures can lead to significant issues. For instance, failure to lubricate internal components may result in increased friction, potentially causing premature wear on critical parts such as the piston or driver blade. This could ultimately lead to costly repairs or the need for a replacement. In real-world construction, a contractor relying on multiple such tools might face significant project delays and unexpected expenses if maintenance is neglected, affecting profitability and reputation.
In summary, adhering to a meticulously planned maintenance schedule is not merely a recommendation but a necessity for responsible tool ownership and operation. While time and effort are required for these actions, the long-term benefits are substantial, encompassing increased tool lifespan, enhanced operational efficiency, improved user safety, and reduced overall costs. The maintenance schedule is the tool’s operational backbone.
Frequently Asked Questions
The following section addresses common inquiries regarding the operation, maintenance, and capabilities of this tool, providing concise and informative responses to enhance user understanding.
Question 1: What nail gauge is appropriate for use in a particular application?
The selection of nail gauge is contingent upon the material being fastened and the desired level of holding power. Thinner gauges, such as 18-gauge, are suitable for delicate trim work, while thicker materials may necessitate a 16- or 15-gauge nail for adequate fastening strength. Consult the manufacturer’s recommendations for specific applications.
Question 2: What is the recommended air pressure for operating one of these?
The recommended air pressure typically falls within the range of 70 to 120 PSI, but precise settings vary depending on the specific model and the material being fastened. Consult the owner’s manual for the manufacturer’s specified air pressure range, and adjust the pressure accordingly.
Question 3: How often should the tool be lubricated?
The tool should be lubricated daily or before each use, depending on the frequency of operation. Apply a few drops of pneumatic tool oil to the air inlet to maintain optimal performance and prevent premature wear. Consult the maintenance section of the owner’s manual for specific lubrication instructions.
Question 4: What safety precautions should be observed when operating the tool?
Appropriate safety precautions include wearing eye protection, hearing protection, and using the tool only in well-ventilated areas. The contact tip must be fully engaged with the workpiece before activating the trigger to prevent accidental nail discharge. Never point the tool at oneself or others.
Question 5: What causes a “makita finishing nailer” to jam, and how can these malfunctions be cleared?
Jams typically result from using incorrect nail sizes, debris in the nail magazine, or insufficient lubrication. To clear a jam, disconnect the air supply, open the nail magazine, remove any damaged or misaligned nails, and lubricate the internal components. Consult the owner’s manual for specific troubleshooting instructions.
Question 6: Can the tool be used for applications other than finish carpentry?
While primarily designed for finish carpentry, the tool can be used for other light-duty fastening applications, such as installing paneling or attaching trim. However, it is not intended for structural fastening or heavy-duty construction tasks. Exceeding the tool’s intended use can result in damage or injury.
These frequently asked questions provide a foundation for understanding the safe and effective utilization of the tool. Refer to the owner’s manual for comprehensive operating instructions and safety guidelines.
The next section will discuss the comparative advantages of various models, highlighting key features and performance characteristics to assist in making an informed purchase decision.
In Summary
This exploration has detailed critical aspects of the tool, encompassing operation, maintenance, safety protocols, and comparative advantages among various models. Understanding nail gauge, depth adjustment, air pressure considerations, and adherence to a regular maintenance schedule are crucial for maximizing the tool’s efficiency and longevity.
Mastering the techniques and best practices discussed facilitates professional-grade results, underlining its position as an indispensable asset for woodworking and construction applications. Continuous adherence to safety guidelines ensures a secure working environment, maximizing the utility and value of this power tool.


