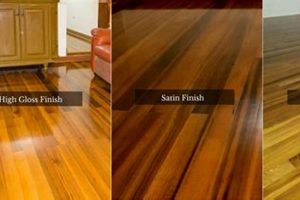
A treatment designed to impart a whitewashed or translucent appearance to wooden surfaces, this technique typically involves applying a diluted paint or stain, then wiping it away to allow the underlying grain to show through. The resulting effect is a subtle, aged look that enhances the texture of the wood. A common example is its application to furniture or paneling to create a light and airy aesthetic.
This type of finish is valued for its ability to brighten rooms, highlight the natural beauty of wood grain, and create a relaxed, informal atmosphere. Historically, it was used to lighten dark interiors and mimic the appearance of more expensive, painted finishes. Its benefits include ease of application, versatility in achieving different levels of opacity, and its suitability for various wood types. The technique can also help to conceal minor imperfections in the wood surface.
The following sections will delve deeper into the preparation required for achieving an optimal result, the diverse product options available for realizing this unique aesthetic, and the recommended application methods to ensure a durable and visually appealing outcome.
Essential Considerations for Achieving a Quality Result
Proper preparation and execution are paramount when aiming for a successful application. Adhering to the following guidelines will contribute significantly to the longevity and aesthetic appeal of the treated surface.
Tip 1: Surface Preparation: Thoroughly sand the wood surface to create a smooth and receptive base. This ensures even penetration and prevents blotchy results. Remove all traces of dust with a tack cloth prior to application.
Tip 2: Product Selection: Choose a product specifically formulated for achieving this effect. Consider water-based options for ease of cleanup and lower VOC emissions. Oil-based products may offer increased durability but require appropriate ventilation.
Tip 3: Dilution Ratio: Adhere to the manufacturer’s recommended dilution ratio. Experiment on a test piece to determine the optimal consistency for the desired level of translucency. A too-concentrated solution may obscure the wood grain.
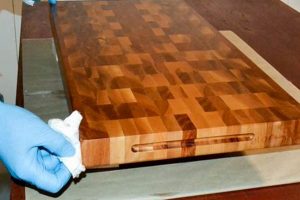
Tip 4: Application Technique: Apply the finish in thin, even coats using a brush or rag. Avoid excessive application, as this can lead to an uneven appearance. Work in the direction of the wood grain for optimal results.
Tip 5: Wiping Excess: Promptly wipe away excess finish with a clean, lint-free cloth. The timing of this step is crucial; waiting too long will result in a heavier, less translucent effect, while wiping too soon may remove too much of the product.
Tip 6: Sealing the Finish: Once the finish is completely dry, apply a clear topcoat to protect the surface and enhance durability. Select a topcoat with a matte or satin sheen to maintain the aged aesthetic.
Tip 7: Sanding Between Coats: Lightly sand between coats of finish, including the topcoat, with fine-grit sandpaper to ensure a smooth, even surface. Remove all sanding dust before applying the next coat.
These considerations are crucial for maximizing the visual impact and longevity of the treated wood. Proper surface preparation, careful product selection, and precise application techniques are essential for achieving a professional-quality outcome.
The subsequent sections will address specific product recommendations and advanced techniques for achieving specialized effects.
1. Grain Enhancement
Grain enhancement is a fundamental aspect of the distinctive aesthetic achieved through this treatment technique. The application process, involving a diluted pigment or stain, is deliberately designed to accentuate the wood’s natural grain pattern rather than obscure it. This effect arises from the selective absorption of the finish by the wood fibers; the softer grain absorbs more of the pigment, while the harder grain absorbs less, thus creating a visual contrast that highlights the inherent texture and structure of the wood. The technique’s success hinges on this selective absorption, transforming what might otherwise be a plain surface into a visually appealing one with depth and character. An illustrative example is the treatment of oak furniture, where the pronounced grain is brought to the forefront, lending the piece a rustic yet sophisticated air.
The degree of grain enhancement can be further controlled through various techniques, such as varying the dilution ratio of the finish or utilizing different application methods. Brushing typically results in more pronounced grain definition compared to wiping, as the brush action forces the pigment deeper into the grain. Furthermore, the type of wood plays a crucial role; woods with naturally open and prominent grain patterns, such as ash or hickory, will exhibit a more dramatic effect than those with tighter, less defined grain, such as maple. Therefore, understanding the wood’s properties and tailoring the application method accordingly are key to achieving the desired level of grain enhancement.
The interplay between the wood’s natural grain and the finish is central to the technique’s aesthetic appeal. Recognizing the cause-and-effect relationship between finish application and grain accentuation enables informed decision-making throughout the project. Challenges may arise from uneven grain patterns or excessive finish absorption, necessitating careful sanding and controlled application. Ultimately, successful grain enhancement contributes significantly to the overall character and perceived value of the treated wood, underscoring the importance of this aspect in achieving a quality and visually appealing final result.
2. Translucent Hue
The characteristic visual signature derives primarily from the application of a translucent hue to the wood surface. This effect is achieved by employing a diluted pigment or stain, allowing the underlying wood grain to remain visible rather than being obscured by an opaque layer. The success of the finish is intrinsically linked to the degree of translucency achieved; too much pigment, and the wood’s natural beauty is lost, while too little, and the desired lightened or whitewashed effect is not realized. The translucent hue, therefore, is not merely a cosmetic attribute but a functional component essential to defining this particular aesthetic.
A practical example of this principle is evident in Scandinavian interior design, where pale, light-reflecting surfaces are favored to maximize brightness in spaces with limited natural light. This aesthetic often utilizes this type of treatment on wood paneling or furniture, employing a translucent white or pale gray hue to create an airy and inviting atmosphere. In contrast, a darker, more heavily pigmented stain would negate the desired effect. Achieving the proper translucency often requires careful experimentation with dilution ratios and application techniques, such as wiping the finish away immediately after application to prevent excessive pigment absorption. Furthermore, the choice of wood species significantly influences the final result. Light-colored woods, such as maple or ash, lend themselves particularly well to this treatment, while darker woods, such as walnut, may require multiple coats or a tinted primer to achieve the desired level of translucency.
In summary, the translucent hue is a critical determinant of the overall effect of a finish on wood. Achieving the correct balance between pigment and transparency demands attention to detail in product selection, application, and wood species considerations. Failure to prioritize the translucent quality of the finish will result in a deviation from the intended aesthetic. Therefore, understanding the significance of the hue’s translucency is paramount for realizing a successful and visually appealing final product.
3. Surface Preparation
Surface preparation is a critical determinant in the successful application and aesthetic outcome of the treatment. The technique relies on the wood’s inherent grain pattern being visible through a translucent layer, and any imperfections or inconsistencies on the surface will be magnified by the finish, detracting from the intended effect. A properly prepared surface allows for uniform absorption of the diluted pigment, leading to a consistent and visually appealing result. Conversely, a poorly prepared surface can exhibit blotchiness, uneven color distribution, and compromised adhesion of the finish.
The process typically involves sanding to create a smooth, receptive base, removing any existing finishes, dirt, or contaminants. The grade of sandpaper used is crucial; coarser grits are employed to remove existing coatings or level uneven surfaces, while finer grits refine the surface to a smooth finish. Failure to adequately remove existing finishes or contaminants will result in inconsistent penetration of the new finish, leading to an unsatisfactory aesthetic outcome. As an example, attempting to apply the treatment over an existing varnish without proper sanding will result in the finish peeling or cracking. Similarly, dust or residue left on the surface can become embedded in the finish, creating an uneven and textured appearance. Therefore, thorough cleaning and dust removal are essential components of surface preparation.
In conclusion, the quality of surface preparation directly impacts the final outcome of the finish. The time and effort invested in this initial stage significantly influence the overall aesthetic appeal and durability of the treated wood. Attention to detail during sanding, cleaning, and dust removal is paramount for achieving a professional-quality result. The absence of meticulous surface preparation is a common cause of failure, leading to an undesirable and visually unappealing surface. Thus, surface preparation should be considered not merely a preliminary step but an integral component of the entire finishing process.
4. Application Technique
The application technique is a pivotal element in achieving the desired aesthetic outcome. The characteristic look is predicated on controlled pigment deposition and subsequent removal, a process directly governed by the application method employed. The chosen technique directly influences the intensity of the color, the visibility of the wood grain, and the overall uniformity of the finished surface. An inappropriate application can lead to uneven color distribution, obscured grain patterns, or a finish that is too opaque, thereby negating the intended visual effect. For instance, applying the treatment with a heavy hand or failing to promptly wipe away excess pigment will result in a finish that appears more like a solid paint than the subtle, translucent effect intended.
Several application methods exist, each with its own set of advantages and disadvantages. Brushing allows for precise control over the pigment deposition, enabling the artisan to target specific areas or enhance the grain pattern selectively. Wiping, on the other hand, offers a more uniform distribution of color and is particularly well-suited for large, flat surfaces. Spraying can also be used, but requires careful masking and control to avoid overspray and uneven coverage. Irrespective of the chosen method, the timing of the pigment removal is crucial. Wiping too soon will remove too much pigment, resulting in a faint or washed-out finish, while waiting too long will allow the pigment to set, making it difficult to remove and resulting in an overly dark and opaque appearance. A real-world example can be observed in furniture restoration, where a skilled craftsman will meticulously apply the treatment with a brush, carefully controlling the amount of pigment applied to highlight the wood’s natural features.
In summary, the application technique is not merely a procedural step but an integral component of achieving the signature look. A thorough understanding of the various application methods, the timing of pigment removal, and the properties of the chosen finish are essential for success. Challenges may arise from inconsistent application, improper surface preparation, or environmental factors such as temperature and humidity. However, by carefully considering these factors and employing appropriate techniques, a professional and visually appealing surface can be achieved.
5. Sealing Protection
Sealing protection represents a critical and necessary phase in the process. The application of a clear topcoat serves as a protective barrier, shielding the underlying delicate finish from environmental factors, physical wear, and potential damage. Without this layer, the treated surface is vulnerable to scratches, moisture penetration, and the degrading effects of ultraviolet radiation. The absence of sealing undermines the longevity of the finish, potentially leading to premature discoloration, cracking, or even complete degradation of the treated wood. Consider, for example, a treated tabletop; without a sealant, spills and daily use will rapidly erode the finish, diminishing its visual appeal and necessitating costly repairs or reapplication.
The selection of an appropriate sealant directly impacts the durability and aesthetic qualities of the overall treatment. Polyurethane-based sealants offer robust protection against abrasion and moisture, making them suitable for high-traffic areas. However, they may slightly alter the color of the underlying finish. Water-based acrylic sealants provide excellent clarity and UV resistance, preserving the original hue, but may be less resistant to physical damage. Wax-based sealants offer a more natural, matte finish but require periodic reapplication to maintain their protective properties. Therefore, the choice of sealant must be carefully aligned with the intended use and desired aesthetic outcome. In museum settings, specific sealants are selected to minimize off-gassing and protect the integrity of delicate wooden artifacts with this delicate, aged appearance.
In summary, sealing protection is not merely an optional add-on but an indispensable component in achieving a durable and aesthetically pleasing result. It safeguards the underlying finish, extending its lifespan and preserving its visual qualities. The careful selection of a sealant appropriate for the intended use and aesthetic preferences is paramount. Neglecting this phase will inevitably lead to premature degradation, diminished visual appeal, and ultimately, a less satisfactory outcome. The successful integration of effective sealing protection ensures the longevity and enduring beauty of the wood treatment.
6. Longevity Increase
Longevity increase, as it relates to this finish, is not an inherent property of the treatment itself but rather a consequence of specific materials, application techniques, and post-treatment care practices. The finish, by its very nature, is delicate, involving the application of a thinned pigment that provides minimal protective coating. Therefore, the extension of the wood’s lifespan depends largely on mitigating factors applied before, during, and after the initial application. For instance, the use of a wood stabilizer prior to the finish can prevent warping and cracking, while a UV-resistant sealant applied afterward protects against fading and sun damage. In situations where wood is used externally, such as for cladding or siding, longevity increases are markedly noticeable after sealant application to the finish. This creates a barrier between the wood and outside elements. Failing to consider these preventative and restorative actions leads to the rapid degradation of the treatment and the underlying wood, underscoring that longevity is not an intrinsic feature but a byproduct of supplemental measures.
Further contributing to the increase in longevity are choices made during the application process. Using high-quality pigments that resist fading and deterioration ensures that the aesthetic appeal of the wood remains intact for a more extended period. Similarly, multiple thin coats, rather than a single thick coat, provide greater adhesion and reduce the likelihood of cracking or peeling. In practice, the maintenance of this finish also plays a crucial role. Regular cleaning with mild, pH-neutral soaps prevents the buildup of dirt and grime, which can accelerate wear. Promptly addressing any scratches or imperfections with touch-up applications prevents moisture intrusion and further damage. In high-use areas, such as kitchen cabinetry, periodic reapplication of the sealant may be necessary to maintain adequate protection.
In summary, the perceived durability of this finish is a direct reflection of preventative measures and consistent maintenance. While the treatment itself offers minimal inherent protection, combining it with appropriate preparatory steps, high-quality materials, diligent application, and ongoing care can significantly extend the lifespan of the treated wood. The misconception that the finish itself guarantees durability is erroneous; longevity is a result of a holistic approach to wood preservation rather than an isolated characteristic of the finish itself. Without such a comprehensive approach, the aesthetic benefits of the finish are short-lived, rendering the initial effort and investment unsustainable.
Frequently Asked Questions
The following addresses common inquiries regarding this wood treatment, clarifying application, maintenance, and suitability.
Question 1: What wood types are most suitable for this treatment?
Open-grained woods, such as oak, ash, and fir, generally exhibit the most desirable results due to their ability to readily absorb the diluted pigment. Tighter-grained woods, such as maple or cherry, may require more extensive preparation to achieve a similar effect.
Question 2: How does surface preparation impact the final result?
Meticulous surface preparation, including sanding and cleaning, is critical for achieving a uniform and aesthetically pleasing result. Imperfections or existing finishes will be accentuated by the translucent nature of the treatment.
Question 3: What type of sealant is recommended for protecting the treated surface?
The selection of a sealant depends on the intended use and desired aesthetic. Polyurethane-based sealants offer enhanced durability, while water-based acrylic sealants provide superior clarity and UV resistance. Wax-based sealants offer a natural, matte finish but require periodic reapplication.
Question 4: Is this treatment suitable for outdoor applications?
It is generally not recommended for outdoor applications without significant protective measures. Prolonged exposure to the elements will accelerate the degradation of the finish. Specialized sealants with UV inhibitors may offer limited protection.
Question 5: How does the application technique affect the final appearance?
The application technique directly influences the intensity of the color and the visibility of the wood grain. Brushing allows for precise control, while wiping offers a more uniform distribution. The timing of pigment removal is crucial for achieving the desired translucent effect.
Question 6: How is the treatment properly maintained to ensure longevity?
Regular cleaning with mild, pH-neutral soaps is recommended to prevent the buildup of dirt and grime. Promptly addressing scratches or imperfections with touch-up applications is essential to prevent moisture intrusion. Periodic reapplication of the sealant may be necessary in high-use areas.
Key takeaways include the necessity of careful wood selection, thorough preparation, appropriate sealant choice, and consistent maintenance for optimal results.
The following section will explore advanced techniques and specialized applications.
Conclusion
The preceding analysis has explored the multifaceted nature of pickled wood finish, detailing its application, maintenance, and the critical factors influencing its longevity and aesthetic appeal. The discussion emphasized the importance of proper surface preparation, suitable wood selection, appropriate sealant choice, and diligent maintenance practices. It also clarified common misconceptions regarding its inherent durability, highlighting that longevity is contingent on supplemental measures rather than an intrinsic property of the finish itself.
Understanding the intricacies of pickled wood finish empowers informed decision-making, enabling individuals to achieve the desired aesthetic outcome while ensuring the long-term preservation of treated wood surfaces. Continued adherence to best practices and a commitment to informed material selection will further enhance the potential of this technique to elevate the beauty and value of wood-based projects.


