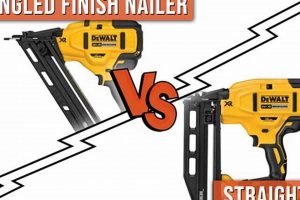
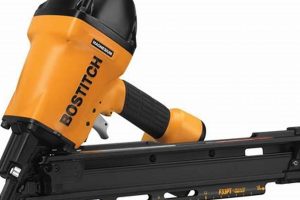
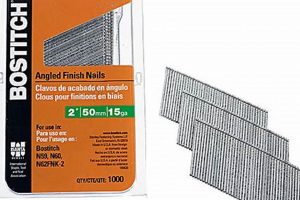
This tool, powered by compressed air, drives fasteners into wood with precision. Its application is common in trim work, cabinetry, and other woodworking tasks requiring a neat, subtle fastening method. An example includes securing baseboards to a wall without prominent nail heads.
The significance of this device lies in its ability to provide a clean, professional finish. It offers a balance between speed and accuracy, contributing to efficient project completion. Historically, it evolved from larger, less refined pneumatic fastening systems, becoming a staple in modern construction and carpentry due to its lightweight design and reduced impact on the surrounding material.
The following sections will delve into the specific features, operational considerations, and maintenance procedures associated with this type of equipment, offering a detailed understanding for optimal use and longevity.
Operational Tips for Pneumatic Finish Fastening
The following tips offer guidance on maximizing the performance and lifespan of pneumatic finish fastening equipment. These guidelines aim to enhance user safety and ensure consistent, high-quality results.
Tip 1: Regulate Air Pressure. Maintaining the correct air pressure is crucial. Consult the tool’s manual for recommended PSI settings. Insufficient pressure may result in incomplete nail driving, while excessive pressure can damage the workpiece.
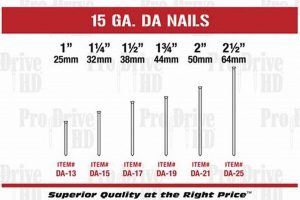
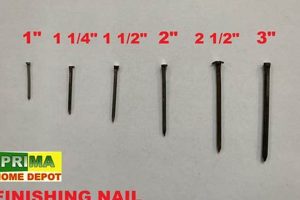
Tip 2: Select Appropriate Fastener Length. Using the correct fastener length ensures secure attachment without protruding through the material. Always measure the combined thickness of the materials being joined and select a fastener of appropriate length.
Tip 3: Maintain a Clean Air Supply. Implement an air compressor filter and dryer. Contaminants such as water and oil in the air supply can damage the internal components of the tool, reducing its efficiency and lifespan.
Tip 4: Utilize Safety Glasses. Eye protection is paramount. Even with safety features, stray fasteners or debris can pose a significant risk. Always wear appropriate safety glasses during operation.
Tip 5: Practice Proper Tool Placement. Ensure the tool is flush against the workpiece before firing. Angling the tool can lead to misfires, inaccurate fastener placement, and potential damage to the surrounding material.
Tip 6: Lubricate Regularly. Periodic lubrication of the tool’s internal components, as per the manufacturer’s instructions, helps to reduce friction and wear, extending the tool’s operational life.
Tip 7: Store Appropriately. When not in use, store the equipment in a clean, dry environment. Disconnect it from the air supply and empty the magazine to prevent accidental firing.
Adhering to these guidelines will promote efficient operation, extend the lifespan of the equipment, and enhance safety. Implementing these practices contributes to consistently achieving professional-quality results.
The subsequent sections of this document will discuss common troubleshooting issues and provide advanced techniques for specialized applications.
1. Air Compressor Compatibility
Proper air compressor compatibility is fundamental to the functionality and lifespan of a pneumatic finish nailer. The nailer’s reliance on compressed air necessitates careful consideration of the compressor’s specifications to ensure optimal performance.
- CFM (Cubic Feet per Minute) Rating
The CFM rating of the air compressor denotes its ability to deliver a consistent volume of air. Finish nailers require a specific CFM at a given pressure (PSI) to operate effectively. Insufficient CFM results in reduced firing power, inconsistent nail depth, and potential damage to the tool. For example, a nailer requiring 2.5 CFM at 90 PSI needs a compressor capable of supplying at least that amount to maintain consistent operation.
- PSI (Pounds per Square Inch) Output
PSI represents the air pressure delivered by the compressor. Most finish nailers operate within a specific PSI range, typically between 70 and 120 PSI. Exceeding the nailer’s maximum PSI rating can damage internal components, while insufficient pressure leads to incomplete nail driving. Ensuring the compressor’s output is within the nailer’s recommended range is critical.
- Tank Size and Duty Cycle
The air compressor’s tank size influences the frequency with which the motor cycles on and off. A larger tank provides a reserve of compressed air, reducing motor starts and stops during continuous use. Duty cycle refers to the percentage of time the compressor can operate continuously within a given period. For high-volume finish nailing tasks, a compressor with a larger tank and a higher duty cycle is recommended to prevent overheating and maintain consistent pressure.
- Hose Diameter and Length
The diameter and length of the air hose connecting the compressor to the nailer affect air pressure delivery. A smaller diameter or excessively long hose creates resistance, reducing the pressure reaching the tool. Using a hose with an appropriate diameter and length minimizes pressure drop and ensures the nailer receives the necessary air supply for consistent performance.
Failure to address these compatibility factors can lead to inconsistent performance, tool damage, and reduced efficiency in finish nailing applications. Matching the air compressor’s output to the specific requirements of the pneumatic finish nailer is essential for reliable and professional results.
2. Fastener Gauge Selection
The selection of the appropriate fastener gauge is a critical decision point when utilizing a pneumatic finish nailer. The gauge, indicating the thickness of the nail, directly impacts the holding power and visibility of the fastener within the finished workpiece. Incorrect gauge selection can compromise the integrity and aesthetic quality of the project.
- 15-Gauge Nails
15-gauge nails are thicker and provide substantial holding power, suitable for applications requiring robust connections, such as attaching door or window casings. They leave a larger hole, necessitating filling prior to finishing. An example application involves securing heavy crown molding where a strong, lasting bond is paramount, despite the need for cosmetic touch-up.
- 16-Gauge Nails
16-gauge nails offer a balance between holding power and minimal visibility. They are frequently employed in general trim work, paneling, and furniture assembly. While providing adequate strength for many applications, they leave a smaller, more easily filled hole compared to 15-gauge nails. Baseboard installation represents a typical use case, offering a secure attachment with a relatively inconspicuous nail entry point.
- 18-Gauge Nails (Brads)
18-gauge brads are the thinnest type of finish nail, primarily used for delicate trim and detail work where minimal visibility is crucial. They offer limited holding power and are best suited for applications involving thin materials or where other adhesives are employed. Attaching decorative trim to cabinet faces is an example where 18-gauge brads provide sufficient holding power without detracting from the aesthetic appeal.
- 23-Gauge Pins
23-gauge pins are headless fasteners offering virtually invisible fastening. Used to fasten the tiniest and most delicate of trims, they’re also used to pin miters and secure intricate joints while glue dries. Since they have almost no head, they cannot be used for any kind of structural fastening.
The choice of fastener gauge must align with the specific requirements of the task, balancing holding strength with aesthetic considerations. Each gauge offers distinct advantages and limitations, influencing the overall quality and durability of the finished product. Selecting the most appropriate gauge is essential for maximizing the effectiveness of the pneumatic finish nailer and achieving the desired results.
3. Depth Adjustment Mechanism
The depth adjustment mechanism on a pneumatic finish nailer is a critical component, providing the operator with control over the penetration depth of the fastener. This capability directly influences the quality of the finished surface, preventing both over-driving (where the nail head sinks too far into the material) and under-driving (where the nail head protrudes above the surface).
- Functionality and Operation
The mechanism typically consists of a dial or lever that allows the user to modify the distance the nailer’s driver blade travels. Adjusting this setting alters the force with which the nail is driven. The mechanism is usually calibrated with incremental settings, allowing for precise control. An example of its use is when transitioning from fastening softwood trim (requiring less depth) to hardwood trim (requiring greater depth).
- Types of Adjustment Mechanisms
Several types of adjustment mechanisms exist, ranging from simple, manually adjusted dials to more sophisticated, tool-free systems. Tool-free systems offer convenience and speed, allowing for on-the-fly adjustments without the need for wrenches or screwdrivers. Regardless of the type, the goal remains the same: to provide the user with precise control over the driving depth. An advanced system might feature a visual indicator displaying the selected depth setting.
- Impact on Material Integrity
Correct adjustment of the depth setting prevents damage to the workpiece. Over-driving can crush the surrounding material, creating an unsightly indentation and weakening the joint. Under-driving, conversely, leaves the nail head exposed, requiring manual setting with a nail set and hammer, negating the speed and efficiency benefits of the pneumatic tool. Proper adjustment preserves the structural integrity and aesthetic appeal of the finished project.
- Influence on Fastener Holding Power
The depth adjustment mechanism directly impacts the holding power of the fastener. Insufficient depth compromises the fastener’s grip within the material, potentially leading to joint failure over time. Conversely, excessive depth may cause the fastener to pass entirely through the material or damage underlying surfaces. Proper depth setting ensures optimal engagement and secure fastening, contributing to the longevity and stability of the construction.
The depth adjustment mechanism is integral to achieving professional results with a pneumatic finish nailer. By providing control over fastener penetration, it allows the operator to adapt to varying material densities and thicknesses, minimizing damage and maximizing holding power. This feature underscores the importance of understanding and utilizing the depth adjustment mechanism for optimal performance in finish carpentry applications.
4. Sequential/Contact Firing
The firing mechanism of a pneumatic finish nailer significantly influences both the speed and safety of operation. Two primary firing modes, sequential and contact, dictate how the tool discharges fasteners, each presenting distinct advantages and limitations for various applications.
- Sequential Firing Mode
Sequential firing necessitates depressing the safety contact tip against the workpiece and then pulling the trigger to actuate the nailer. This mode prioritizes safety, preventing accidental discharge. It’s particularly suited for precise applications where careful nail placement is paramount, such as intricate trim work or delicate joinery. The user must lift the tool completely between each firing cycle.
- Contact (Bump) Firing Mode
Contact firing allows for rapid fastener deployment. The trigger is held down, and the nailer fires each time the safety contact tip is depressed against the workpiece. This mode increases speed and efficiency, suitable for repetitive tasks like sheathing or fencing. However, it inherently carries a higher risk of accidental discharge, requiring extreme caution.
- Safety Implications
The choice between sequential and contact firing directly impacts user safety. Sequential firing significantly reduces the risk of unintentional nail discharge, making it the preferred mode for less experienced operators or situations requiring meticulous control. Contact firing, while faster, demands heightened awareness and adherence to safety protocols to prevent injury.
- Application Suitability
The application dictates the optimal firing mode. Sequential firing excels in scenarios demanding precision and control, such as installing intricate moldings or assembling delicate furniture components. Contact firing is more efficient for large-scale projects requiring rapid fastener deployment, like subflooring or roofing, provided appropriate safety measures are implemented.
The selection of the appropriate firing mode for a pneumatic finish nailer should be based on a careful assessment of the project requirements, the operator’s skill level, and a commitment to safety. Understanding the distinct characteristics of sequential and contact firing is crucial for maximizing efficiency while minimizing the risk of accidents. Some nailers offer a switch to easily change firing modes depending on the need.
5. Magazine Capacity
The magazine capacity of a pneumatic finish nailer directly influences operational efficiency and workflow continuity. It dictates the number of fasteners the tool can hold, impacting the frequency of reloading and subsequent interruptions to the task at hand. Optimizing magazine capacity is a critical factor in maximizing productivity.
- Standard Capacity and Dimensions
The standard magazine capacity for most finish nailers ranges from approximately 100 to 130 nails. The physical dimensions of the magazine are influenced by the nail gauge and length accommodated by the tool. A larger magazine can increase the tool’s overall weight and bulk, potentially affecting maneuverability and user comfort, especially during prolonged use. Common sizes are: 100-count for smaller 18-gauge brad nailers, and 110-130 count for 15- or 16-gauge finish nailers.
- Impact on Project Workflow
Higher magazine capacity reduces the need for frequent reloading, streamlining the workflow. This is particularly beneficial in applications requiring a large number of fasteners, such as installing extensive trim or paneling. Conversely, projects involving fewer fasteners may not necessitate a high-capacity magazine, and a smaller, lighter tool might be preferred for ease of handling and precision.
- Magazine Type and Loading Mechanism
The type of magazine, whether strip or coil, and the loading mechanism influence the speed and ease of reloading. Strip magazines typically accommodate straight strips of collated nails, while coil magazines hold a coiled strip. Loading mechanisms vary from simple drop-in designs to more complex systems involving latches and springs. The design of the loading mechanism can significantly impact the time required to replenish the nail supply, thereby affecting overall efficiency. Some magazines load from the side (easier access) vs. the top (more compact).
- Considerations for Specific Applications
The optimal magazine capacity is contingent upon the specific application. High-volume applications, such as production cabinetmaking or large-scale trim installations, benefit from larger magazines to minimize downtime. Conversely, intricate detail work may prioritize tool maneuverability over magazine capacity. Choosing a nailer with a magazine capacity that aligns with the typical demands of the intended applications is crucial for optimizing performance and productivity.
The magazine capacity of a pneumatic finish nailer is a practical consideration that directly affects project efficiency and user experience. Selecting a tool with an appropriate magazine size and loading mechanism can contribute to streamlined workflow and enhanced productivity in various finish carpentry applications.
6. Ergonomic Design
Ergonomic design, in the context of pneumatic finish nailers, directly influences user comfort, reduces fatigue, and enhances overall work efficiency. The tool’s design characteristics significantly impact the user’s physical well-being and long-term productivity.
- Grip Design and Material
The grip is a primary point of contact between the user and the tool. Ergonomic grips are contoured to fit the natural shape of the hand, reducing strain during prolonged use. Materials like rubber overmolds provide a secure, non-slip surface and dampen vibrations, minimizing hand fatigue. A poorly designed grip can lead to discomfort, reduced control, and increased risk of repetitive strain injuries.
- Weight Distribution and Balance
The weight distribution of the finish nailer affects the user’s stability and control. A balanced tool reduces the effort required to maintain proper positioning, decreasing muscle fatigue. If the weight is concentrated at one end, the user must exert more force to counteract the imbalance, leading to strain in the wrist and arm. An optimized design ensures even weight distribution for improved handling.
- Trigger Mechanism and Actuation Force
The design of the trigger mechanism and the force required to actuate it impact finger fatigue and control. An ergonomically designed trigger is easily accessible and requires minimal force to activate, reducing strain on the trigger finger. Excessive trigger force can lead to finger cramps and decreased accuracy, especially during repetitive tasks. A smooth, responsive trigger contributes to user comfort and precision.
- Exhaust Vent Positioning
The placement of the exhaust vent is crucial to prevent the user from being exposed to blasts of compressed air. An ergonomically positioned vent directs exhaust away from the user’s face and body, minimizing discomfort and potential eye irritation. Poor vent placement can create a distracting and uncomfortable working environment.
These ergonomic considerations collectively contribute to a more comfortable and efficient user experience when operating a pneumatic finish nailer. Incorporating ergonomic principles into the tool’s design is essential for reducing user fatigue, preventing injuries, and maximizing productivity in finish carpentry applications.
7. Maintenance Procedures
Adherence to prescribed maintenance procedures is paramount for sustaining the operational efficiency and extending the lifespan of a pneumatic finish nailer. The intricate internal mechanisms of this tool, reliant on compressed air and precision engineering, are susceptible to wear, contamination, and malfunction if neglected. Regular maintenance mitigates these risks, preventing costly repairs and ensuring consistent performance. For example, the accumulation of moisture within the air lines can lead to corrosion and impede the movement of internal components, resulting in reduced driving power and eventual tool failure. Lubricating the tool with the manufacturer’s recommended oil mitigates internal friction, promoting smooth operation and minimizing wear.
Specific maintenance tasks include daily draining of the air compressor tank to remove accumulated water, regular cleaning and oiling of the nailer’s internal components, and inspection of air hoses and fittings for leaks. Consistent maintenance schedules, based on the tool’s usage frequency, are critical. Consider a scenario where a finish nailer is used daily in a high-production cabinet shop. A rigorous daily maintenance routine, including air line draining and lubrication, will significantly reduce the likelihood of downtime compared to a tool used infrequently and subjected to minimal maintenance.
In summary, consistent and appropriate maintenance procedures are indispensable for pneumatic finish nailers. Neglecting these procedures leads to compromised performance, increased repair costs, and a shortened tool lifespan. A proactive approach to maintenance, incorporating regular cleaning, lubrication, and inspection, ensures the tool remains a reliable and efficient asset in any finish carpentry application. The challenge lies in establishing and adhering to a consistent maintenance schedule, but the long-term benefits outweigh the effort.
Frequently Asked Questions
This section addresses common inquiries regarding the operation, maintenance, and application of pneumatic finish fastening equipment. The information provided aims to clarify concerns and enhance understanding for optimal tool utilization.
Question 1: What is the optimal air pressure for a pneumatic finish nailer?
The optimal air pressure varies depending on the specific nailer model and the material being fastened. Consult the manufacturer’s specifications for recommended PSI (pounds per square inch) settings. Generally, a range of 70 to 120 PSI is suitable for most applications.
Question 2: What types of fasteners are compatible with a standard pneumatic finish nailer?
Compatibility is determined by the nailer’s gauge and nail length specifications. Common gauges include 15, 16, and 18. Adhering to the manufacturer’s recommendations for nail type and size prevents tool damage and ensures proper fastener driving.
Question 3: How often should a pneumatic finish nailer be lubricated?
Lubrication frequency depends on usage. For daily use, lubricate the tool daily with a few drops of pneumatic tool oil inserted into the air inlet. For infrequent use, lubricate before each use. Always follow the manufacturer’s specific instructions for lubrication procedures.
Question 4: What causes a pneumatic finish nailer to misfire?
Misfires can result from several factors, including insufficient air pressure, incorrect fastener loading, a worn driver blade, or debris obstructing the internal mechanism. Diagnosing and addressing the underlying cause is essential for preventing recurring misfires.
Question 5: Is safety eyewear necessary when operating a pneumatic finish nailer?
Safety eyewear is mandatory. The risk of projectiles, such as fasteners or wood splinters, warrants the use of ANSI-approved safety glasses or goggles to protect the eyes from potential injury.
Question 6: How should a pneumatic finish nailer be stored when not in use?
Store the nailer in a clean, dry environment. Disconnect it from the air supply, empty the magazine, and apply a few drops of pneumatic tool oil to the air inlet to prevent corrosion and maintain internal lubrication.
Proper understanding of these frequently asked questions promotes safe and efficient operation, contributing to optimal performance and longevity of the equipment.
The subsequent sections of this document will provide advanced techniques for specialized applications.
Conclusion
This document has explored the pneumatic finish nailer, detailing its operational principles, critical components, safety considerations, and maintenance requirements. Emphasis has been placed on the tool’s impact on efficiency and the quality of finished carpentry projects. Understanding the nuances of air compressor compatibility, fastener selection, depth adjustment, firing modes, magazine capacity, ergonomic design, and maintenance is essential for maximizing the tool’s capabilities and ensuring operator safety. The information presented provides a comprehensive foundation for informed decision-making regarding tool selection, operation, and care.
Proficient utilization of this equipment extends beyond mere operation; it necessitates a thorough comprehension of its mechanics and a commitment to safe practices. Continued adherence to established guidelines and ongoing professional development are crucial for optimizing performance and mitigating risks associated with pneumatic fastening technology. The lasting impact of quality craftsmanship relies on the skillful and informed use of tools such as the one described herein.


