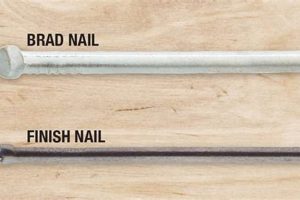
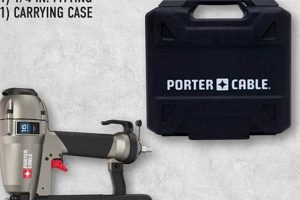
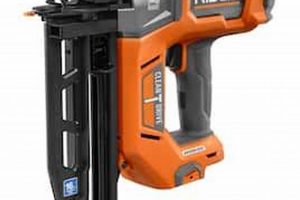
This tool is a type of pneumatic nail gun utilized for delicate woodworking and trim applications. It employs small-gauge fasteners, typically 18-gauge, to secure materials without significant splitting or marring of the surface. These tools are commonly used in cabinetry, molding installation, picture framing, and other projects requiring a subtle and refined finish.
The advantages of using this specialized nail gun include reduced visibility of the nail head, minimizing the need for extensive filling and sanding. Its lightweight design and ease of maneuverability allow for precise placement, crucial for intricate work. The development of this tool has streamlined many finishing processes, enhancing the quality and speed of project completion, from hobbyist endeavors to professional carpentry.
The following sections will delve deeper into specific applications, safety considerations, and maintenance procedures related to this type of pneumatic tool, providing a comprehensive overview for both novice and experienced users.
Operational Guidelines for Pneumatic Finishing Tools
This section offers practical advice for optimal utilization of tools designed for fine woodworking and trim tasks.
Tip 1: Regulate Air Pressure. Consistent air pressure, as specified by the manufacturer, ensures proper fastener depth and prevents damage to the workpiece. Test the pressure setting on scrap material before commencing the final application.
Tip 2: Select Appropriate Fastener Length. The fastener’s length should be adequate to penetrate both the trim and the underlying material securely, without protruding excessively. Overly long fasteners can compromise the aesthetic and structural integrity of the finished product.
Tip 3: Maintain a Consistent Angle. When driving fasteners, hold the tool perpendicular to the surface for uniform penetration and to avoid angled entry, which can weaken the joint and detract from the appearance.
Tip 4: Utilize a Consistent Driving Motion. A firm, steady pressure applied during actuation helps to drive the fastener cleanly and flush with the surface. Avoid jerking or hesitating during the firing sequence.
Tip 5: Monitor Fastener Placement. Consistent spacing between fasteners contributes to a more professional appearance and even load distribution. Employ a measuring tool or template for repeatable placement.
Tip 6: Clean Regularly. Regularly clean the tool of debris and lubricate moving parts to ensure smooth operation and extend its lifespan. A clean tool is a safer and more efficient tool.
Tip 7: Use Safety Glasses: Always wear appropriate eye protection to shield against potential debris or stray fasteners.
Adherence to these guidelines promotes efficient operation, reduces the likelihood of errors, and enhances the overall quality of finished projects. Attention to detail during operation is key to successful and professional outcomes.
The concluding section will offer insights into troubleshooting common issues and performing necessary maintenance.
1. Gauge and Fastener Type
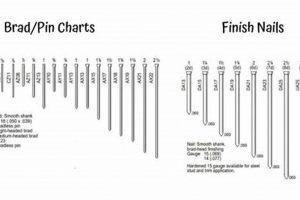
The operational effectiveness of a pneumatic finishing tool is intrinsically linked to the gauge and type of fastener it employs. These tools are designed to utilize a specific range of fastener gauges, predominantly 18-gauge, though variations exist. The gauge directly correlates to the fastener’s diameter; higher gauge numbers indicate smaller diameters. Selection of the appropriate gauge and fastener type is critical for minimizing surface damage and achieving a clean, professional finish. For instance, using a larger gauge fastener in delicate trim work may result in unsightly splitting or require extensive filling and sanding to conceal the nail head.
Conversely, employing an inappropriate fastener type, such as using a brad with an insufficient head size or shank design, can compromise the holding power of the fastening. This can lead to joint failure over time. The manufacturer’s specifications for the tool outline the permissible fastener dimensions and materials. Adherence to these specifications ensures proper tool function, optimal fastening performance, and minimizes the risk of tool malfunction or damage to the workpiece. An example would be using 23-gauge headless pins in a 15- or 16-gauge nailer which would cause damage to the tool.
In summary, a comprehensive understanding of the relationship between gauge, fastener type, and the capabilities of a finishing tool is essential for successful project outcomes. Proper selection prevents cosmetic imperfections and structural weaknesses, contributing to the longevity and aesthetic appeal of the finished product. Therefore, meticulous attention should be paid to matching the fastener to the tool and the specific requirements of the application. The next consideration will focus on the tool air pressure regulation.
2. Air Pressure Regulation
Air pressure regulation constitutes a critical operational parameter for pneumatic finishing tools. Precise control over the air pressure delivered to the tool directly influences fastener penetration depth and, consequently, the quality of the finished surface. Insufficient air pressure results in fasteners that do not fully seat, leaving nail heads protruding above the material surface. Conversely, excessive pressure can cause fasteners to penetrate too deeply, potentially damaging the surrounding wood fibers or even driving the fastener completely through the material. This is especially critical for delicate trim and molding applications, where aesthetic considerations are paramount.
Practical application dictates careful adjustment of the air compressor’s regulator to match the manufacturer’s specified operating pressure range for the tool. This range is typically indicated on the tool itself or within the accompanying documentation. Furthermore, the density and hardness of the workpiece material must be factored into the pressure setting. Softer woods generally require lower pressure to prevent over-driving, while harder woods necessitate slightly higher pressure for complete fastener insertion. For example, installing pine trim typically requires a lower pressure setting than installing oak trim. Regular monitoring of the air pressure gauge and incremental adjustments are often necessary to achieve optimal results.
In summary, air pressure regulation is not merely a setting but an integral element in achieving consistent and professional results with pneumatic finishing tools. Mastering the nuances of pressure adjustment, considering both the tool specifications and the material properties, is essential for minimizing surface defects and maximizing the efficiency and effectiveness of the finishing process. The following section will discuss the significance of the nailer’s depth adjustment mechanism.
3. Depth Adjustment Mechanism
The depth adjustment mechanism in a pneumatic finishing tool is a critical feature enabling precise control over fastener penetration. This mechanism allows the user to tailor the driving depth to the material’s density, preventing overdriving or underdriving the fastener. Its correct calibration is essential for achieving flush and consistent finishes, a hallmark of quality finish work.
- Purpose of Depth Adjustment
The primary function of the depth adjustment mechanism is to regulate the distance the nail is driven into the material. This ensures that the nail is seated flush with the surface or countersunk slightly, depending on the desired finish and the material’s properties. Without this adjustment, variations in material density or thickness can result in inconsistent nail depths, compromising both aesthetics and structural integrity.
- Types of Adjustment Mechanisms
Several types of depth adjustment mechanisms exist, ranging from simple dials or screws to more sophisticated tool-free systems. Dial-based systems offer incremental adjustments, allowing for fine-tuning of the driving depth. Tool-free systems often utilize a lever or button to quickly adjust the depth, providing convenience and speed in situations where frequent adjustments are required. The choice of mechanism often depends on the tool’s overall design and intended use.
- Impact on Finishing Quality
The depth adjustment mechanism directly impacts the quality of the finished product. Consistent and accurate nail depths contribute to a smooth, uniform surface, minimizing the need for filling and sanding. Overdriven nails create unsightly depressions and can weaken the material, while underdriven nails protrude from the surface, posing a safety hazard and detracting from the aesthetic appeal. Properly calibrated depth adjustment is therefore crucial for achieving professional-grade results.
- Considerations for Different Materials
Different materials necessitate different depth settings. Softwoods, such as pine, require shallower settings to prevent overdriving, while hardwoods, such as oak, may require deeper settings to ensure proper fastener seating. Additionally, variations in material thickness may necessitate adjustments to maintain a consistent finish. Understanding these material-specific considerations is essential for effectively utilizing the depth adjustment mechanism and achieving optimal results.
In summary, the depth adjustment mechanism is an indispensable feature of pneumatic finishing tools. Its correct utilization, guided by an understanding of material properties and desired finishing characteristics, directly contributes to the quality, consistency, and aesthetic appeal of finished carpentry projects. Precise control over fastener penetration depth is essential for achieving professional-grade results.
4. Tool Weight and Ergonomics
The physical characteristics of a pneumatic finishing tool, specifically its weight and ergonomic design, significantly influence user fatigue and precision during operation. A heavier tool requires greater physical exertion to maneuver, potentially leading to decreased accuracy and increased muscle strain, particularly during extended use. Conversely, a lightweight tool promotes ease of handling and reduces fatigue, enabling more precise fastener placement and improved overall work quality. The balance of the tool is equally important; a well-balanced tool feels lighter and is easier to control. For example, prolonged use of a poorly balanced and heavy nailer can lead to inconsistent nail placement, resulting in a substandard finish, increased material waste, and potential user injury.
Ergonomic design considerations extend beyond weight to encompass grip shape, handle material, and trigger mechanisms. A comfortable and secure grip reduces hand fatigue and improves control, allowing for more consistent pressure application and reduced slippage. Vibration dampening features mitigate the impact of repetitive firing, further minimizing user discomfort. The placement and sensitivity of the trigger are also crucial; a trigger that requires excessive force or awkward positioning can lead to fatigue and reduced accuracy. Power tool manufacturers must find a balance between size, weight, power, and ergonomics to achieve a productive and easy-to-use tool. For instance, a tool might be lightweight, but has an awkward grip; it will be hard to maneuver.
The selection of a finishing tool should therefore prioritize weight and ergonomics, alongside other performance characteristics. Lightweight designs, coupled with thoughtfully engineered grips and balanced weight distribution, promote user comfort, reduce fatigue, and enhance precision. This leads to improved work quality, reduced material waste, and minimized risk of musculoskeletal strain. A tool that feels good in the hand directly translates to better results on the workpiece. The next part we will focus on will talk about safety features.
5. Safety Features Importance
The incorporation of specific safety mechanisms into pneumatic finishing tools is paramount due to the inherent risks associated with high-pressure nailers. Unintentional discharge or misdirected fasteners can result in serious injury. Therefore, understanding and utilizing these features are essential for safe operation.
- Contact-Trip Actuation
This system requires the tool’s contact element to be pressed firmly against the work surface before the trigger can be activated. This prevents accidental firing if the trigger is inadvertently depressed while the tool is not properly positioned. For example, if a tool with contact-trip actuation is dropped, it will not discharge a fastener unless the nose is pressed against a surface.
- Sequential Actuation
Sequential actuation mandates that the contact element be engaged first, followed by depressing the trigger. This adds an extra layer of protection against accidental firing, particularly useful in environments where the tool might be bumped or jostled. This requires the user to engage the safety, then fire the nail, making it more difficult to accidentally fire the tool.
- Adjustable Exhaust Deflector
The exhaust deflector allows the user to direct the expelled air away from their face and body, reducing the risk of eye irritation and preventing dislodged debris from causing injury. The direction of the air exhaust should be adjusted away from the user to prevent particulates from causing eye injury.
- Clear Safety Glasses/Goggles
Although not directly part of the tool, consistent use of proper eye protection is crucial. The risk of stray fasteners or wood splinters necessitates the consistent use of safety eyewear that meets ANSI standards. Safety glasses or goggles will protect the user from debris that could cause eye injury.
These safety features, when properly understood and utilized, significantly mitigate the risks associated with pneumatic finishing tools. Their consistent use is not optional but a fundamental aspect of responsible tool operation. These features serve to limit the risk of injury and should always be engaged while operating. This section concludes the discussion of important factors.
Frequently Asked Questions
The following section addresses common inquiries regarding the application, operation, and maintenance of pneumatic finishing tools.
Question 1: What is the primary distinction between a finishing tool and a framing nailer?
A finishing tool employs smaller gauge fasteners (typically 18 gauge) designed for delicate trim and finish work. A framing nailer utilizes larger gauge fasteners for structural applications such as framing walls and roofs. The choice depends on the project’s requirements.
Question 2: What air pressure is optimal for operating a finishing tool?
The optimal air pressure varies depending on the tool model and the material being fastened. Consult the manufacturer’s specifications for the recommended pressure range. Testing on scrap material is advisable before commencing the final application.
Question 3: How frequently should a finishing tool be lubricated?
Lubrication frequency depends on the intensity of use. For regular use, daily lubrication with a pneumatic tool oil is recommended. Infrequent users should lubricate before each use and after storage.
Question 4: Can a finishing tool be used with any type of air compressor?
A finishing tool requires an air compressor capable of delivering the specified pressure and air volume. Ensure the compressor’s output meets or exceeds the tool’s requirements. Smaller, portable compressors are often sufficient.
Question 5: What safety precautions should be observed when using a finishing tool?
Always wear safety glasses. Maintain a firm grip on the tool. Ensure the workpiece is securely supported. Disconnect the air supply before performing maintenance. Never point the tool at oneself or others.
Question 6: What are the common signs of a malfunctioning finishing tool?
Signs of malfunction include inconsistent fastener depth, air leaks, jamming, and failure to fire. Consult the tool’s manual for troubleshooting guidance. Professional repair may be necessary for complex issues.
Adherence to these guidelines promotes safe and efficient tool operation. Consulting the manufacturer’s manual for specific model information is always recommended.
The subsequent section will provide a comparative analysis of available finishing tool models.
Conclusion
This exploration has illuminated the critical role of the finish and brad nailer in achieving refined results across diverse woodworking applications. The correct utilization of this tool, informed by an understanding of fastener types, air pressure regulation, depth adjustment, and ergonomic considerations, is paramount for achieving professional-grade outcomes.
The pursuit of precision in finish carpentry demands a commitment to both safety and technical proficiency. Professionals and hobbyists alike must remain vigilant in their adherence to best practices, ensuring that the finish and brad nailer serves as a reliable instrument for realizing intricate and aesthetically pleasing designs. Continued advancements in tool technology promise to further enhance the efficiency and accuracy of this vital process.


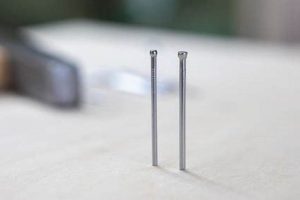
![Best Harbor Freight 16 Gauge Finish Nailer [Review] Best Final Touch: Elevate Your Projects with Professional Finishing Best Harbor Freight 16 Gauge Finish Nailer [Review] | Best Final Touch: Elevate Your Projects with Professional Finishing](https://bestfinaltouch.com/wp-content/uploads/2026/02/th-39-300x200.jpg)
