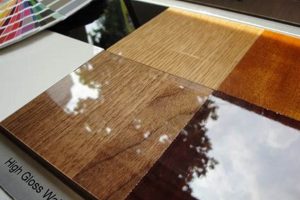
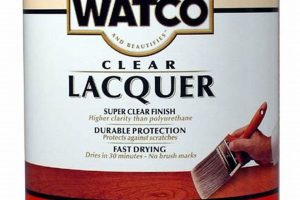
The process involves applying colorants to the wood surface to enhance its natural grain or alter its appearance, followed by the application of protective coatings to seal the wood and provide durability against wear, moisture, and ultraviolet light. This dual-step method shields the material while accentuating its aesthetic properties. An example would be the transformation of a plain pine table into a rich, mahogany-colored showpiece with a glossy, protective layer.
Proper application of these techniques increases the longevity of wooden items, preserving them against environmental damage and daily use. This time-honored approach has been employed across various cultures and eras, contributing to both the functional utility and the artistic value of wood-based creations. The practice not only protects the material but also allows for stylistic expression, enhancing the visual appeal of furniture, structures, and decorative objects.
The following sections will delve into the specific types of materials used, the techniques employed for optimal results, and the best practices for ensuring a durable and visually appealing final product. Detailed explanations regarding surface preparation, application methods, and maintenance strategies will be provided.
Essential Guidance for Surface Enhancement
Achieving a professional result requires attention to detail and adherence to established best practices. These guidelines are intended to improve the outcome of every project.
Tip 1: Surface Preparation is Paramount: Prior to any application, meticulous sanding is crucial. Start with coarser grits to remove imperfections and progress to finer grits to achieve a smooth, uniform surface. Ensure removal of all sanding dust before proceeding.
Tip 2: Test Color Compatibility: Before committing to a large area, test the chosen colorant on an inconspicuous section of the wood. This allows for evaluation of the final color and absorption rate, preventing unforeseen discrepancies.
Tip 3: Apply Even Coats: Uneven application leads to blotchiness and an unprofessional appearance. Use consistent strokes and maintain a wet edge to ensure uniform color distribution.
Tip 4: Allow Adequate Drying Time: Adhering to the manufacturer’s recommended drying times between coats is critical for proper adhesion and durability. Rushing the process can compromise the final finish.
Tip 5: Use Quality Applicators: Investing in high-quality brushes or spray equipment yields superior results. Avoid inexpensive brushes that shed bristles, and ensure spray equipment is properly calibrated for consistent application.
Tip 6: Proper Ventilation is Essential: Many products contain volatile organic compounds (VOCs). Work in a well-ventilated area to minimize exposure and ensure a safe working environment.
Tip 7: Consider Multiple Coats: Applying multiple thin coats provides better protection and a more uniform appearance than a single thick coat. Light sanding between coats can improve adhesion.
Following these guidelines will enhance the durability and aesthetic appeal of wooden surfaces. Implementing these recommendations contributes to a professional-grade outcome.
The subsequent section will cover advanced techniques and address common challenges encountered in the process.
1. Color Depth
Color depth, in the context of wood surface treatment, refers to the richness, intensity, and complexity of the color achieved through the application of colorants and protective topcoats. It is a crucial aspect of the aesthetic outcome, influencing the perceived quality and character of the finished piece.
- Pigment Concentration and Layering
The concentration of pigments within the stain or dye directly affects the saturation and depth of color achieved. Applying multiple thin layers of stain allows for a gradual build-up of color, creating a richer and more nuanced tone compared to a single heavy coat. This controlled layering prevents uneven absorption and enhances the perceived depth.
- Wood Species and Grain Structure
Different wood species possess varying densities and grain patterns, which significantly impact color absorption and depth. Open-grained woods like oak tend to absorb more colorant, resulting in a deeper and more pronounced tone, while close-grained woods like maple may require more effort to achieve the desired color depth. Understanding these inherent characteristics is essential for achieving predictable results.
- The Role of the Topcoat
The topcoat, whether varnish, lacquer, or polyurethane, can profoundly influence the perceived color depth. A clear topcoat enhances the underlying color, making it appear more vibrant and pronounced. Conversely, tinted topcoats can alter the overall hue and saturation, providing additional control over the final color depth. The refractive properties of the topcoat also contribute to the perceived depth and clarity of the finish.
- Surface Preparation and Color Depth Perception
Inadequate surface preparation can drastically affect the color depth outcome. Scratches, uneven sanding, and residual debris can cause uneven color absorption, leading to a blotchy or muddy appearance. Proper sanding to progressively finer grits ensures uniform absorption, resulting in a consistent and deeper color penetration. Cleanliness is also critical; any surface contaminants will impede stain absorption, reducing color vibrancy.
The interplay of pigment concentration, wood characteristics, topcoat selection, and surface preparation directly influences the resulting color depth. Achieving the desired aesthetic outcome requires a comprehensive understanding of these factors and careful execution of each step in the process. Ignoring one aspect will have a direct impact on the colors depth achieved.
2. Protective Barrier
A protective barrier, in the context of wood surface treatment, constitutes an essential element that directly impacts the longevity and resilience of the material. Its primary function is to shield the wood from environmental factors and physical wear, preserving its aesthetic qualities and structural integrity. The successful implementation of a protective barrier is paramount to realizing the full potential of wood surface treatments.
- Resistance to Moisture Intrusion
A well-formulated protective barrier prevents moisture penetration into the wood structure. Water absorption can lead to warping, swelling, and ultimately, decay. Finishes such as polyurethane and epoxy create a hydrophobic layer, effectively repelling water and mitigating the risk of moisture-related damage. Consider the exterior of a wooden boat; its protective coating must withstand constant exposure to water, preventing rot and structural failure.
- Protection Against Ultraviolet (UV) Radiation
Prolonged exposure to UV radiation degrades lignin, a component of wood, resulting in discoloration and surface deterioration. Certain finishes incorporate UV absorbers or blockers, mitigating the harmful effects of sunlight. This is especially important for outdoor applications, such as decks and siding, where constant sun exposure necessitates robust UV protection.
- Abrasion and Impact Resistance
Protective barriers provide a physical shield against scratches, dents, and other forms of mechanical wear. Hard-wearing finishes like polyurethane and conversion varnishes offer superior abrasion resistance, making them suitable for high-traffic areas like flooring and tabletops. The application of such finishes safeguards the wood surface from everyday use, preserving its appearance and structural integrity.
- Chemical Resistance
Certain finishes offer resistance to chemical spills and stains, protecting the wood from discoloration and damage caused by household cleaners, solvents, and other corrosive substances. This is particularly relevant in kitchen and laboratory settings, where surfaces are routinely exposed to a variety of chemicals. Epoxy resins, for example, exhibit excellent chemical resistance, making them ideal for applications requiring a high degree of protection.
The effectiveness of a protective barrier directly correlates with the selection of appropriate materials and the meticulous application of these materials. Wood surface treatments, therefore, are not merely aesthetic enhancements but rather strategic measures designed to prolong the life and utility of wooden objects. The careful choice of finishes, tailored to the specific environmental and usage conditions, ensures optimal protection and enduring performance.
3. Surface preparation
Surface preparation is the foundational stage of any successful wood surface treatment process. It dictates the adhesion, uniformity, and overall quality of the final finish, regardless of the specific stain or topcoat employed. Inadequate preparation invariably leads to compromised results, necessitating rework or complete failure of the coating system.
- Removal of Existing Finishes
The complete removal of prior coatings, such as paints, varnishes, or aged stains, is essential for achieving uniform color penetration and adhesion. Chemical strippers, sanding, or a combination of both are employed to expose the bare wood. Failure to remove these coatings can result in uneven color absorption, peeling, and blistering of the new finish. Consider the restoration of antique furniture; the removal of decades-old finishes is critical for achieving a historically accurate and visually appealing result.
- Sanding and Smoothing
Sanding is employed to create a smooth, uniform surface, removing imperfections such as scratches, dents, and mill marks. Progressively finer grits of sandpaper are used to refine the surface, ensuring optimal adhesion of subsequent coatings. The appropriate grit sequence depends on the wood species and the desired finish characteristics. For example, a high-gloss finish requires a finer surface than a rustic, textured finish. Proper sanding prevents blotchy stain absorption and ensures a smooth, even topcoat application.
- Cleaning and Dust Removal
After sanding, thorough cleaning is crucial to remove all traces of dust, debris, and contaminants. A tack cloth, vacuum, or compressed air can be used to ensure a pristine surface. The presence of residual dust particles can interfere with stain absorption, creating imperfections in the final finish. Moreover, dust trapped beneath the topcoat can compromise its adhesion and durability. A clean surface is paramount for achieving a flawless and long-lasting finish.
- Addressing Wood Defects
Prior to staining or finishing, any wood defects, such as knots, pitch pockets, or sapwood, must be addressed. Knots can be sealed to prevent uneven stain absorption, and pitch pockets can be removed and filled with wood filler. Sapwood, which tends to absorb stain differently than heartwood, may require pre-treatment to ensure color uniformity. Addressing these defects proactively contributes to a more consistent and visually appealing final product. Ignoring these flaws leads to a compromised project.
The effectiveness of the subsequent staining and finishing process is inextricably linked to the quality of surface preparation. The meticulous execution of each step, from the removal of existing finishes to the final dust removal, directly impacts the adhesion, appearance, and longevity of the coating system. Comprehensive surface preparation is not merely a preliminary step but rather an integral component of a successful wood surface treatment endeavor.
4. Application method
The application method significantly influences the final outcome of wood staining and finishing. The technique employed directly affects the uniformity, penetration, and overall aesthetic appeal of the finished surface. Selecting the appropriate method is therefore crucial for achieving the desired results.
- Brushing Technique
Brushing involves applying stain or finish with a brush, allowing for precise control over application. It is well-suited for intricate details and smaller surfaces. However, brushstrokes can be visible if the technique is not properly executed, potentially detracting from the uniformity of the finish. An example is the careful application of varnish to a fine piece of cabinetry, where precision and control are paramount.
- Spraying Techniques
Spraying utilizes compressed air to atomize the stain or finish, resulting in a smooth, even coat. It is efficient for covering large surfaces and achieving a professional-grade finish. However, spraying requires specialized equipment and a controlled environment to minimize overspray and ensure proper ventilation. Consider the finishing of a large wooden door, where spraying can provide a uniform and efficient application.
- Wiping Application
Wiping involves applying stain or finish with a cloth and then wiping away the excess. This method is effective for highlighting the wood grain and achieving a translucent finish. However, it may require multiple coats to achieve the desired color depth and protection. A common example is applying an oil-based stain to a piece of furniture, where the wiping technique enhances the natural grain.
- Roller Application
Roller application is suitable for covering large, flat surfaces quickly and efficiently. However, rollers can leave a stippled texture, which may not be desirable for all finishes. Careful selection of the roller nap and technique is essential to minimize this effect. This is often used for finishing large wooden floor surfaces that need to be completed quickly.
The choice of application method should align with the specific requirements of the project, considering factors such as surface size, desired finish characteristics, and available equipment. Understanding the nuances of each technique is essential for achieving a successful and aesthetically pleasing result when staining and finishing wood.
5. Longevity enhancement
The practice of staining and finishing wood plays a critical role in longevity enhancement, extending the service life and preserving the structural integrity of wooden materials. The application of these processes directly contributes to mitigating degradation caused by environmental factors, biological agents, and physical wear. Consequently, the selection of appropriate staining and finishing techniques is a key determinant in maximizing the lifespan of wood products.
- Protection Against Moisture and Decay
Staining and finishing create a protective barrier that minimizes moisture absorption, a primary cause of wood decay. Finishes like varnish and polyurethane form a water-resistant film, preventing fungal growth and subsequent rot. Properly sealed wood is less susceptible to warping, swelling, and cracking caused by moisture fluctuations. For instance, exterior wood siding benefits significantly from a protective finish, preventing water infiltration and prolonging its service life.
- Resistance to Ultraviolet (UV) Radiation
Prolonged exposure to UV radiation degrades lignin, a component of wood, leading to discoloration and weakening of the surface. Certain stains and finishes contain UV absorbers, which mitigate the harmful effects of sunlight. This is particularly important for outdoor furniture and decking, where constant exposure to UV rays can accelerate deterioration. A well-formulated finish can significantly extend the lifespan of these items by protecting them from UV-induced damage.
- Physical Abrasion and Wear Mitigation
Finishes provide a protective layer against physical abrasion, scratches, and impact damage. Durable finishes, such as epoxy resins and conversion varnishes, offer superior resistance to wear, making them suitable for high-traffic areas and surfaces subject to heavy use. Flooring, countertops, and furniture benefit from these finishes, maintaining their appearance and structural integrity over extended periods. The right finish choice can significantly reduce maintenance costs and extend the useful life of these items.
- Protection from Biological Infestation
Stains and finishes can act as a deterrent against wood-boring insects and other pests that can compromise the structural integrity of wood. Certain treatments contain insecticides or create a physical barrier that prevents insect infestation. This is particularly crucial for structural timbers and wooden components used in construction, where pest damage can lead to significant structural weakening. Proper treatment can safeguard these materials and prevent costly repairs or replacements.
The various facets of staining and finishing, when implemented correctly, contribute significantly to longevity enhancement. The selection of appropriate materials and techniques, tailored to the specific environmental conditions and usage requirements, is paramount to maximizing the lifespan of wooden materials. These practices not only preserve the aesthetic qualities of wood but also ensure its structural integrity and long-term performance.
Frequently Asked Questions
The following section addresses common inquiries and clarifies misconceptions regarding wood staining and finishing processes. Accurate understanding of these principles is critical for achieving satisfactory results.
Question 1: What constitutes the most effective method for preparing wood surfaces prior to staining?
Effective surface preparation necessitates thorough sanding using progressively finer grits of sandpaper, complete removal of sanding dust, and ensuring the wood is free from contaminants such as oils or residues.
Question 2: What is the optimal environment for applying wood stains and finishes?
The application area should be well-ventilated, with a consistent temperature and minimal humidity. Direct sunlight and drafts should be avoided to prevent premature drying or uneven application.
Question 3: How should one address uneven stain absorption on different parts of a wood surface?
Employing a wood conditioner prior to staining can mitigate uneven absorption. This helps to create a more uniform surface, especially with softwoods or woods with varying densities.
Question 4: What factors dictate the choice between oil-based and water-based wood finishes?
Oil-based finishes generally offer greater durability and moisture resistance, whereas water-based finishes exhibit lower VOC emissions and faster drying times. The selection should align with the specific project requirements and environmental considerations.
Question 5: What is the recommended interval between coats of wood finish?
Adherence to the manufacturer’s instructions regarding drying times is crucial. Insufficient drying time can compromise adhesion and lead to a soft or tacky finish.
Question 6: How can one ensure a durable and long-lasting wood finish?
Utilizing high-quality products, proper surface preparation, applying multiple thin coats, and protecting the finished surface from excessive moisture and sunlight contribute to a durable and long-lasting wood finish.
Successful staining and finishing depend on meticulous attention to detail and adherence to established best practices. The information provided herein serves as a foundational guide for navigating the process.
The subsequent section will delve into advanced techniques and address common challenges encountered in the process.
Conclusion
The preceding exploration of staining and finishing wood has elucidated the critical factors influencing the aesthetic quality, durability, and longevity of wood surfaces. Proper surface preparation, meticulous application techniques, and the selection of appropriate materials are paramount to achieving optimal results. The interplay between wood species, stain characteristics, and finishing agents necessitates a thorough understanding of their respective properties and potential interactions.
A commitment to rigorous technique and informed decision-making is essential for maximizing the benefits derived from staining and finishing wood. Continued research and refinement of existing methodologies will undoubtedly lead to further advancements in the field, enhancing both the functional and artistic value of wood-based products. Professionals and hobbyists alike are encouraged to pursue ongoing education and experimentation to elevate their proficiency in this demanding yet rewarding craft.


