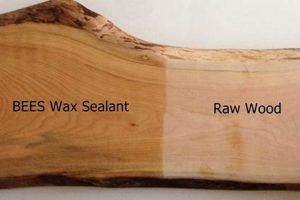
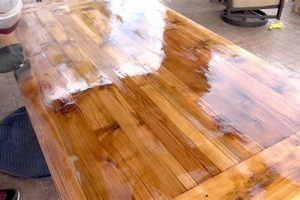
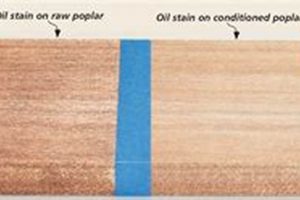
The appropriate treatment of cedar for interior applications involves selecting a method that protects the wood while enhancing its natural beauty. This often includes processes like sanding, staining, and applying a sealant to safeguard against moisture and wear. Consider, for example, applying a clear coat polyurethane to a cedar-lined closet to preserve the aromatic qualities while providing a durable surface.
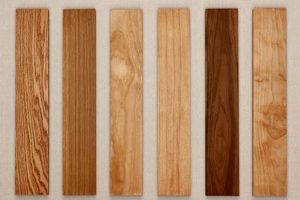
Finishing interior cedar serves multiple purposes. Primarily, it extends the lifespan of the wood by providing a protective barrier against environmental factors such as humidity fluctuations and physical abrasion. Furthermore, the application of a finish can amplify the aesthetic appeal of cedar, highlighting the grain patterns and color variations inherent to the species. Historically, oil-based finishes were common, but modern water-based options offer lower VOCs and ease of application.
The subsequent sections will detail the preparation process, explore various finishing options and their suitability, and provide guidance on application techniques for achieving a professional and long-lasting result. Emphasis will be placed on selecting products that complement the inherent characteristics of cedar and address the specific needs of the interior environment.
Finishing Interior Cedar
Achieving a successful and durable finish on interior cedar requires meticulous planning and execution. The following guidelines provide key insights for optimizing the process and ensuring long-lasting results.
Tip 1: Surface Preparation is Paramount: Thoroughly sand the cedar surface using progressively finer grits of sandpaper, starting with 120 and finishing with 220. Remove all dust and debris before applying any finish.
Tip 2: Select an Appropriate Finish: Consider the intended use and desired aesthetic. For closets, a penetrating oil or clear sealer preserves the cedar aroma. For paneling in high-traffic areas, a durable polyurethane or lacquer is more suitable.
Tip 3: Test Finishes in an Inconspicuous Area: Due to cedar’s unique properties, test the chosen finish on a hidden section to ensure compatibility and desired appearance before applying it to the entire surface.
Tip 4: Apply Thin, Even Coats: Avoid applying finishes too thickly, as this can lead to runs, drips, and prolonged drying times. Multiple thin coats are preferable to a single heavy coat.
Tip 5: Allow Adequate Drying Time: Adhere strictly to the manufacturer’s recommended drying times between coats and before placing the finished cedar into service. Insufficient drying can compromise the finish’s integrity.
Tip 6: Consider a Sanding Sealer: Applying a sanding sealer before the final finish coats can help to fill the cedar’s open grain and create a smoother, more uniform surface.
Tip 7: Maintain Consistent Environmental Conditions: Apply finishes in a well-ventilated area with stable temperature and humidity levels. Extreme fluctuations can negatively impact the finish’s drying and curing process.
Adhering to these guidelines will contribute to a professional-looking and long-lasting finish that protects and enhances the natural beauty of interior cedar.
The following sections will delve deeper into specific finishing products and their application techniques, providing further guidance for achieving optimal results.
1. Surface Preparation
Effective surface preparation is integral to achieving a desirable and enduring finish on interior cedar. The condition of the cedar surface directly influences the adhesion, appearance, and longevity of any applied finish. Neglecting proper preparation can result in a compromised final product, regardless of the quality of the finish itself.
- Sanding: Achieving a Smooth Base
Sanding serves to remove imperfections, open the wood pores, and create a consistent texture. Progressively finer grits of sandpaper, typically starting with 120 and moving to 220 or 320, are employed. Failure to sand adequately can lead to uneven finish absorption and a rough or textured surface. An example includes poorly sanded cedar paneling displaying visible scratches beneath a clear coat finish.
- Cleaning: Removing Contaminants
After sanding, the removal of dust, debris, and any existing contaminants is critical. Vacuuming followed by wiping with a tack cloth ensures a clean surface free from particles that could interfere with finish adhesion and appearance. For instance, residual sawdust left on the cedar prior to finishing can create a cloudy or speckled effect in the final result.
- Addressing Imperfections: Repairing Flaws
Prior to finishing, any imperfections such as knots, gouges, or cracks should be addressed. Wood filler or epoxy can be used to repair these flaws, creating a uniform surface for the finish. Untreated imperfections will be accentuated by the finish, detracting from the overall aesthetic. For example, an unpatched nail hole in cedar trim becomes highly visible after the application of a stain.
- Assessing Moisture Content: Preventing Issues
The moisture content of the cedar should be within an acceptable range (typically 6-8% for interior applications) before finishing. Excess moisture can prevent proper finish adhesion and lead to issues like blistering or peeling. Allowing cedar to acclimate to the interior environment before finishing helps to stabilize moisture content. Using a moisture meter can confirm the wood is ready. For example, finishing cedar directly after it has been transported from a humid environment to a dry interior can cause problems.
The aforementioned facets of surface preparation work in concert to provide an optimal foundation for finishing interior cedar. Thoroughly addressing each aspect ensures that the chosen finish adheres properly, highlights the natural beauty of the wood, and provides long-lasting protection. Conversely, overlooking any of these steps can compromise the final result and necessitate costly repairs or rework.
2. Finish Selection
The selection of an appropriate finish is a crucial determinant in the successful treatment of interior cedar wood. The finish acts as a protective barrier, influencing the wood’s resistance to moisture, scratches, and UV damage, thereby affecting its longevity. The choice directly impacts the aesthetic qualities, including the color, sheen, and texture of the finished surface. An inappropriate finish can result in a compromised appearance, inadequate protection, or even damage to the wood itself. For example, a film-forming finish applied to cedar in a humid environment without proper ventilation may trap moisture, leading to blistering and eventual peeling.
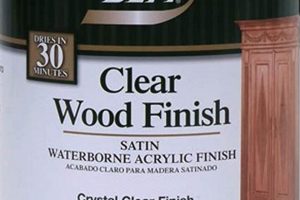
The intended use of the cedar is a primary factor guiding finish selection. Cedar used for closet lining, where the aromatic qualities are desired, benefits from penetrating oil finishes or clear sealers that allow the scent to permeate. In contrast, cedar used for paneling in a high-traffic area necessitates a more durable finish, such as polyurethane or lacquer, to withstand abrasion and impact. The species characteristics of cedar itself, including its natural oils and porous structure, also influence the suitability of different finishes. Certain finishes may not adhere properly to cedar without a suitable primer or sealer, while others may accentuate the wood’s grain patterns in undesirable ways. Consideration of VOC content is also pertinent, favoring low-VOC or water-based finishes to minimize off-gassing in interior environments.
In summation, careful finish selection is a non-negotiable element in the comprehensive process of treating cedar for interior use. The finish provides a protective layer, enhances aesthetic properties, and affects the wood’s longevity. Failure to select a suitable finish can lead to aesthetic imperfections, structural damage, and a shortened lifespan for the cedar. Understanding the interplay between the wood’s characteristics, the intended application, and the properties of different finishes is essential for achieving optimal results and ensuring the long-term preservation of interior cedar wood.
3. Application Technique
The success of any finishing endeavor on interior cedar is inextricably linked to the application technique employed. This stage represents the practical execution of choices made regarding surface preparation and finish selection, and its impact on the final outcome cannot be overstated. Imprecise or inappropriate application can negate the benefits of prior preparation and lead to a substandard result, diminishing both the aesthetic appeal and protective qualities of the finish.
- Brush Selection and Handling
The type of brush used, whether natural or synthetic, and the manner in which it is handled directly affects the smoothness and uniformity of the finish. A high-quality brush, properly loaded and moved with the grain, minimizes brushstrokes and ensures even coverage. An inappropriate brush, such as a stiff-bristled brush for a thin finish, may leave noticeable marks and an uneven surface. Similarly, excessive pressure during application can result in finish buildup and drips. For example, using a low-quality brush can cause visible brush strokes to appear on the surface of a clear coat applied to cedar paneling.
- Spray Application Techniques
Spray application, whether with an airless sprayer or aerosol can, demands precise control and technique to avoid runs, sags, and uneven coverage. Maintaining a consistent distance from the surface, overlapping spray patterns, and adjusting the sprayer’s settings are essential. A poorly calibrated sprayer or incorrect application distance can lead to a textured, orange-peel effect, or areas with insufficient finish. An instance of this would be using a sprayer with too low pressure to apply a clear coat which can result in the clear coat running and sagging.
- Coat Thickness and Number of Coats
Applying the correct number of coats, each with the appropriate thickness, is critical for achieving the desired level of protection and aesthetic appeal. Too few coats may provide inadequate protection, while excessively thick coats can lead to prolonged drying times, runs, and potential cracking. Following the manufacturer’s recommendations regarding coat thickness and drying times is paramount. For example, applying a thick coat of polyurethane to cedar flooring might cause it to cure improperly and become prone to cracking over time.
- Environmental Control During Application
The ambient temperature, humidity, and airflow during application significantly influence the drying and curing process. Applying finishes in conditions that are too hot, too cold, or too humid can compromise adhesion, increase drying times, and affect the final appearance. Maintaining a stable and controlled environment is essential for optimal results. An example is finishing cedar in a humid room may result in the finish taking longer to dry and cure.
These facets of application technique collectively determine the ultimate success of finishing interior cedar. Mastery of these skills, combined with careful consideration of surface preparation and finish selection, provides a pathway to a durable, aesthetically pleasing, and long-lasting result. By giving due attention to the application process, one can effectively safeguard and enhance the natural beauty of interior cedar wood.
4. Drying Time
Proper curing is intrinsically linked to the longevity and aesthetic quality of a finish applied to interior cedar. The allotted duration for drying directly affects the durability, hardness, and overall performance of the protective coating, influencing resistance to wear and environmental factors.
- Solvent Evaporation and Finish Hardening
The evaporation of solvents within the finish is essential for hardening and achieving the desired protective properties. Inadequate drying time prevents the finish from reaching its optimal hardness, leaving it vulnerable to scratches and dents. For instance, prematurely placing items on a freshly finished cedar shelf may result in indentations or a sticky residue due to incomplete solvent evaporation.
- Impact of Environmental Conditions
Ambient temperature, humidity, and ventilation rates exert a significant influence on drying time. Elevated humidity levels can retard the evaporation of solvents, prolonging the curing process. Insufficient ventilation hinders the removal of evaporated solvents, potentially leading to uneven drying and a compromised finish. Applying a finish to cedar paneling in a poorly ventilated room can result in a tacky surface that remains soft for an extended period.
- Recoat Windows and Adhesion
Adhering to recommended recoat windows is crucial for ensuring proper intercoat adhesion. Applying subsequent coats of finish before the previous layer has adequately dried can result in delamination or a lack of bond between layers. For example, applying a second coat of varnish to a cedar table before the first coat is fully cured may cause the finish to peel or crack over time.
- Effect on Cedars Natural Oils
Insufficient drying time can trap cedar’s natural oils beneath the finish, potentially causing adhesion issues and discoloration over time. These oils can interfere with the curing process and compromise the integrity of the finish. Allowing adequate drying time facilitates the release of these oils, promoting a stronger bond between the finish and the wood. Sealing cedar too quickly could lead to finish failure and discoloration.
In summation, proper attention to the curing of the finish is vital when considering how to treat interior cedar. Failing to account for environmental factors and adhering to recommended drying times can compromise the integrity of the finish. By allowing sufficient drying time, the protective barrier and overall aesthetic properties will ensure the wood is fully protected and its natural beauty is highlighted.
5. Maintenance
The long-term preservation of a finished interior cedar surface hinges critically on consistent and appropriate maintenance practices. A well-executed finishing process can be undermined by neglect or improper care, leading to premature degradation and necessitating costly repairs or refinishing. Therefore, understanding and implementing a suitable maintenance regimen is essential for maximizing the lifespan and aesthetic appeal of treated cedar.
- Regular Cleaning Protocols
Periodic removal of dust and surface debris is paramount. A soft cloth, lightly dampened with water or a pH-neutral cleaning solution, is generally suitable. Abrasive cleaners and harsh chemicals should be avoided as they can damage or dull the finish. For instance, routine dusting of cedar paneling prevents the accumulation of particulate matter that can scratch the surface or become embedded in the finish over time. Use the correct cleaning protocols as improper cleaning chemicals or products could break down and deteriorate the cedar wood finish.
- UV Protection Measures
Prolonged exposure to direct sunlight can cause fading or discoloration of the finish, as well as the underlying wood. Implementing measures to mitigate UV exposure, such as window treatments or UV-blocking films, is advisable. Example is cedar furniture placed near a sun-exposed window will likely require more frequent refinishing if UV protection is not implemented.
- Humidity Control Considerations
Maintaining stable humidity levels within the interior environment is crucial for preventing dimensional changes in the cedar that can lead to finish cracking or peeling. Humidifiers or dehumidifiers may be necessary to regulate humidity fluctuations. This is because excessive moisture in the air will cause the wood to warp, buckle, or shift.
- Prompt Repair of Damage
Addressing scratches, dents, or other forms of damage promptly prevents further deterioration and minimizes the need for extensive repairs later. Minor scratches can often be concealed with touch-up pens or waxes specifically designed for wood finishes. Leaving scratches can lead to finish damage from regular wear and tear.
These maintenance facets, when consistently applied, contribute significantly to the longevity and visual appeal of finished interior cedar. The effectiveness of any finishing treatment is inextricably linked to the ongoing care and attention afforded to the surface. Failure to implement appropriate maintenance practices will inevitably result in a diminished return on the initial investment of time and resources in the finishing process.
Frequently Asked Questions
The following addresses common inquiries regarding the proper methods and considerations for finishing cedar within interior environments.
Question 1: Does interior cedar require a finish?
While not strictly mandatory, a finish provides protection against moisture, wear, and UV damage. It also enhances aesthetic qualities such as color and grain definition. Whether a finish is necessary depends on the intended use and desired appearance.
Question 2: What type of finish is most suitable for a cedar-lined closet?
Penetrating oil finishes or clear sealers are often preferred for cedar closets. These finishes allow the cedar’s aromatic oils to permeate, preserving its characteristic scent while providing a minimal level of protection.
Question 3: How should interior cedar be prepared before finishing?
Proper preparation involves sanding the surface with progressively finer grits of sandpaper, typically starting with 120 and ending with 220 or 320. The surface must then be thoroughly cleaned to remove all dust and debris.
Question 4: Can polyurethane be used on interior cedar?
Yes, polyurethane is a viable option, particularly for cedar used in high-traffic areas such as paneling or flooring. Polyurethane provides a durable, protective layer that resists scratches and wear.
Question 5: What is the ideal moisture content for cedar before finishing?
The moisture content should ideally be within the range of 6-8% for interior applications. This range minimizes the risk of finish adhesion problems and dimensional instability.
Question 6: How can the aroma of cedar be preserved when applying a finish?
Using a penetrating oil finish or a very thin coat of a breathable sealer can help to preserve the aroma. Avoid thick, film-forming finishes that can encapsulate the cedar and impede the release of its oils.
These answers highlight the importance of assessing the specific application and intended use when selecting a finishing approach for interior cedar. Proper preparation and informed product selection are crucial for achieving optimal results.
The next section will summarize the key principles and best practices discussed throughout this guide.
Conclusion
This exploration of how to finish cedar wood for indoors has detailed the crucial steps involved in achieving a durable and aesthetically pleasing result. Surface preparation, finish selection, application technique, drying time considerations, and ongoing maintenance collectively determine the success of the process. Each element demands careful consideration and precise execution to maximize the wood’s inherent beauty and ensure its long-term protection.
The principles outlined herein offer a framework for responsible stewardship of this valuable natural resource. Applying this knowledge enables the preservation of cedar’s inherent beauty for generations and allows homeowners to make a conscious and thoughtful decision on how to best finish cedar wood for indoors.


