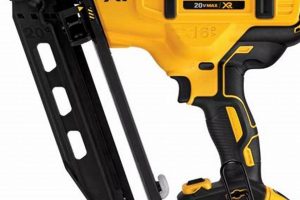
The selection of a fastening tool for decorative moldings necessitates careful consideration. One must evaluate factors such as the molding’s size and material, as well as the desired aesthetic outcome. The chosen tool will directly influence the holding power and the visibility of the fasteners, thereby impacting the overall quality of the finished trim work. For instance, delicate trim pieces may require a less aggressive fastener to prevent splitting or damage.
The correct choice offers numerous advantages, including enhanced project efficiency and a professional appearance. Historically, hand-nailing was the standard practice, but advancements in pneumatic tools have significantly improved the speed and precision of trim installation. Utilizing an appropriate tool contributes to a reduction in material waste and minimizes the need for extensive filling and sanding to conceal fastener marks.
The subsequent discussion will delve into the specific characteristics of two common options for securing moldings, examining their respective strengths and weaknesses in various applications. This analysis will provide a clearer understanding of which option is best suited for different trim projects. Considerations include nail gauge, head size, holding power, and suitability for different wood types.
Tips for Selecting a Fastening Tool for Trim
Effective trim installation hinges on using the right fastening tool. The following tips offer guidance on making the optimal selection based on project requirements and desired results.
Tip 1: Consider Trim Material Density: Softer woods, such as pine, generally require a smaller gauge fastener to prevent splitting. Harder woods, like oak or maple, may necessitate a larger gauge for adequate holding power. Pre-drilling pilot holes can also mitigate splitting in dense materials.
Tip 2: Assess the Scale of the Trim: Delicate or small trim pieces are often best secured with a smaller gauge nail, minimizing visibility and potential damage. Larger, heavier trim elements demand a more substantial fastener to ensure long-term stability and prevent movement.
Tip 3: Evaluate the Need for Concealment: If a seamless finish is paramount, select a tool that leaves a minimal entry point. Smaller gauge fasteners generally result in smaller holes, requiring less filler and sanding for a smooth, paint-ready surface.
Tip 4: Analyze the Project’s Structural Demands: For trim that primarily serves a decorative function, holding power may be a lesser concern. However, if the trim is integral to the structural integrity of an element, a more robust fastening solution is essential.
Tip 5: Determine the Desired Level of Permanence: While both types of nailers provide secure fastening, the removal process differs. A tool using smaller gauge nails can be easier to conceal if removal and repositioning are anticipated during installation.
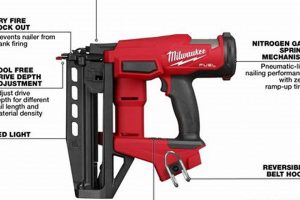
Tip 6: Factor in the Compressor’s Capacity: Ensure the air compressor is adequately sized for the chosen tool. Inadequate air pressure can lead to inconsistent nail depth and reduced performance.
Tip 7: Use Appropriate Safety Measures: Eye protection is mandatory when operating any nailer. Familiarize oneself with the tool’s operation manual and safety features before commencing work. Ear protection is also recommended.
Selecting the correct fastening tool for trim results in a more professional finish, reduces rework, and enhances the overall durability of the installation. Careful consideration of these factors will contribute to a successful trim project.
The subsequent sections will address frequently asked questions and offer a concluding summary of the key points discussed.
1. Gauge Size
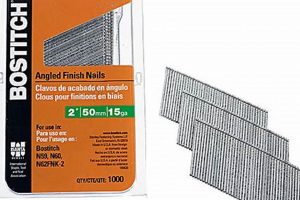
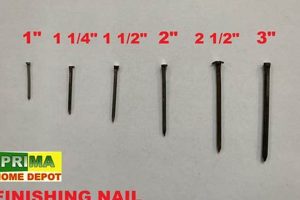
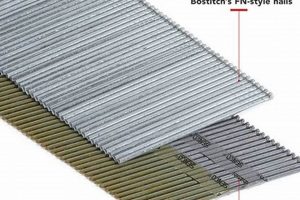
Gauge size represents a critical distinction when selecting a nailer for trim applications. It refers to the diameter of the nail shank, directly influencing both holding power and the visibility of the fastener. A brad nailer typically utilizes 18-gauge nails, characterized by their slender profile. Conversely, a finish nailer usually employs 15- or 16-gauge nails, possessing a greater diameter and consequently, increased holding strength. This difference necessitates a careful evaluation of the specific trim project’s requirements. The gauge size influences the fastener’s ability to resist pull-out forces, with larger gauges generally providing superior resistance. Thicker trim pieces or installations subject to greater stress may benefit from the increased holding power of a larger gauge finish nailer.
However, the larger gauge also results in a more prominent nail hole. In applications where aesthetic considerations are paramount, such as delicate decorative moldings or where a perfectly seamless finish is desired, the smaller gauge brad nailer offers a distinct advantage. The smaller nail creates a less conspicuous hole, requiring less filler and sanding to achieve a smooth, paint-ready surface. A real-world example is the installation of shoe molding. A finish nailer might offer a secure hold, but the resulting hole would require significant filling. A brad nailer provides sufficient holding power while leaving a minimal, easily concealed mark.
Therefore, understanding the relationship between gauge size and the intended application is paramount. The selection process involves a trade-off between holding power and aesthetic impact. The optimal choice aligns the fastener’s capabilities with the project’s structural demands and desired finish. Ignoring this critical factor can result in either insufficient holding power, leading to loose or unstable trim, or unacceptably visible nail holes, detracting from the overall appearance of the installation. The careful consideration of gauge size ensures the longevity and visual appeal of the finished trim work.
2. Head Type
Head type is a significant factor when selecting between a brad nailer and a finish nailer for trim applications. The head’s design directly impacts the nail’s holding power and the visibility of the fastener in the finished installation. Brad nailers typically use nails with very small, nearly headless, heads. This design minimizes the visual impact, making them suitable for delicate trim where a nearly invisible fastener is desired. In contrast, finish nailers employ nails with slightly larger, but still relatively small, heads. This provides a greater surface area for the nail to grip the material, enhancing holding power, but also results in a more noticeable hole.
The practical implication of head type becomes evident when considering different trim materials and applications. For instance, when installing thin or easily split trim, the nearly headless brad nail reduces the risk of material damage. The minimal head allows the nail to sink almost entirely into the wood, requiring minimal filling or patching. Conversely, when installing heavier or more substantial trim pieces, such as crown molding or baseboards, the increased holding power of a finish nailer with its slightly larger head is often necessary to ensure secure and long-lasting attachment. The slightly larger head distributes the force over a greater area, reducing the likelihood of the nail pulling through the material over time.
In summary, head type represents a crucial design element that directly influences the trade-off between holding power and fastener visibility. Choosing the appropriate head type involves balancing the structural needs of the trim installation with the desired aesthetic outcome. While headless or nearly headless nails offer a cleaner finish, they may lack the necessary holding power for certain applications. Conversely, larger headed nails provide greater security but necessitate more extensive hole filling and finishing. Therefore, understanding the characteristics of each head type is essential for achieving a successful and visually appealing trim installation.
3. Wood Density
Wood density directly influences the selection between a brad nailer and a finish nailer for trim installation. Denser woods, such as oak or maple, require greater force to penetrate and offer more resistance to nail withdrawal. Employing a brad nailer on these materials may result in insufficient penetration, bent nails, or inadequate holding power. Conversely, softer woods like pine or fir are easily penetrated, but the less dense structure provides a weaker grip on the fastener. A finish nailer in softwoods may lead to splitting or the nail sinking too deeply, requiring extensive filling and sanding. Therefore, an understanding of wood density is crucial for ensuring proper nail penetration, secure fastening, and a professional-looking finish. The selection of the incorrect nailer can compromise the integrity and aesthetics of the trim work.
For example, installing crown molding made of medium-density poplar using a brad nailer may initially seem sufficient. However, seasonal changes in humidity can cause the wood to expand and contract, potentially loosening the brad nails over time. The same molding, when installed with a finish nailer, provides a more secure, longer-lasting hold. Conversely, delicate trim made of soft basswood is more prone to splitting if a finish nailer is used. The higher force of the finish nailer can easily fracture the wood fibers, leading to visible cracks and a compromised aesthetic. A brad nailer, in this case, offers a gentler approach, minimizing the risk of splitting while still providing adequate holding power for lightweight trim.
In conclusion, the interaction between wood density and nailer selection highlights the importance of considering material properties during trim installation. Selecting the appropriate nailer based on wood density mitigates the risk of improper fastening, splitting, or inadequate holding power. Proper selection promotes a secure, durable, and aesthetically pleasing trim installation. Ignoring wood density may result in rework, material waste, and a compromised final product.
4. Trim Thickness
Trim thickness is a key determinant in selecting the appropriate fastening tool for installation. It dictates the required nail length and influences the necessary holding power to ensure secure and lasting attachment. The relationship between trim thickness and the gauge of nail employed directly affects the quality and longevity of the finished trim work.
- Minimum Nail Penetration
A fundamental requirement is adequate nail penetration into the substrate behind the trim. Insufficient penetration compromises holding strength, leading to loose or detached trim. Guidelines typically suggest a minimum nail penetration of at least one inch into the framing or wall structure. For thinner trim, a brad nailer might suffice, provided it can achieve this minimum penetration. However, for thicker trim, a finish nailer offering longer nail options becomes essential to meet the penetration requirement.
- Risk of Blowout
Conversely, excessively long nails pose the risk of “blowout,” where the nail tip protrudes through the back of the substrate. This is particularly problematic when working with thin walls or delicate surfaces. Careful consideration of nail length in relation to trim and substrate thickness is crucial to avoid this issue. In cases where only longer nails are available, adjusting the nailer’s depth setting is imperative to prevent blowout and ensure a clean, professional finish.
- Material Strength Impact
Thicker trim, often made of more substantial materials, inherently demands greater holding power. Finish nailers, with their larger gauge nails, provide this enhanced security. While a brad nailer may temporarily hold thicker trim in place, the long-term risk of movement or detachment increases due to the smaller nail’s limited holding capacity. The material composition of thicker trim further influences the choice. Hardwoods necessitate stronger fasteners than softwoods, even at equivalent thicknesses.
- Aesthetic Considerations
The thickness of the trim also influences the visibility of the nail hole. Thicker trim can more easily conceal the slightly larger hole produced by a finish nailer. Thinner trim, however, benefits from the smaller, less noticeable hole created by a brad nailer. The desired aesthetic outcome, particularly regarding the level of filler and sanding required to achieve a seamless finish, plays a significant role in determining the optimal nailer for a given trim thickness.
These facets demonstrate that the thickness of the trim necessitates a careful evaluation of nail length, penetration depth, material strength, and aesthetic goals. The selection of either a brad nailer or a finish nailer must be based on a holistic understanding of these factors to ensure a secure, durable, and visually appealing trim installation. The trade-off between holding power and concealment dictates the optimal choice for any given project.
5. Project Scope
Project scope, encompassing the scale and complexity of a trim installation, is a primary determinant in selecting an appropriate fastening tool. The scope dictates the volume of work, the diversity of trim types, and the overall demands on the fastening system. Consequently, the choice between a brad nailer and a finish nailer must align with the project’s specific requirements to ensure efficiency, durability, and aesthetic consistency.
- Scale of the Project
Small-scale projects, such as installing trim in a single room or adding decorative accents, may be adequately addressed with a brad nailer. The reduced weight and ease of maneuverability of a brad nailer are advantageous in confined spaces or when frequent adjustments are necessary. Conversely, large-scale projects involving entire homes or commercial spaces demand the greater speed and holding power of a finish nailer. The increased efficiency of a finish nailer can significantly reduce labor time and ensure consistent fastening across a larger area. For example, a single bathroom remodel may only require a brad nailer, while a new construction project benefits from the rapid fastening capabilities of a finish nailer.
- Complexity of the Trim Detail
Projects involving intricate trim details or layered molding profiles often benefit from the precision offered by a brad nailer. The smaller gauge nail minimizes the risk of splitting delicate trim pieces and allows for precise placement in tight corners or along curved surfaces. Simpler trim profiles, such as basic baseboards or door casings, can be efficiently installed with a finish nailer, leveraging its greater holding power for long-term stability. An elaborate crown molding installation with multiple components is more amenable to a finish nailer, providing the necessary strength to secure the combined weight of the assembled trim.
- Material Variation
Projects involving a mix of trim materials, such as hardwoods, softwoods, and composite materials, necessitate a fastening tool capable of accommodating diverse densities and textures. A finish nailer, with adjustable depth settings and the ability to drive larger gauge nails, offers greater versatility in these situations. Projects employing a single, consistent trim material may allow for the exclusive use of a brad nailer, provided the nail length and holding power are appropriate for the chosen material. When a project specifies both oak baseboards and pine window trim, the adjustable power and nail size range of a finish nailer become essential.
- Accessibility and Work Environment
Confined spaces, overhead installations, or projects requiring extensive ladder work favor the lighter weight and maneuverability of a brad nailer. The reduced fatigue associated with a lighter tool can improve overall efficiency and safety. Projects with ample workspace and easy access may benefit from the increased power and speed of a finish nailer, even if it is slightly heavier. For example, installing trim in a finished attic with limited headroom may necessitate the use of a compact brad nailer, while a ground-floor installation with unobstructed access is well-suited for a finish nailer.
Ultimately, the project scope serves as a guiding factor in determining the optimal fastening tool for trim installation. Carefully considering the scale, complexity, material variation, and accessibility of the project ensures a balanced approach, maximizing efficiency, minimizing material waste, and achieving a professional and durable final product. Failure to account for project scope can result in compromised structural integrity, increased labor costs, and a diminished aesthetic outcome, regardless of the individual merits of the brad nailer or the finish nailer.
6. Aesthetic Goals
Aesthetic goals are paramount when selecting a fastening tool for trim installation. The desired final appearance, including the visibility of fastener holes and the overall smoothness of the surface, directly influences the choice between a brad nailer and a finish nailer. A brad nailer, utilizing smaller-gauge nails, leaves a less conspicuous hole, making it suitable for projects where minimizing visual imperfections is critical. Conversely, a finish nailer, employing larger-gauge nails, provides greater holding power but results in a more noticeable hole that requires filling and sanding. The level of acceptable imperfection is a primary consideration. For example, installing delicate crown molding in a formal dining room often prioritizes a seamless, virtually invisible finish, favoring the use of a brad nailer. The reduced hole size minimizes the need for extensive patching and ensures the molding blends seamlessly with the wall.
The choice also depends on the finish being applied to the trim. If the trim is to be painted, minor imperfections can be easily concealed with filler and multiple coats of paint. In this case, the increased holding power of a finish nailer might outweigh the aesthetic disadvantage of a slightly larger hole. However, if the trim is to be stained or left natural, the visibility of the nail holes becomes more critical. Staining accentuates imperfections, making it more challenging to conceal fastener marks. In such scenarios, the smaller holes produced by a brad nailer are preferable, minimizing the need for fillers that may not match the wood grain and color perfectly. Consider a scenario where oak trim is being installed around a library. The natural wood grain is intended to be showcased. A brad nailer would be preferred to avoid visible nail holes that distract from the natural beauty of the wood.
In summary, the prioritization of aesthetic goals fundamentally affects the selection process. The trade-off between holding power and fastener visibility requires careful consideration of the project’s specific requirements and desired outcome. Achieving a professional-looking trim installation necessitates aligning the fastening method with the overall aesthetic vision. Failure to adequately consider these factors can result in a compromised final product that detracts from the intended design. The brad nailer versus finish nailer decision is, therefore, intrinsically linked to the aesthetic aspirations of the project.
7. Tool Precision
Tool precision represents a critical element in the selection process for fastening trim, directly influencing the quality and appearance of the finished installation. In the context of choosing between a brad nailer or a finish nailer, precision encompasses several factors, including the accuracy of nail placement, the consistency of nail depth, and the minimization of surface damage. A nailer exhibiting high precision ensures that fasteners are driven precisely where intended, at the correct depth, without marring the surrounding material. This capability is particularly important when working with delicate or intricate trim pieces where even minor errors can be visually prominent or structurally detrimental. The inherent differences in design and operation between brad nailers and finish nailers contribute to variations in their respective levels of precision.
Brad nailers, generally employing smaller gauge nails and operating at lower pressures, tend to offer a higher degree of precision in nail placement and depth control. The finer nails allow for more accurate targeting, reducing the risk of splitting or damaging the trim. The lower operating pressure minimizes the potential for overdriving the nail, ensuring a flush and consistent finish. This precision is invaluable when installing intricate moldings or working with hardwoods that are prone to splitting. Conversely, finish nailers, designed for heavier-duty applications, may sacrifice some precision in favor of increased power and holding strength. While modern finish nailers often incorporate adjustable depth settings and other features to improve accuracy, they may still be more challenging to control precisely, especially when working with delicate materials or in tight spaces. An example of precision influencing the choice would be installing intricate decorative molding around a window. The brad nailer’s precision minimizes the risk of splitting the wood and ensures accurate placement along the detailed profile. With a finish nailer, splitting and less accurate placement is more common.
Ultimately, the significance of tool precision in the decision between a brad nailer and a finish nailer hinges on the specific requirements of the trim installation. Projects demanding the highest level of aesthetic perfection, particularly those involving delicate materials or intricate designs, benefit from the enhanced precision of a brad nailer. Projects where structural integrity and holding power are paramount, and where minor imperfections can be easily concealed, may be better suited for a finish nailer. The key challenge lies in balancing the need for precision with the demand for strength and efficiency, carefully considering the trade-offs inherent in each tool. Accurate assessment of the projects needs ensures the selected tool enhances the final quality and durability of the trim installation.
Frequently Asked Questions
This section addresses common inquiries regarding the selection and application of appropriate fastening tools for trim installation, providing clarity on best practices and mitigating potential issues.
Question 1: When is a brad nailer generally preferred over a finish nailer for trim work?
A brad nailer is typically favored when working with delicate or thin trim pieces prone to splitting, or when minimizing the visibility of nail holes is a primary concern. Its smaller gauge nails reduce the risk of material damage and leave a less conspicuous mark, requiring minimal filling.
Question 2: What are the primary advantages of using a finish nailer for trim installation?
A finish nailer offers increased holding power, making it suitable for heavier or thicker trim pieces. It provides a more secure and durable fastening solution, particularly in situations where structural integrity is paramount.
Question 3: How does wood density affect the choice between a brad nailer and a finish nailer?
Denser woods often require the greater force of a finish nailer to ensure proper penetration and secure fastening. Softer woods may be adequately secured with a brad nailer, minimizing the risk of splitting or over-driving the nails.
Question 4: Can nail hole visibility be effectively minimized when using a finish nailer?
Yes, nail hole visibility can be reduced through the use of appropriate filling compounds and careful sanding techniques. However, this process adds time and labor to the project and may not be as effective as using a brad nailer in the first place.
Question 5: Are there specific safety precautions that should be observed when operating a brad nailer or a finish nailer?
Eye protection is mandatory when operating any nailer. Users should also familiarize themselves with the tool’s operating manual and safety features, ensuring proper handling and minimizing the risk of accidental injury.
Question 6: Is it possible to use both a brad nailer and a finish nailer on the same trim project?
Yes, it is common to utilize both tools on a single project, strategically employing each for specific trim elements based on their size, material, and location. This approach optimizes both holding power and aesthetic considerations.
In summary, selecting the correct fastening tool depends on a careful assessment of the trim material, project requirements, and desired aesthetic outcome. Understanding the strengths and weaknesses of both brad nailers and finish nailers enables informed decision-making and contributes to a successful trim installation.
The subsequent section will offer a conclusive summary, synthesizing the key insights discussed throughout this article.
Conclusion
The preceding analysis has explored the nuances involved in selecting between a brad nailer and a finish nailer for trim applications. Critical factors, including wood density, trim thickness, project scope, aesthetic aspirations, and tool precision, significantly influence this determination. A comprehensive understanding of these parameters is essential for achieving optimal results. Ignoring these considerations can lead to compromised structural integrity or an undesirable final appearance.
The decision requires careful consideration of multiple variables. Recognizing the long-term impact of this choice on the quality and durability of the trim installation reinforces the importance of informed selection. Further research and practical experience are encouraged to refine individual understanding and optimize fastening strategies. Mastering this critical aspect of trim work contributes significantly to professional craftsmanship and enduring aesthetic appeal.


