The procedures involved in achieving a smooth, durable, and aesthetically pleasing surface on newly poured material are crucial. These processes include leveling, smoothing, and texturing the wet substance to meet specific functional and visual requirements. For example, proper execution of these techniques ensures a level surface for flooring installation or creates a non-slip area around a swimming pool.
The successful completion of these methods provides numerous advantages. A properly treated surface enhances durability and longevity, resists weathering and wear, and contributes to the overall structural integrity of the construction. Historically, achieving a refined result has evolved from rudimentary hand tools to sophisticated power equipment, each advancement improving efficiency and the quality of the resultant surface.
The following discussion will detail the essential aspects of surface preparation, application of various tools and techniques, and the crucial considerations that contribute to an enduring and high-quality installation. Each phase is critical to ensure the final product meets intended specifications and withstands intended use.
Surface Enhancement Guidance
The following guidance provides practical recommendations for optimal results. Adherence to these suggestions contributes significantly to the longevity and aesthetic appeal of the final product.
Tip 1: Precise Mixture Control: Maintain strict control over the water-to-cement ratio. Excessive water weakens the mixture, leading to cracking and dusting. Conversely, insufficient water hinders proper hydration and reduces workability.
Tip 2: Timely Placement: Pour promptly after mixing. Delayed placement can cause premature stiffening, making finishing more difficult and compromising structural integrity.
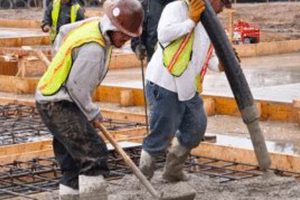
Tip 3: Proper Screeding: Employ a screed to establish the desired level and remove excess material. Ensure the screed extends beyond the pour’s boundaries to prevent inconsistencies.
Tip 4: Strategic Floating: Begin floating when bleed water has evaporated and the surface can support weight. Floating densifies the surface and prepares it for subsequent troweling.
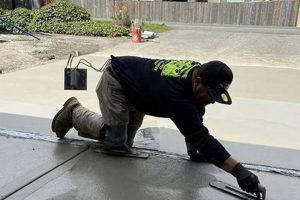
Tip 5: Cautious Troweling: Trowel when the surface has hardened sufficiently to resist indentation. Excessive troweling, particularly too early, can trap moisture and lead to blistering.
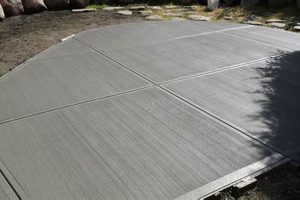
Tip 6: Proper Jointing: Cut control joints at regular intervals to control cracking. The depth of the joint should be at least one-quarter of the slab thickness.
Tip 7: Curing Implementation: Initiate curing immediately after finishing. Employ methods such as wet curing, curing compounds, or plastic sheeting to maintain moisture and promote hydration.
Tip 8: Subgrade Preparation: Proper subgrade preparation is important for the structural integrity of the slab. Compacting the subgrade and ensuring proper drainage will prevent settling and cracking over time.
Implementing these insights provides a foundation for a superior outcome, resulting in a durable and visually appealing final product. Each suggestion plays a critical role in maximizing the material’s potential and ensuring lasting performance.
The subsequent discussion will address common challenges and troubleshooting techniques, further enhancing the user’s ability to achieve professional-grade installations.
1. Leveling and Screeding
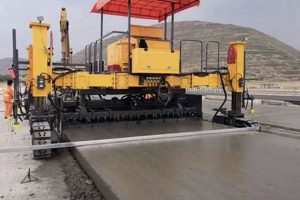
Leveling and screeding constitutes the foundational stage in surface completion. This process directly influences the final elevation and planarity of the slab. The primary objective is to establish a uniform surface free of significant undulations, ensuring that subsequent procedures are conducted on a consistent plane. Inadequate leveling and screeding can result in structural weaknesses, uneven flooring installations, and compromised drainage. For example, an improperly leveled surface may necessitate costly corrective measures to accommodate sensitive equipment or prevent water accumulation.
The effectiveness of leveling and screeding determines the efficiency and quality of subsequent processes. Accurate screeding reduces the effort required during floating and troweling, minimizing the potential for overworking the surface. This initial step also dictates the final material volume, impacting cost and material utilization. Consider the placement of a large concrete slab for an industrial warehouse; precise leveling is critical to ensuring forklift traffic flows smoothly and product storage remains stable. Variations in surface level can lead to equipment instability and safety hazards.
In summation, leveling and screeding are inseparable from achieving a quality surface. This phase’s thorough execution not only optimizes the finishing processes but also substantially impacts the long-term performance and functionality. Failure to prioritize this foundational element frequently necessitates costly repairs, emphasizing its significance within the comprehensive process. The proper procedure is not merely a step, but rather a pivotal determinant of the final outcome.
2. Floating and Flattening
Floating and flattening represents a critical phase within the overall process of surface completion, directly affecting the density, smoothness, and uniformity of the finished product. The purpose of floating is to embed large aggregate particles just beneath the surface, remove imperfections left by screeding, and consolidate the surface in preparation for subsequent troweling. Flattening, typically achieved concurrently with floating, focuses on eliminating any remaining high or low spots to create a level plane. This phase corrects minor deviations in elevation introduced during the initial leveling, ensuring the final surface meets the required tolerances for flatness.
The effectiveness of floating and flattening substantially influences the durability and performance of the installation. Proper floating eliminates air pockets near the surface, reducing the likelihood of scaling and spalling under freeze-thaw conditions. Inadequate floating, conversely, leaves a porous surface prone to moisture penetration and premature deterioration. For instance, in the construction of a highway bridge deck, meticulous floating is essential to produce a dense, impermeable surface that can withstand heavy traffic and environmental stresses. Failure to adequately float the surface can result in accelerated corrosion of the reinforcing steel and structural failure.
In summary, floating and flattening are indispensable procedures. The quality of their execution dictates the long-term resilience and serviceability. These steps must be rigorously implemented to ensure the material’s optimal performance. Attention to detail during this process reduces the potential for costly repairs and enhances the overall value of the completed installation.
3. Edging and Jointing
Edging and jointing are integral components within surface finishing. Edging addresses the perimeter of the pour, creating a rounded or beveled profile to prevent chipping and improve aesthetics. Jointing, conversely, involves the creation of controlled planes of weakness within the slab to manage cracking caused by shrinkage and thermal expansion. The timing and execution of these steps directly influence the structural integrity and appearance of the completed surface. For example, failure to properly edge a sidewalk can lead to premature deterioration of the edges due to freeze-thaw cycles and pedestrian traffic. Similarly, inadequate jointing can result in uncontrolled cracking that compromises the integrity of the slab and creates safety hazards.
Proper edging typically involves the use of specialized hand tools or powered edgers to create a smooth, rounded profile along the edges of the surface after floating. Jointing requires the creation of control joints using a saw, groover, or pre-formed jointing strips. The spacing and depth of the joints are determined by the thickness of the slab and the anticipated environmental conditions. For instance, a large parking area would require more frequent and deeper joints than a smaller residential patio to accommodate the increased stress from vehicle traffic and temperature fluctuations. The specific techniques employed must be adapted based on site conditions and the intended use of the completed surface.
In conclusion, edging and jointing represent essential elements, profoundly impacting durability and aesthetics. Their meticulous implementation mitigates the risk of edge deterioration and uncontrolled cracking. Therefore, proper execution ensures a structurally sound and visually appealing surface, aligning with the overarching goal of achieving a high-quality outcome.
4. Texturing and Detailing
Texturing and detailing represent critical steps in the final stage of surface completion, influencing both aesthetic appeal and functional performance. These processes follow the primary leveling, floating, and jointing operations, and are essential for achieving a refined and durable surface.
- Surface Texture Enhancement
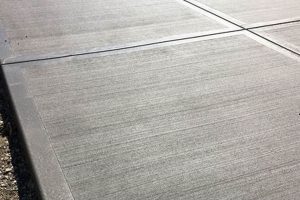
Texturing involves imparting a specific surface finish to the material, influencing slip resistance, light reflectivity, and overall aesthetics. Techniques range from simple broom finishes to more elaborate stamped patterns. For example, a broom finish is commonly used on sidewalks to provide traction, while stamped concrete can replicate the appearance of natural stone for decorative purposes. Texture selection must align with intended use and environmental factors.
- Edge and Joint Refinement
Detailing includes refining the edges and joints of the slab to enhance visual appeal and structural integrity. This may involve hand-tooling edges to create a more defined profile or applying a sealant to joints to prevent water infiltration. A properly detailed edge resists chipping and spalling, while sealed joints minimize the risk of cracking and water damage. These small refinements contribute significantly to the longevity and appearance.
- Decorative Aggregate Exposure
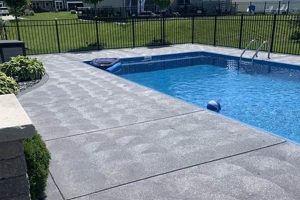
An additional detailing technique involves the exposure of decorative aggregate within the surface mix. This is achieved through the removal of the cement paste layer using chemical retarders or abrasive methods. Exposed aggregate finishes offer a unique aesthetic and enhance slip resistance. For instance, exposing the pebbles in a patio surface creates an attractive, non-slip surface. The selection and exposure of aggregate should complement the overall design.
- Coloring and Staining Application
The implementation of color and staining is a final detailing aspect that impacts visual interest and can be applied to enhance the overall design. Concrete stains penetrate the surface, creating a permanent color change, while dyes offer a more translucent effect. These applications are frequently used to enhance the natural tones of concrete or create custom designs. Staining allows integration into any environment.
These components of texturing and detailing contribute significantly to the final appearance and performance characteristics. The selection of appropriate techniques and materials directly influences the functionality, durability, and appeal of the finished surface. It is essential to coordinate these processes with the initial design and material selection to achieve the desired outcome.
5. Curing and Protection
Curing and protection constitute the final, yet critically important, phases of surface completion. Curing refers to maintaining adequate moisture and temperature in the material for a specified period to allow proper hydration of the cement, which is essential for achieving desired strength and durability. Protection encompasses measures taken to shield the newly placed installation from environmental factors, such as excessive heat, cold, wind, or rain, as well as physical damage from traffic or construction activities. These processes directly influence the long-term performance and lifespan. Inadequate curing and protection invariably lead to weakened structures, surface cracking, and reduced resistance to abrasion and weathering. As an example, consider a large parking structure; if the poured installation is not properly cured, rapid evaporation of moisture can lead to plastic shrinkage cracks, requiring costly repairs.
The connection between curing/protection and other surface completion stems from the fundamental nature of cement hydration. The various steps of leveling, floating, texturing and detailing, prepare the way for the cement to properly hydrate. The hydration process is the chemical reaction through which cement gains strength and durability. Proper curing methods, such as ponding, wet coverings, or application of curing compounds, ensure that this hydration process continues uninterrupted for an appropriate time. For example, applying a curing compound to freshly placed material creates a moisture barrier that prevents rapid evaporation, promoting optimal hydration and minimizing the risk of cracking. The selection of curing method must align with environmental conditions, material properties, and project specifications. Ignoring these elements may negate the benefits of careful placement and finishing.
In conclusion, curing and protection are inextricably linked to the successful outcome. Their importance is not merely additive; rather, they are integral to realizing the full potential. These phases, implemented correctly, safeguard the investment by maximizing long-term durability and minimizing maintenance costs. Neglecting to prioritize curing and protection ultimately undermines the integrity of other steps, and compromising the structural and aesthetic goals. The implementation of correct procedures ensures the installation will perform reliably throughout its intended service life, which should be viewed not as an isolated step, but as a crucial continuation of the building process.
Frequently Asked Questions About Achieving Desired Results
The following section addresses common inquiries and concerns regarding the proper methods. Understanding these aspects contributes to a more informed and successful outcome.
Question 1: How soon after pouring should screeding commence?
Screeding should commence immediately after pouring and consolidating. Delay can lead to premature stiffening, compromising the ability to achieve a level surface.
Question 2: What are the implications of excessive water content in the mixture?
Excessive water weakens the resulting installation, increasing the likelihood of cracking, dusting, and reduced durability. Precise water-to-cement ratio control is essential.
Question 3: What constitutes proper timing for floating?
Floating should begin after bleed water has evaporated from the surface, and the material can support the weight of the equipment without significant indentation.
Question 4: What determines the optimal depth and spacing of control joints?
Control joint depth should be at least one-quarter of the slab thickness. Spacing is influenced by the slab thickness and environmental factors, generally ranging from 10 to 15 feet in each direction.
Question 5: What are the most effective curing methods?
Effective curing methods include wet curing (ponding or wet coverings), application of curing compounds, and use of plastic sheeting. The selected method should maintain consistent moisture levels for at least seven days.
Question 6: How can dusting be prevented?
Dusting is typically caused by improper curing or excessive water in the mixture. Ensuring proper hydration through adequate curing and controlling the water-to-cement ratio are the keys to prevention.
Adherence to established best practices and careful attention to detail are the key factors in mitigating potential issues and ensuring successful completion.
The following article sections will summarize these main key points from these FAQ question.
Concluding Remarks
This exposition has elucidated the sequential and interdependent nature of procedures necessary for achieving a high-quality surface. From the initial leveling and screeding to the crucial curing and protection phases, each step demands meticulous execution and adherence to established best practices. Controlling the water-to-cement ratio, timing operations appropriately, and implementing proper curing techniques are paramount. Mastery of these individual processes, and an appreciation for their interconnectedness, will lead to consistent and predictable results.
The quality of an installation is a direct reflection of the care and diligence applied throughout each phase. Understanding the inherent challenges and employing proven techniques not only ensures a durable and aesthetically pleasing outcome, but also mitigates the risk of costly repairs and premature deterioration. Continued adherence to these principles will contribute to the longevity and structural integrity of concrete structures, maximizing their value and service life.


