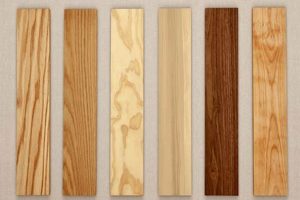
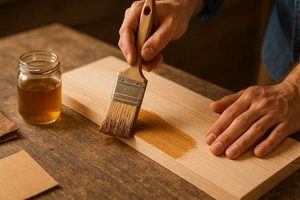
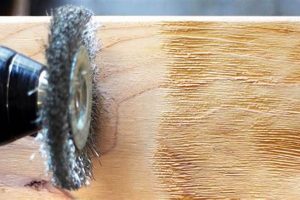
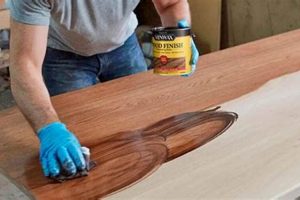
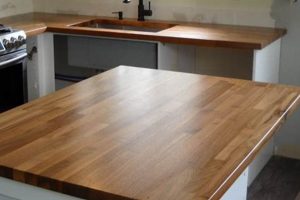
The process of removing existing coatings from wooden surfaces is a key step in refinishing projects. This involves eliminating old paint, varnish, or stain to reveal the bare wood underneath. This removal allows for the application of a fresh, new protective layer, enhancing the appearance and longevity of the wooden item.
The value of removing the old coating lies in the ability to address imperfections, repair damage, and customize the final aesthetic. Properly preparing the surface ensures better adhesion of the new finish, leading to a more durable and visually appealing result. Historically, this preparation method has been integral to woodworking and furniture restoration.
The subsequent sections of this document will delve into the methodologies, appropriate materials, and safety precautions associated with the coatings removal process, alongside detailed guidance on preparing the wooden surface for the application of various modern coating products.
Essential Guidance for Effective Coating Removal from Wood
Achieving a flawless refinished wood surface requires meticulous preparation. The following tips are designed to optimize the removal process and ensure a high-quality outcome.
Tip 1: Prioritize Safety. Always work in a well-ventilated area and utilize appropriate personal protective equipment, including gloves, eye protection, and a respirator. Coatings often contain hazardous chemicals that can be harmful if inhaled or contacted directly.
Tip 2: Identify the Existing Coating. Determining the type of coating present, whether it is oil-based or water-based, is critical for selecting the most effective removal method and minimizing damage to the wood.
Tip 3: Test a Small, Inconspicuous Area. Before applying any chemicals or abrasive techniques to the entire piece, test a small, hidden area to assess the effectiveness of the chosen method and potential impact on the wood.
Tip 4: Employ the Least Aggressive Method First. Begin with gentle methods, such as chemical stripping or heat application, before resorting to more abrasive techniques like sanding. This minimizes the risk of gouging or damaging the wood surface.
Tip 5: Neutralize Chemical Residue. Following chemical stripping, thoroughly neutralize the surface according to the manufacturer’s instructions to prevent interference with the adhesion of the new coating.
Tip 6: Sand Methodically. If sanding is necessary, use progressively finer grits of sandpaper to achieve a smooth and uniform surface. Sand in the direction of the wood grain to avoid creating unsightly scratches.
Tip 7: Thoroughly Clean the Wood. After removing the old coating and sanding, remove all dust and debris with a tack cloth or vacuum to ensure proper adhesion of the new coating.
Effective removal of old coatings is crucial for achieving a professional-looking finish and extending the lifespan of wooden items. By adhering to these guidelines, a successful preparation process is more assured.
The subsequent sections will explore the application of various finishing products and techniques to achieve a desired aesthetic and provide lasting protection for the prepared wood surface.
1. Chemical Stripping Agents
The relationship between chemical stripping agents and the removal of coatings from wood is direct and causal. Chemical agents function by softening or dissolving existing paints, varnishes, lacquers, and other protective layers. This softening action allows for the easier manual removal of the coatings, revealing the original wood surface underneath. The selection of an appropriate chemical stripping agent is crucial for effective coating removal, as different agents are formulated to work optimally with specific types of coatings. For example, a stripping agent designed for latex paint will likely be ineffective on a polyurethane finish.
The utilization of chemical stripping agents offers several advantages over mechanical methods like sanding, particularly when dealing with intricate details or delicate wood veneers. These agents minimize the risk of damaging the underlying wood structure, preserving the integrity of the piece. However, chemical stripping necessitates careful application and adherence to safety protocols, as many agents contain hazardous chemicals. Furthermore, thorough neutralization of the wood surface following chemical treatment is essential to ensure proper adhesion of the new finish. An example of this is when removing paint from an antique chair. A chemical stripper can get into the intricate details without damaging the wood, something that sanding may not be able to achieve.
In summary, chemical stripping agents represent a critical tool in the process of wood refinishing. Their proper selection and application are essential for the effective and safe removal of existing coatings, ultimately contributing to the quality and longevity of the refinished piece. While challenges such as chemical hazards and potential wood damage exist, careful adherence to established procedures mitigates these risks. Further research and development in the field of chemical stripping agents continues to focus on creating safer and more effective formulations.
2. Surface Preparation Techniques
The effectiveness of any attempt to strip wood finish is inextricably linked to the quality of surface preparation techniques employed. These techniques represent the crucial intermediate steps between the removal of the old coating and the application of a new finish. Inadequate surface preparation invariably leads to finish failures, aesthetic imperfections, or reduced longevity of the refinished item. For instance, residual traces of the old finish or contaminants left on the surface will prevent the new finish from properly adhering to the wood. The desired outcome of strip wood finish, which is a smooth and durable surface, is completely dependent on the proper execution of these techniques.
Common surface preparation techniques include sanding, scraping, and cleaning. Sanding removes any remaining residue of the old finish, smooths out imperfections, and creates a mechanical key for the new finish to grip. Scraping is often used to remove loose or flaking material, particularly on large, flat surfaces. Cleaning removes dust, grease, and other contaminants that can interfere with adhesion. The specific combination of techniques used will vary depending on the type of wood, the type of old finish, and the desired appearance of the new finish. An example would be sanding a table with progressively finer grits of sandpaper after using a chemical stripper.
In conclusion, surface preparation is not merely a preliminary step, but an integral part of the strip wood finish process. Its meticulous execution is paramount to achieving a superior result. The challenges associated with surface preparation, such as selecting the correct sanding grits or ensuring complete removal of contaminants, highlight the need for careful attention to detail and adherence to best practices. Ultimately, proper surface preparation translates to a more durable, aesthetically pleasing, and longer-lasting refinished wood surface, fulfilling the core goals of effective strip wood finish.
3. Sanding Grit Progression
The successful removal of wood coatings is inextricably linked to the systematic application of sanding grit progression. This progression, moving from coarser to finer abrasive particles, serves as the method to refine the wood surface after the initial removal of the bulk coating material. Sanding grit progression directly impacts the smoothness, uniformity, and receptiveness of the wood to subsequent finishing processes. Improper or absent grit progression results in visible scratches, uneven surfaces, and compromised finish adhesion. For example, if one were to move directly from a very coarse grit to a very fine grit without intermediate steps, the scratches left by the coarse grit would remain visible through the final finish. The use of a methodical grit progression mitigates these issues and ensures a professional-quality outcome.
The implementation of proper sanding grit progression necessitates a careful assessment of the wood’s condition after the main coatings have been removed. Coarser grits, such as 80 or 100, are utilized to address any remaining imperfections, surface irregularities, or lingering coating remnants. Subsequent sanding with progressively finer grits, like 120, 150, 180, and 220, gradually refines the surface, minimizing scratches and producing a consistently smooth texture. The specific grits employed and the number of stages in the progression depend on the type of wood, the desired finish, and the initial condition of the surface. As an example, restoring a piece of antique furniture might require a more delicate and extensive grit progression than preparing a new, mass-produced wooden item.
In summary, appropriate sanding grit progression is a critical component of effective strip wood finish. Its proper execution ensures optimal surface preparation, contributing directly to the aesthetic quality, durability, and longevity of the refinished wood item. While challenges such as determining the appropriate grit sequence and ensuring consistent sanding pressure exist, adherence to established best practices minimizes these risks. A thorough understanding of sanding grit progression and its impact on the strip wood finish process is essential for achieving professional-quality results.
4. Dust Removal Protocol
The meticulous execution of a dust removal protocol is fundamentally linked to the success of any project aiming to strip wood finish. The presence of particulate matter on a prepared wood surface compromises the adhesion and appearance of subsequent coatings, leading to imperfections and premature finish failure. Thus, a rigorous protocol is not merely a procedural step, but an integral component of achieving a high-quality and lasting finish.
- Surface Contamination Mitigation
The primary role of dust removal is to eliminate surface contaminants that impede finish bonding. Dust particles, composed of wood fibers, sanding abrasives, or environmental pollutants, create a barrier between the wood substrate and the applied coating. This interference weakens the adhesive bond, increasing the likelihood of chipping, peeling, or bubbling of the finish. For example, failing to remove sanding dust before applying a polyurethane finish can result in a cloudy or textured surface. Mitigation of this contamination is therefore essential for achieving a smooth, durable, and aesthetically pleasing result.
- Material Compatibility and Finish Integrity
The selected dust removal materials and methods must be compatible with both the wood species and the type of finish being applied. Aggressive cleaning agents or improper wiping techniques can damage delicate wood surfaces or leave behind residues that react adversely with the finish. For instance, using a solvent-based cleaner on a water-based finish can compromise its integrity. Therefore, the dust removal protocol must be tailored to the specific materials and finishes used, ensuring a harmonious interaction and preventing detrimental chemical reactions.
- Equipment and Technique Standardization
The consistent application of standardized equipment and techniques is crucial for ensuring uniform dust removal across the entire surface. Employing a combination of vacuuming, tack cloths, and compressed air can effectively eliminate particulate matter from both flat and intricate areas. Standardized techniques, such as wiping in the direction of the wood grain, prevent the introduction of new contaminants or the redistribution of existing dust. For example, improper use of a tack cloth can leave behind a sticky residue that interferes with the finish. Therefore, a standardized protocol ensures thorough and consistent dust removal, minimizing the risk of surface imperfections.
- Environmental Control and Workspace Management
Implementing environmental controls within the workspace further minimizes dust contamination. Working in a clean, well-ventilated area and using air filtration systems can reduce the influx of airborne particles. Proper storage and handling of materials, such as sanding abrasives and finish coatings, prevent the introduction of new contaminants. For instance, sanding in a dusty environment can exacerbate surface contamination, even after initial dust removal efforts. Therefore, proactive workspace management and environmental control are essential for minimizing dust accumulation and ensuring a pristine surface for finish application.
In summary, an effective dust removal protocol is an indispensable component of achieving a high-quality strip wood finish. The combined effects of surface contamination mitigation, material compatibility, equipment standardization, and environmental control significantly impact the final aesthetic and durability of the refinished wood surface. Rigorous adherence to a well-defined protocol is paramount for preventing finish failures and maximizing the longevity of the finished piece.
5. Finish Adhesion Quality
The quality of finish adhesion constitutes a critical determinant of the overall success and longevity of any endeavor to strip wood finish. Inadequate adhesion undermines the protective and aesthetic benefits of the applied finish, leading to premature failure characterized by peeling, cracking, or blistering. This connection is directly causal: the effectiveness of the strip wood finish process hinges on creating a substrate that allows the new finish to form a robust and lasting bond. Poor adhesion renders the entire refinishing effort unsustainable, necessitating costly repairs or reapplication. For example, if old varnish is not completely removed, the new finish will not adhere properly, which creates unsightly bubbles and the finish begins to peel and crack off within a short amount of time.
Several factors influence finish adhesion quality within the context of strip wood finish. These include thorough removal of prior coatings, meticulous surface preparation, selection of compatible finish materials, and proper application techniques. Residual contaminants, such as dust, grease, or remnants of the previous finish, act as barriers that prevent the new finish from bonding directly with the wood. The creation of a slightly roughened surface through sanding provides a mechanical key for the finish to grip. Furthermore, the chemical compatibility between the wood substrate, the primer (if used), and the topcoat is essential for optimal adhesion. The proper application technique, including controlling temperature, humidity, and film thickness, also plays a significant role. An example of proper technique would be using a solvent based finish on a freshly sanded and prepared wood surface because they can penetrate and adhere to the wood more effectively.
In conclusion, finish adhesion quality represents an indispensable component of a successful strip wood finish process. While challenges such as identifying and addressing surface contaminants or selecting compatible materials can arise, adherence to best practices and meticulous attention to detail are paramount. A clear understanding of the factors influencing adhesion, coupled with the proper application of surface preparation and finishing techniques, ensures that the final result is both aesthetically pleasing and durable. The practical significance of this understanding lies in the ability to extend the lifespan of wooden items, reduce the need for frequent refinishing, and enhance their overall value and appearance.
Frequently Asked Questions
This section addresses common inquiries regarding the process of removing old finishes from wood, aiming to clarify best practices and dispel misconceptions.
Question 1: What are the primary methods for achieving strip wood finish?
The primary methods include chemical stripping, mechanical sanding, and heat application. Chemical stripping employs solvents to soften the existing finish, while mechanical sanding utilizes abrasive materials to remove it. Heat application softens the finish for easier scraping. The appropriate method depends on the type of finish, the wood species, and the desired outcome.
Question 2: Is professional assistance required for a quality strip wood finish?
While professional services ensure expertise and efficiency, a quality outcome is attainable through meticulous adherence to established best practices, proper equipment utilization, and strict safety protocols.
Question 3: What safety precautions must be taken during the strip wood finish process?
Essential safety precautions include working in a well-ventilated area, wearing appropriate personal protective equipment (gloves, eye protection, respirator), and properly disposing of waste materials. Chemical strippers and sanding dust pose significant health hazards.
Question 4: How can damage to the wood be minimized during the strip wood finish process?
Damage minimization strategies involve employing the least aggressive method necessary, testing removal techniques on inconspicuous areas first, and using appropriate tools and abrasives. Over-sanding or harsh chemical application can irreversibly damage the wood.
Question 5: What constitutes proper surface preparation after the strip wood finish process?
Proper surface preparation includes thorough removal of all residual stripping agents or sanding dust, addressing any surface imperfections (scratches, dents), and lightly sanding to create a smooth, receptive surface for the new finish.
Question 6: How does the type of wood influence the strip wood finish process?
Different wood species exhibit varying levels of hardness, grain patterns, and susceptibility to damage. Softer woods require more delicate removal and sanding techniques, while hardwoods can withstand more aggressive methods. The wood’s porosity also influences the selection of finish materials.
In conclusion, the strip wood finish process demands careful consideration of methodology, safety, and material compatibility to ensure a successful and lasting result.
Subsequent sections will delve into specific finishing techniques and their application to prepared wood surfaces.
Conclusion
This exploration of the strip wood finish process has underscored its multifaceted nature. Success hinges upon a confluence of factors, including method selection, meticulous surface preparation, rigorous safety protocols, and material compatibility. Deviation from established best practices invariably results in compromised aesthetic quality and diminished longevity of the treated wood.
The effective execution of strip wood finish represents a commitment to craftsmanship and preservation. A dedication to informed decision-making and diligent application will yield surfaces that are not only visually appealing but also structurally sound and enduring. Continued adherence to these principles ensures the lasting value of wooden objects and structures.


