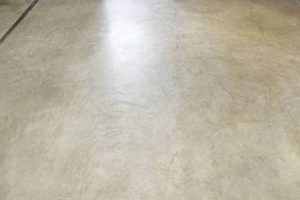
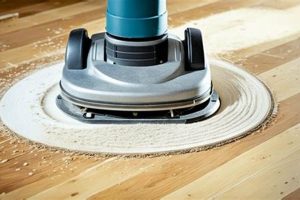
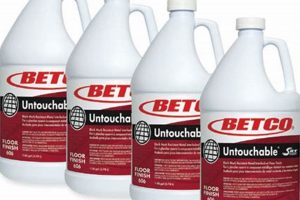
Restoring the protective coating on timber flooring addresses surface imperfections, such as scratches, dullness, and wear, to maintain the floor’s aesthetic appeal and structural integrity. This process involves rectifying damage to the uppermost layer without necessarily replacing the entire floor. A common example is addressing scuff marks on a polyurethane-coated hardwood floor by lightly sanding and applying a fresh coat of finish.
Maintaining the integrity of a wooden floor’s protective layer is critical for its longevity and appearance. A well-maintained finish protects the wood from moisture, dirt, and daily wear, preventing costly damage like warping, staining, and splintering. Historically, various methods, from waxing to applying varnishes, have been employed to shield wooden surfaces, evolving with advancements in materials and technology to offer more durable and aesthetically pleasing results.
The following sections will delve into the types of protective coatings commonly used on wood floors, the methods for assessing damage, and the specific repair techniques applicable to each type of finish, ensuring a comprehensive understanding of the restoration process.
Guidance on Restoring Timber Floor Coating
The following advice provides essential considerations for maintaining and restoring the protective layer on wooden floors, ensuring durability and aesthetic appeal.
Tip 1: Identify the Existing Coating Type. Determining the finish whether polyurethane, varnish, shellac, or wax is paramount. Different coatings require specific products and techniques. Testing in an inconspicuous area with appropriate solvents can aid in identification.
Tip 2: Assess the Damage Accurately. Superficial scratches may only require a screen and recoat, while deeper gouges necessitate more extensive sanding and refinishing. Thoroughly evaluate the extent of the damage to select the appropriate approach.
Tip 3: Prepare the Surface Meticulously. Proper surface preparation, including thorough cleaning and light abrasion, is crucial for optimal adhesion of the new finish. Remove all dust and debris prior to application.
Tip 4: Select Appropriate Products for Repair. Using compatible products is vital. Ensure the chosen coating is designed for wooden floors and matches the existing finish for uniformity in appearance and performance.
Tip 5: Apply Thin, Even Coats. Multiple thin coats are preferable to a single thick coat, preventing drips, runs, and uneven drying. Follow the manufacturer’s instructions regarding application techniques and drying times.
Tip 6: Consider Professional Consultation. For extensive damage or uncertainty regarding the type of coating or repair process, seeking expert advice is recommended. Professionals possess the knowledge and equipment to ensure a successful outcome.
Tip 7: Maintain Adequate Ventilation. Working in a well-ventilated area is essential to minimize exposure to fumes and ensure proper drying of the coating. Adhere to safety precautions outlined on product labels.
Adhering to these guidelines ensures a successful restoration process, enhancing the appearance and prolonging the lifespan of the wooden floor.
The subsequent sections will address specific repair scenarios and advanced techniques, providing a more in-depth understanding of the restoration process.
1. Assessment of Damage
A comprehensive evaluation of the existing protective coating is the foundational step in any wood floor restoration project. This assessment dictates the appropriate repair strategy, product selection, and ultimately, the success of the restoration.
- Identification of Coating Type
Determining the existing finish (e.g., polyurethane, varnish, wax) is paramount. The type of finish influences the selection of compatible repair products and techniques. Misidentification can lead to incompatible product application, resulting in adhesion failures or aesthetic inconsistencies. For instance, applying a water-based polyurethane over an oil-based varnish without proper preparation can cause the new coating to peel.
- Depth and Severity of Scratches
Surface scratches may only require a screen and recoat, a less invasive process that involves abrading the existing finish and applying a new topcoat. Deeper scratches, gouges, or wear patterns often necessitate more extensive sanding to remove the damaged layer before applying a new finish. Ignoring the depth of damage can result in inadequate repairs, where scratches remain visible beneath the new coating.
- Presence of Underlying Damage
Beyond the surface finish, examining the wood for signs of water damage, staining, or decay is critical. Addressing these issues prior to applying a new finish is essential for long-term floor integrity. For example, moisture trapped beneath a sealed finish can lead to mold growth and structural damage to the wood itself, requiring board replacement before any restoration can be effectively performed.
- Evaluation of Existing Finish Adhesion
Assessing the adhesion of the current finish to the wood is important. Loose, peeling, or chipping finishes indicate a compromised bond, which must be addressed before applying a new coating. Failure to do so can result in the new finish delaminating along with the old one. Adhesion tests, such as tape tests, can help determine the strength of the bond.
The accuracy of the assessment directly impacts the durability and appearance of the restored floor. By carefully identifying the coating type, depth of damage, underlying problems, and adhesion strength, the appropriate method can be chosen, ensuring a professional and long-lasting result.
2. Preparation is Crucial
Proper preparation forms the bedrock of a successful restoration. The quality of surface preparation directly influences the adhesion, durability, and aesthetic outcome of any protective coating application.
- Thorough Cleaning
Eliminating all surface contaminants, such as dirt, dust, grease, and wax, is essential before any abrasion or coating application. Residual contaminants impede proper adhesion, potentially leading to premature finish failure. For example, failing to remove old wax buildup can prevent a new polyurethane coating from bonding correctly, resulting in peeling and chipping.
- Effective Abrasion
Abrading the surface, whether through sanding or screening, creates a profile that promotes mechanical bonding between the existing surface and the new coating. The appropriate grit selection and sanding technique are crucial to avoid damaging the underlying wood. Insufficient abrasion provides inadequate tooth for adhesion, while excessive abrasion can create unevenness or swirl marks that are visible through the new finish.
- Dust Removal
Following abrasion, meticulously removing all dust particles is vital. Even microscopic dust can interfere with finish adhesion, creating a textured surface and compromising the final appearance. Tack cloths and vacuums equipped with HEPA filters are often used to ensure a dust-free environment.
- Appropriate Environmental Conditions
Maintaining proper temperature and humidity levels during preparation and application is critical. Extreme temperatures or excessive humidity can affect finish drying times, adhesion, and overall performance. Manufacturer guidelines typically specify optimal environmental conditions for each product.
Neglecting these aspects of surface preparation can negate the benefits of even the highest-quality coatings and expert application techniques. Diligence during surface preparation ensures optimal adhesion, a smooth and even finish, and ultimately, a durable and aesthetically pleasing wooden floor.
3. Selecting Right Products
The efficacy of wood floor finish restoration is inextricably linked to the correct product selection. The choice of finish directly determines the durability, appearance, and longevity of the restored floor. Using an incompatible or inappropriate finish can lead to adhesion failures, discoloration, premature wear, and costly rework. For example, applying an oil-based polyurethane over a previously applied wax finish, without proper wax removal, will inevitably result in poor adhesion and a compromised finish. The selection process must account for the existing finish type, the level of foot traffic, and the desired aesthetic.
Specific product attributes, such as VOC content, drying time, and abrasion resistance, should be considered in relation to the intended use and environmental conditions. High-traffic areas necessitate finishes with superior abrasion resistance, such as commercial-grade polyurethanes. Furthermore, the compatibility of cleaning and maintenance products with the selected finish is a critical, yet often overlooked, factor. Using harsh or inappropriate cleaning agents can degrade the finish over time, negating the benefits of the restoration. Selecting a finish system, including compatible cleaners and maintenance products, provides a cohesive and long-lasting solution.
In conclusion, proper product selection is not merely a step in restoration, but a determinant of its ultimate success. Understanding the characteristics of different finishes, matching them to the specific needs of the floor, and considering the long-term maintenance implications are essential. The consequences of incorrect product selection extend beyond aesthetics, impacting the floor’s structural integrity and requiring further, more extensive restoration efforts in the future.
4. Application Techniques Matter
The execution of restoration is as significant as the materials employed. Improper application leads to a compromised protective layer, regardless of the quality of the product. Variations in coating thickness, caused by uneven application, result in inconsistent wear patterns and aesthetic imperfections. A thick application may lead to prolonged drying times, increasing the likelihood of dust contamination or solvent entrapment, ultimately weakening the integrity of the protective layer. Conversely, a thin application might provide insufficient protection, rendering the floor vulnerable to damage from daily use. An example is a polyurethane finish applied with incorrect brush strokes, leading to visible brush marks that detract from the floor’s appearance and create uneven protection.
Specific techniques, such as maintaining a wet edge during application, are critical for seamless blending of individual sections. Failure to do so results in lap marks, which are visually unappealing and indicative of a deficient protective layer. Moreover, the proper use of applicators, whether brushes, rollers, or specialized pads, significantly influences the outcome. Using a low-quality brush, for instance, can introduce bristles into the finish, necessitating additional correction steps. Techniques like proper sanding between coats and the consistent application of sealant are crucial for an enduring, smooth surface.
In summation, proficient application techniques are indispensable for attaining optimal results. Skillful execution ensures uniform coating thickness, minimizes defects, and maximizes the longevity of the protective layer. While material selection is undoubtedly crucial, mastery of application techniques transforms those materials into a resilient and aesthetically pleasing finish. Overlooking this aspect often results in premature failure, necessitating further restoration efforts.
5. Long-Term Maintenance
Consistent upkeep is integral to preserving the integrity of a wood floor finish, thereby minimizing the need for extensive repairs. Proactive maintenance strategies extend the lifespan of the protective coating and maintain the floor’s aesthetic appeal.
- Regular Cleaning Protocols
Consistent cleaning, using pH-neutral cleaning agents specifically designed for wood floors, prevents the accumulation of dirt and debris that can abrade the finish over time. Failing to remove particulate matter allows it to act as an abrasive, gradually dulling the finish and leading to scratches. A routine of sweeping or vacuuming followed by damp mopping, as needed, minimizes this abrasive action and preserves the finish’s protective properties.
- Protective Measures Against Wear
Employing preventative measures, such as placing mats at entryways and felt pads under furniture legs, significantly reduces wear and tear on the floor’s surface. Entryway mats trap dirt and moisture, preventing them from being tracked onto the floor. Felt pads minimize scratches caused by furniture movement. Consistent use of these measures mitigates surface damage and extends the time between necessary finish repairs.
- Prompt Spill Management
Addressing spills immediately prevents staining and potential water damage that can penetrate the finish and affect the wood beneath. Liquids, especially acidic substances, can etch or discolor the finish if left unattended. Promptly wiping up spills with a clean, dry cloth minimizes the risk of permanent damage and preserves the finish’s protective barrier.
- Periodic Professional Inspection
Scheduling periodic inspections by a qualified flooring professional allows for early detection of finish degradation or underlying issues. Professionals can assess the condition of the finish, identify areas of concern, and recommend appropriate maintenance or repair strategies. Early intervention prevents minor issues from escalating into more extensive and costly repairs.
Integrating these facets of long-term maintenance significantly reduces the frequency and scope of necessary repairs. By prioritizing proactive care, the finish remains intact, preserving both the aesthetic quality and the structural integrity of the wood floor. Neglecting these measures invariably leads to accelerated finish wear, increasing the likelihood of requiring more extensive and costly finish restoration.
Frequently Asked Questions
The following section addresses common inquiries regarding the maintenance and restoration of protective coatings on timber flooring.
Question 1: What are the primary indicators that a wood floor finish requires attention?
The degradation of a wood floor finish is typically indicated by visible scratches, dullness, or a worn appearance in high-traffic areas. These are signs that the protective layer has been compromised, exposing the wood to potential damage.
Question 2: Is it always necessary to sand a wood floor completely before reapplying a finish?
Complete sanding is not always required. If the existing finish is in relatively good condition with only superficial scratches, a process known as screen and recoat can be employed. This involves lightly abrading the surface and applying a fresh topcoat without removing the entire existing finish.
Question 3: What type of finish is most durable for high-traffic areas?
Polyurethane finishes, particularly those formulated with aluminum oxide, offer superior durability and abrasion resistance, making them suitable for high-traffic areas. Water-based polyurethanes are also a viable option due to their lower VOC content and good durability.
Question 4: How can one determine the type of finish currently on a wood floor?
Determining the existing finish can be challenging. A simple test involves applying a small amount of denatured alcohol to an inconspicuous area. Shellac will dissolve, while other finishes like polyurethane will remain unaffected. Consulting with a flooring professional for identification is also recommended.
Question 5: What are the common mistakes to avoid when repairing a wood floor finish?
Common errors include inadequate surface preparation, using incompatible finishes, applying the finish too thickly, and neglecting proper drying times. Adherence to manufacturer instructions and best practices is crucial to avoid these issues.
Question 6: How often should a wood floor finish be professionally restored?
The frequency of professional restoration depends on factors such as foot traffic, maintenance practices, and the type of finish. On average, a floor in a residential setting may require restoration every 7-10 years. Commercial settings typically necessitate more frequent attention.
In summary, understanding the nuances of finish types, preparation techniques, and maintenance routines is essential for effective protective coating restoration.
The following section provides a comprehensive guide to relevant tools and products.
Conclusion
This exploration has detailed the critical facets of restoring protective coatings on timber floors. From identifying the existing finish and assessing the damage, to selecting appropriate products and applying them with precision, the presented information underscores the importance of a systematic approach. The discussion also highlighted the significance of long-term maintenance in preserving the integrity of the protective layer and minimizing the need for future intervention.
Effective wood floor finish repair demands diligent attention to detail and a comprehensive understanding of materials and techniques. The condition of timber flooring reflects both aesthetic choices and structural care, thereby necessitating proactive and informed decisions to ensure lasting beauty and value. Ignoring the principles outlined herein risks accelerated degradation, leading to more extensive and costly remediation in the future.


